It’s Saturday so I have another simple card for you today. This set will be released on Tuesday and is in the new May through August catalog. If you don’t have a catalog yet, stop by Terry’s shop and pick one up. Get your wish list ready! Stampin’ Up! will also have a new Online Exclusive release on Tuesday. So, double the fun. Now onto the card.
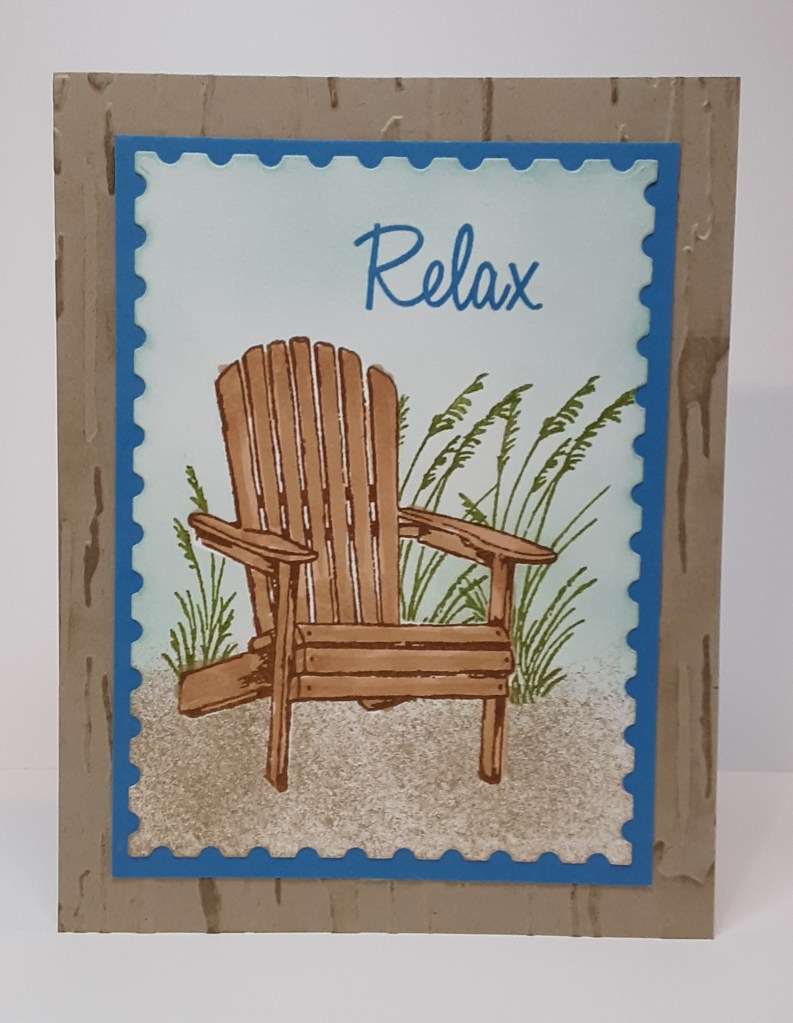
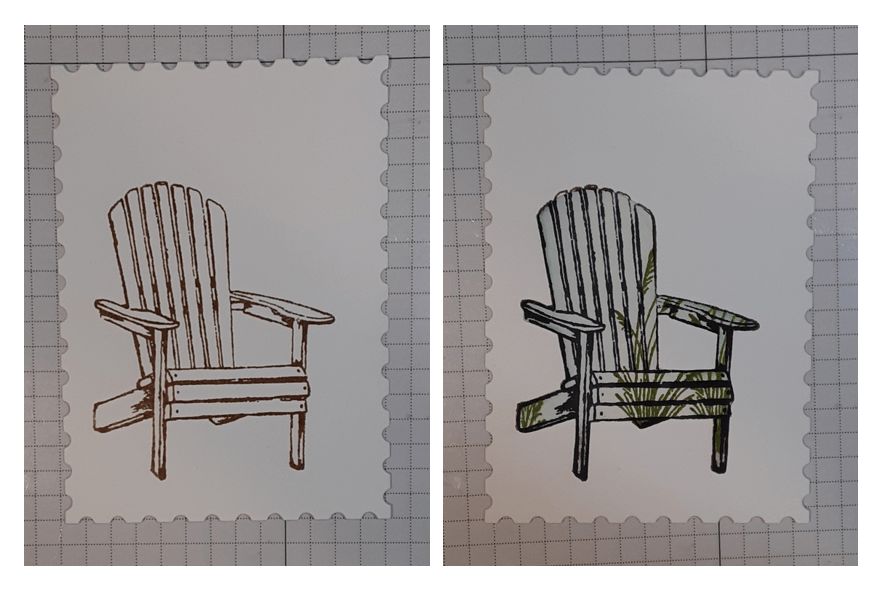
To make the card base, I cut a piece of Crumb Cake cardstock to 5½” x 8½” on my Paper Trimmer, scored and folded at 4¼”, and burnished with my Bone Folder. I cut an additional piece of Crumb Cake to 4⅛” x 5⅜” and ran it through my Birch Wood 3D Embossing Folder (Last Chance!) on my Stampin’ Cut & Emboss Machine. I cut a piece of Azure Afternoon cardstock to 3¼” x 4½” to act as a mat. I cut a piece of Basic White cardstock to 3¼” x 4½” and die cut the second largest rectangle from the Perennial Postage die set from it. This is the piece I will stamp my focal image.
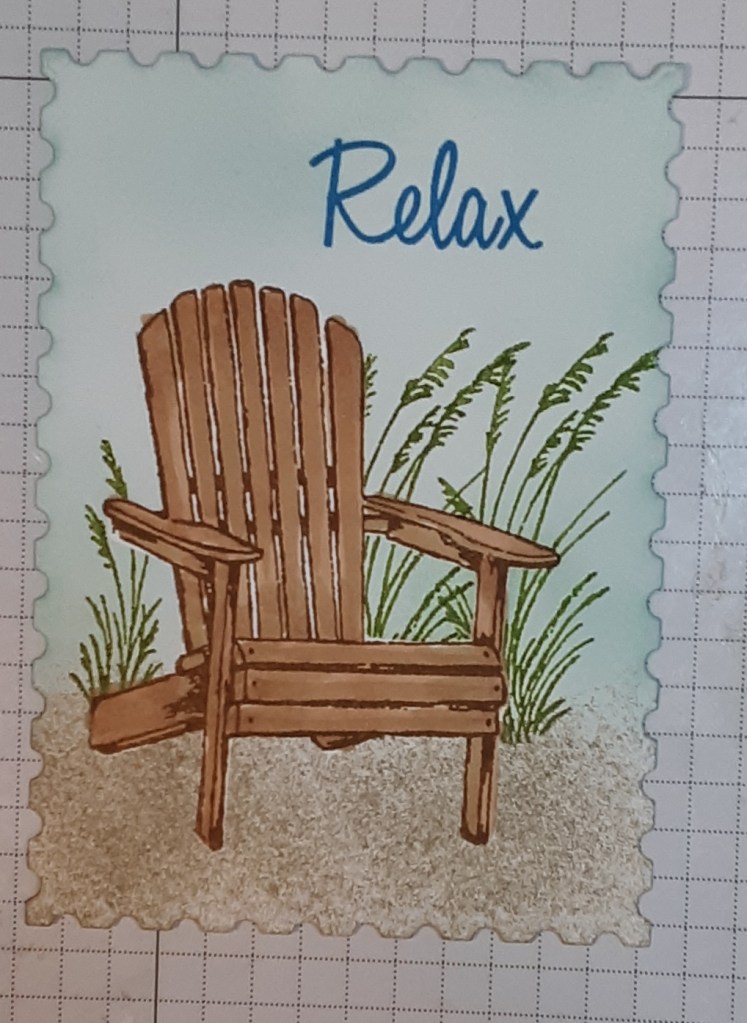
With my white piece, I stamped the Adirondak chair from Relaxing Waterside stamp set (save 10% on the bundle) in Pecan Pie ink. I stamped the chair again on a piece of Masking Paper. I cut the chair from the masking paper and covered the chair on my white paper. This will protect the image while I stamp and ink blend. As you can see in the picture, you can use the masking paper more than once.
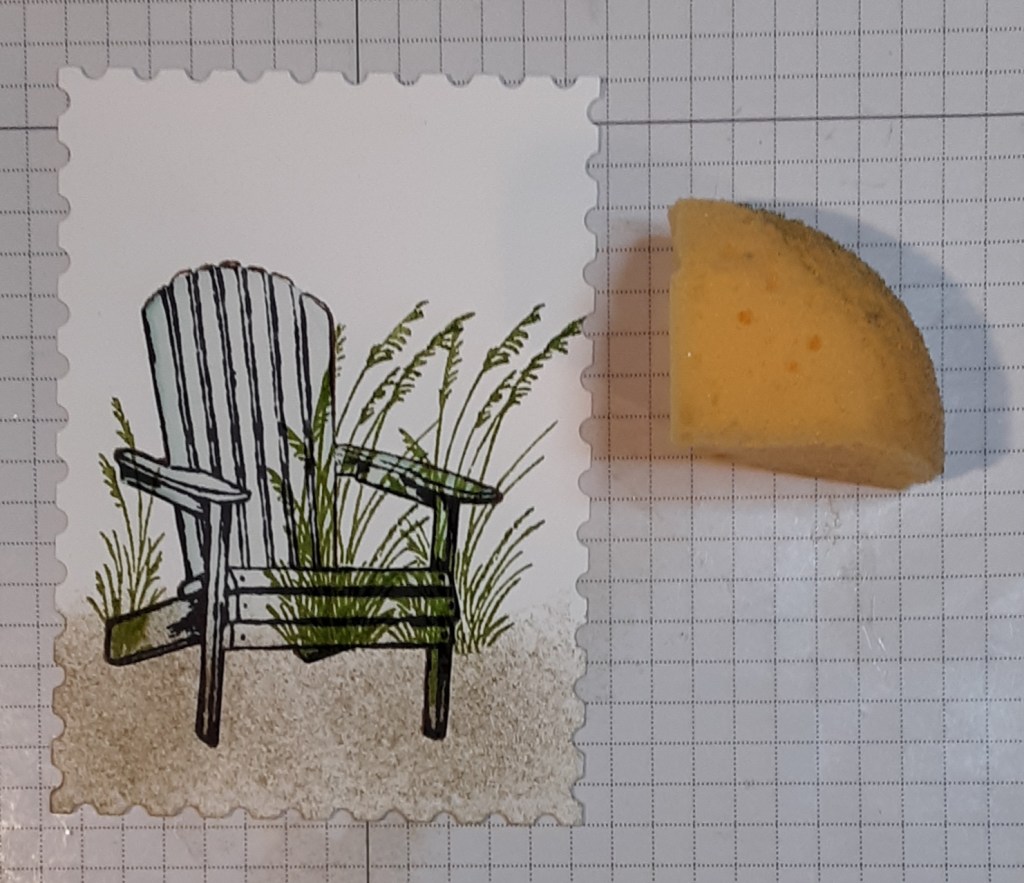
Next, I stamped the sea grass with Old Olive Ink. Stamp right on top of the masking paper. I stamped the larger sea grass twice. When stamping, make sure the base of the grass is no lower than the back legs of the chair. Masking the chair puts it in front of the grass and when the grass is too far forward, it messes with the perspective. (I know this because I had to redo the image and that is why there is a previous stamping on the masking paper.) I used a sponge and Crumb Cake ink to add ‘sand’ under my chair. You can see the type of sponge I used in the picture. You can pick up a sponge at most hobby stores in the art section. I have mine from when Stampin’ Up! used to sell them. It doesn’t take much ink, and you just lightly daub the ink in place. It needs to be at least as high as your chair legs. We don’t want them to hover in space!
I used a Blending Brush and Balmy Blue ink to apply color to the sky and background. I came in from the outside of the piece and blended in. This put the highest concentration of ink on the edges. I carefully removed the masking paper so that I could use it again. Now my chair looks like it is sitting in front of the grasses.
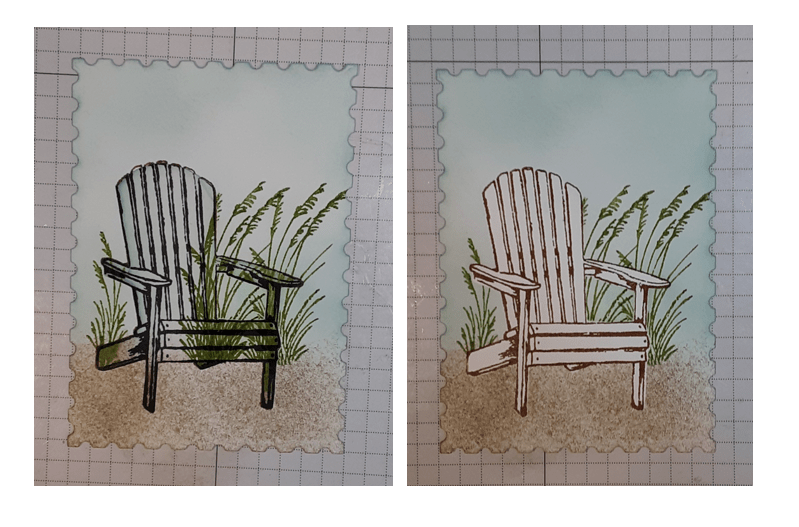
I colored my chair with an SU500 Stampin’ Blend marker from the Stampin’ Blends Medium Combo Pack. I also stamped the word Relax in Azure Afternoon ink. I think this stamp set is intended for Father’s Day, retirement, or birthday because of the included sentiments. (Yay! Some useful sentiments!)
I adhered this to my blue mat with my favorite adhesive (Multipurpose Liquid Glue or Stampin’ Seal).
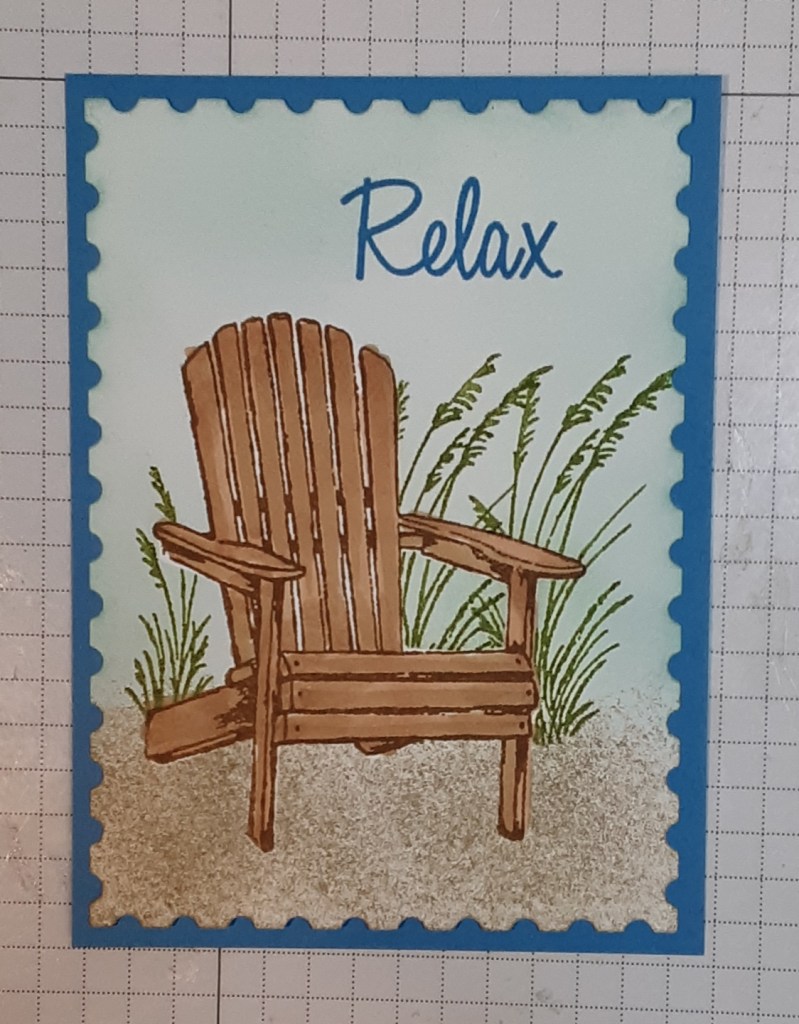
I ran my Crumb Cake ink pad along the raised embossed areas on my Crumb Cake piece. I adhered my focal point to my embossed piece and glued this panel to my card base.
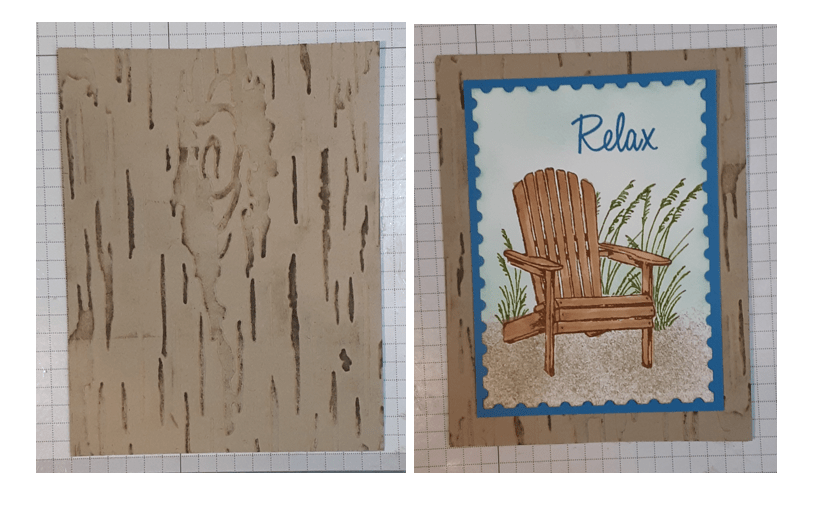
To finish the card, I stamped a greeting on a 4” x 5¼” piece of Basic White cardstock and glued it inside the card.
I hope you liked this simple card.
For the complete supply list, click here.
Images © Stampin’ Up!
