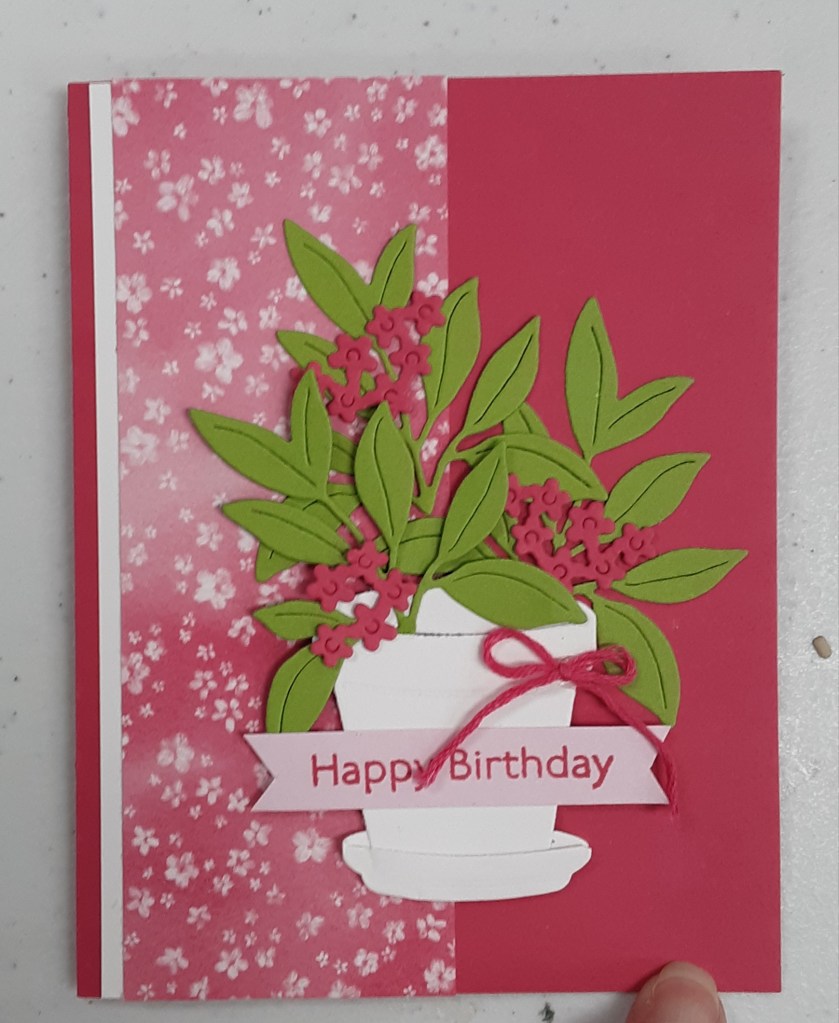
Happy Wednesday! Today I have a card from Terry’s most recent class, only I am never satisfied with just plain die cuts, so I jazzed them up a little by adding some inking. I really like the dimension it provides. I’ll tell you how I did this later in the post.
If you haven’t checked it out yet, the new May through August catalog kicked off yesterday, along with some new Online Exclusives. Today’s card uses an Online Exclusive that was released in March. I know it is easy to miss the Online Product. Oftentimes by the time I get something from this category, it is no longer current or available. Don’t forget to check out the new Product of the Month. Now onto the card.

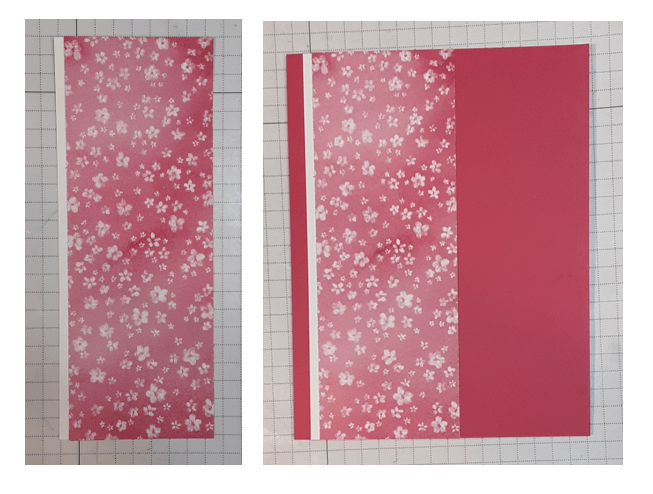
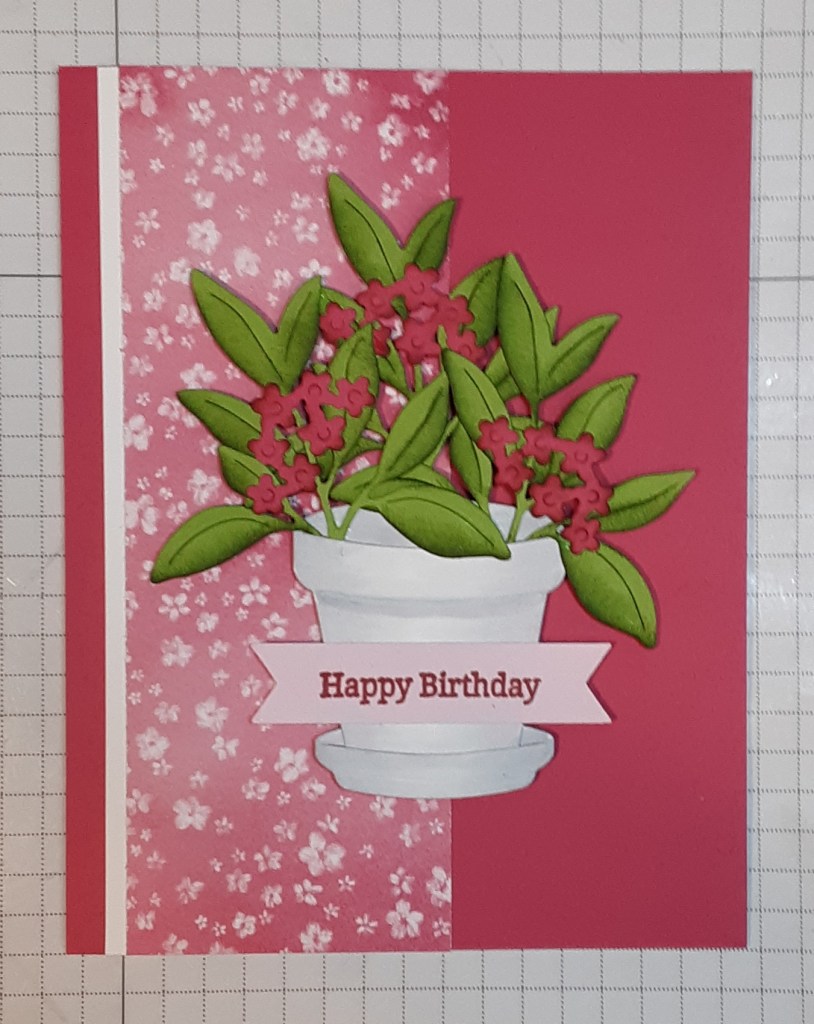
For the card base, I cut a piece of Melon Mambo cardstock to 5½” x 8½” on my Paper Trimmer, scored and folded at 4¼”, and burnished with my Bone Folder. I cut a piece of DSP from last year to 2″ x 5½”. You can always change up the colors to accommodate what you have in your stash. I also cut a scrap strip of Basic White cardstock to ½” x 5½”.
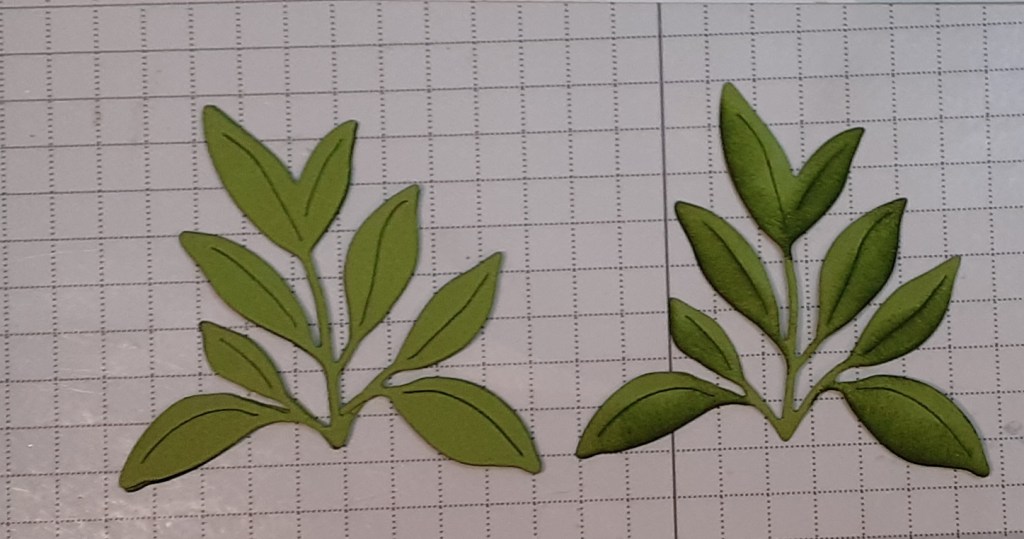
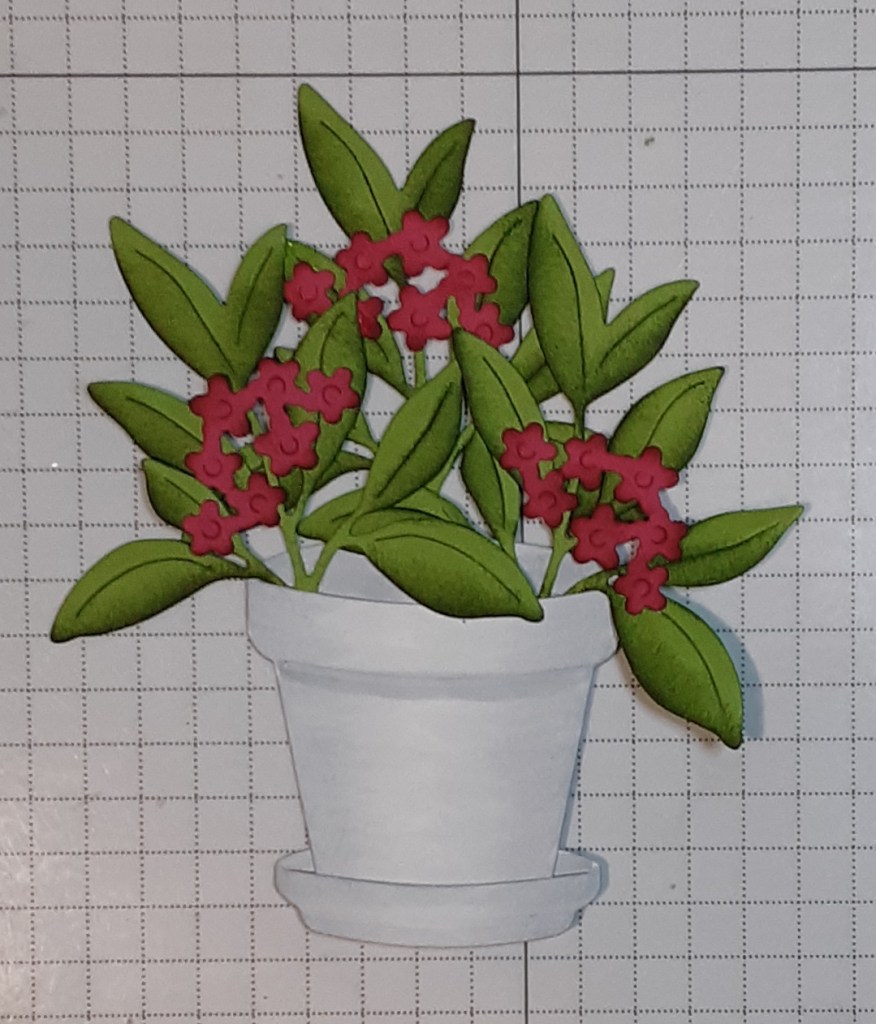
With the Help Me Grow dies (save 10% on the bundle), I cut large foliage die from Granny Apple Green cardstock three times.

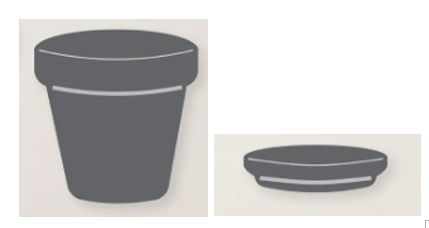
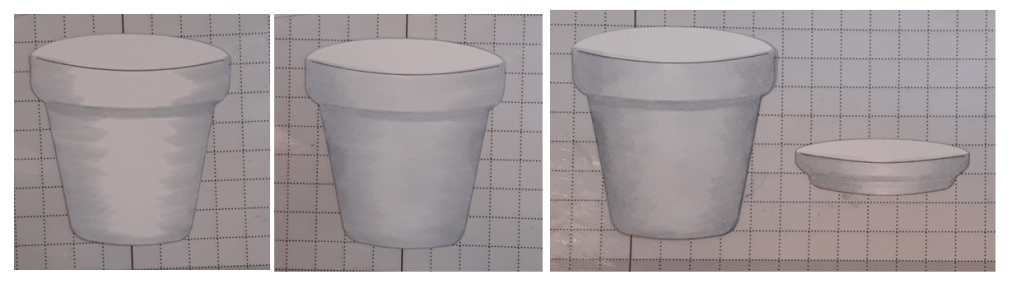
I cut the flower pot and coaster in the set from Basic White cardstock.
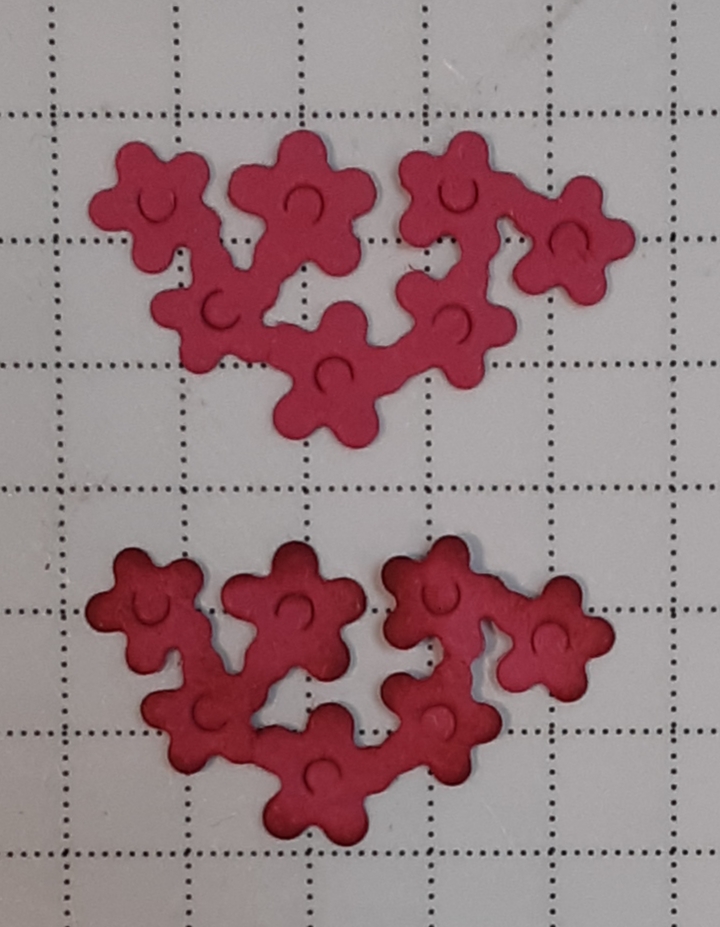
I cut the bunch of flowers three times from Melon Mambo cardstock.

To add more interest to the leaves, I used a Sponge Dauber and Granny Apple Green ink to add some shadow to the images. I focused on putting the ink on the lower part of the leaves.
With Smoky Slate Stampin’ Blends, I added shading to my flowerpot and coaster. I came in from the sides with the darker marker and lightly stroked it inward. I also drew along the underside of the top edge of the pot. Next, I came in with the lighter marker and brushed the color in toward the center, but not quite meeting in the middle. The shading helps the pot look round. It doesn’t show in the picture, but I colored the part behind the slits in both pieces the darker gray.
The last bit of shading I did was to the flowers. I used a Sponge Dauber to add Melon Mambo ink to the edges of the flowers.
I arranged the greenery in my pot and tacked them down with my favorite adhesive (Multipurpose Liquid Glue or Stampin’ Seal). I added the flowers to my foliage.
I adhered my DSP to my white strip with ⅛” showing. I adhered this to my card base.
I added my potted plants to my card with Stampin’ Dimensionals and Mini Dimensionals.

For some added sparkle, you could add some tiny gems to the centers of the flowers or use a gold or silver gel pen to draw in the centers. Or you could add a drop of glue and sprinkle on some glitter in the centers.
For the sentiment, I stamped Happy Birthday from Banner Sayings bundle on Bubble Bath cardstock, and punched it out with the coordinating punch. I added Dimensionals to either end of the banner and a smidge of glue in the middle where it overlaps the pot.
To finish the card, I stamped a greeting on a 4” x 5¼” piece of Basic White cardstock and glued it inside my card.
I hope you liked this stepped-up version of Terry’s class card.
For the complete supply list, click here.
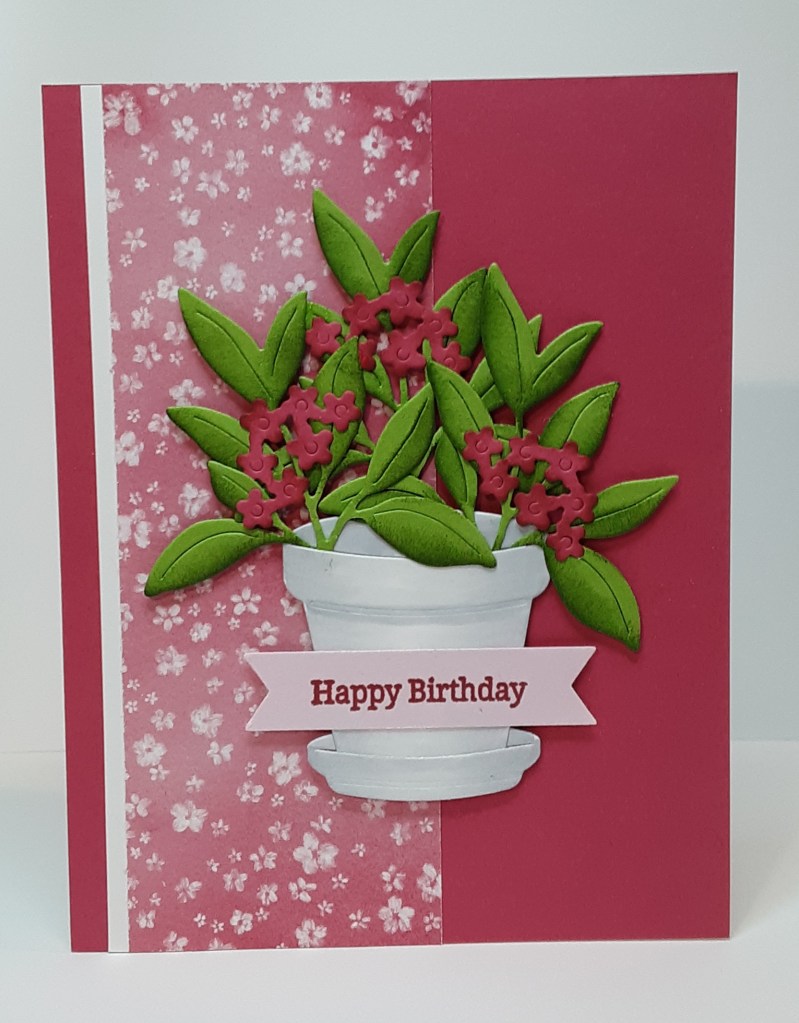
The original from Terry’s class: