
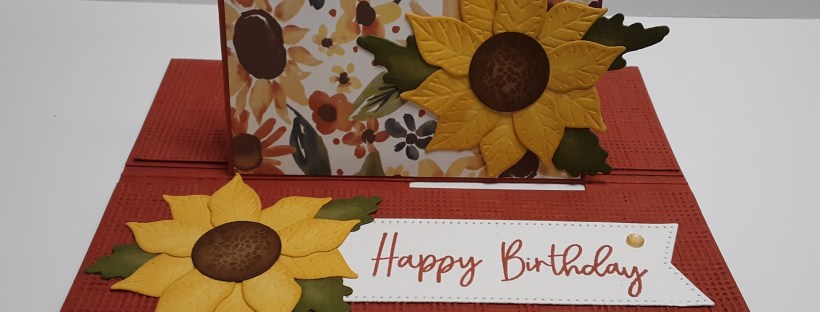
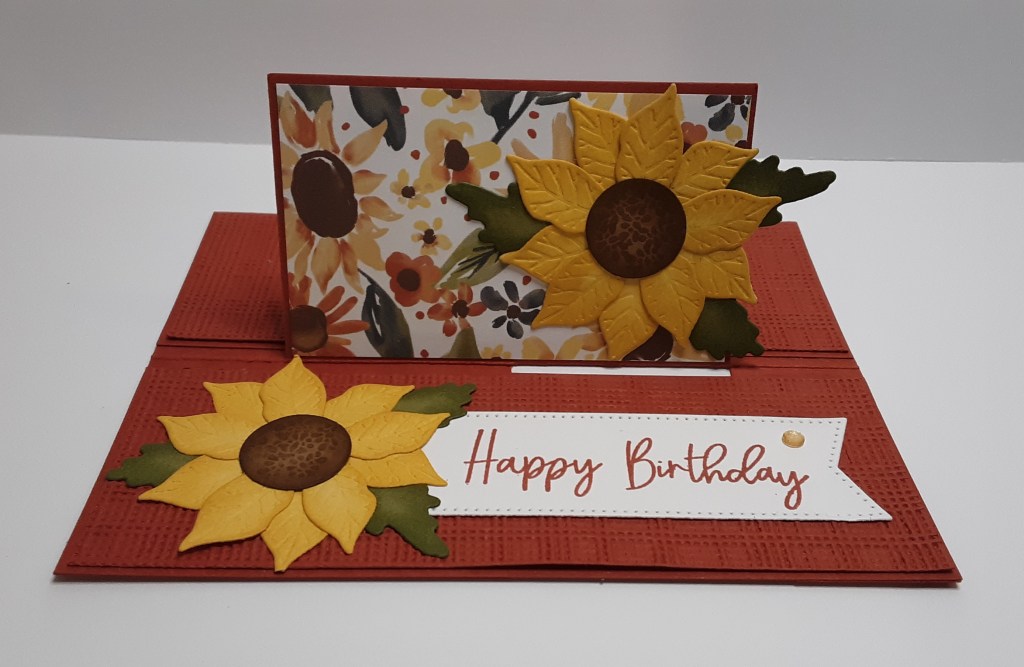
Today I have a fun card called an impossible card. The impossible part is the flap that stands up in the middle of the card. Looks impossible, but I will show you how to create it. It is actually quite simple. A cut here and a fold there, and voila! an impossible card!
Also, today is the day that I announce our $25. gift card winner. Thank you to everyone who posted a comment and gave me some excellent feedback. The winner is… sostokfam! Please contact Terry at stampinfunwithterry@gmail.com so she can get the gift card to you.
Beginning today through Friday, Stampin’ Up! is having a Flash Sale for 15% off select stamp sets.
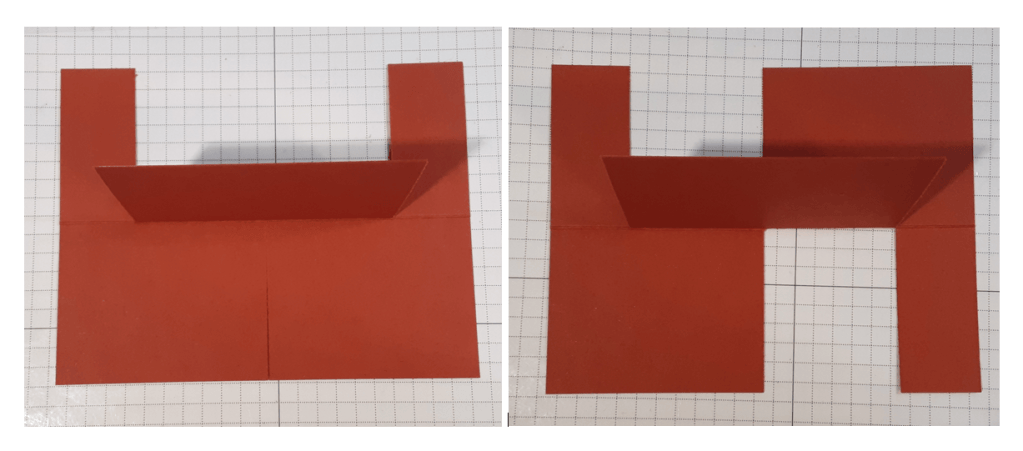
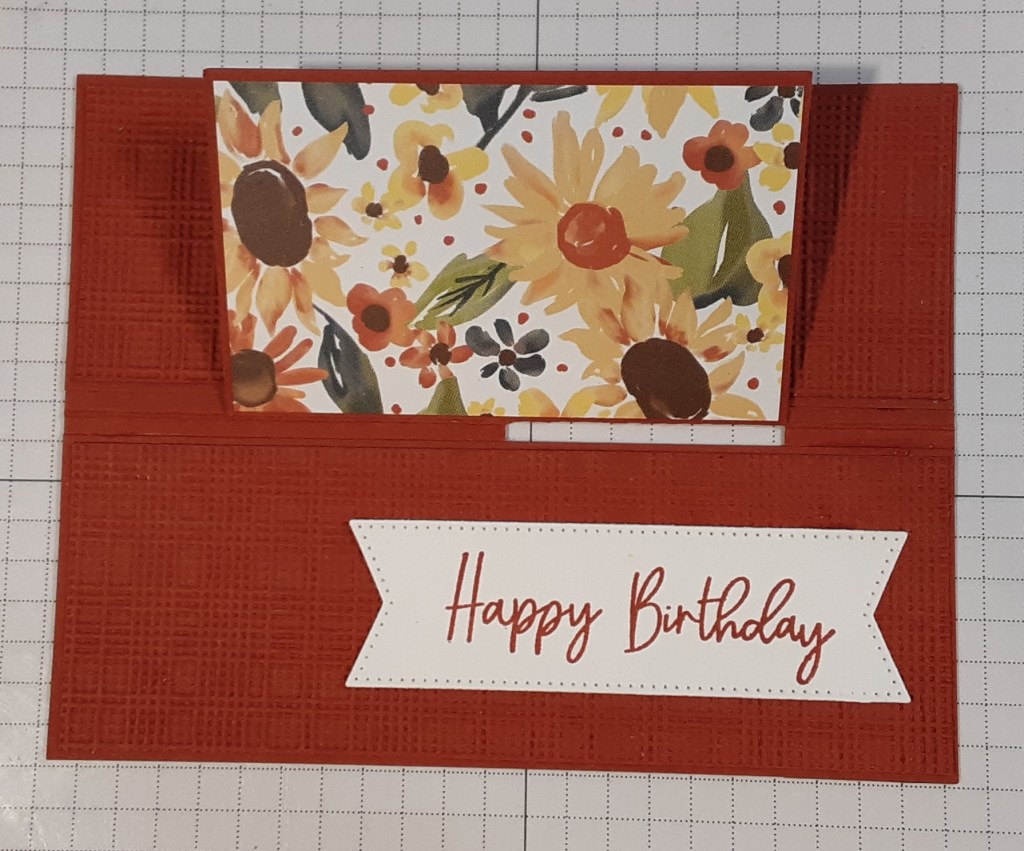
Now on to the card. To make the card base, I cut a piece of Cajun Craze cardstock to 4¼” x 5½” and scored longwise at 2⅛” on my Paper Trimmer. Next, I cut on one 5½” side from the edge to the fold line. Having a drop-down blade on your trimmer is a huge help. I turned my paper upside down and cut in 1″ from the top edge to the fold line on each end. It looks like a mess at this point.
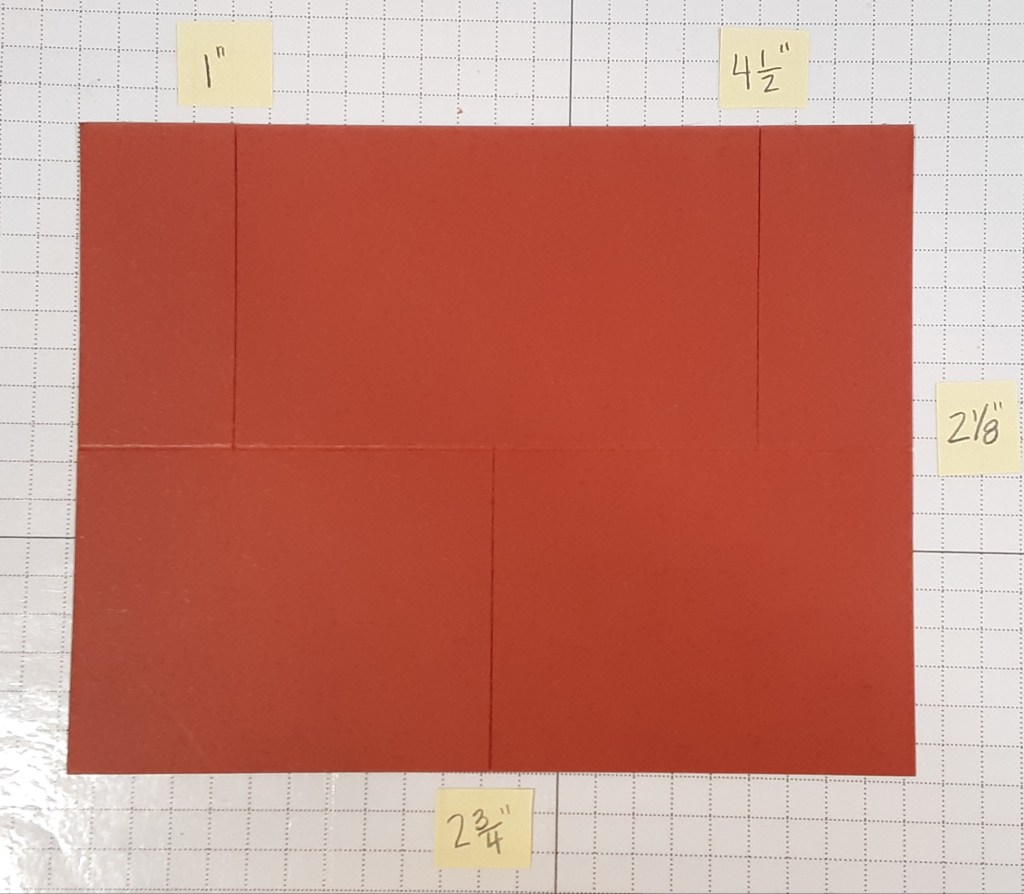
I folded on the score line and burnished with my Bone Folder. If you have a difficult time seeing the score line, you could fold before cutting. With the piece lying flat, I folded up the middle section. Then, I folded the right section back along the fold line. This is the base of our impossible card.
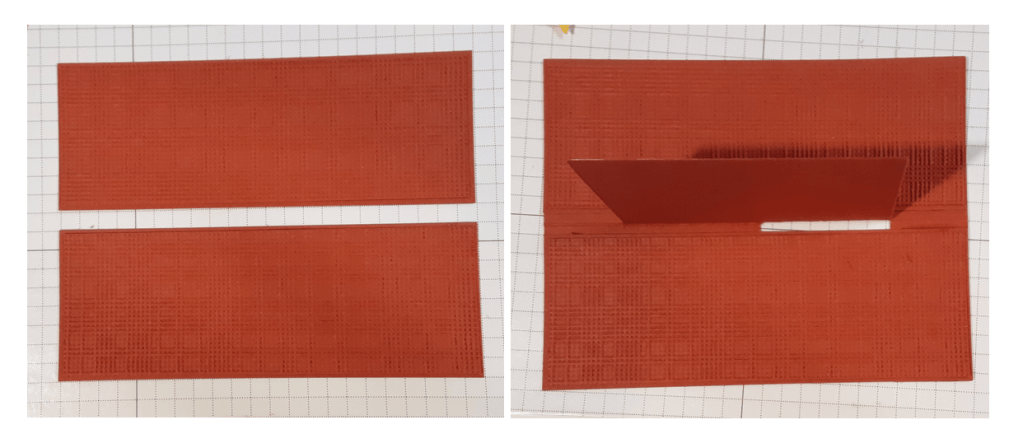
I cut two pieces of Cajun Craze cardstock to 2″ x 5½”. I cut two additional pieces of Cajun Craze cardstock to 1⅞” xv5⅜” and ran them through my Softly Woven Embossing Folder on my Stampin’ Cut & Emboss Machine. I adhered the embossed pieces to the plain pieces with my favorite adhesive (Multipurpose Liquid Glue or Stampin’ Seal) to make them sturdier. I adhered these to my card base, lining up the corners and edges.
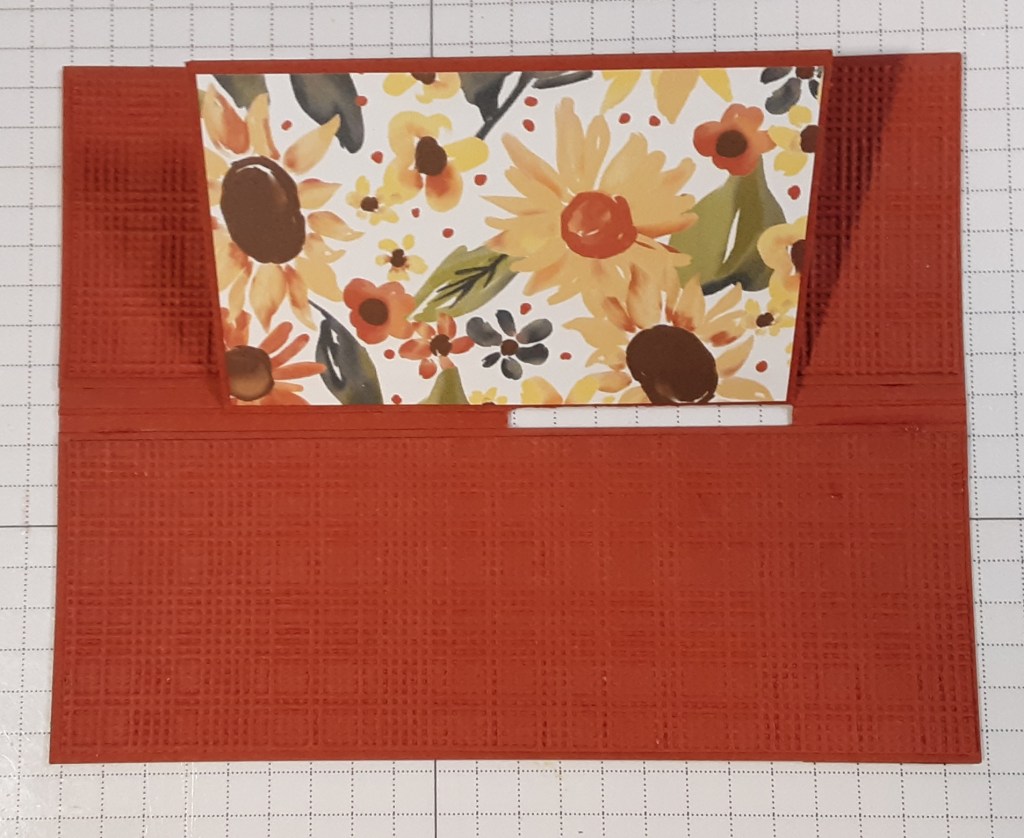
I cut a piece of Sunflower Fields DSP to 2″ x 3⅜” and adhered it to the front of the flap on my card.
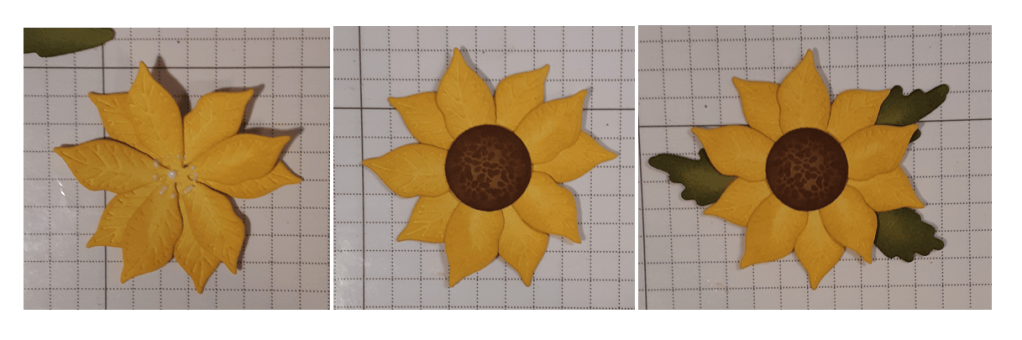
Now we are ready to decorate. Since I do not have the coordinating sunflower dies, I decided to use my Pretty Poinsettia dies (bundle) to make the flowers. I die cut four of the second smallest petal die from Daffodil Delight cardstock. With a Sponge Dauber, I inked the edges with Daffodil Delight ink. I die cut the leaves three times from Old Olive cardstock (for a total of six) and used a dauber to add Old Olive ink. Below is a comparison of inked and uninked. I like the depth the inking gives the die cut. With a ¾” circle punch, I punch a circle from Pecan Pie cardstock. I added Pecan Pie ink to the edges with a dauber. Then I used the stamp from the Pretty Poinsettia bundle to add the dots with Pecan Pie ink.
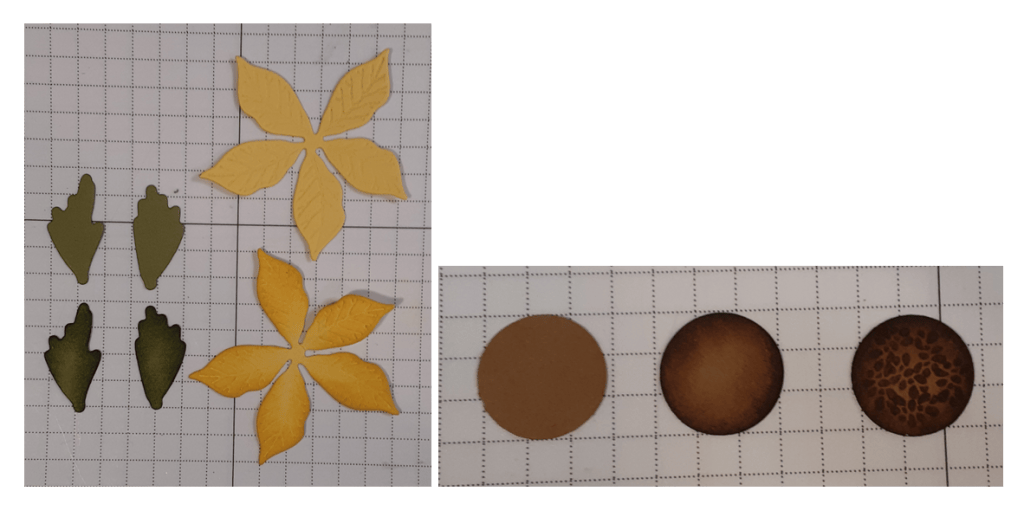
I glued the yellow petals together with a dot of glue in the center. I added the brown centers. I added the leaves behind the petals. Keep in mind when placing the leaves that you only have about 2″ of height to fit the flowers onto the card.
From Basic White cardstock, I die cut the largest banner from Stylish Shapes dies. I stamped Happy Birthday from Balloon Festoon stamp set in Cajun Craze ink. I added it to my card base.
I added my flowers to my card.
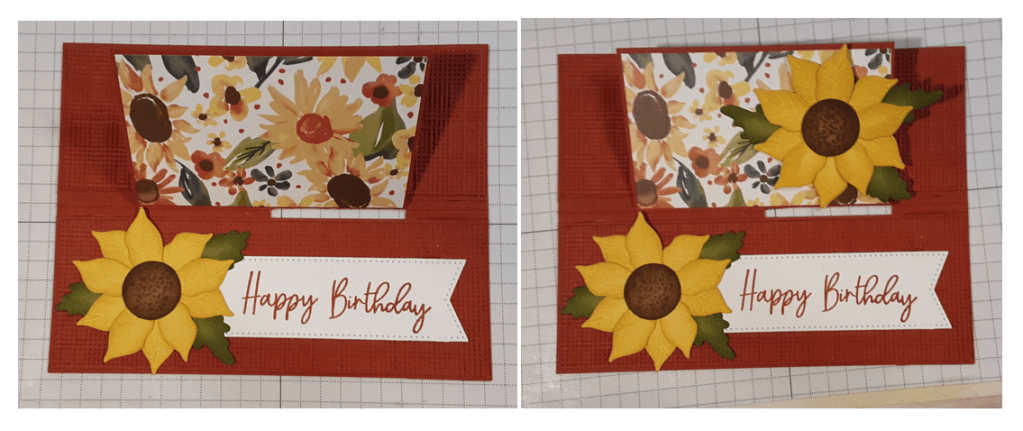
For a bit of sparkle, I added a Radiant Gem to my sentiment.
To finish the card, I cut a piece of Basic White cardstock to 2″ x 3⅜” and glued it to the back of the flap.
Since the card is folded in half, it may feel a little flimsy in the middle. If you don’t like how that feels, you can add a 4¼” x 5½” piece of Cajun Craze cardstock or Basic White cardstock to the back of the card. If you add the white, you could skip the small piece on the back of the flap to write your greeting.
I hope you liked this “impossible” card!
For the complete supply list, click here.
Images © Stampin’ Up!
 stampinfunwithterry.net