
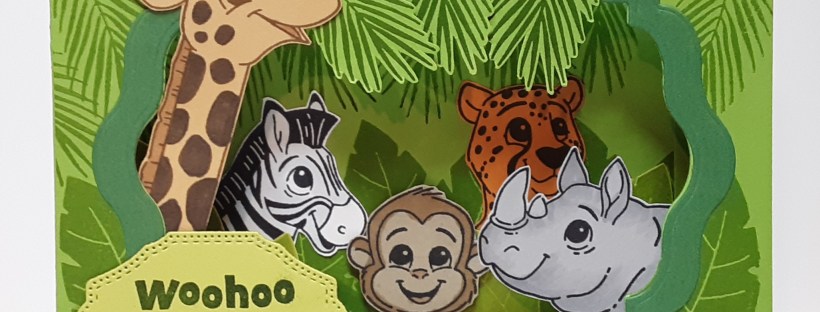

It’s Wednesday so I have another card. This is a fun card using a stamp set on the Last Chance list, so I thought I’d put it to good use before it went away. You can get it in a bundle with the 1⅞” Circle Punch and save 10% on the two items. The stamp set itself is also 10% off.
Don’t forget the Product of the Month, Glow of Harvest DSP for $5 with a qualifying purchase. The Last Chance list was refreshed last week. Many items are discounted. Another special is Stampin’ Up!’s cardstock and DSP sale on selected products. Now on to the card.
To make the card base I cut two pieces of Granny Apple Green cardstock to 4¼” x 5½” with my Paper Trimmer. I cut two additional pieces of Granny Apple Green to 2″ x 4¼”. I scored the two strips at ½”. 1″, and 1½”. I accordion folded them on the score lines and burnished them with my Bone Folder. These will help create the mechanism that makes the card pop.
On one of the 4¼” x 5½”, I die cut the second largest label die from Beautifully Celebrated dies (Last Chance!) on my Stampin’ Cut & Emboss Machine from the center. I also die cut the largest and second largest label from Garden Green cardstock to create a frame.
With the second piece, I stamped the palm leaves from Silly Safari stamp set in Granny Apple Green ink from the top of the piece. With the large leaves, I stamped with the same ink from the bottom.
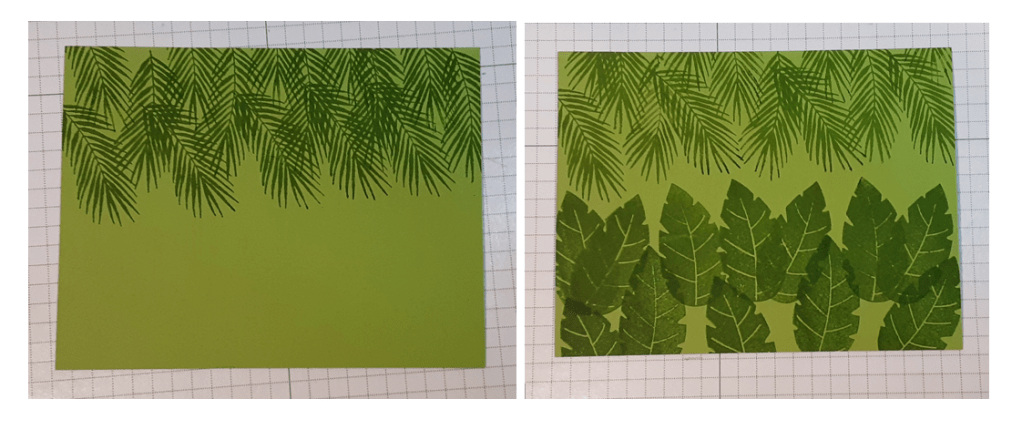
I stamped the same foliage to the front “windowed” piece. I adhered the frame with my favorite adhesive (Multipurpose Liquid Glue or Stampin’ Seal). The frame acts as a frame, but it also gives added support to the cut out window piece.

I stamped the animals next. I stamped the giraffe in Pecan Pie ink on Golden Glow cardstock. With the SU100 Stampin’ Blend from the Deep Combo pack, I colored in the knobs on his head (what are they really called!?) and the spots. I used SU500 from the Medium pack to color along its back. I stamped the leopard (or is it a cheetah?) in Black ink on Timid Tiger cardstock. I stamped the rhinoceros in black on Smoky Slate cardstock. I highlighted the shadowed areas with Smoky Slate blends. I stamped the zebra with black ink on Basic White cardstock. I softened the white with the light Smoky Slate blend. Finally, I stamped the monkey with black ink on Crumb Cake cardstock and colored parts with SU500. I colored his nose and tongue with SU700 from the Medium Light pack. I fussy cut the animals with my scissors.

I stamped the large leaves with Lemon Lime Twist ink on Lemon Lime Twist cardstock four times. I fussy cut these leaves out. I stamped the palm leaves with Granny Apple Green ink on Granny Apple Green cardstock three times and fussy cut these out.
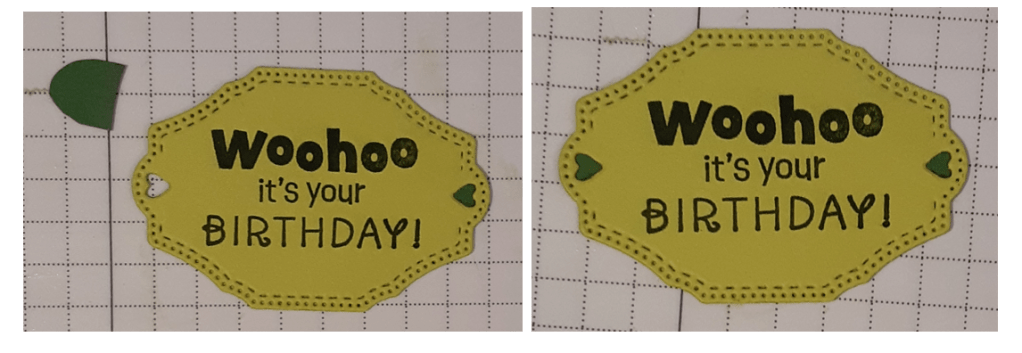
The final bit of stamping was my sentiment label. I stamped Woohoo it’s your birthday in Granny Apple Green on Lemon Lime Twist ink. I die cut this out using a small label from Sweet Words & Labels dies. I glued small scraps of Garden Green cardstock to the back where the heart openings were.
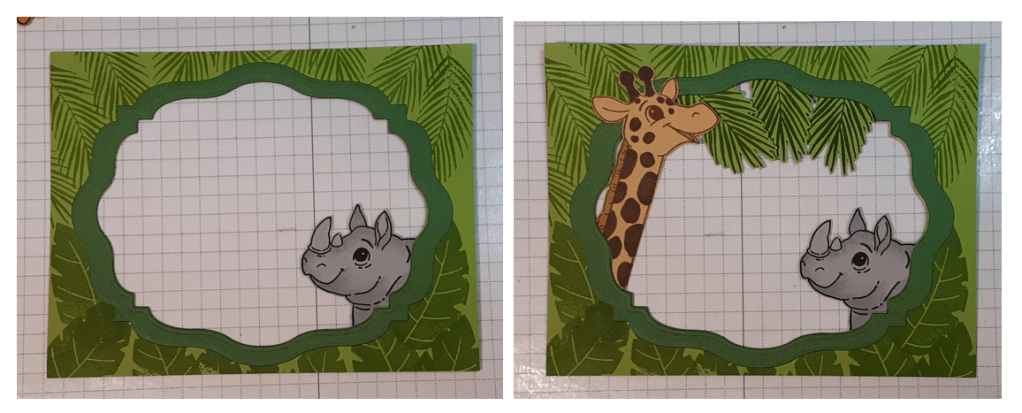
I began assembling the card with the animals attached to the window piece. I glued the rhino in the lower right and the giraffe on the left. I glued his neck behind the window, but his head on the front. I added the three cut out palm leaves. I did need to trim some of the leaves.
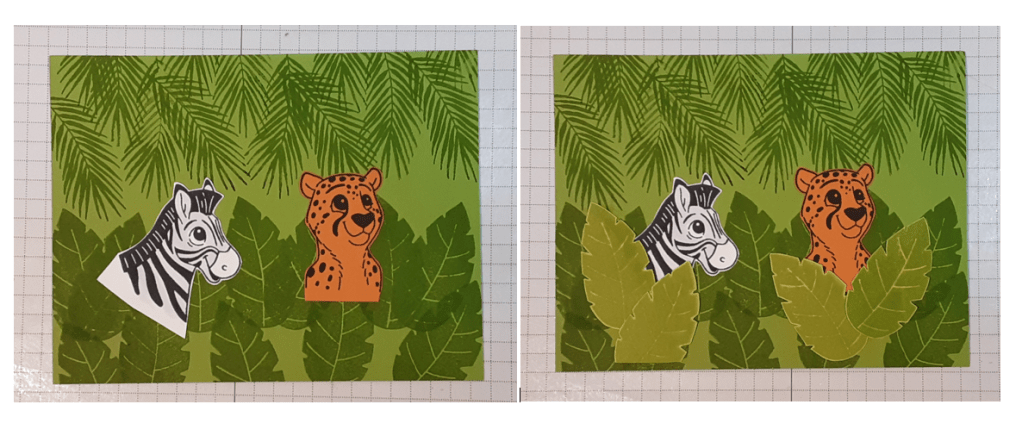
To position my inside animals, I laid the window on top of my background. I glued the zebra and leopard (cheetah?) flat on the background. I added the large leaves to cover the exposed edges of the animals.
I added glue to one edge of each of my spring mechanisms and glued them to either edge of my background piece with the fold on the outside.
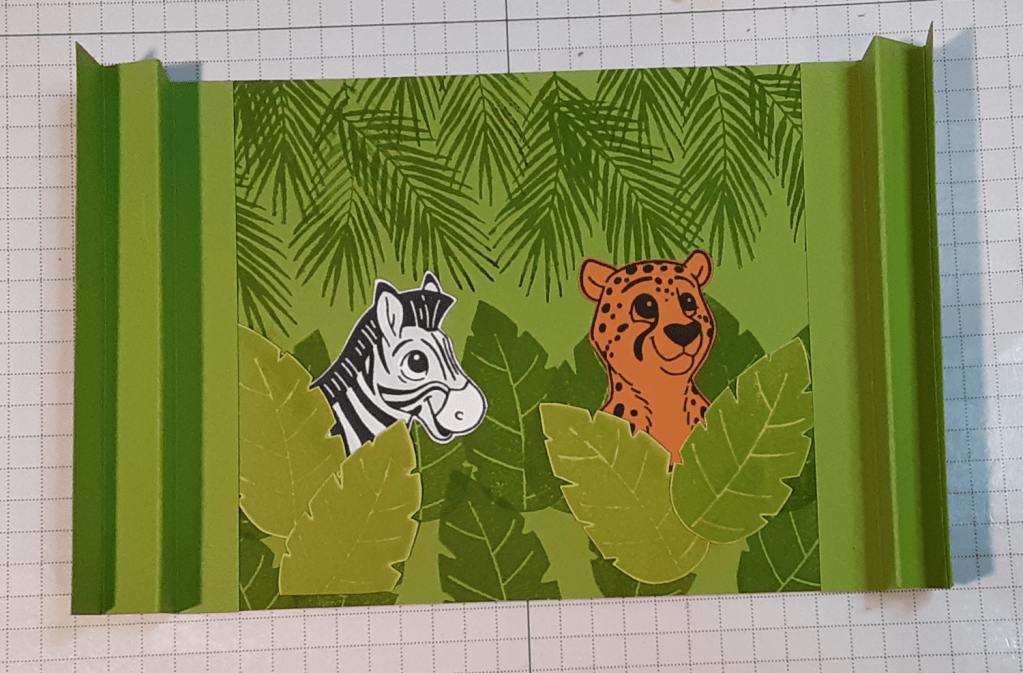
I added glue to the top edge of one mechanism and added the window piece by lining up the edges. I glued the other side and lined the edges up. The card compresses and lies flat but springs up when relealsed.

I added the monkey with Stampin’ Dimensionals to give it a little extra depth. I glued my sentiment under the giraffe.

To finish the card, I stamped a greeting on a 4” x 5¼” piece of Basic White cardstock and glued it on the back of my card.
I hope you liked this card!
For the complete supply list, click here.
Images © Stampin’ Up!.
 stampinfunwithterry.net