
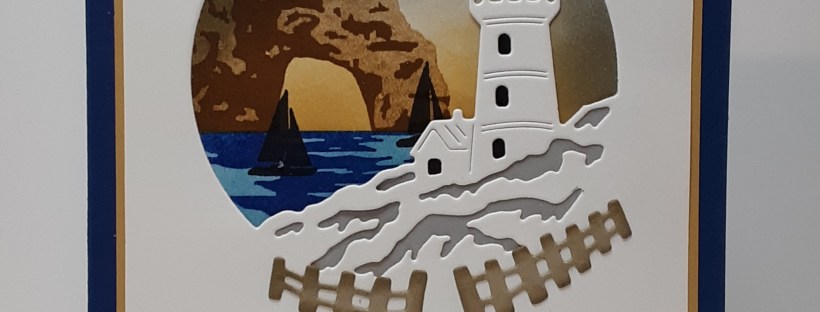
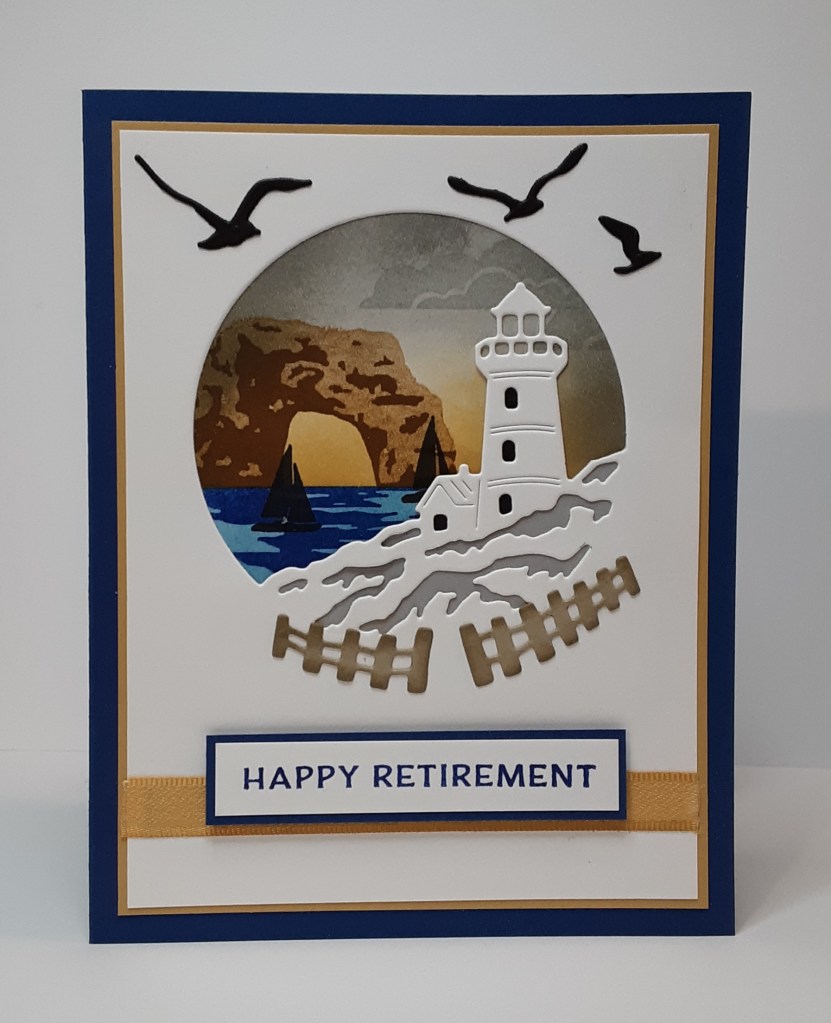
It’s Wednesday and I have a not so simple card. It’s not hard, but it does have several steps. I think it is worth the effort. I saw some similar cards on Pinterest, so I’m not sure who came up with the color combinations first. Jackie Bolhuis has a card posted but I couldn’t find it on her blog. So, I came up with my own version.
To make the card base, I cut a piece of Blueberry Bushel cardstock to 5½” x 8½” on my Paper Trimmer, scored and folded at 4¼”, and burnished with my Bone Folder. I cut a piece of Golden Glow cardstock to 3⅞” x 5⅛” to act as a mat. I cut a piece of Basic White cardstock to 3¾” x 5” for my focal image. From this white piece, I die cut the lighthouse scene from the Sunset Coast bundle on my Stampin’ Cut and Emboss Machine. Before cutting the image out, make sure you line up the die and try to make the lighthouse straight. We don’t want the lighthouse to fall into the ocean. I used the windows to guide me.
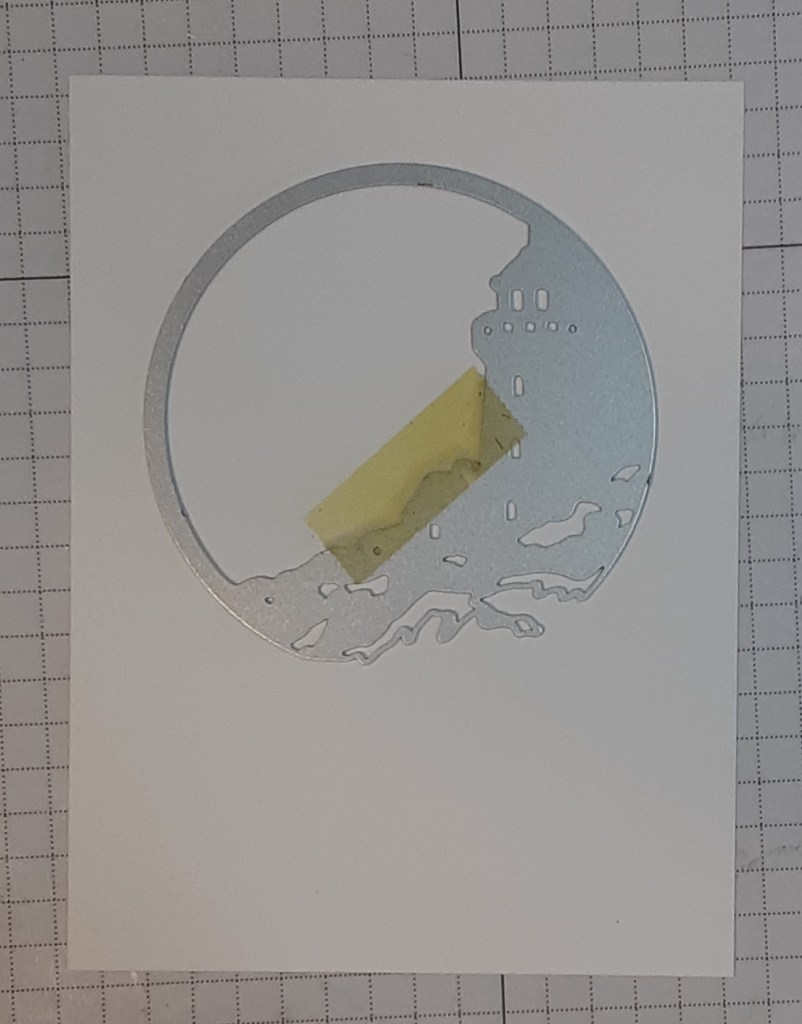
While I had my die machine out, I die cut the two birds from Basic Black cardstock and the fence pieces from Crumb Cake cardstock.
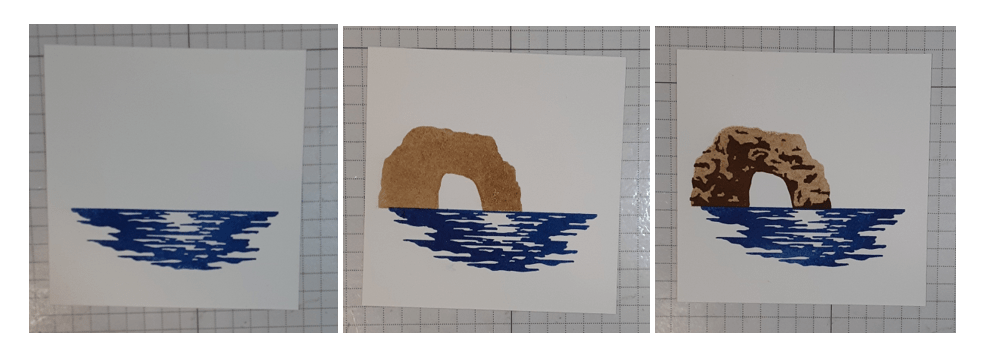
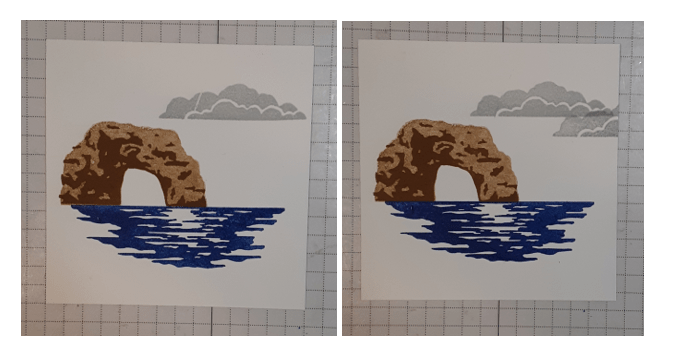
Next, I needed to work on my background. I cut a piece of Basic White cardstock to 3¼” x 3¼”. First, I stamped the water in Blueberry Bushel ink. Next, I stamped the arch with stamped off Pecan Pie ink. Finally, I stamped the arch detail with Pecan Pie ink.
I stamped the clouds with Cloud Cover ink (refill and uninked pad). I stamped them again, a little offset.
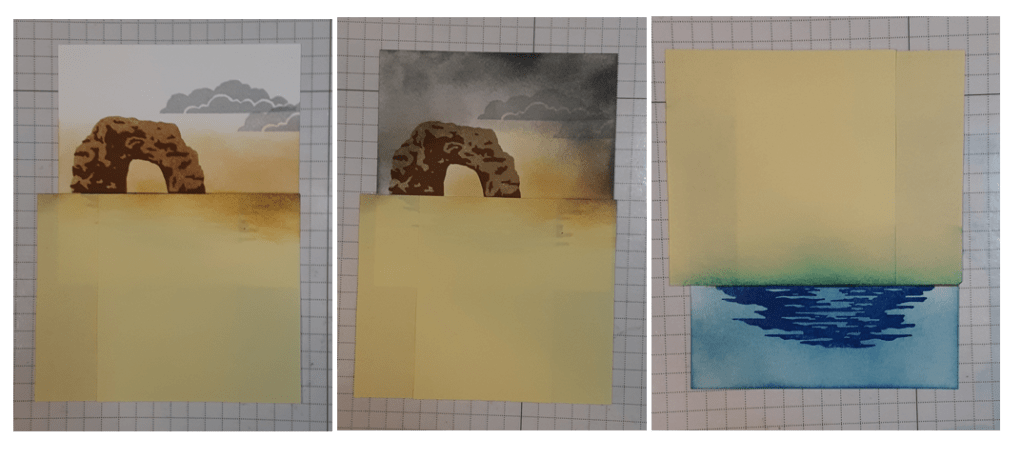
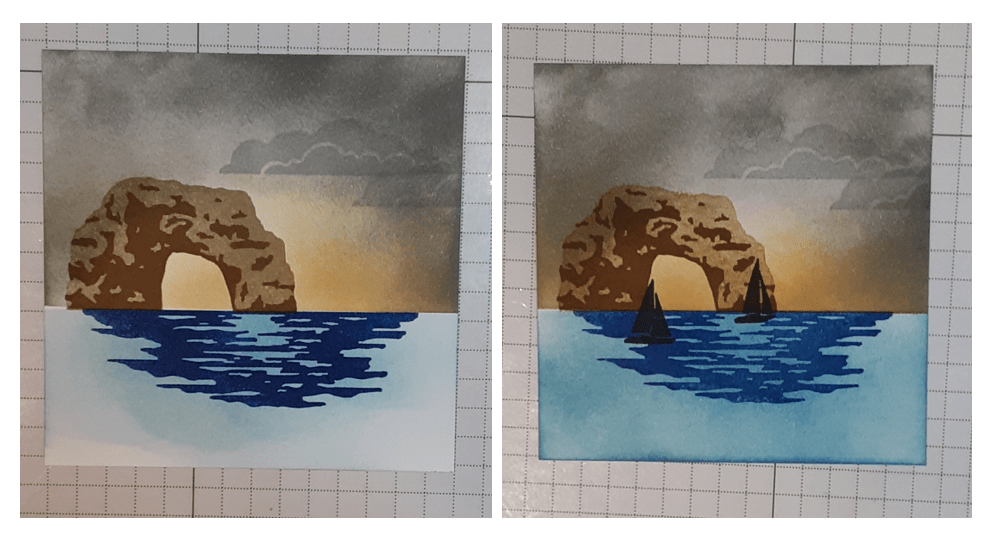
I covered the water portion of the image with two Post-it notes. With a Blending Brush, I applied Golden Glow ink. Then, I applied Smoky Slate ink to make a dusky sky. I covered the sky section and added Balmy Blue ink. Make sure to tap off excess ink before applying to get a softer effect.
After removing the mask, I stamped the sailboats in Black ink.
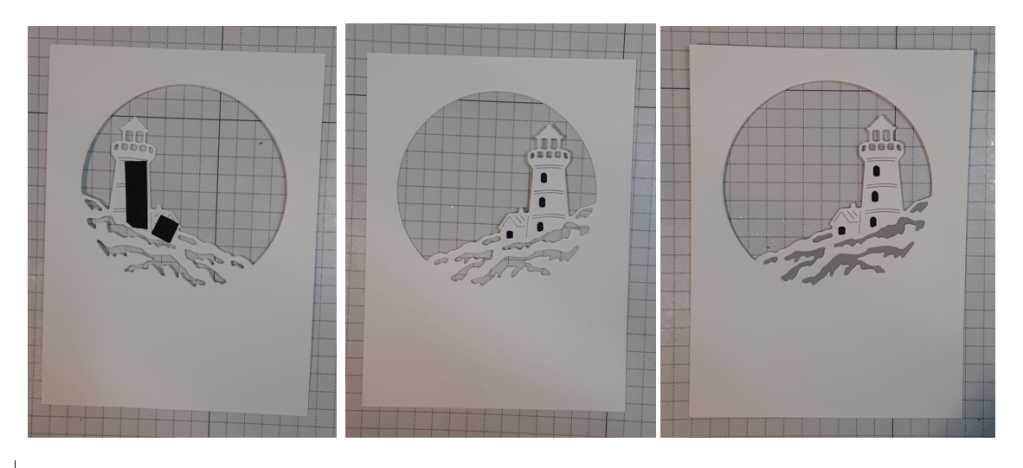
If you lay your lighthouse piece on top of the background, you can see through the cutouts in the lighthouse and the hill under it. To make the lighthouse more solid and realistic, I added a little strip of black cardstock behind the windows. I used a non-tacky glue for this because I didn’t want adhesive to accidentally come through the windows. I added Smoky Slate cardstock to the back of the hill.
With my favorite adhesive (Multipurpose Liquid Glue or Stampin’ Seal) I adhered my stamped panel behind the white piece. I added the fence pieces after applying Crumb Cake ink with a Sponge Dauber to the edges. I added this panel to my Golden Glow mat.
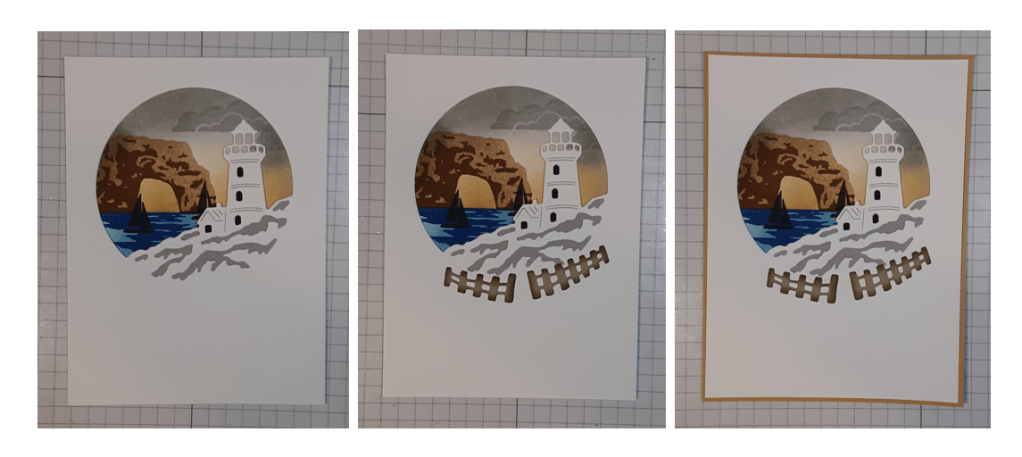
I added this panel to my card base. I also added my birds.
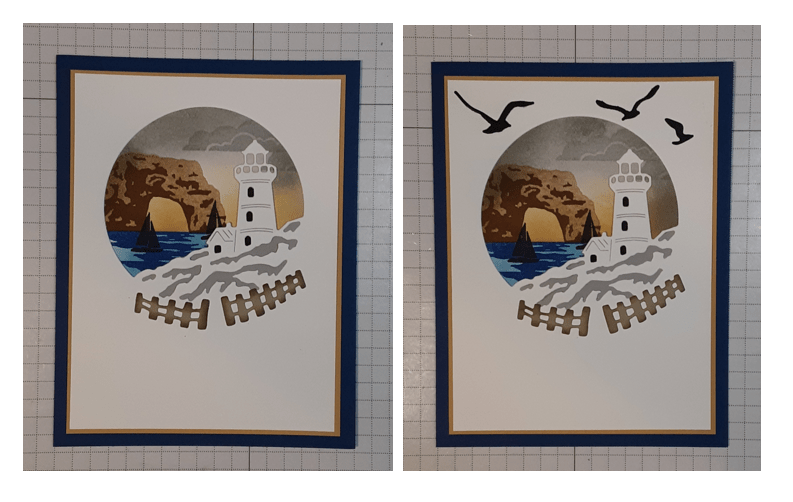
For my sentiment, I stamped Happy Retirement from the Sunset Coast stamp set in Blueberry Bushel ink on a strip of Basic White cardstock. I mounted this on a piece of Blueberry Bushel cardstock and trimmed it down for a narrow border. With tape runner, I added a strip of Golden Glow ⅜” Bordered Ribbon across the card near the bottom. If I had thought to add this sooner, I could have tucked the ends behind the panel before adding to the gold mat. I added my sentiment with Stampin’ Dimensionals.
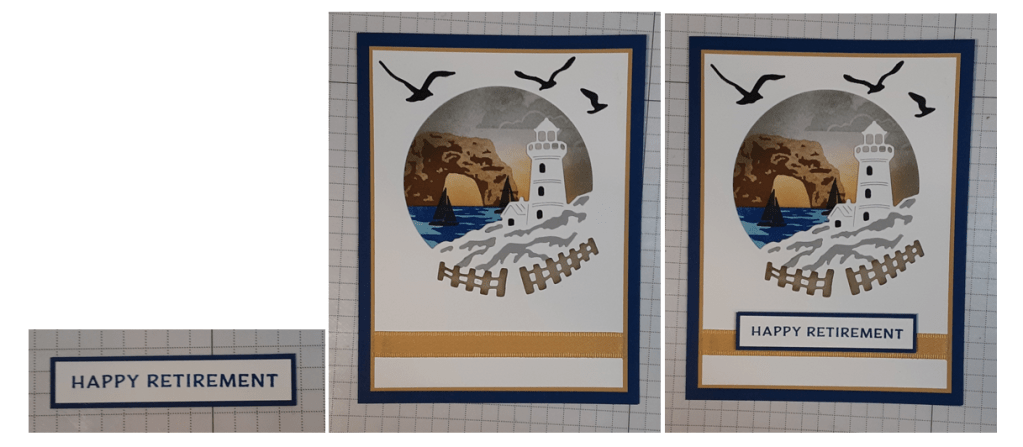
There are other sentiments in the set, though you aren’t constrained to use just the set. I plan on making some birthday, thank you, and thinking of you cards using stamps I have on hand. You are only limited by your imagination.
To finish the card, I stamped a greeting on a 4” x 5¼” piece of Basic White cardstock and glued it inside my card.
I hope you liked my rendition of this fun card.
For the complete supply list, click here.
Images © Stampin’ Up
 stampinfunwithterry.net