
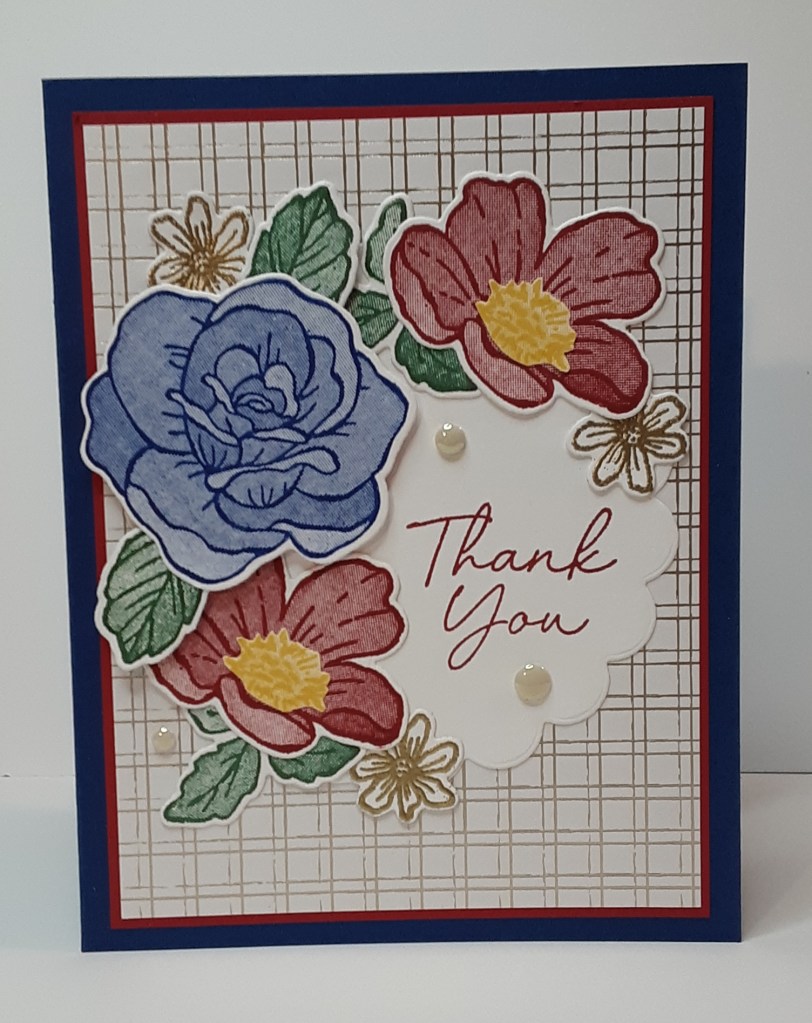
It’s Saturday, so today I have a simple card for you. Okay, maybe not so simple, but I really tried to make it simple. Tomorrow is Flag Day here in the US and I thought I’d focus my colors on our flag’s colors: red, white, and blue. I looked through my current stamp sets and settled on these pretty flowers. I guess roses can be blue. If not, I claim creative license. As an aside, today is the final day of free shipping. If you haven’t taken advantage of this offer, you’ll want to get to it today before it goes away. Now on to the card.
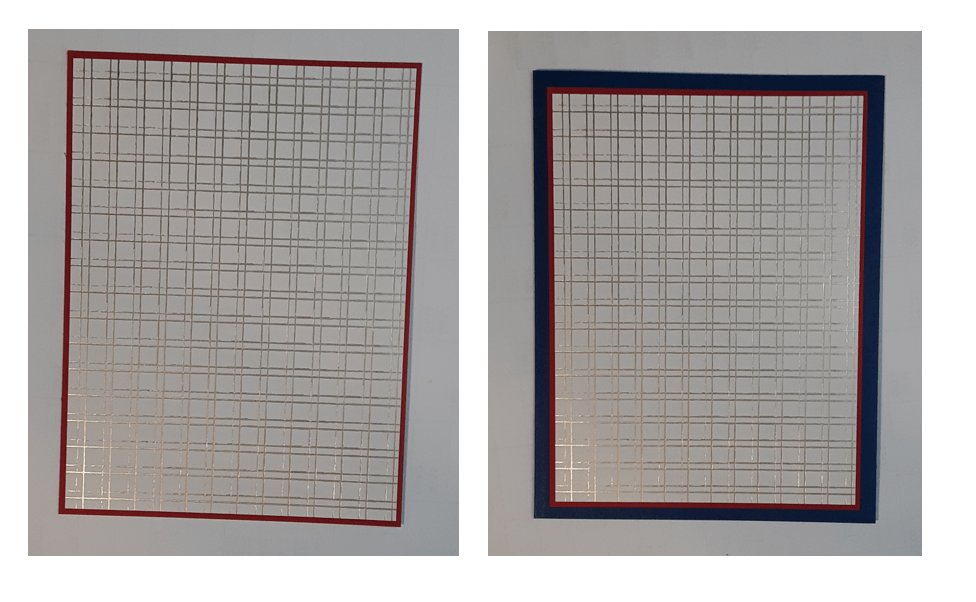
For the card base, I cut a piece of Blueberry Bushel cardstock to 5½” x 8½” on my Paper Trimmer, scored and folded at 4¼”, and burnished with my Bone Folder. l cut a piece of Real Red cardstock to 3⅞” x 5⅛” to act as my mat. I cut a piece of Regal Distressed Patterns DSP (Last Chance!) to 3¾” x 5” for my background piece.
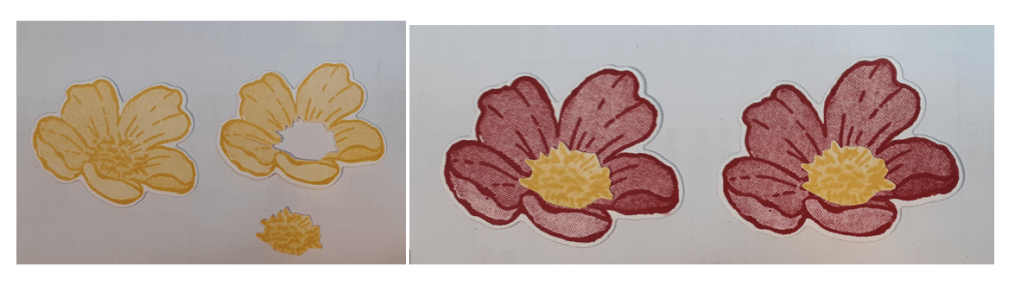
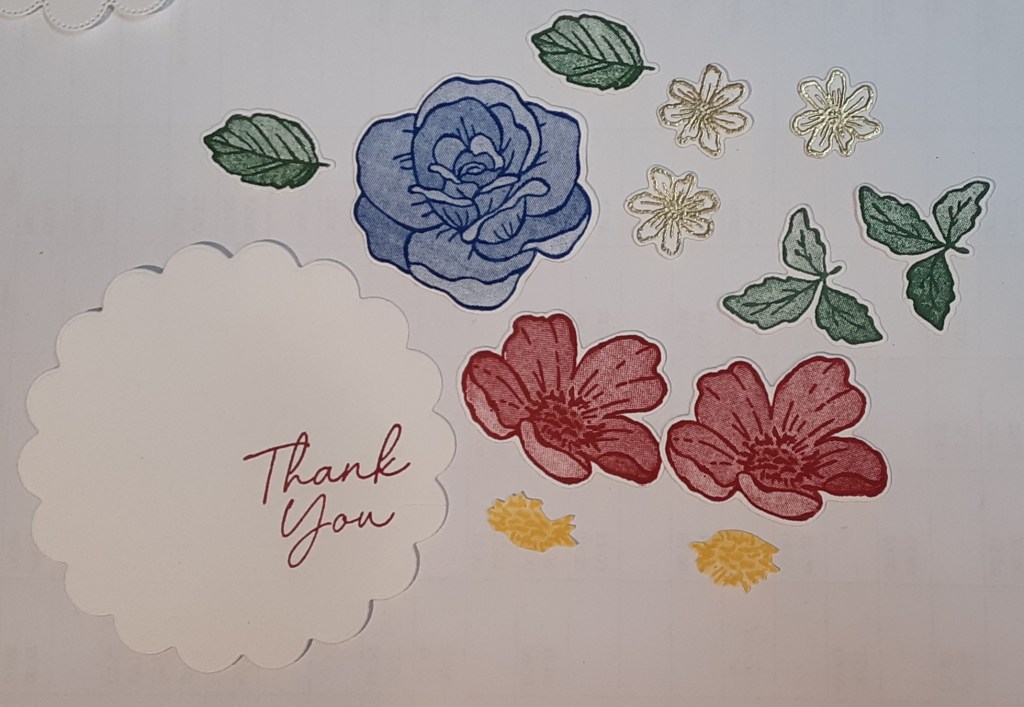
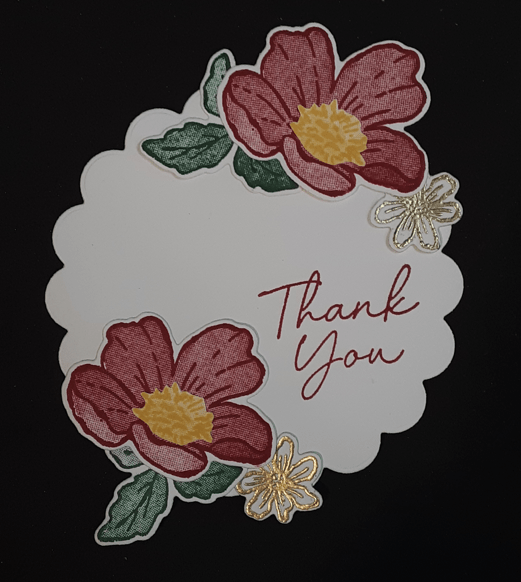
I stamped the rose from Boutique Blossoms bundle with Blueberry Bushel ink on Basic White cardstock. This is a two-step stamp and I stamped both layers with Blueberry Bushel ink. I die cut it out with the coordinating die on my Stampin’ Cut & Emboss Machine. I stamped the other flower twice with Real Red ink for both layers on Basic White cardstock and die cut it out. I stamped this flower again (after cleaning my stamp) with Daffodil Delight ink twice, again using Daffodil Delight ink for both layers. With the yellow flower, I cut out the center and discarded the petals. I adhered the yellow centers to my red flowers with my favorite adhesive (Multipurpose Liquid Glue or Stampin’ Seal).
I stamped the leaves in Peaceful Pine ink, a new In Color, on Basic White cardstock. I stamped both layers in Peaceful Pine ink and die cut them out with the coordinating die. Lastly, I stamped the small flower three times with Versamark ink on Basic White cardstock, sprinkled on gold embossing powder from the Metallics Embossing Powder pack and heat set it with my Heat Tool. I die cut these out with my coordinating dies.
I die cut the 3¼” scalloped circle from the Scalloped Blooms bundle from Basic White cardstock. I stamped Thank You in Real Red ink from the stamp set in the bundle. Now I had all my pieces.
I glued my background to my red mat. I adhered this to my card base.
Before gluing my flowers down, I laid them out on my scalloped circle to see how I wanted them to look. I added the leaves to my red flowers and then glued them to my scalloped circle. I added two of my embossed flowers.
I glued my focal image to my card base.
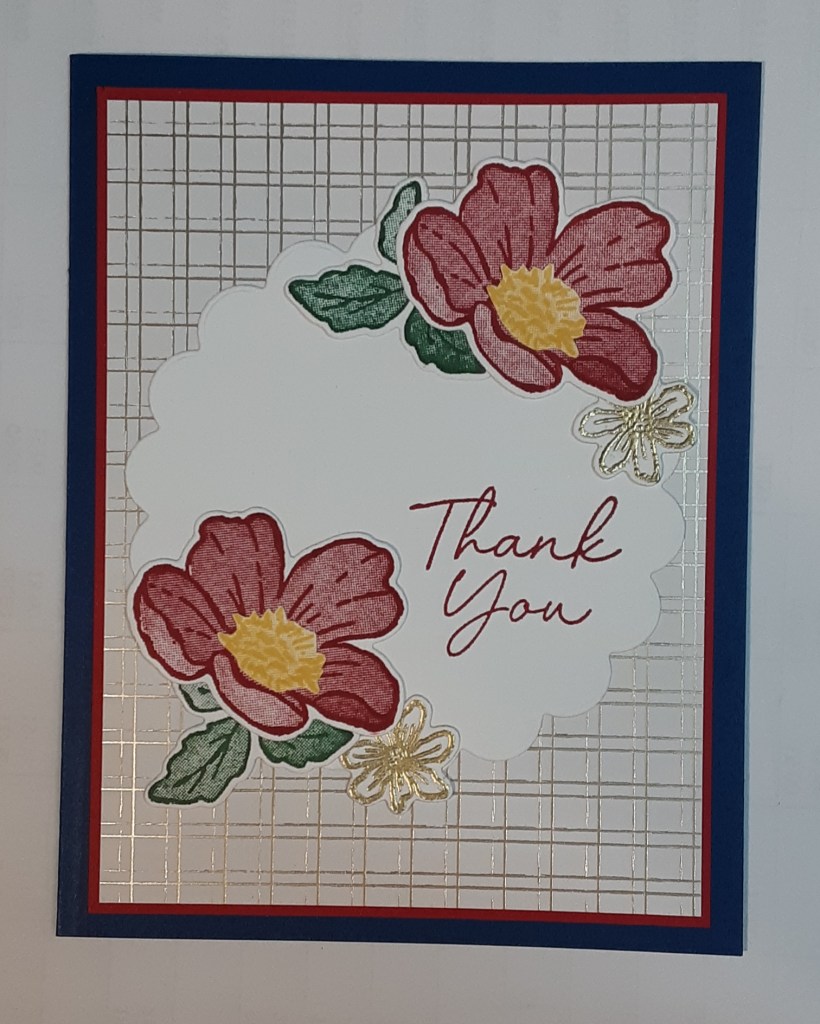
I added the leaves to my blue rose. I added the rose to my card with Stampin’ Dimensionals. I tucked my third white flower behind the rose.

I added three Antique Pearls to the card for a little shine and to help fill the empty space on the label.
To finish the card, I glued a 4″ x 5¼” piece of Basic White cardstock inside the card.
I hope you liked this card!
For the complete supply list, click here.
