
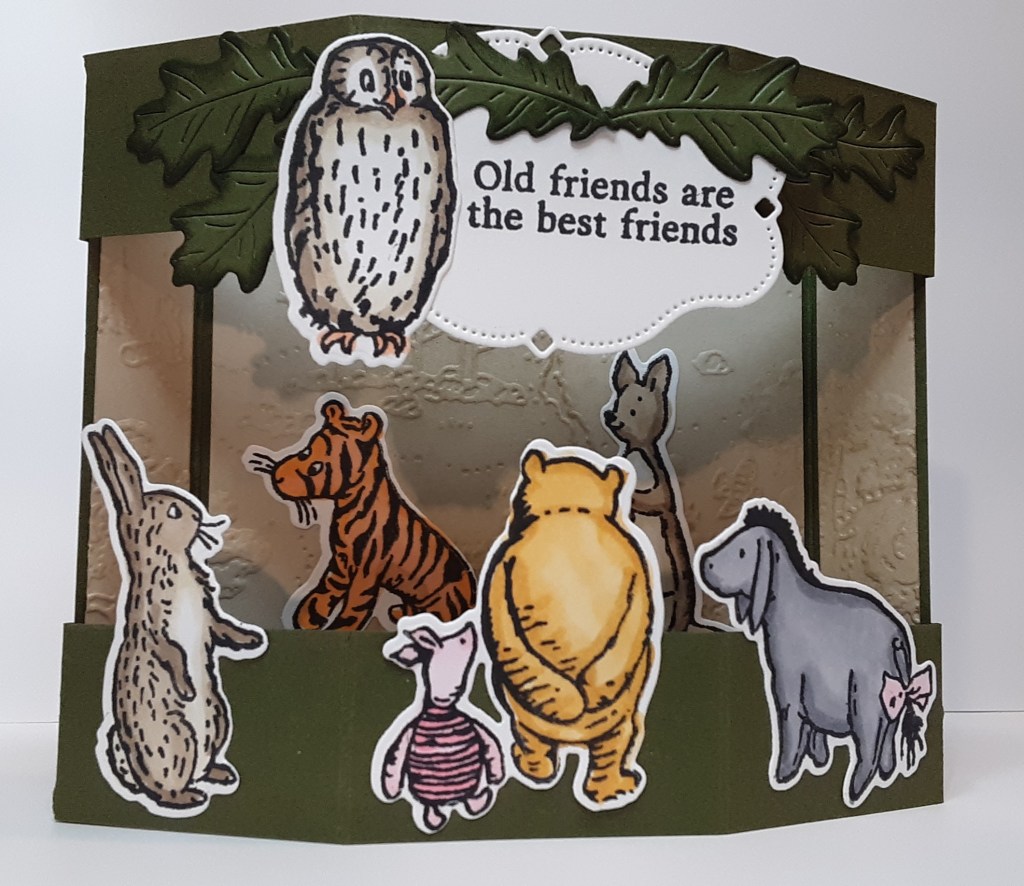
Today I have a fun card that uses all the characters in the Sweet Old Friends stamp set. Originally, I thought of using the Perennial Postage dies and make a collection of stamps, but the characters were all too big or odd shaped to fit on any of the “stamps” cut from the dies. I had to come up with a different approach and came us with the diorama card. This style of card has dimension and a couple layers and allows the characters to interact on the card. So, let’s get to it.
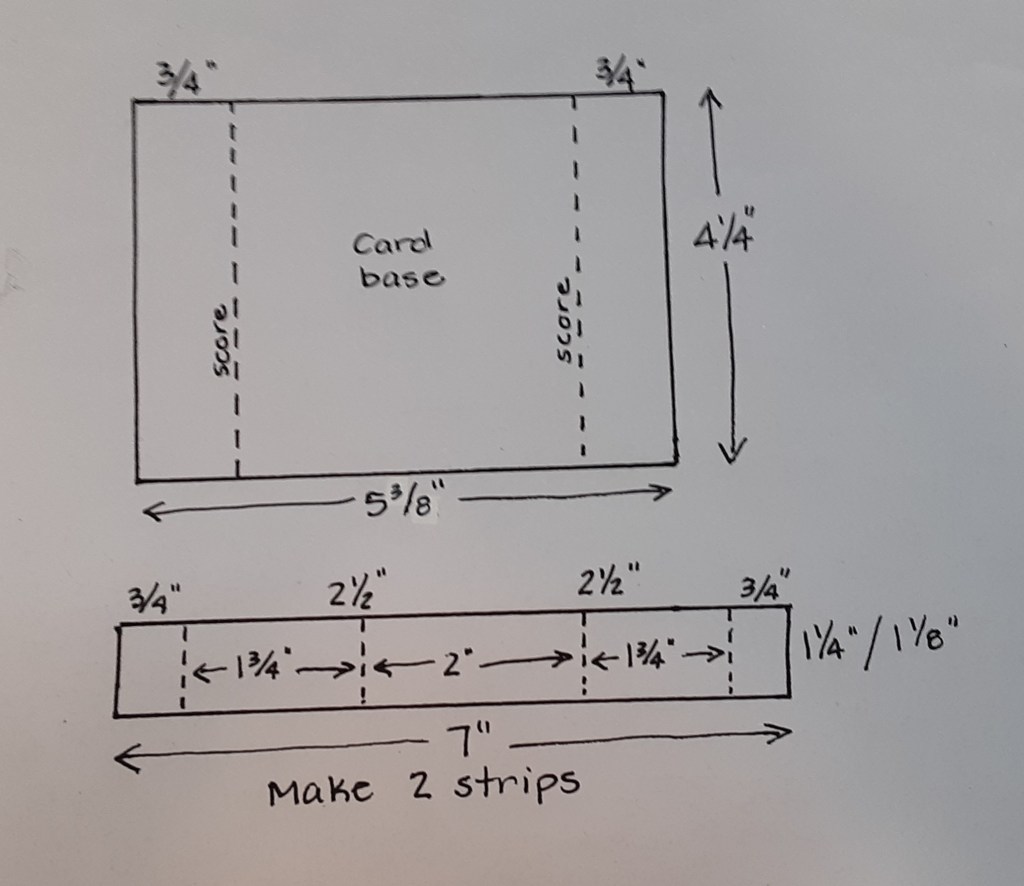
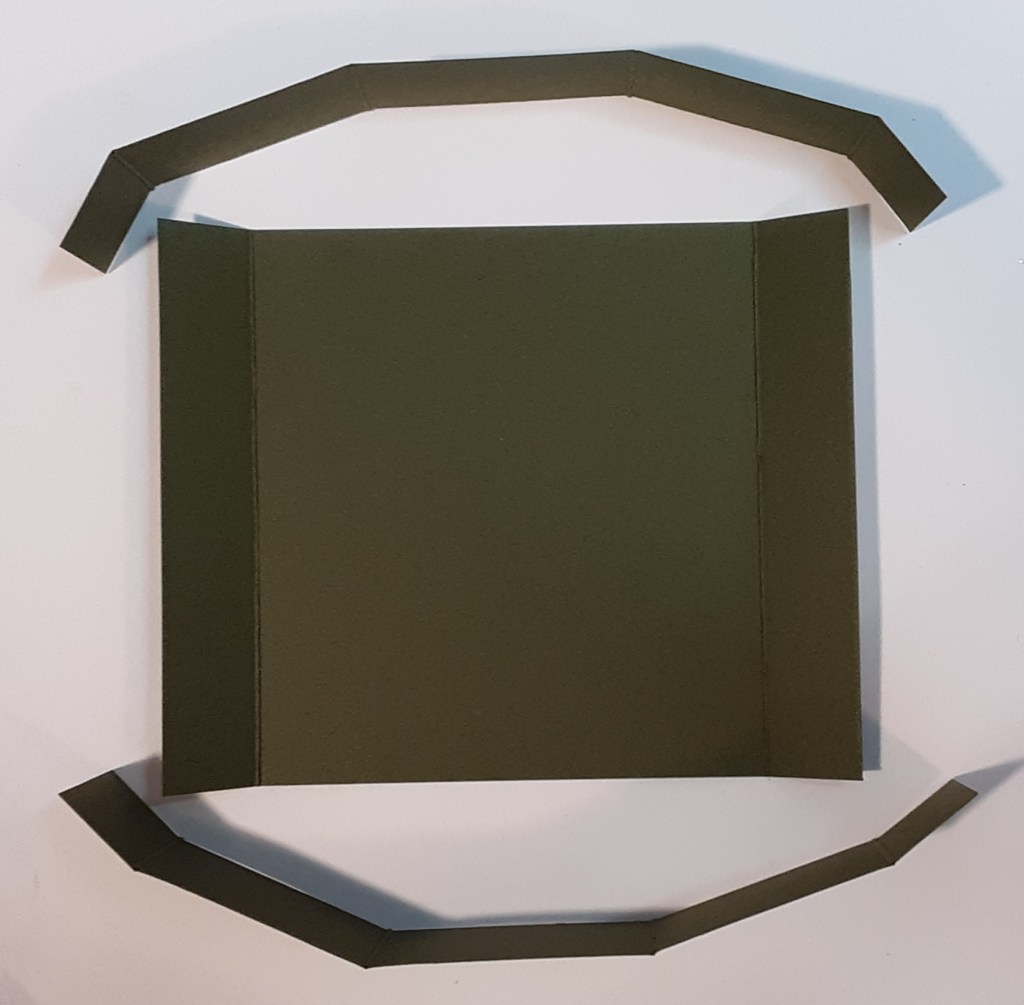
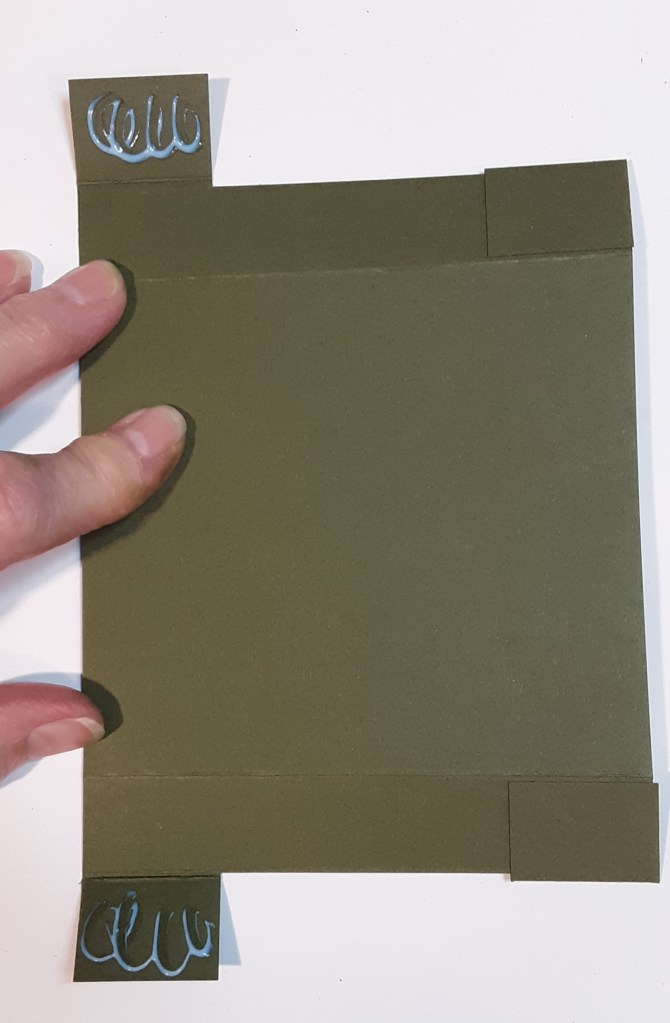
To make the card base, I cut a piece of Mossy Meadow cardstock to 5⅜” x 4¼” on my Paper Trimmer, scored at ¾” from each end on the 5⅜” edge, folded, and burnished with my Bone Folder. I cut another piece of Mossy Meadow cardstock to 2½” x 7″, and scored at ¾” and 2½” from each end and folded in on all folds. I cut the strip in half at 1⅛” to make two strips.
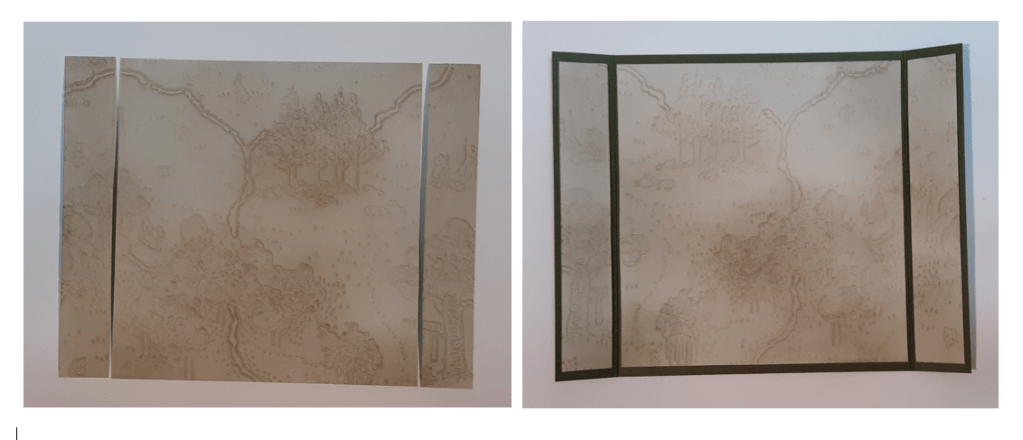
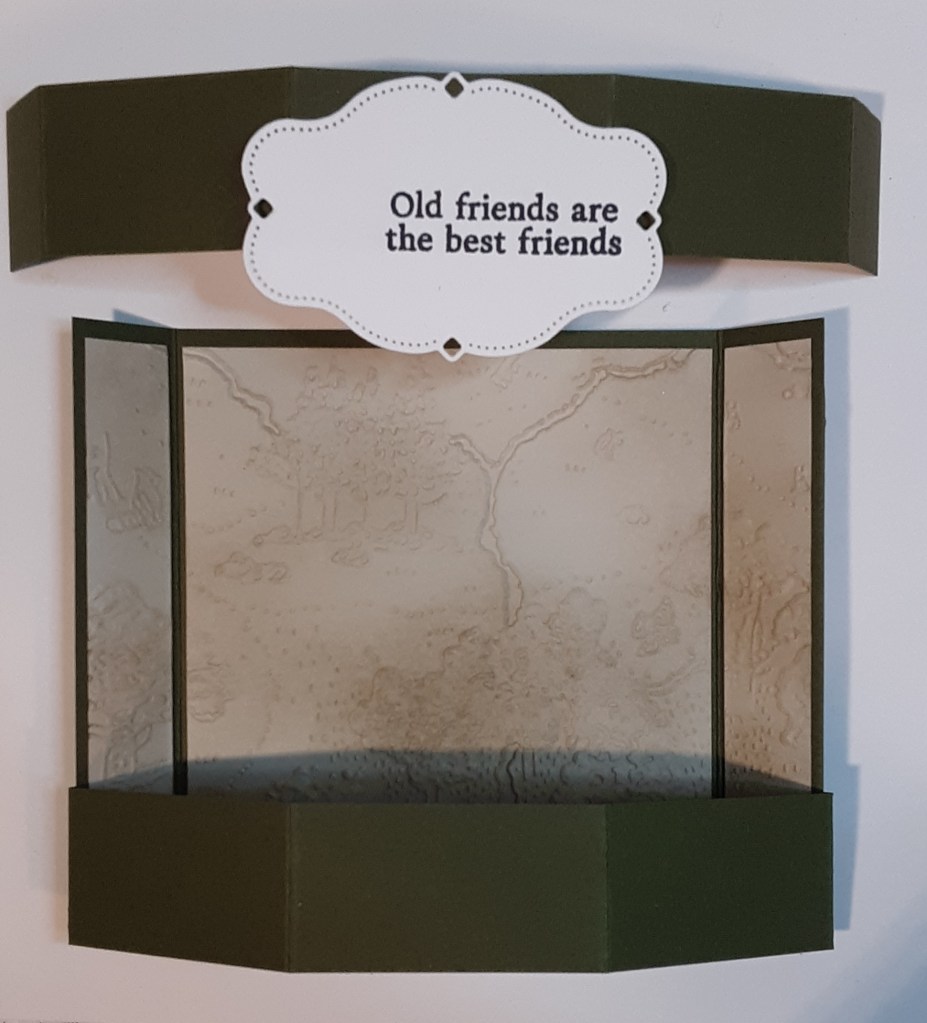
I cut a piece of Basic Beige cardstock to 4½” x 4¼”. I ran this piece through the Hundred Acre Wood Embossing Folder on my Stampin’ Cut & Emboss Machine. When positioning the piece on the embossing folder, keep in mind that the 4½” sides are the top and bottom. With Crumb Cake ink, I lightly ink blended with a Blending Brush the raised areas to make them stand out a bit. I cut ⅝” from either end on the 4½” edge. I adhered my pieces to my card base using my favorite adhesive (Multipurpose Liquid Glue or Stampin’ Seal).
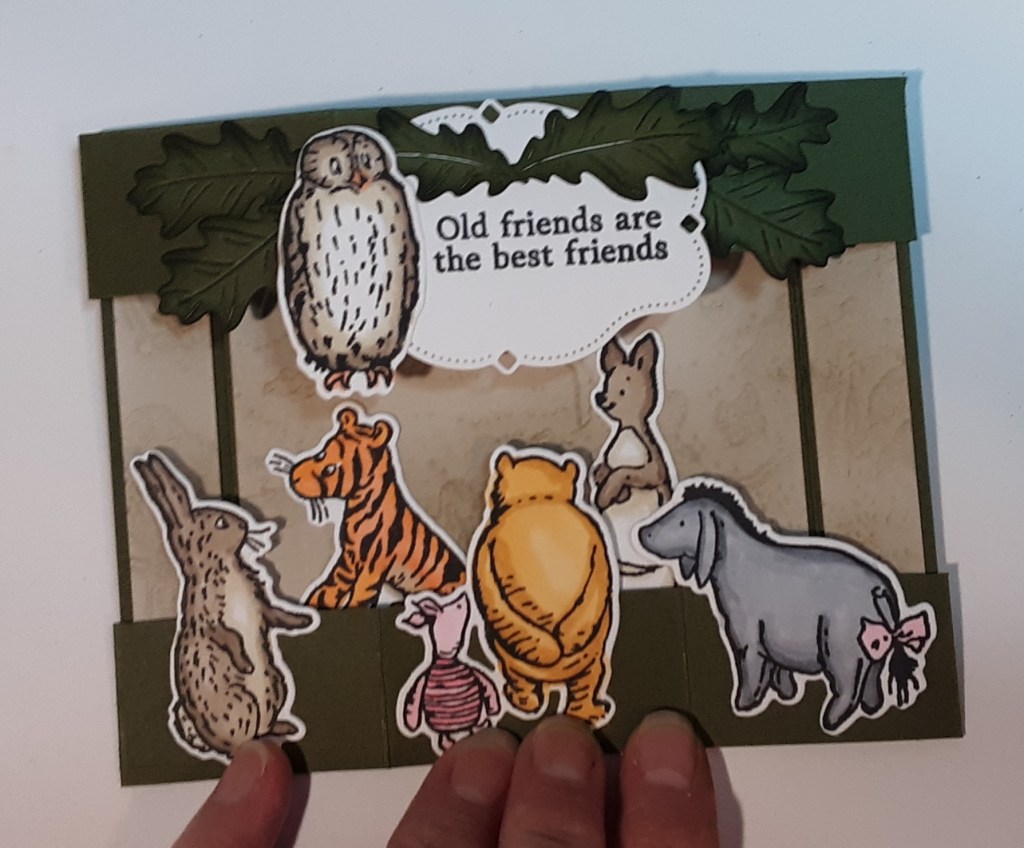
I stamped my characters from Sweet Old Friends bundle with Momento Tuxedo Black ink on Basic White cardstock. I colored them in with Stampin’ Blends: Golden Glow, Smoky Slate, Crumb Cake, Pumpkin Pie, Ivory, Color Lifter, and Bubble Bath. I die cut them with the coordinating dies.
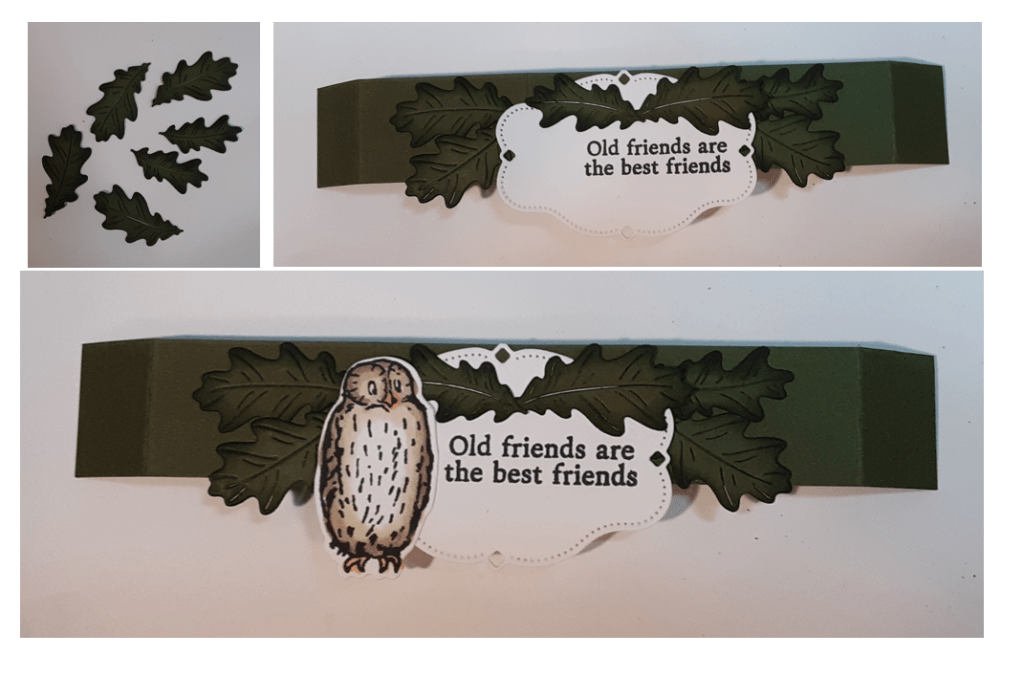
I die cut the leaves in the Sweet Words and Labels die set from the bundle from Mossy Meadow cardstock twice. I used a Sponge Dauber to apply Mossy Meadow ink to the edges for a little dimension. I stamped Old friends are the best friends from the bundle on Basic White cardstock and die cut it out with the label from the die set. I adhered these to one of the strips. This would be the top strip.
I adhered my bottom strip to my card base by folding the tabs in and applying glue. I made sure that my strip was flush with the bottom of the card. I did not adhere the upper strip yet.
I added my characters to my card base. When applying glue, make sure you don’t put the adhesive on the areas that are exposed or the card won’t be 3D. I debated whether to glue my inside animals flat or pop them up with Stampin’ Dimensionals. I did glue them flat, but I think they would look great popped up a smidge. It would add a little extra bulk to the card.

I added the top strip to the card by lining up the strip with the edge of the card, adding some glue to the tabs, and folding them back.
The card lies flat to fit into an envelope.
To finish the card, I cut a 3¾” x 4¼” piece of Basic White cardstock and addeded my greeting. I glued this to the back of the card. You could also leave it blank and write a personal message on it later.
I hope you liked this fun card!
For the complete supply list, click here.
If you’re still reading, I wanted to mention that I stopped by the post office the other day and picked up some really cute stamps. They are called A Day at the Beach. I also picked up some sunflower stamps, Route 66 (so nostalgic!), and bald eagle stamps. I really stocked up! I love putting fun stamps on my envelopes. Now if they would come up with some vintage Winnie the Pooh…
Images © Stampin’ Up!
