
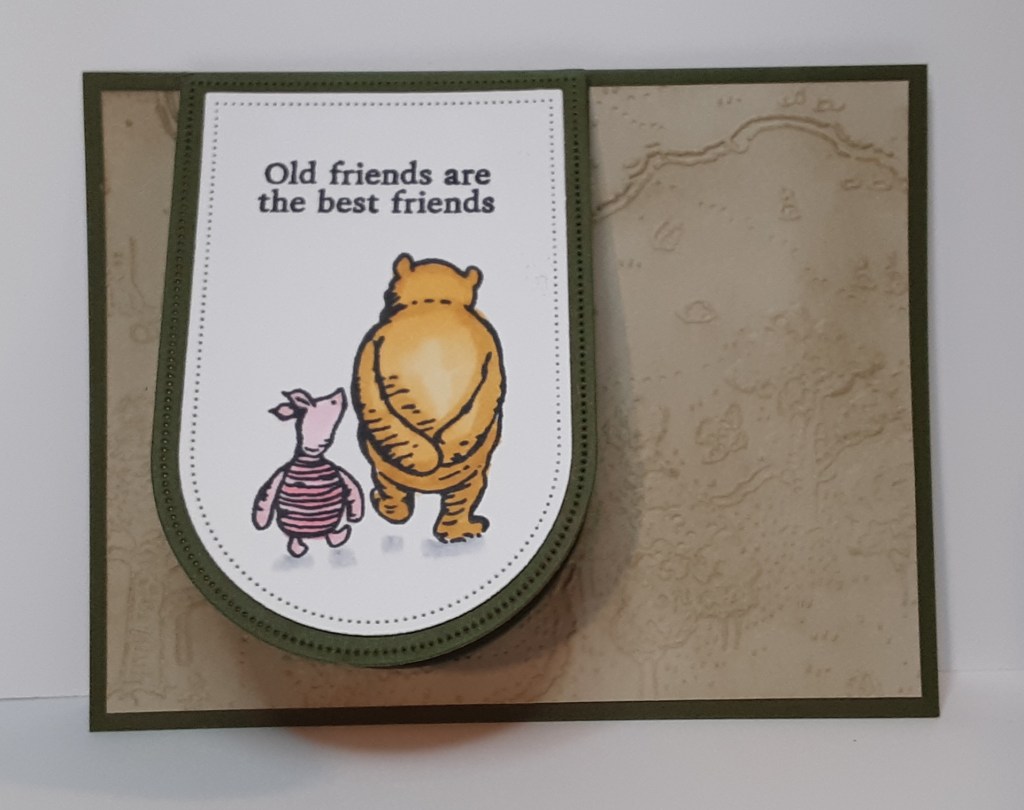
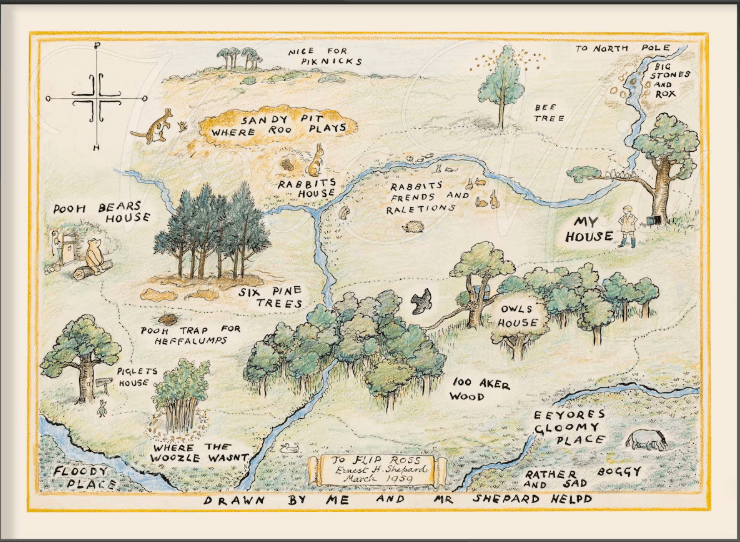
Today I have a simple fun fold card using the Sweet Old Friends stamp set. The characters in this set are from Winnie the Pooh by A.A. Milne. The coordinating embossing folder is a map of the Hundred Acre Wood. I googled Hundred Acre Wood, and it is very similar to the map from the book. It’s all so nostalgic. So, let’s take a stroll down memory lane and make a card.
Isn’t this sweet?
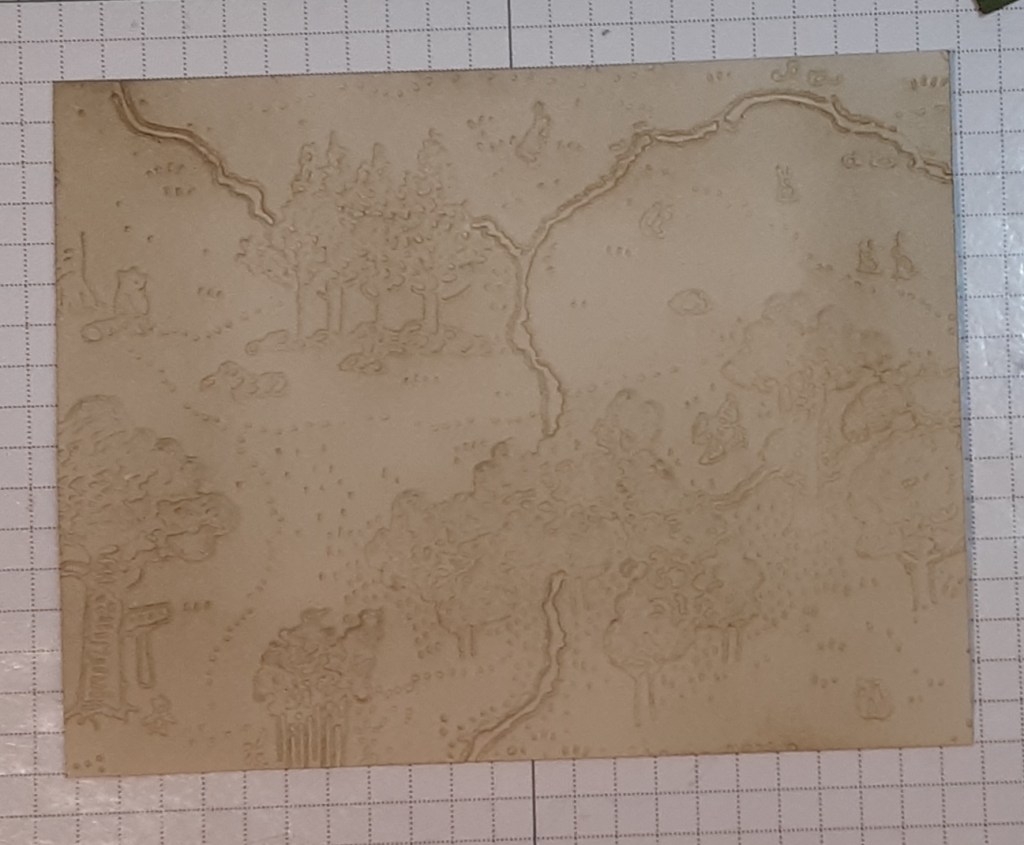
For the card base, I cut a piece of Mossy Meadow cardstock to 4¼” x 5½” on my Paper Trimmer. If you prefer more space to write, you could cut a standard card base and fold. I cut a piece of Basic Beige cardstock to 4” x 5¼” and ran this through the Hundred Acre Wood Embossing Folder on my Stampin’ Cut & Emboss Machine.
To help highlight the embossing on the cardstock, I applied Crumb Cake ink using a Blending Brush. Initially, I tried coloring in the raised areas using Stampin’ Blends but I didn’t really like it. I thought I’d go over the embossed images with a brayer to accentuate the embossing, but that would have been a mess because the trees would have been a dark blob. So, I went the simple route and used the Crumb Cake.
With Everyday Arches dies, I cut the two middle arches from Mossy Meadow cardstock (larger one) and Basic White cardstock (smaller one), twice each.
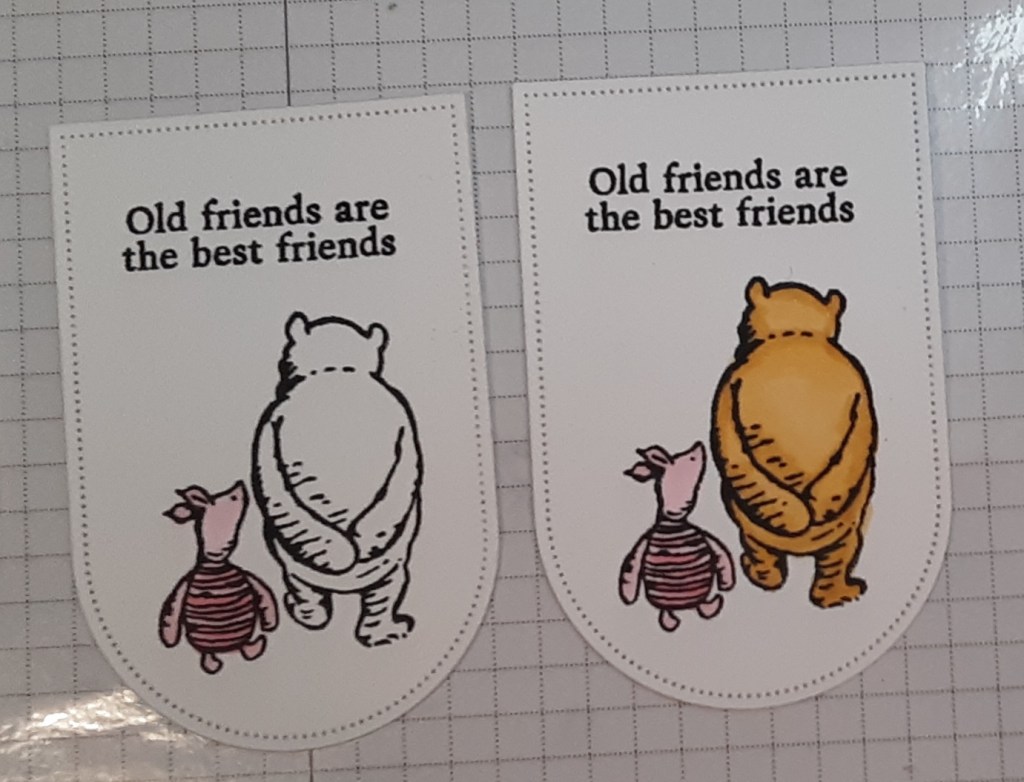
On one of the white arches, I stamped Pooh and Piglet from Sweet Old Friends stamp set (bundle) with Momento Tuxedo Black ink. Then I stamped Old friends are the best friends from Sweet Words and Labels stamp set (bundle). With Stampin’ Blends I colored in Pooh and Piglet (Golden Glow, Bubble Bath, Smoky Slate, Color Lifter).
I wanted my focal image to fold up, so I cut a piece of Mossy Meadow cardstock to 2½” x 1″, scored and folded at ½” longwise (hot dog fold as I used to tell my students), and burnished with my Bone Folder. This piece is the mechanism to open and close the label and make a flap. I glued the mechanism so the fold side was along the straight side of the arch using my favorite adhesive (Multipurpose Liquid Glue or Stampin’ Seal). Then I glued the second arch to the mechanism.
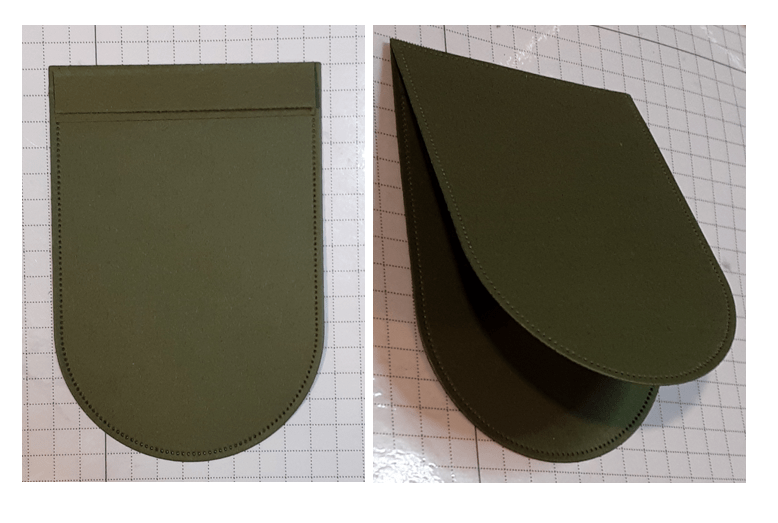
I adhered my focal image to the top of the flap. I adhered the second white piece inside the flap. I didn’t stamp anything inside the flap but you easily could.
I adhered my embossed panel to my card base. I adhered the flap to the front of the card.
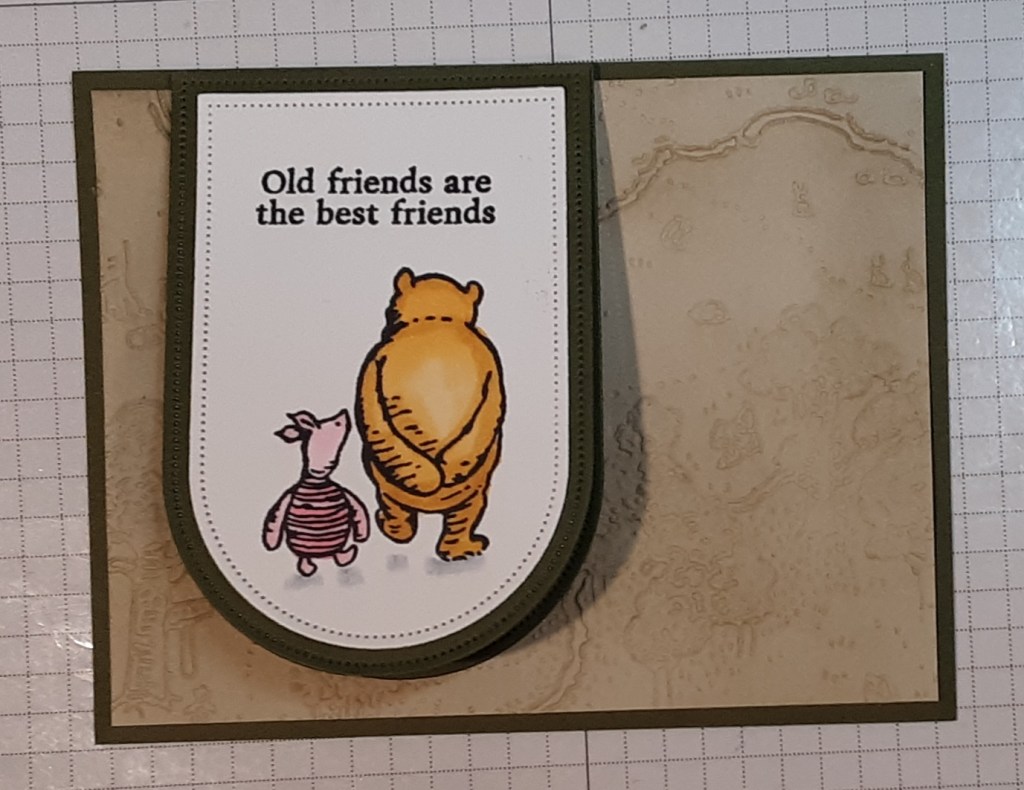
This is my attempt at coloring the embossed panel. Yikes! I didn’t love it. I think I’ll try again using colored pencils or some other medium where I have a little more control over where the color goes.

I hope you liked this card!
For the complete supply list, click here.
