
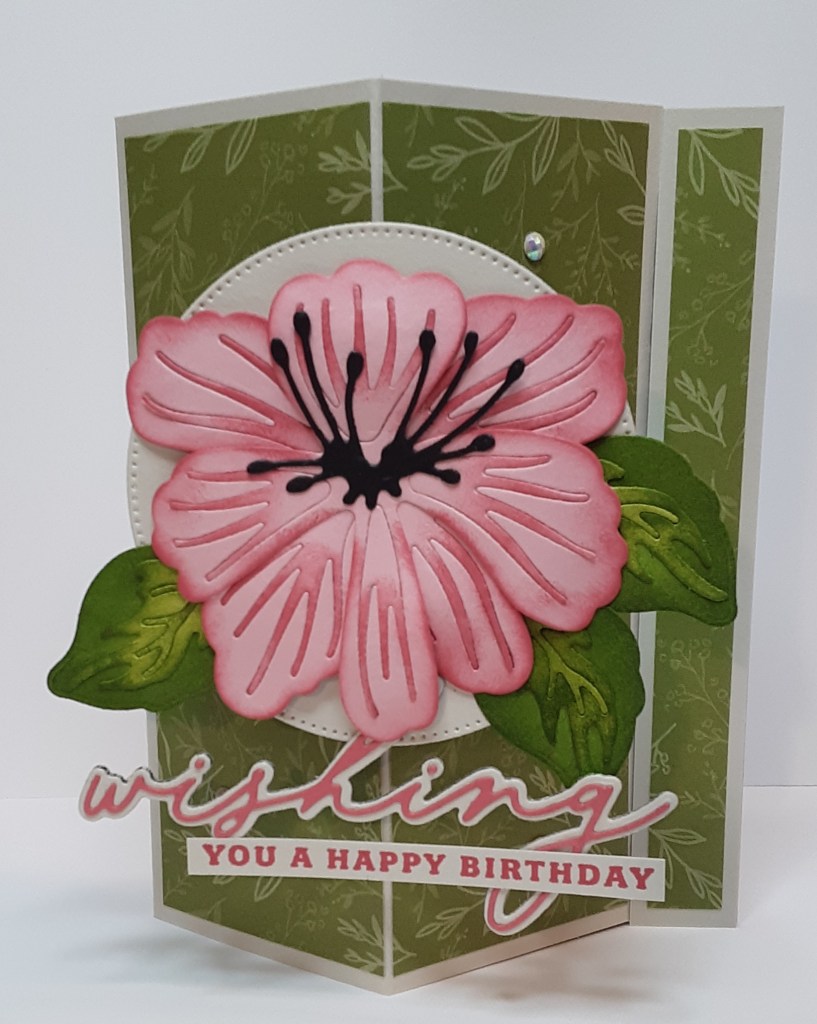
Happy Wednesday! Today I have a card that looks complicated but really isn’t. Okay, maybe a little, but I’ll try to explain step by step how to achieve this card. Marilyn here with another card.
As a reminder, the annual catalog is coming to an end with the May through August catalog. That means the Last Chance list has been updated. Today’s card uses some items on the list, so time is limited to acquire them. Take advantage of the discounts some of them have. Now on to the card.
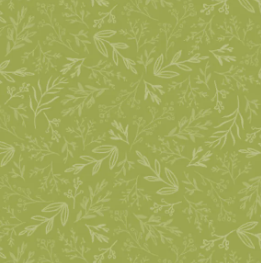
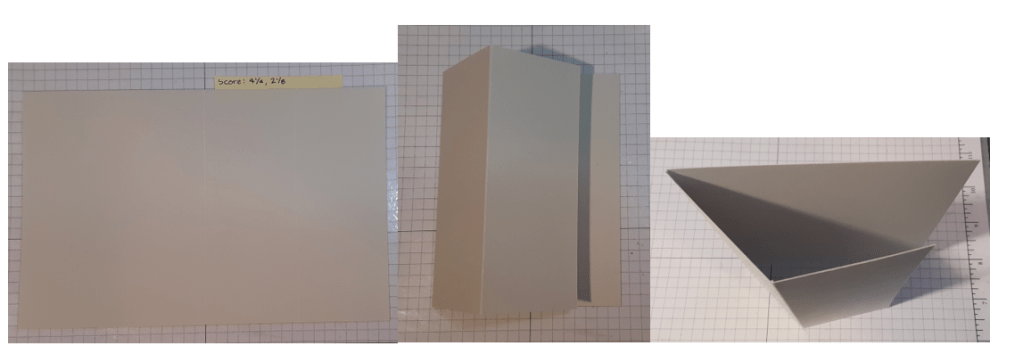
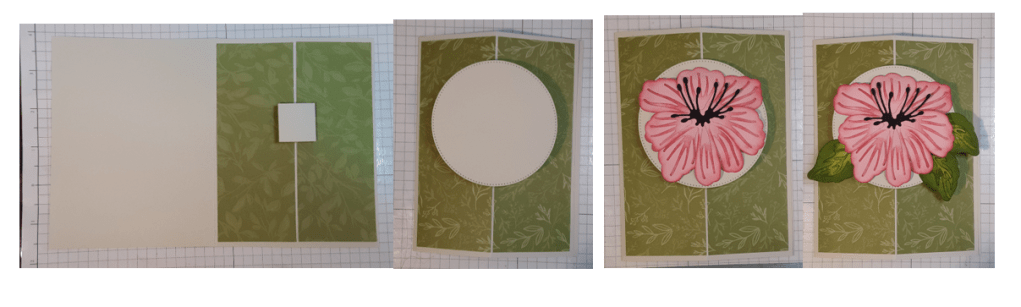
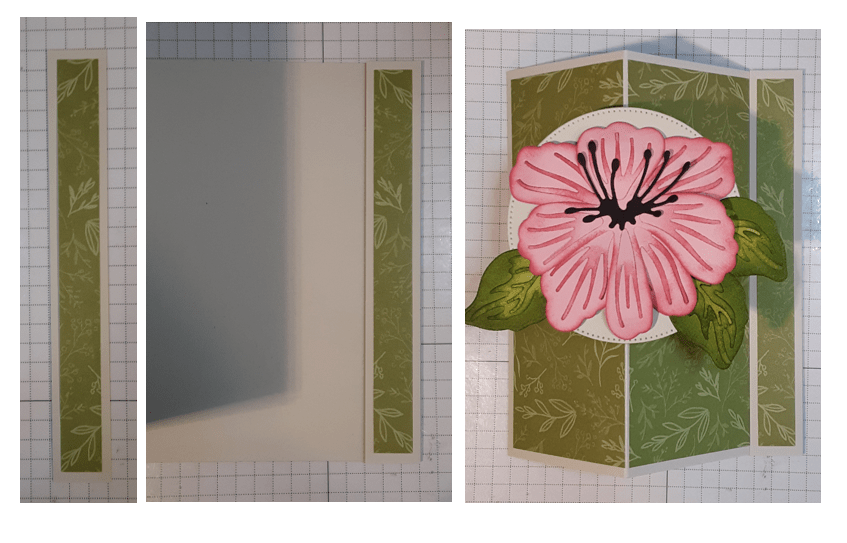
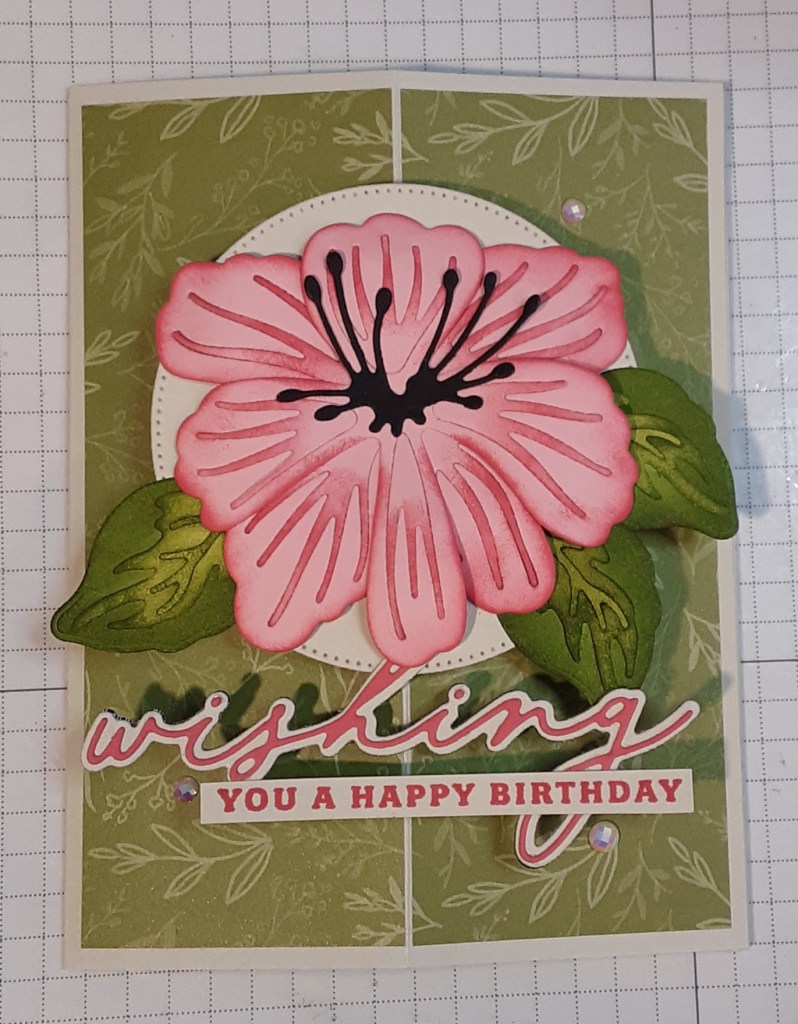
For the card base, I cut a piece of Basic Beige cardstock to 5½” x 8½” on my Paper Trimmer, scored and folded at 4¼” and 2⅛”, and burnished with my Bone Folder. I also cut a 5½” x ¾” piece of Basic Beige. I cut two pieces of Lovely & Beautiful DSP to 5¼” x 2″. I cut another piece to 5¼” x ½”.
To make the card base, I folded on the score lines mountain folds.
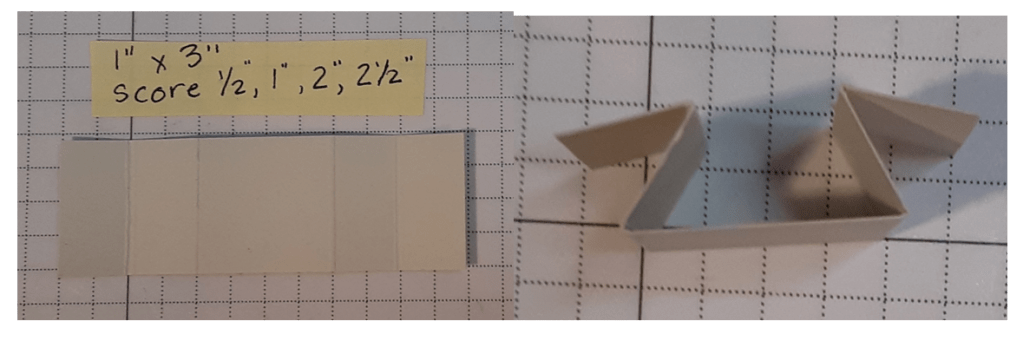
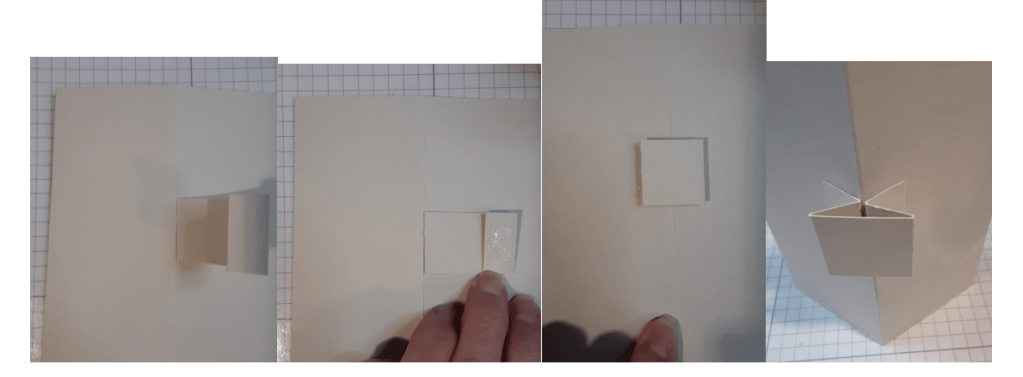
To make the pop-up mechanism, I cut a scrap of Basic Beige cardstock to 1″ x 3″. I scored this at ½”, 1, 2, and 2½”. I folded on the outside score lines in and the other score lines out.
I added the mechanism to my card. I lined up one of the fold sides of the tabs with the center fold of my card base. I glued this down using my favorite adhesive (Multipurpose Liquid Glue or Stampin’ Seal). I added glue to the other tab and glued it to the other side of the fold.
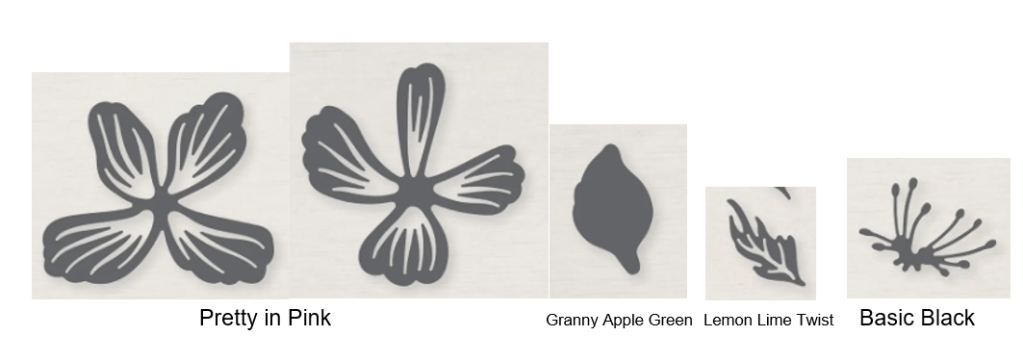
With the Stylish Shapes dies, I cut the largest circle from Basic Beige cardstock on my Stampin’ Cut & Emboss Machine. I also die cut the large floral images in Simply Beautiful die set from Pretty in Pink cardstock (Last Chance!). I cut the leaf outline three times from Granny Apple Green cardstock. I cut the veins three times from Lemon Lime Twist cardstock. I kept all the pieces, including the inside of the petals and the leaves.
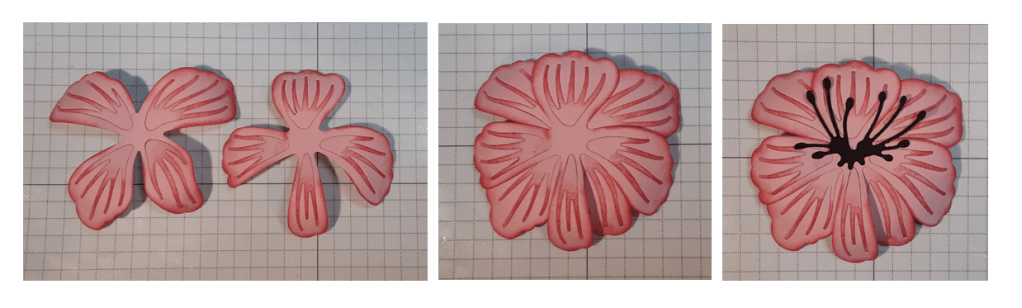
With a Sponge Dauber and Strawberry Slush ink, I ink blended the flower petals. I also added ink to the cut-out parts. I tried it without the centers in the flowers and decided I didn’t like the open spaces. I taped the flowers together with Scotch tape on the back. I used my Bone Folder to add some curl to the petals. I glued the two pieces together by adding a little adhesive to the centers only. I adhered the black center to the middle.
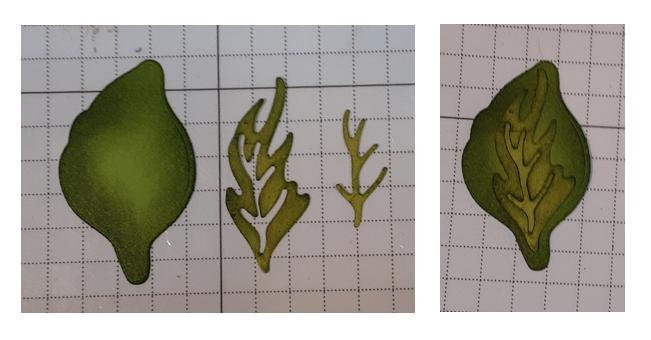
To make the leaves, I applied Granny Apple Green ink to the leaf and veins with a sponge dauber. I used tape runner to adhere the veins because I didn’t want the wet glue to seep through the openings.
I added my two DSP pieces to the card, tucking the edges near the fold under my mechanism. I glued my circle onto the pop-up mechanism. I added the flower by just adding a little glue to the center. I wanted my petals to have some dimension and gluing them flat would take that away. I added my leaves under the petals, being careful not to extend past the edges of the card. Make sure your glue does not extend beyond the circle or it won’t pop up.
To make the stopper for the easel, I adhered my DSP strip to my Basic Beige strip. I added four Stampin’ Dimensionals to the back and adhered the strip inside the card flush with the right side.
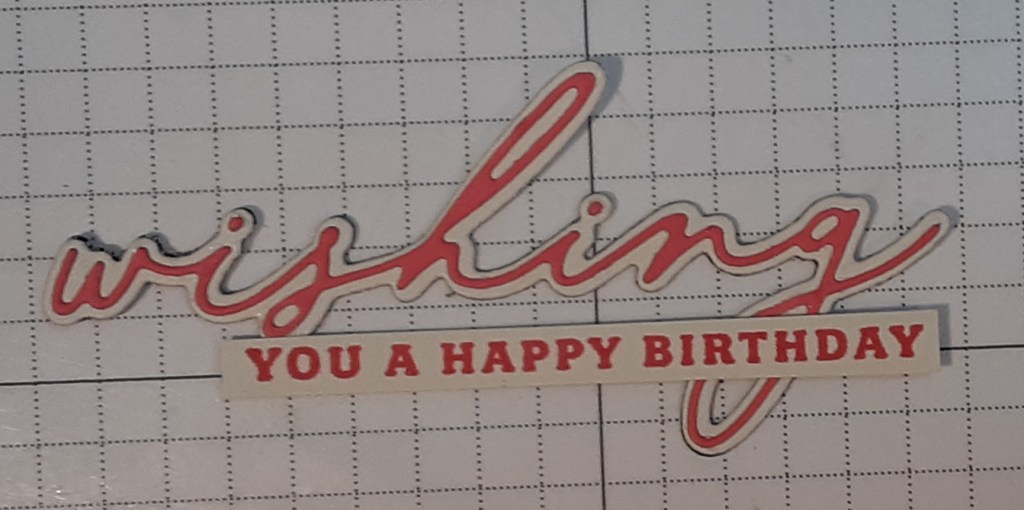
For the sentiment, I die cut Wishing from the Delightful Wishes die set (Last Chance!) from Strawberry Slush cardstock. I cut the shadow from Basic Beige cardstock. I adhered the word die cut to the shadow die cut. I did cut another shadow piece from a scrap of packaging and glued it to the back of my word to give it a little extra support.
I stamped You a Happy Birthday from the Delightful Wishes stamp set (Last Chance!) with Strawberry Slush ink on Basic Beige cardstock. I trimmed it close to the words. I adhered this to the bottom of my die cut with a spot of glue on the bottom of the “s” and “g”.
I added this sentiment to my card by adding it to my circle and the leaf hanging the lowest on the right. Again, be careful where you put the glue so the sentiment “floats” below the circle. Once again, I put a spot of glue behind the “g” and the top of the “h”.
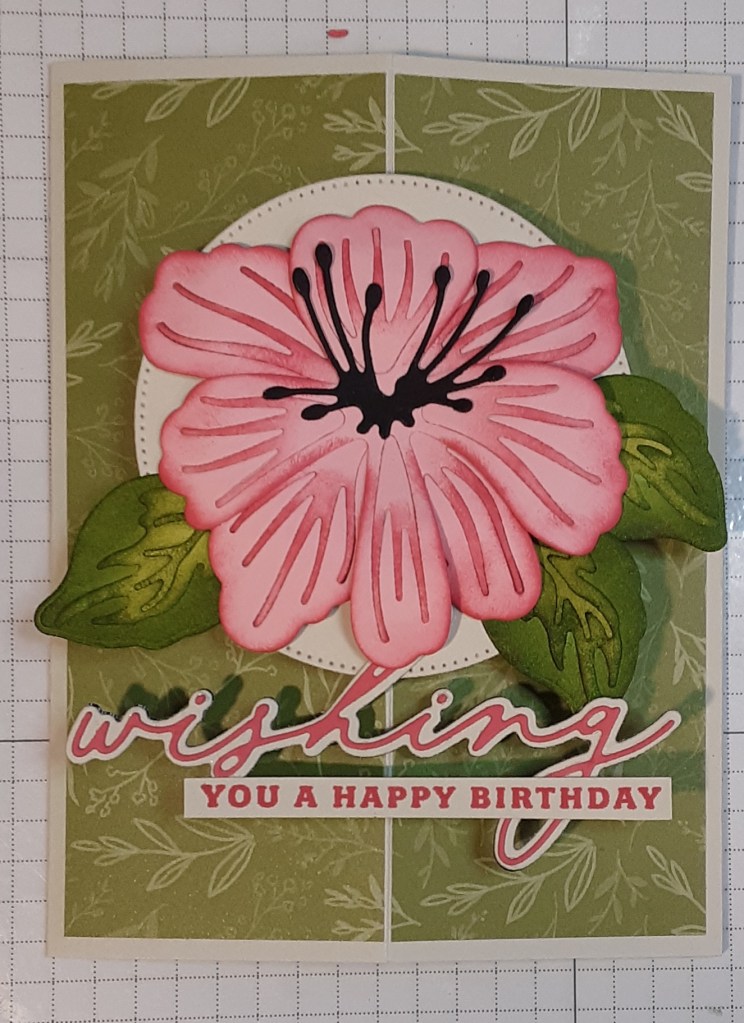
For a bit of sparkle, I added three Pearlized Faceted Circles.
To finish the card, I added a 5¼” x 3″ piece of Basic White cardstock to the inside of the card after stamping my greeting.
I hope you liked this card!
If you are interested in purchasing the Delightful Wishes stamp set ($14.00) and dies ($17.50), I recommend ordering them individually instead of in the bundle ($49.50). The bundle is not discounted beyond the 10%.
For the complete supply list, click here.
Images © Stampin’ Up!
