

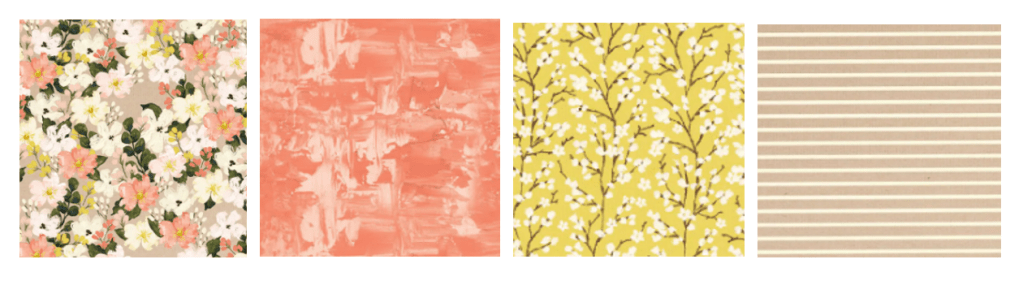
Happy Saturday and Happy Easter for everyone who celebrates! Today I have another simple card that relies on the layout and DSP. One bonus with Stampin’ Up! DSP is that it coordinates and you don’t have to guess if the different patterns will fit together. I pulled four patterns from the Brushed with Beauty DSP pack to make this card. There is no die cutting involved, though I did use two embossing folders.
I did want to mention that Stampin’ Up! released their latest Last Chance List. As I mentioned in previous posts, the 2024-2026 In Colors would be retiring. They are, of course, on the list and they usually go fast. So, if there is a color you must have, now is the time to stock up. You may also want to check out some of the stamp sets. I was sad to see Boardwalk Fun bundle was on the list. It is such a great set for summer.
So, let’s get to the card.
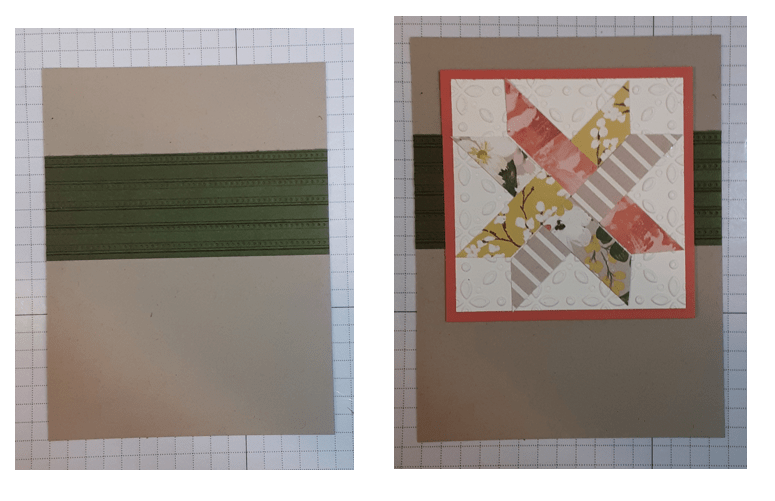
To make the card base, I cut a piece of Early Espresso cardstock to 5½” x 8½” on my Paper Trimmer, scored and folded at 4¼”, and burnished with my Bone Folder. I cut a piece of Crumb Cake cardstock to 4″ x 5¼”. I cut a piece of Calypso Coral cardstock to 3¼” x 3¼”. I cut apiece of Mossy Meadow cardstock to 4″ x 1½”. I ran this piece through my Lovely Stripes 3D Embossing Folder on my on my Stampin’ Cut & Emboss Machine. Finally, I cut a piece of Very Vanilla cardstock to 3″ x 3″. I ran this through my Eyelet 3D Embossing Folder (Last Chance). I tried to center the image on my folder, though this really isn’t necessary.

I chose four patterns of Brushed with Beauty DSP to make my focal image.
I cut a 3¼” x ½” strip from each pattern. I also cut the corners off the ends after marking ½”. I cut each strip from the corner of the strip to my pencil mark. You can see the pencil marks on the middle piece.
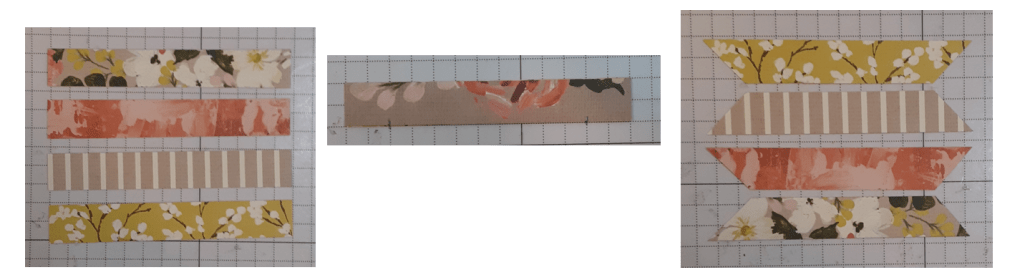
With my strips, I arranged them one at a time, sliding one piece under and the other over, trying to keep the strips perpendicular to each other. I used Easy See tape to temporarily hold them together in the position I wanted.
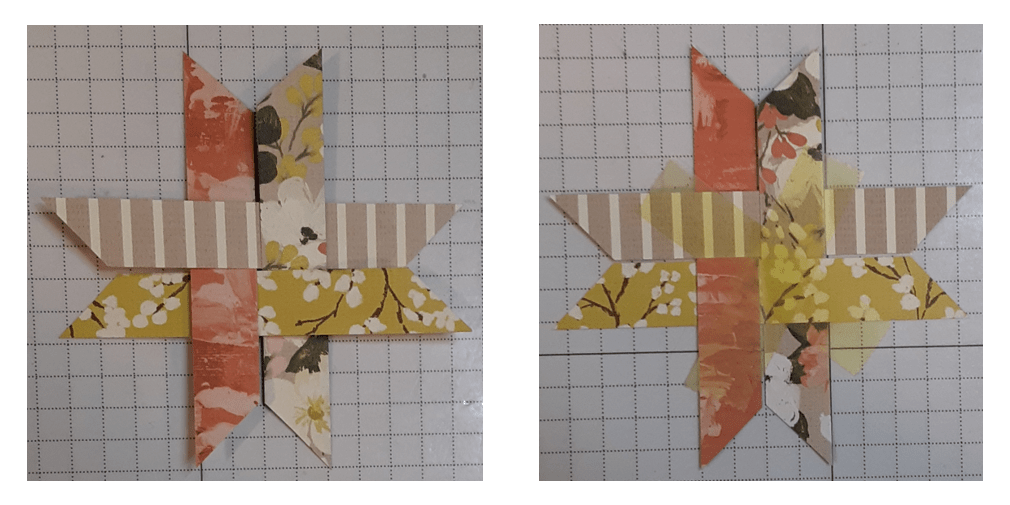
I adhered this to my embossed vanilla piece using my favorite adhesive (Multipurpose Liquid Glue or Stampin’ Seal). I glued this to my coral square.
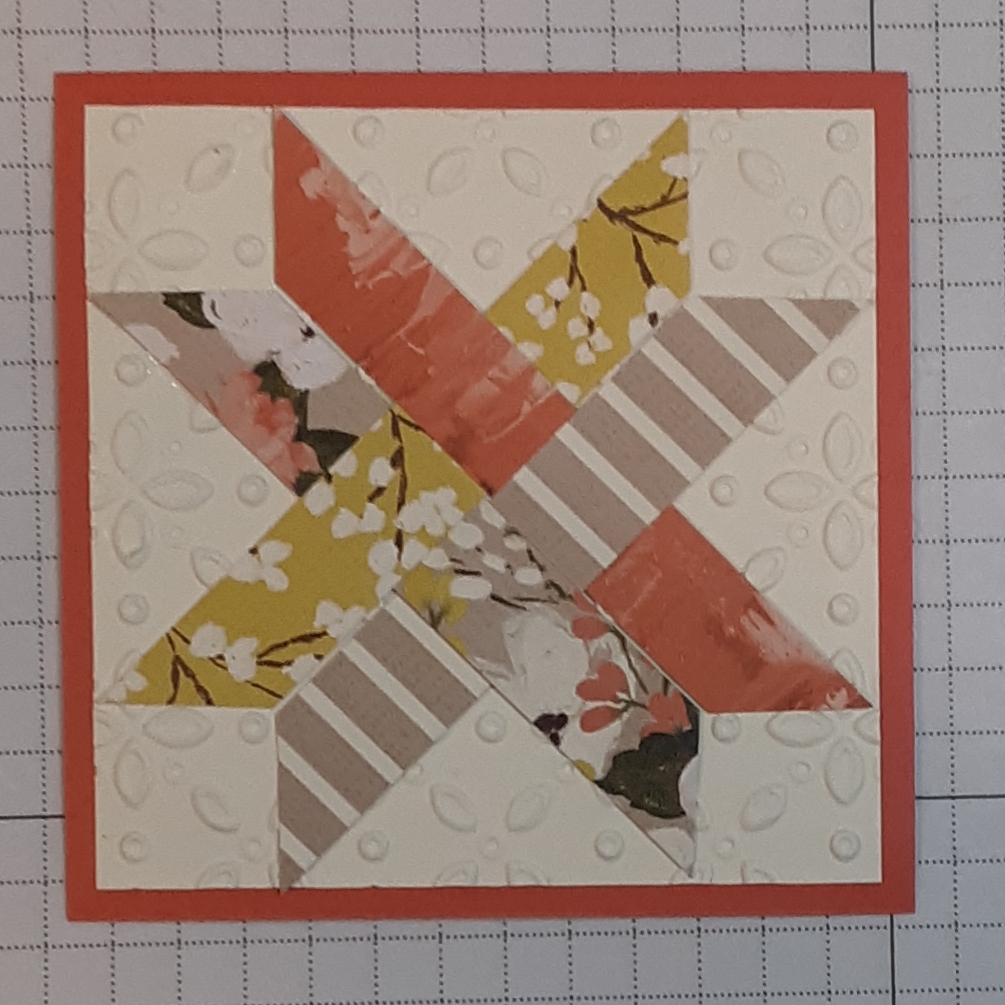
I adhered my Mossy Meadow piece to my Crumb Cake panel. I adhered my focal image to my panel with Stampin’ Dimensionals on the top and bottom of the focal piece and some glue in the middle. The embossed piece has some depth to it and I didn’t want my focal image to bulge in the middle.
I stamped Happy Birthday from Banner Sayings bundle with Mossy Meadow ink on a scrap of Very Vanilla cardstock, and punched it out with the coordinating punch. I added this to my card with the straight right edge even with the edge of my Crumb Cake panel. I adhered this panel to my card base.
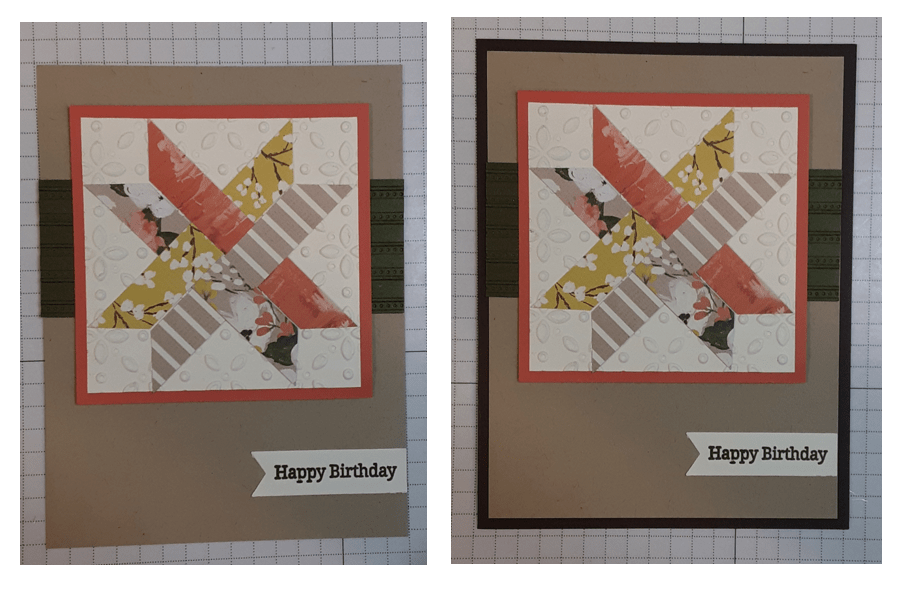
For a bit of sparkle, I added three gems from the Pearlized Faceted Circles pack. To finish the card, I stamped a greeting on a 4” x 5¼” piece of Very Vanilla cardstock and glued it inside the card.
I hope you liked this simple card with a fun layout.
For the complete supply list, click here.
Images © Stampin’ Up!
