
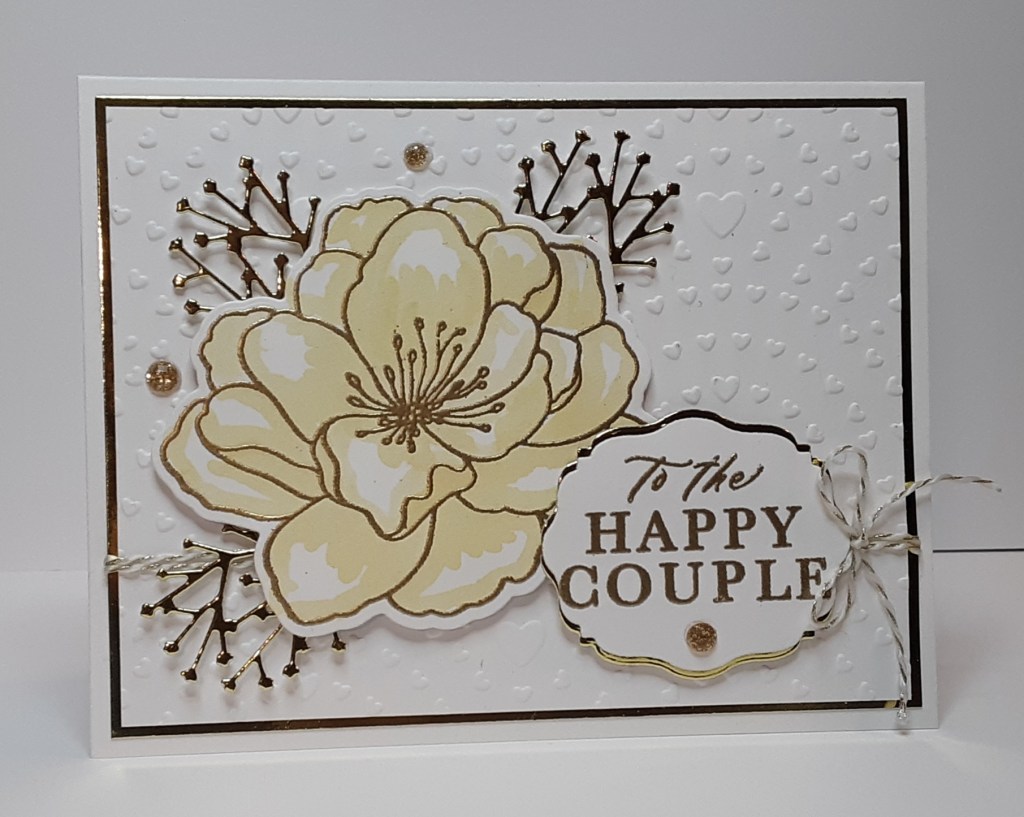
June is typically the month of weddings. In anticipation of wedding season, I have created this card from the Simply Beautiful bundle which was recently released in January and is currently on the Last Chance list. I thought I should use before it is gone. I debated whether to lightly color in the flower or to leave it stark white. As you can see, color won. Without the color, there was no depth. I used a water coloring method to add color, and I may have gone a little dark with the Daffodil Delight. I was reluctant to use too much water because it could pill the cardstock. Oh, the dilemma! You can choose how you want to make this card if you decide to give it a try. You could also use Stampin’ Blends. Don’t forget to check out the Last Chance product list. Once the supply is gone, it disappears. Now on to the card.
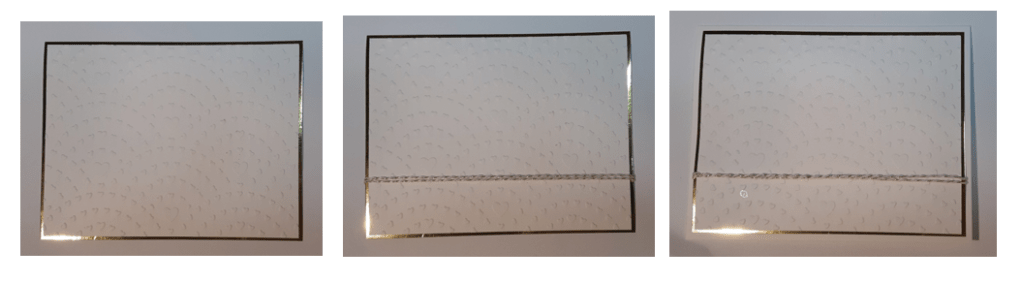
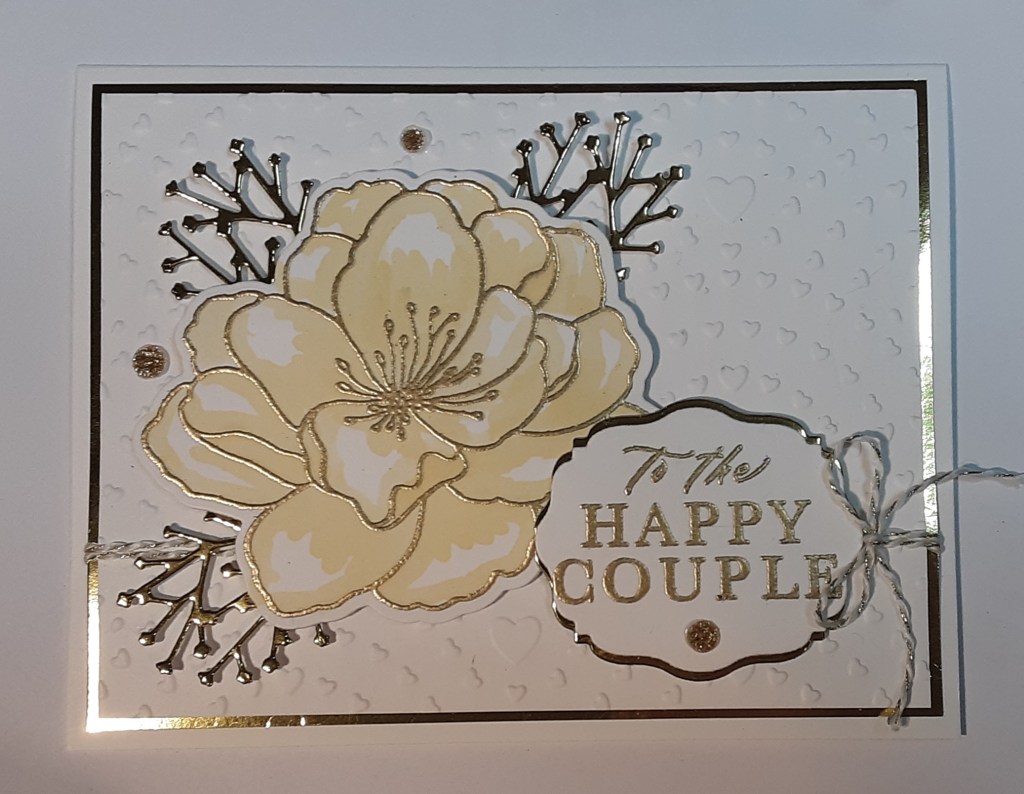
To make the card base, I cut a piece of THICK Basic White cardstock to 5½” x 8½” on my Paper Trimmer, scored and folded at 4¼”, and burnished with my Bone Folder. I cut a piece of Gold Foil sheet to 4” x 5¼”. I cut a piece of Basic White cardstock to 3⅞” x 5⅛”. I ran this piece through my Hearts of Love Embossing Folder on my Stampin’ Cut & Emboss Machine.
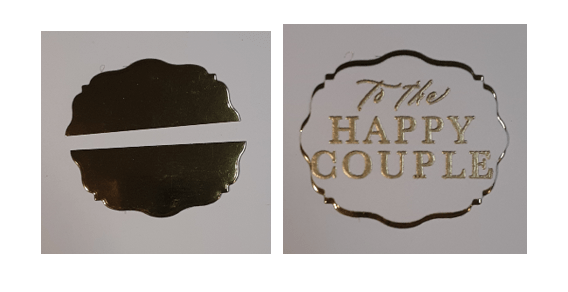
From the center of my gold foil piece, I cut three sprigs and the smallest label from the Beautifully Celebrated dies. I cut another Basic White cardstock label from the same label die. On the white label, I stamped To the Happy Couple with Versamark ink. It is a tight fit but doable. I sprinkled it with the gold embossing powder from the Metallics Embossing Powder set and heat set it with my Heat Tool. I cut the gold label in half horizontally. I adhered my white label on my gold label with just a bit of gold peeking out top and bottom.
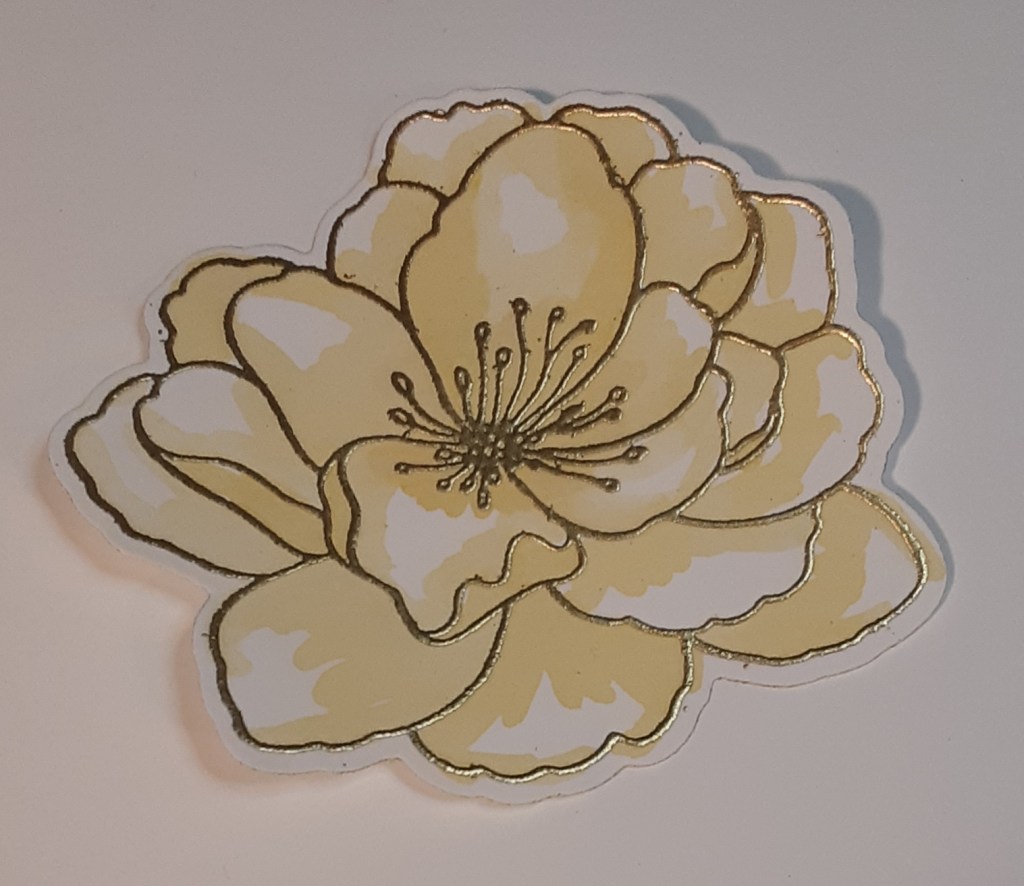
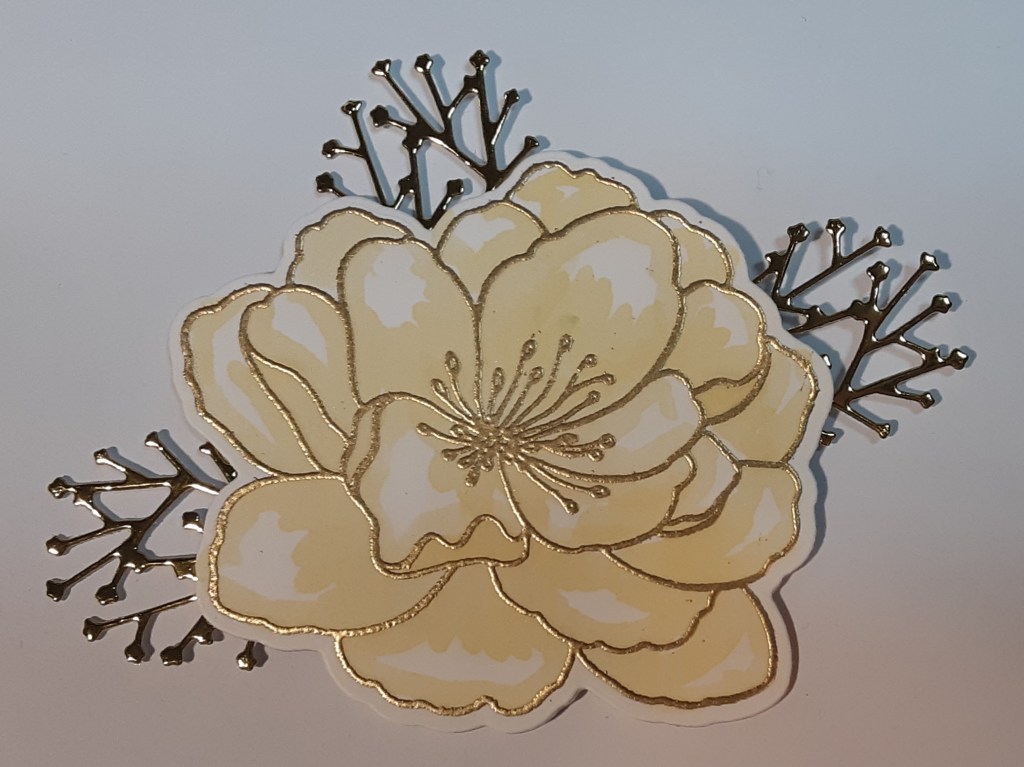
With Versamark ink, I stamped the large floral image from Simply Beautiful bundle. I added gold embossing powder and heat set it. I die cut it out with the coordinating die. I smooshed some ink from my Daffodil Delight ink pad on an acrylic block and added water. With a round paint brush (you could use a water painter) I picked up color and added it to my flower. You may want to test it on a scrap piece. To make the color lighter, add more water. I tried to vary the colors to show shadow. Obviously, I am not a professional water colorist.
I adhered my embossed piece to my gold piece using my favorite adhesive (Multipurpose Liquid Glue or Stampin’ Seal). I cut a piece of White & Gold Baker’s Twine about ½” beyond either end of the card and doubled. I adhered it to the back of my panel with Mini Glue Dots. I added this panel to my card base.
Since I water colored my flower, I decided to give it some support, so I die cut an additional flower from some cardboard packaging and glued it to the back of my flower die cut. I put it under something heavy until it set. I added the three gold sprigs to the back of my flower.
With Stampin’ Dimensionals, I added the flower to my card. I added the sentiment with Stampin’ Dimensionals, also, but I put a spot of glue on the label where it overlapped the flower. I tied a bow with the twine and adhered it by the label with another glue dot.
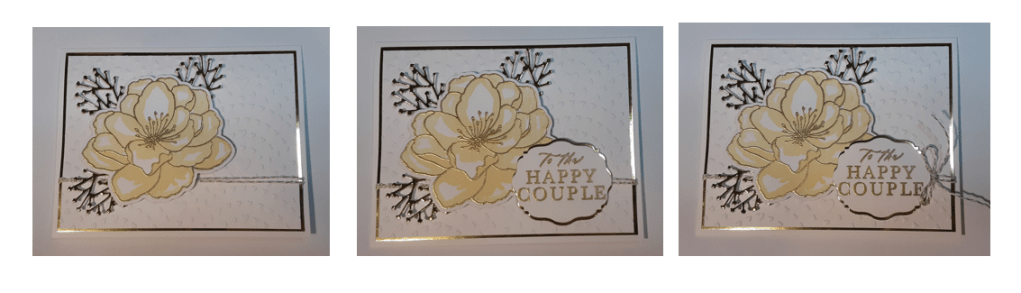
For a little sparkle, I added three gold sparkle gems from the 12 Days of Crafting Advent Calendar kit.
To finish the card, I stamped a greeting on a 4″ x 5¼” piece of Basic White cardstock and glued it inside my card.
This card would also make a nice anniversary card.
I hope you liked this card.
For the complete supply list, click here.
