
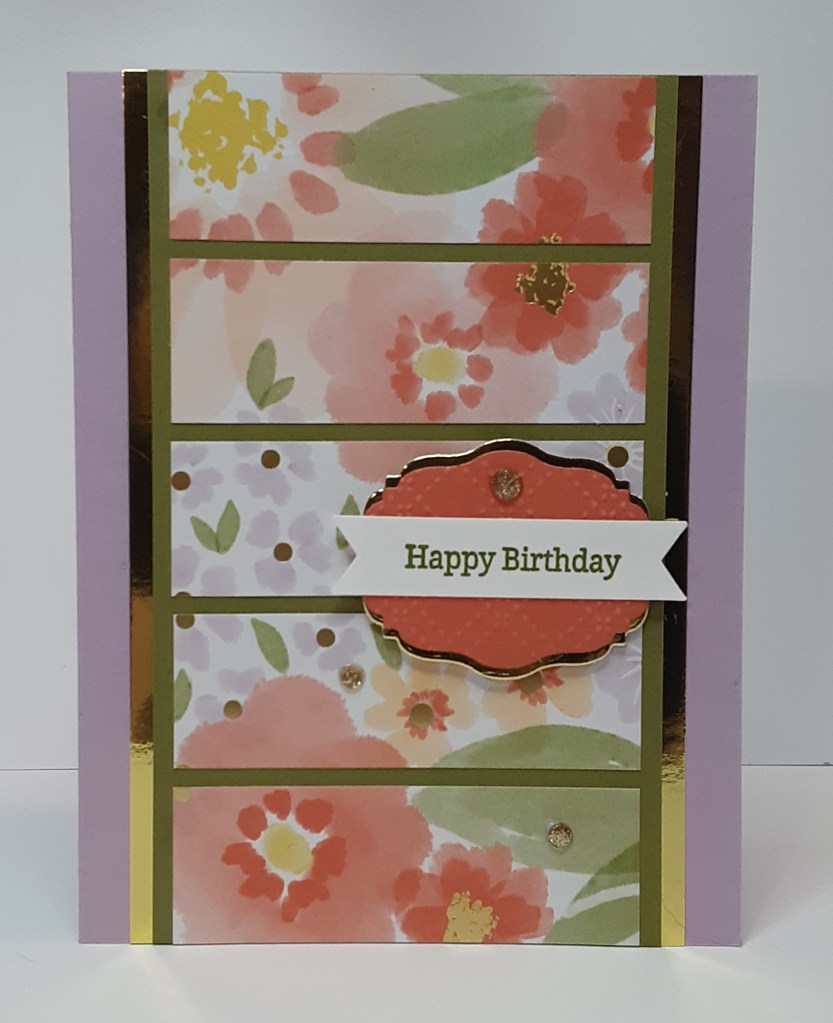
It’s Saturday and I have another simple card. Today’s card features the Lovely & Beautiful Specialty DSP. It has gold foiling, which doesn’t really show up in the picture. In person, it is very pretty! I choose this particular design because the pattern is so large that it would be lost in a smaller piece. The layout I used also stretches the piece to get more bang for your buck. You can make eight cards from one sheet of paper and still have a 2″ x 12″ strip leftover to use on another card or add to the inside. So, let’s get onto the card.
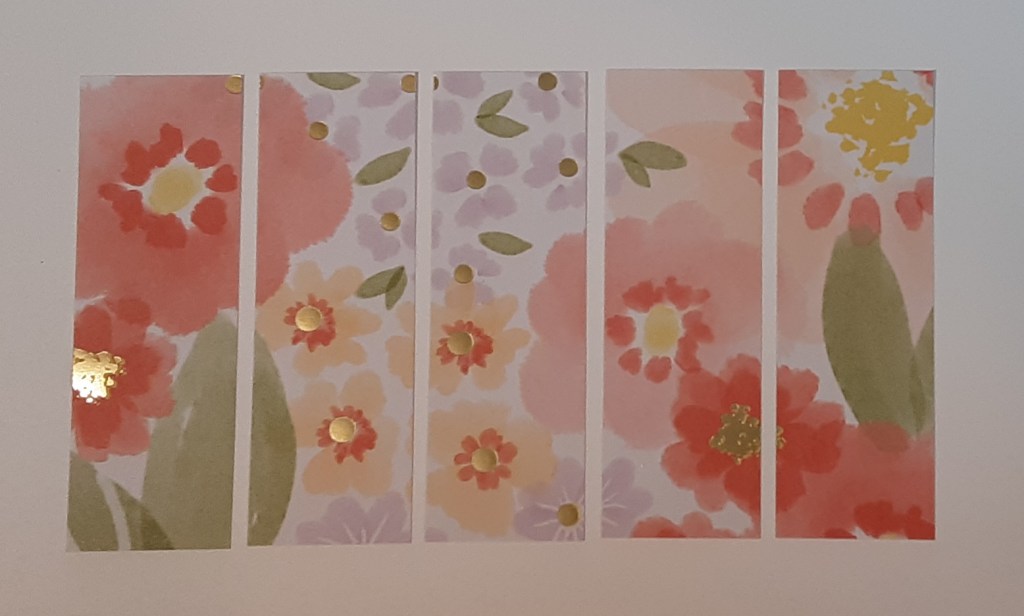
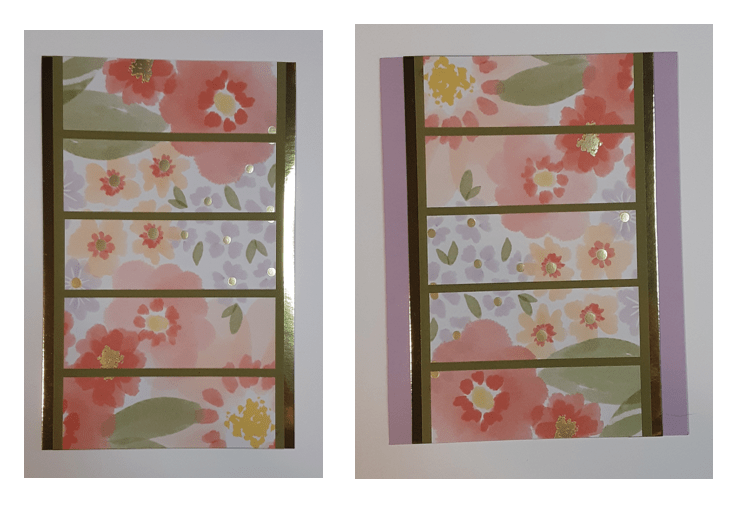
For the card base, I cut a piece of Fresh Freesia cardstock to 5½” x 8½” on my Paper Trimmer, scored and folded at 4¼”, and burnished with my Bone Folder. I cut a piece of Lovely & Beautiful DSP to 3″ x 5″. I don’t think the paper is necessarily directional, but make sure you cut it to get the best effect. I cut a piece of Old Olive cardstock to 3¼” x 5½” to act as my mat. I cut two ½” x 5½” strips of Gold Foil sheets.
With the 3″ x 5″ piece of DSP, I cut it into five 3″ x 1″ strips. I kept them in order so the images would flow.
I laid the strips on the olive mat prior to adhering. When I had adjusted the pieces to my satisfaction, I glued them down using my favorite adhesive (Multipurpose Liquid Glue or Stampin’ Seal). The wet glue does give you a little wiggle room to adjust the strips. I started with the outside strips and worked my way in, keeping the side borders even.
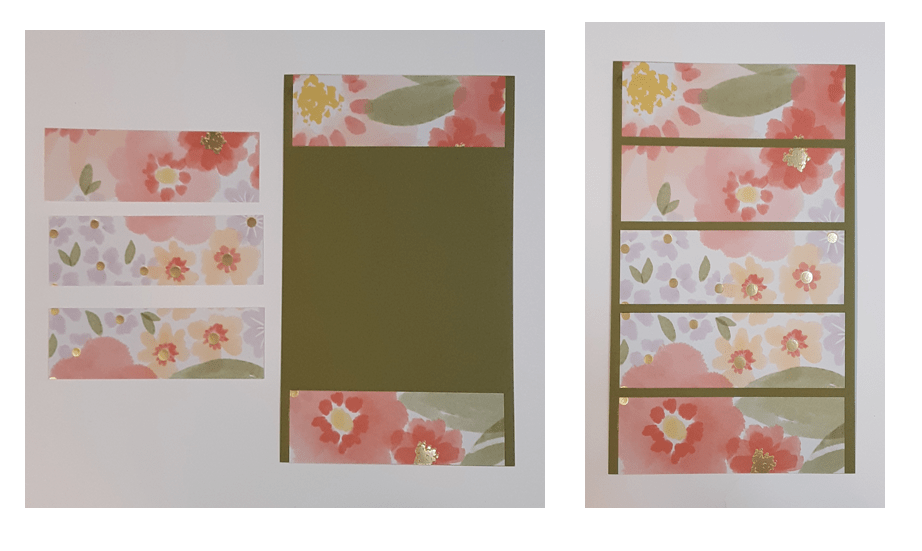
I adhered the Gold Foil strips to either side of the panel. I adhered this panel to my card base.
I stamped Happy Birthday from Banner Sayings bundle with Old Olive ink on a strip of Basic White cardstock. I punched it out with the coordinating punch.
I die cut the smallest label die from Beautifully Celebrated die set from Calypso Coral cardstock and again from Gold Foil Sheets with my Stampin’ Cut & Emboss Machine. I ran the coral one through the Beautiful Pattern Embossing Folder. I cut it in half and trimmed about ½” from the middle. I placed these together and glued on the sentiment. I cut the gold piece in half and trimmed the middle a bit and offset the coral label on the gold one so I had a narrow border top and bottom.
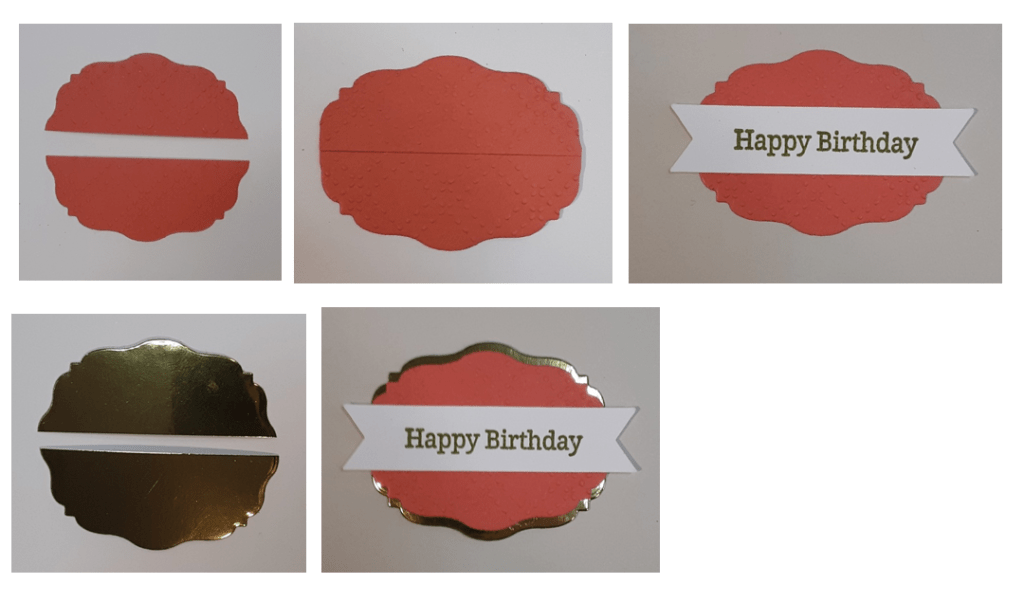
I adhered this to my card with Stampin’ Dimensionals. For a bit of sparkle, I glued three glitter dots from my 12 Days of Crafting Advent Calendar (Last Chance item!) onto the card.
I hope you liked this simple card!
For the complete supply list, click here.
