
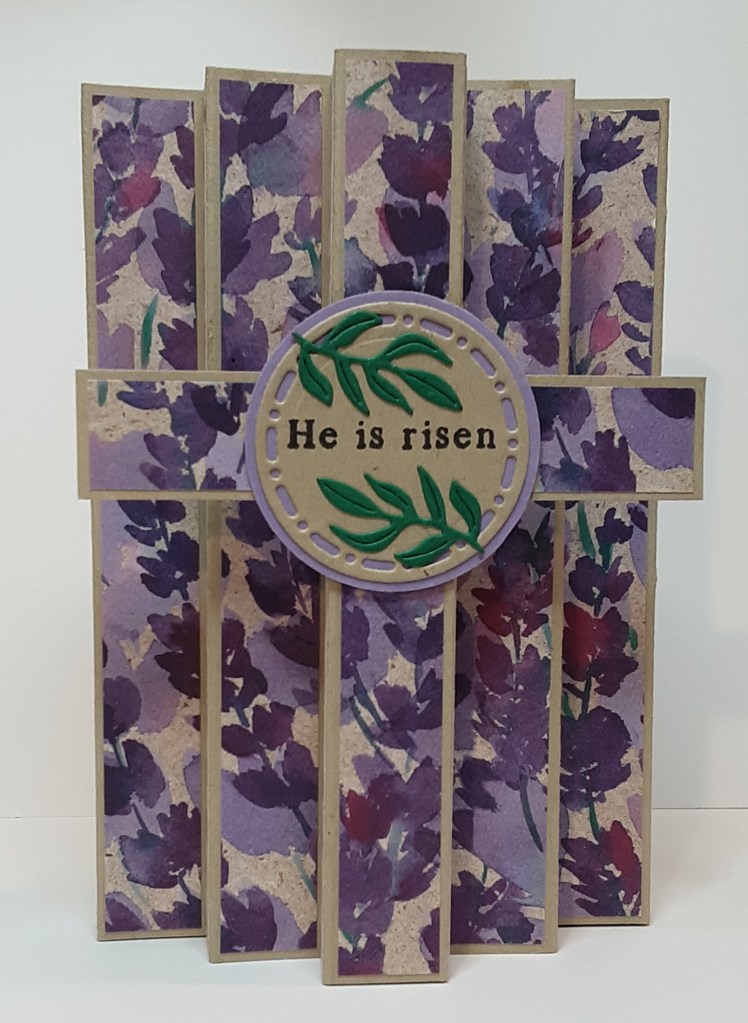
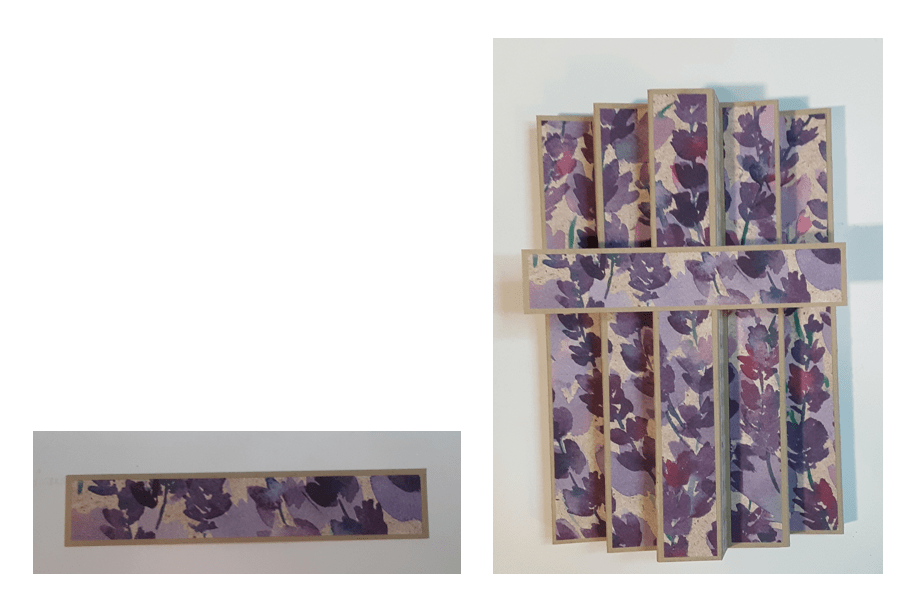
With Holy Week next week, I thought I would showcase one more Easter card. Today I chose this tri-pillar card that features a cross on the middle pillar. Last year, I published a post with a single pillar in the center of the card and we received favorable input. The challenge for this card was finding a patterned paper that was beautiful but also stayed true to the theme of the card. I decided to use Perennial Lavender DSP because it fit the criteria better than other patterns I had access to. Feel free to use whatever paper you have that feels appropriate. So here it goes!
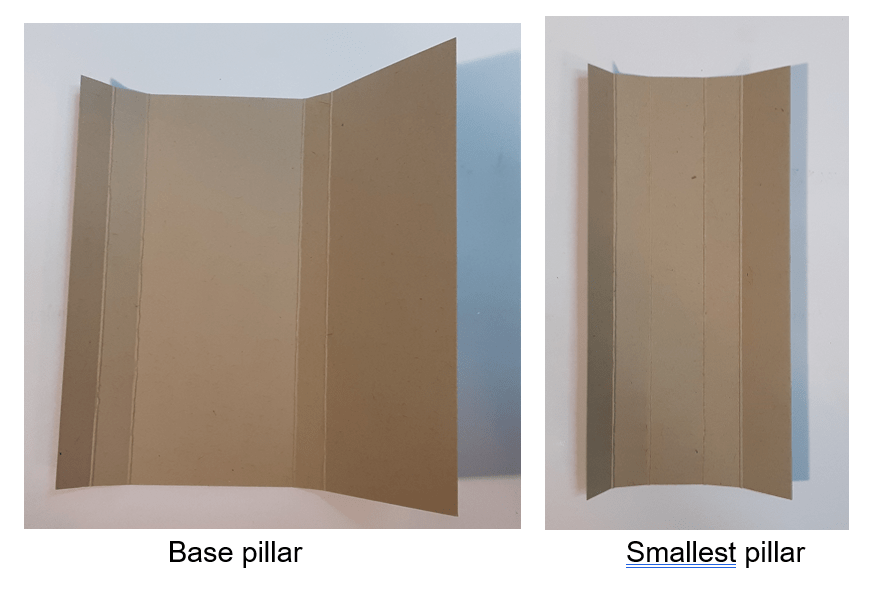
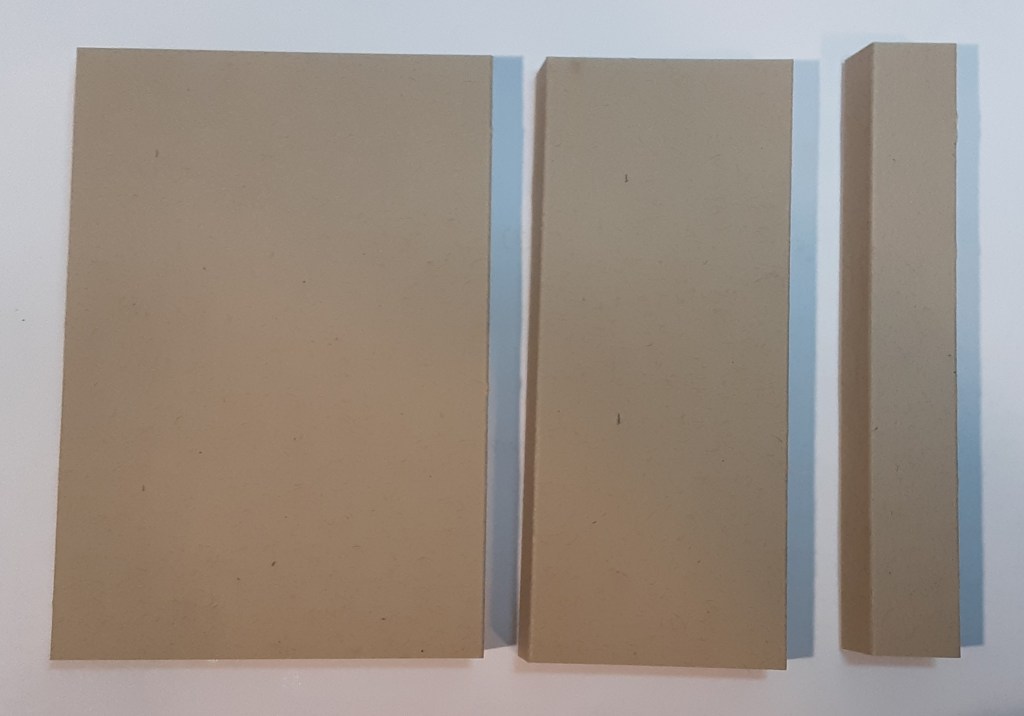
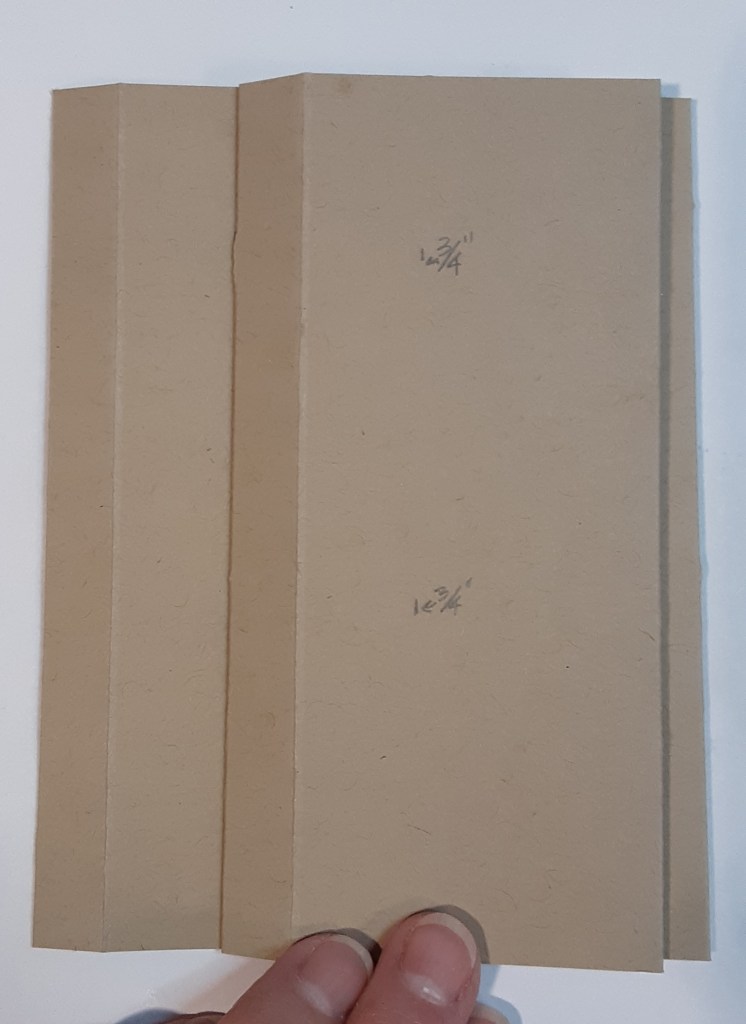
To make the base pillar, I cut a piece of Crumb Cake cardstock to 5½” x 9″ on my Paper Trimmer, scored and folded at 3¾”, 4¼”, 8″, and 8½” on the 9″ side, and burnished with my Bone Folder. The folds were all mountain folds and created an oblong tube. I cut another piece of Crumb Cake cardstock to 5½” x 6″, scored and folded at 2¼”, 2¾”, 5″, and 5½” on the 6″ side, and burnished with my Bone Folder. Again, all the folds are mountain folds to form a tube of sorts. The final pillar was cut from a 5½” x 3″ piece of Crumb Cake cardstock, scored and folded at ¾”, 1¼”, 2″, and 2½” on the 3″ side, and burnished with my Bone Folder. Again, all the folds are mountain folds.
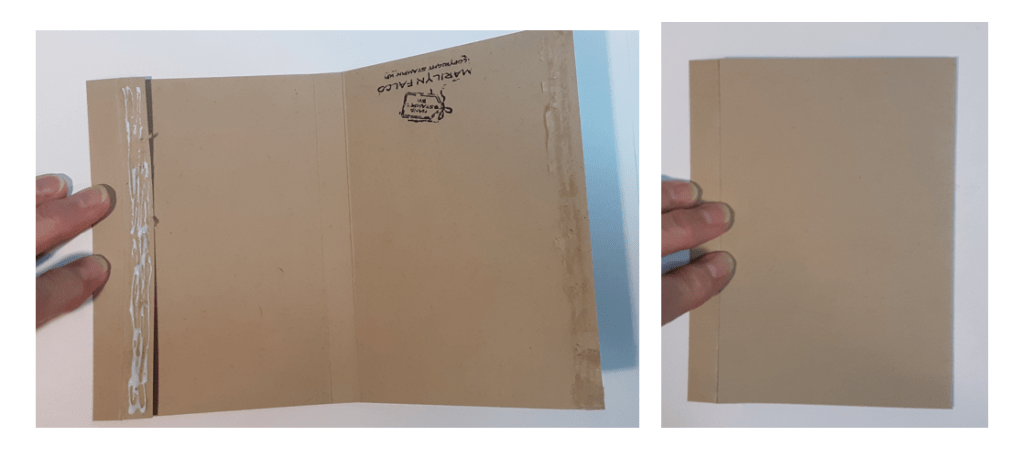
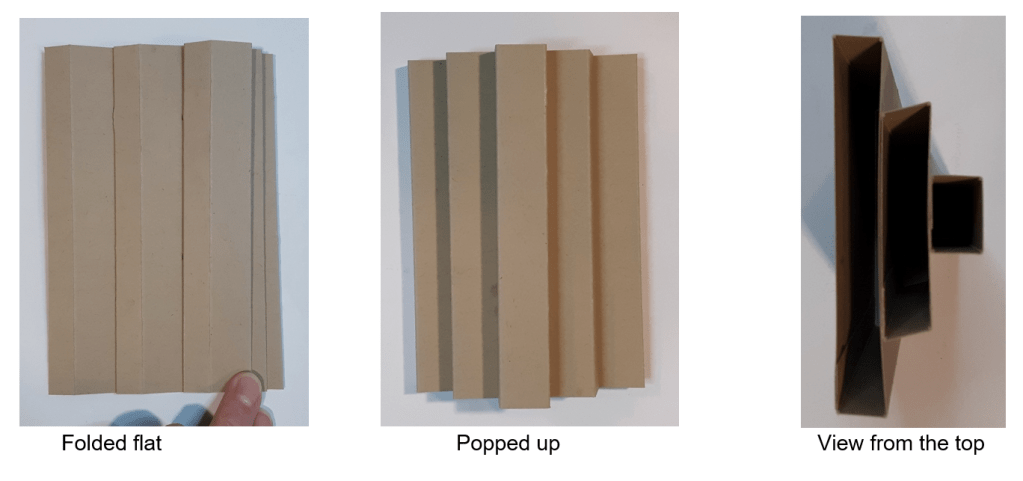
To close the pillars, each has a ½” tab. Fold in on the 1″ score line. Add adhesive (Multipurpose Liquid Glue or Stampin’ Seal) to the ½” tab. As you can see in the photo, I added my Hand stamped logo to inside of the card. I folded the flap over and adhered it to the glue. This will pop open to form the pillar. I burnished my folds so that it could lay either way.
I repeated this process with the other two pillars (except stamping my name!). I used a pencil to mark ¾” from the left edge of the largest and middle pillars so I would know where to place the pillars so they would be centered.
I applied glue to the back of the middle pillar, lined up the edge with the pencil marks and adhered. I pressed the pillars flat so that I would have good adhesion. In the photo, it shows the ¾” pencil marks where I will put the final pillar.
I added the final pillar. The picture shows how I lined up the three pillars and glued them. I wanted the edges of the pillars to be even so my card would stand up without a problem.
With Perennial Lavender DSP, I cut a piece 5⅜” x 3⅛” and another at 5⅜” x 2¼”.
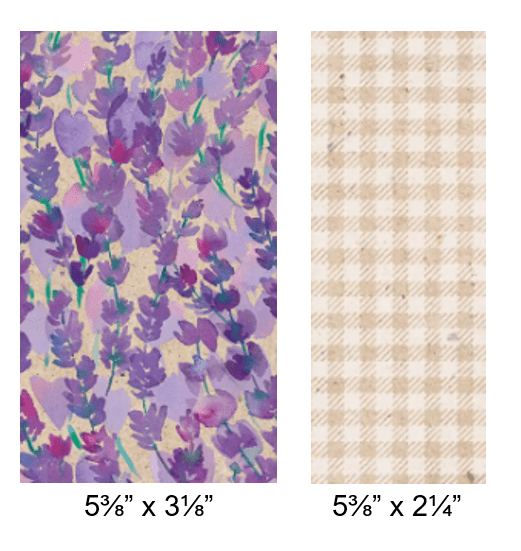
From the floral pattern I cut five ⅝” strips. From the checked pattern I cut six ⅜” strips. I cut one strip ⅝” x 3⅝” from the floral pattern DSP running perpendicular to the other floral. I cut the ⅝” strip from the bottom of my sheet of DSP and trimmed it down to 3⅝”
I wanted my design to flow, so I kept my strips in order before adhering to the card. With the checked pieces, I tried to keep the lines consistent. I flattened the card to add the side pieces.
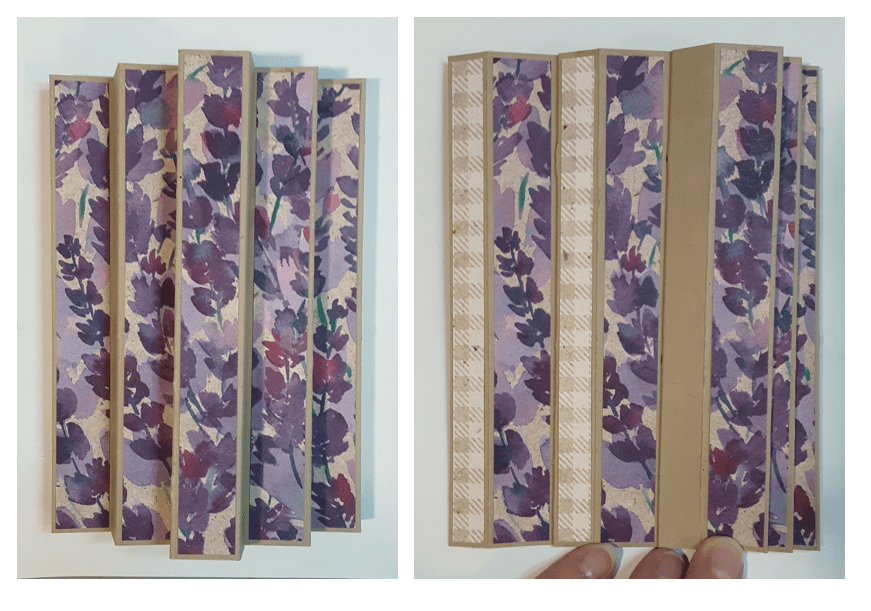
I cut a piece of Crumb Cake cardstock to ¾” x 3¾”. I glued my last patterned strip to this piece. It will form the cross. To adhere it, I decided where I wanted it to be on the card. I flattened my largest pillar one way and the middle pillar the opposite way. I alternated the folds as I went. To adhere it, I centered it on the narrowest pillar and lined up the end with the edge of the card. This ensured that the card would fit into my envelope without a problem. My crosspiece ended up being about 1¾” from the top.
I stamped He is risen from Faith Collection stamp set in Momento Tuxedo Black ink on Crumb Cake cardstock. I die cut it using the Spotlight on Nature dies on my Stampin’ Cut & Emboss Machine. I punched my 1¾” Circle Punch from Highland Heather cardstock to act as a mat. I also die cut two leaves from the die in my 12 Days of Crafting Advent Calendar kit from Shaded Spruce cardstock and adhered them above and below my sentiment.
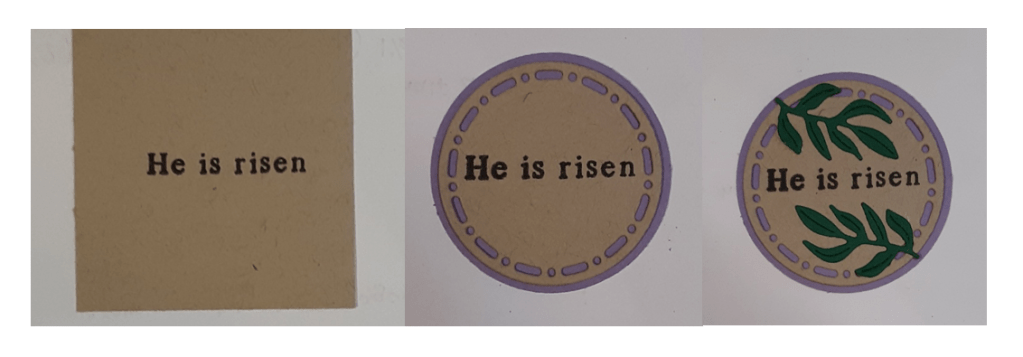
I centered the sentiment in the middle of the crosspiece. I didn’t add any embellishments to my card but you certainly could.
I cut a 3⅝” x 5⅜” piece of Basic White cardstock and stamped a sentiment on it. I added this to the back of the card.
I hope you liked this fun card!
For the complete supply list, click here.
