

It’s Wednesday and I have a fun card for spring! Spring is right around the corner, and my daffodils are already starting to peek through the soil. Hopefully, they will be able to bloom without being nipped by Jack Frost. The weather here in southwest Ohio is unpredictable at best. One day we have 70° temperatures and the next we wake up to 2″ of snow! Hopefully, the snow is over until next winter and these glimmers of spring are not just teasers. But now, on to the card!
To make the card base, I cut a piece of Pool Party cardstock to 5½” x 8½” on my Paper Trimmer, scored and folded at 4¼”, and burnished with my Bone Folder. I cut an additional piece of Pool Party cardstock to 4¼” x 5½”. I ran this piece through my Beautiful Pattern 3D Embossing Folder on my Stampin’ Cut & Emboss Machine. I adhered this panel to my card base with the debossed side up using my favorite adhesive (Multipurpose Liquid Glue or Stampin’ Seal). You may need to trim the panel before adhering. Sometimes running cardstock through an embossing folder changes the dimensions a smidge. You could skip this panel and directly emboss the front of the card base, but the embossing does weaken the paper.
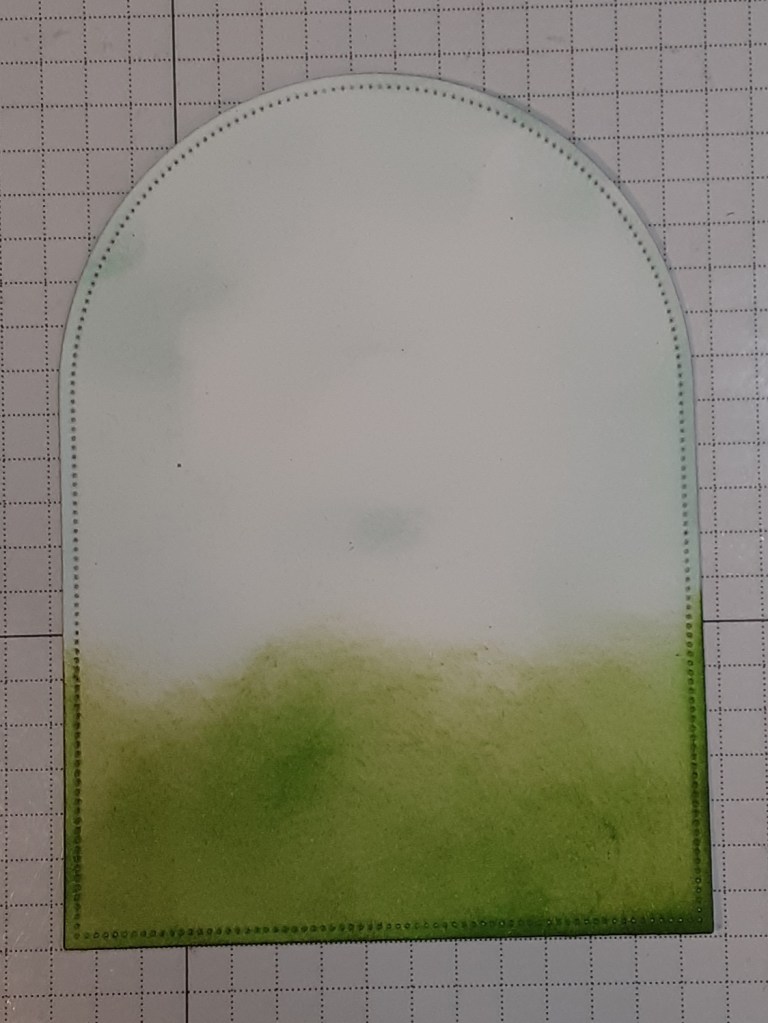
Using the Everyday Arches dies, I cut the second largest arch from Basic White cardstock. With my Blending Brush and some Pool Party ink, I blended color on the top ¾ of the arch. With Granny Apple Green ink, I blended ink on the lower ¼ to act as grass and to provide grounding for my basket.
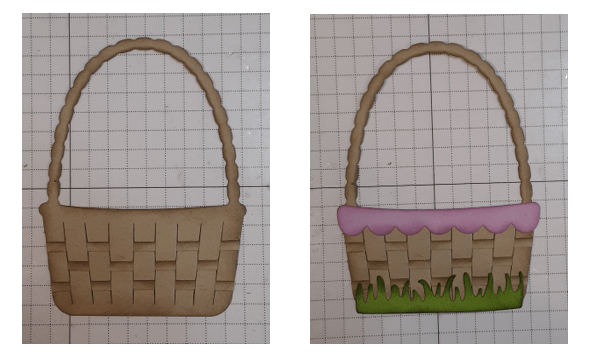
I die cut the basket and strips from the Easter Basket bundle from Crumb Cake cardstock.
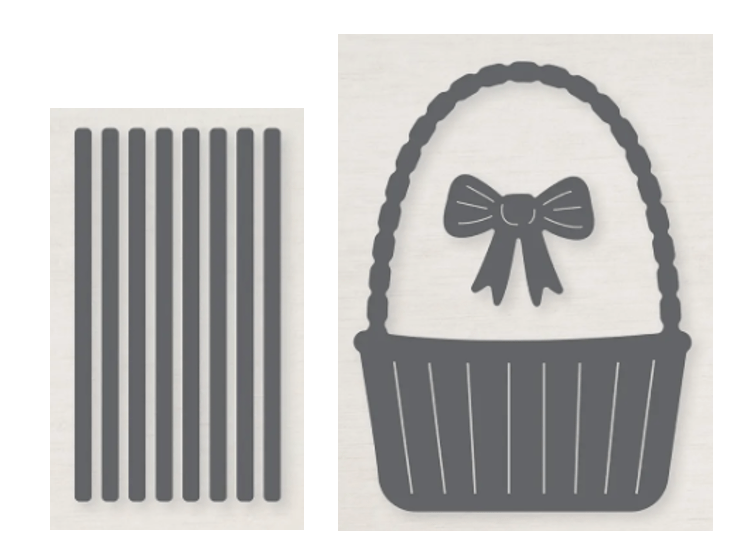
I cut the bow and scalloped edging from Fresh Freesia cardstock.

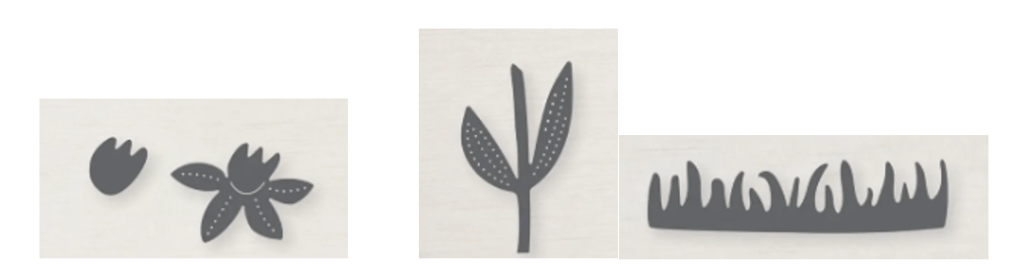
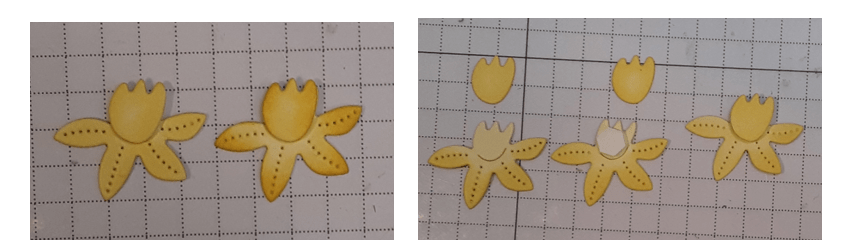
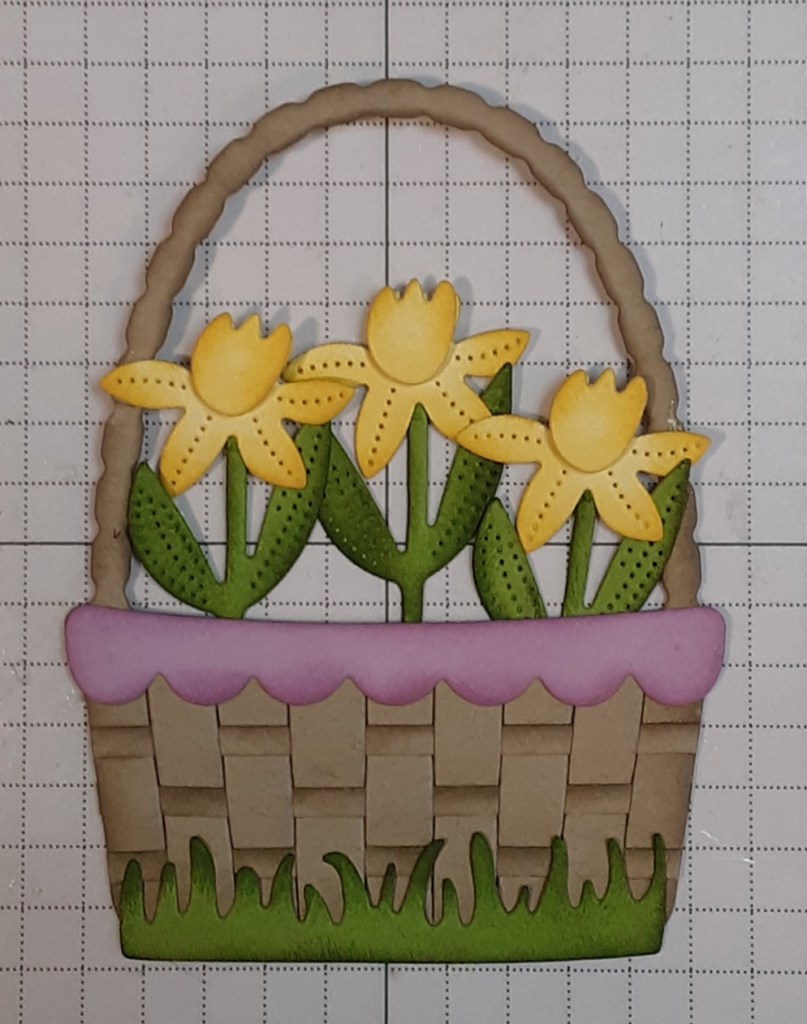
I cut four daffodils (one die, two pieces) from Lemon Lolly cardstock, and three stems and two grasses from Granny Apple Green cardstock.
To help give a little dimension to my die cut pieces, I used a Sponge Dauber to add ink. I used Crumb Cake ink on the basket pieces. I added Fresh Freesia ink to the bow and edging. I added Granny Apple Green ink to the grass and stems. I added, first, Lemon Lolly ink and, then, Daffodil Delight ink to the daffodils. To assemble the daffodils, I used a Mini Stampin’ Dimensional.
I applied Crumb Cake ink to my basket pieces. For the narrow strips, I applied ink to just one of the long sides. I wove three strips between the slits cut into the basket. You could also use other colors for the strips for a little pop. I trimmed the strips to be even with the sides of the basket. I glued the ends down with a dab of glue. I added the scalloped edging and grass to the basket.
I glued the daffodils to the ends of the stems with a dot of glue. I arranged these in the basket, glueing the bits that overlapped. I tried to vary the heights of the flowers.
I cut the second piece of grass into two pieces. I laid the basket on the card to gauge where I wanted the grass to land (about 1″) from the bottom. I adhered the grass pieces to the arched panel.

I adhered the fourth blossom to the middle of the flower cluster. I added the bow to the top of the basket. With Stampin’ Dimensionals, I added the basket to my panel.

The Easter Basket stamp set (in the bundle) has a hello, spring or Happy Easter sentiment that could easily be added to the card.
To finish the card, I stamped a greeting on a 4” x 5¼” piece of Basic White cardstock and glued it inside the card. You could also stamp some of the other images from the stamp set.
I hope you like this card!
For the complete supply list, click here.
