
It’s Saturday and the sun is shining in Southwest Ohio, at least for now. Yesterday was gorgeous and almost too warm in some places. It is hard to predict what the weather will be like throughout the day. It changes so quickly! Tonight is also the night where we set our clocks ahead one hour, or spring forward. I don’t know about you, but I really miss that extra hour of sleep on Monday morning!
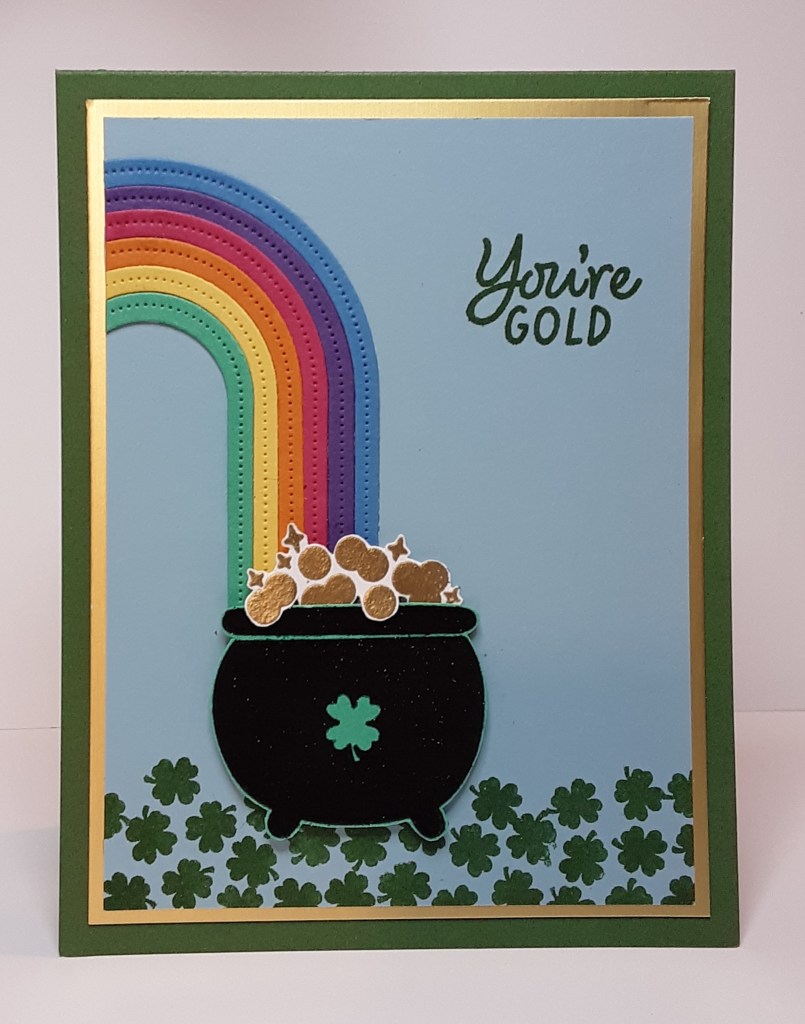
Today I have another St. Patrick’s Day card. I think it is simple, though some may disagree because of the die cutting and heat embossing. I’ll try to make the instructions as straight forward as possible and show how easy it really is to make. So, let’s get onto the card!
To make the card base, I cut a piece of Garden Green cardstock to 4¼” x 11” on my Paper Trimmer, scored and folded at 5½”, and burnished with my Bone Folder. I cut a piece of Gold Foil sheets to 5⅛” x 3 ⅞”. I cut a piece Balmy Blue cardstock to 5″ x 3¾”.
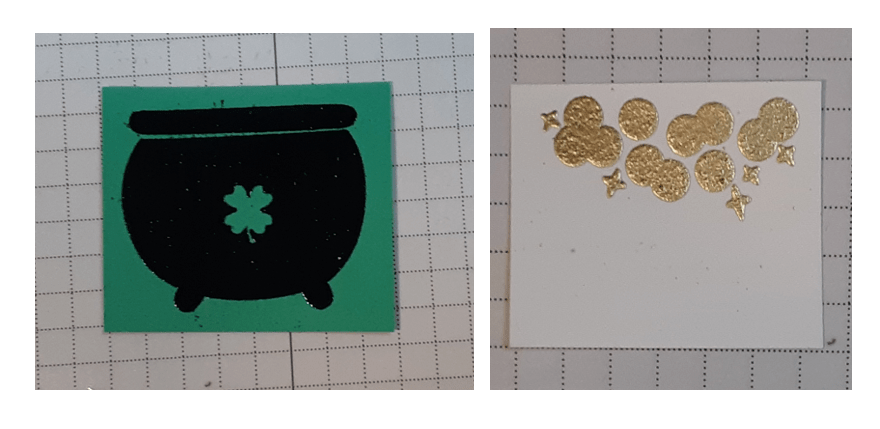
To make the pot, I stamped the pot from Good Luck stamp set with Versamark ink on a scrap of Shy Shamrock cardstock (a soon to be retiring In Color!). I sprinkled it with black embossing powder from the Basic Embossing Powder pack. I heat set it with my Heat Tool. On a piece of Basic White cardstock, I stamped the coins from the set with Versamark ink and embossed it with gold embossing powder from the Metallics Embossing pack. I fussy cut both of these pieces. I slid the gold coins onto the top of the pot and added Stampin’ Dimensionals to the back to secure the two pieces together.
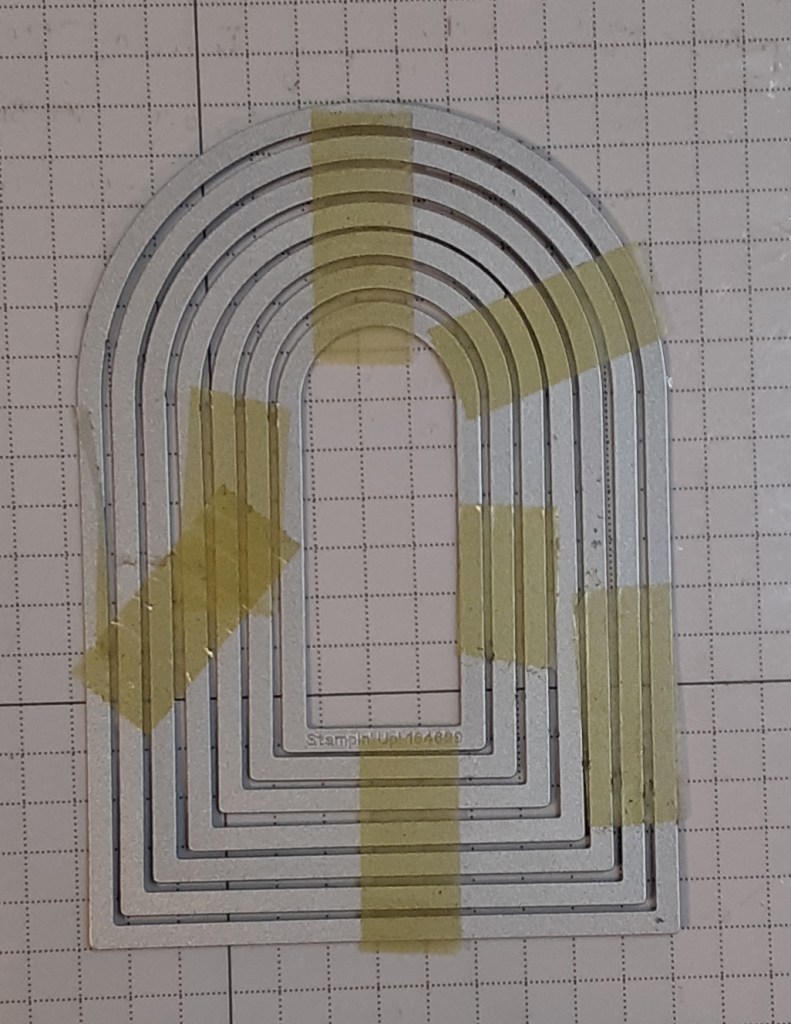
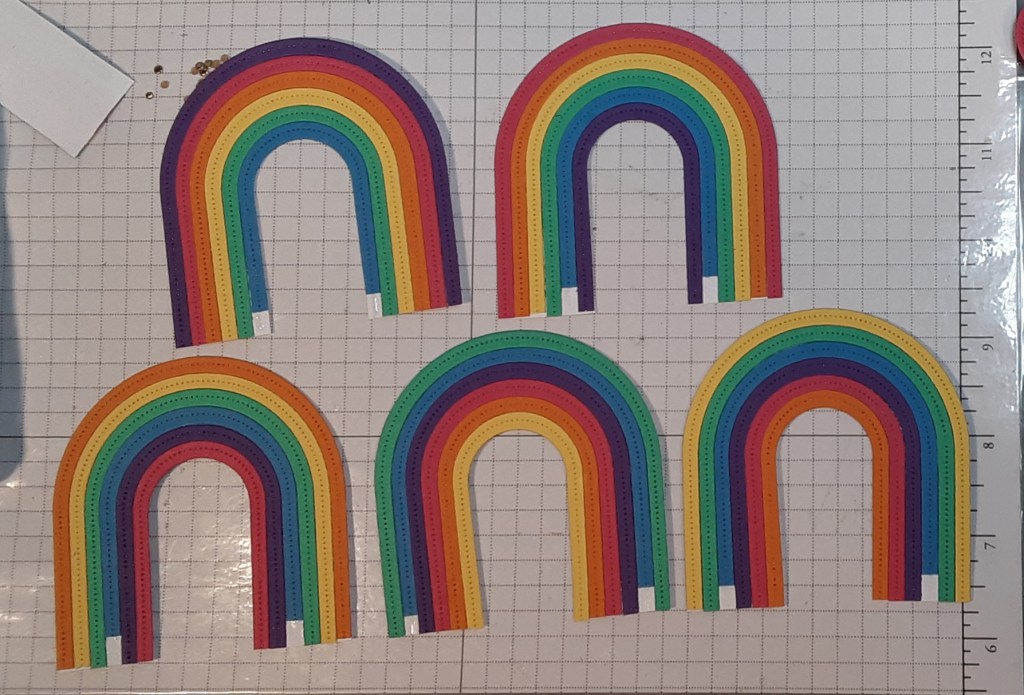
To make the rainbow, I used my Everyday Arches dies. With the seven smallest dies I fitted them together and taped them with Easy See tape. You could also use Washi tape, if you prefer.
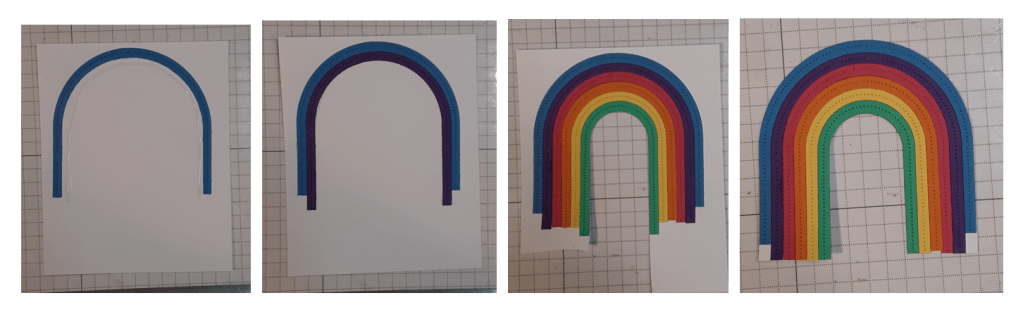
I used this die set up to cut the pieces of my rainbow by cutting from Melon Mambo cardstock, Pumpkin Pie cardstock, Daffodil Delight cardstock, Shy Shamrock cardstock, Azure Afternoon cardstock, and Gorgeous Grape cardstock on my Stampin’ Cut & Emboss Machine. This cuts enough pieces to make six cards. They will all be different, but that is okay.
To make it easier to add to my card, I assembled the rainbows by glueing them together on a scrap of copy paper with my favorite adhesive (Multipurpose Liquid Glue or Stampin’ Seal). I actually used some non-tacky glue from I-Craft. It can get a little messy and wet glue gives you a little wiggle room to fit the arches together. If you do use a tackier glue, clean up the stickiness with a gum eraser when it is dry. After the glue dried, I cut out my rainbow.
See below for all my renditions in addition to the featured card’s.
With the Balmy Blue piece, I stamped the small shamrock on the bottom with Garden Green ink. I glued on my rainbow with part of it extending off my panel. I trimmed it even with the edge.
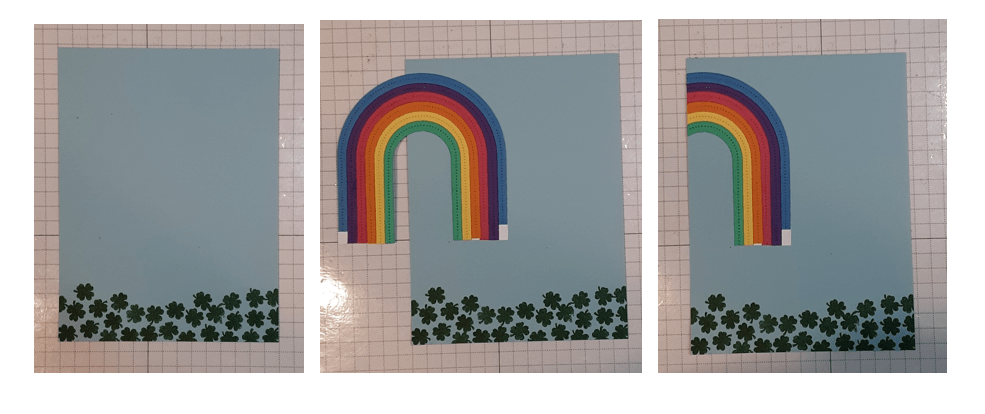
I added the pot so that it overlapped the bottom of the rainbow. As I mentioned previously, I used Stampin’ Dimensionals. I added my sentiment, You’re Gold, with Garden Green ink to my panel. I adhered this panel to my gold mat. You may want to die cut some useful pieces from the center of the gold mat before adhering, since only a small bit actually shows. I use my Trimmer and cut out the center for later use.
I glued this panel to my card base. I stamped a greeting on a 4” x 5¼” piece of Basic White cardstock and glued it inside my card.
A fun addition to this card would be to punch or die cut small circles from the gold paper and scatter them on the shamrocks we stamped at the bottom of the card. You could also add some gold embellishments for a little sparkle.
I hope you like this card!
For the complete supply list, click here.
