
It’s Saturday, so I have a simple card to share. Also, as a reminder, today is the LAST DAY to redeem your Bonus Days coupons! Don’t forget that the 2024-2026 In Colors will be retiring soon, so get them while they last. I’m not sure which one is my favorite, but it’s probably Pretty in Pink. I also love Summer Splash and Petunia Pop. Of course, there is Peach Pie (so yummy!). Shy Shamrock is the perfect color for March. This is probably my favorite set of colors ever.
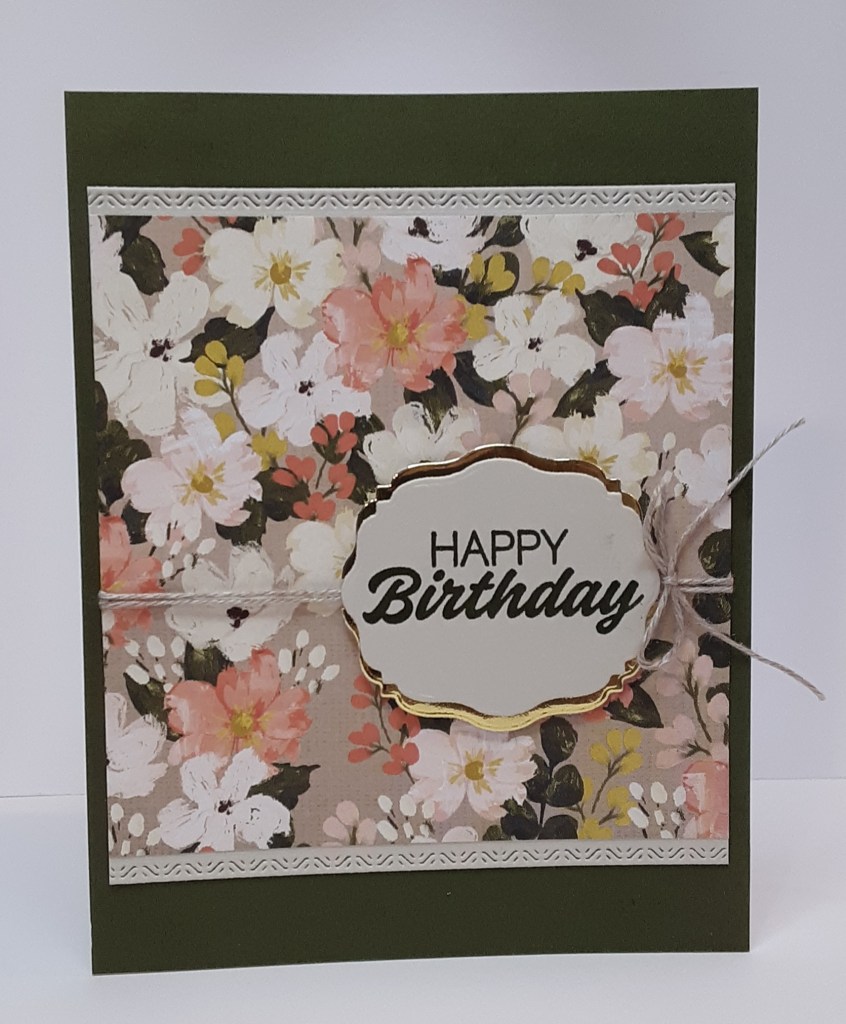
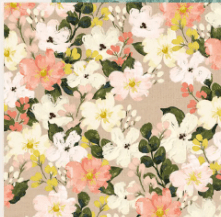
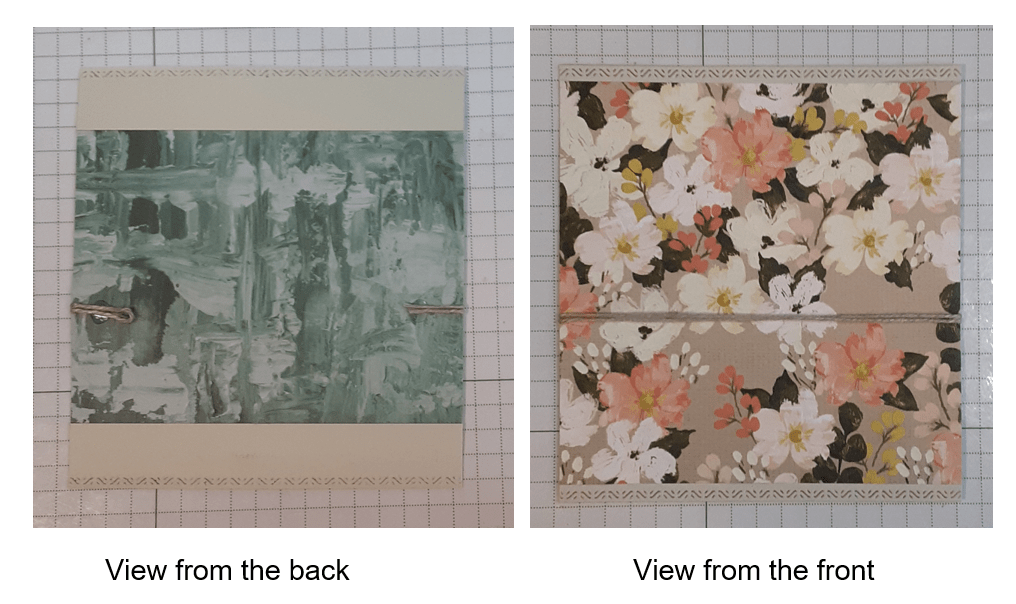
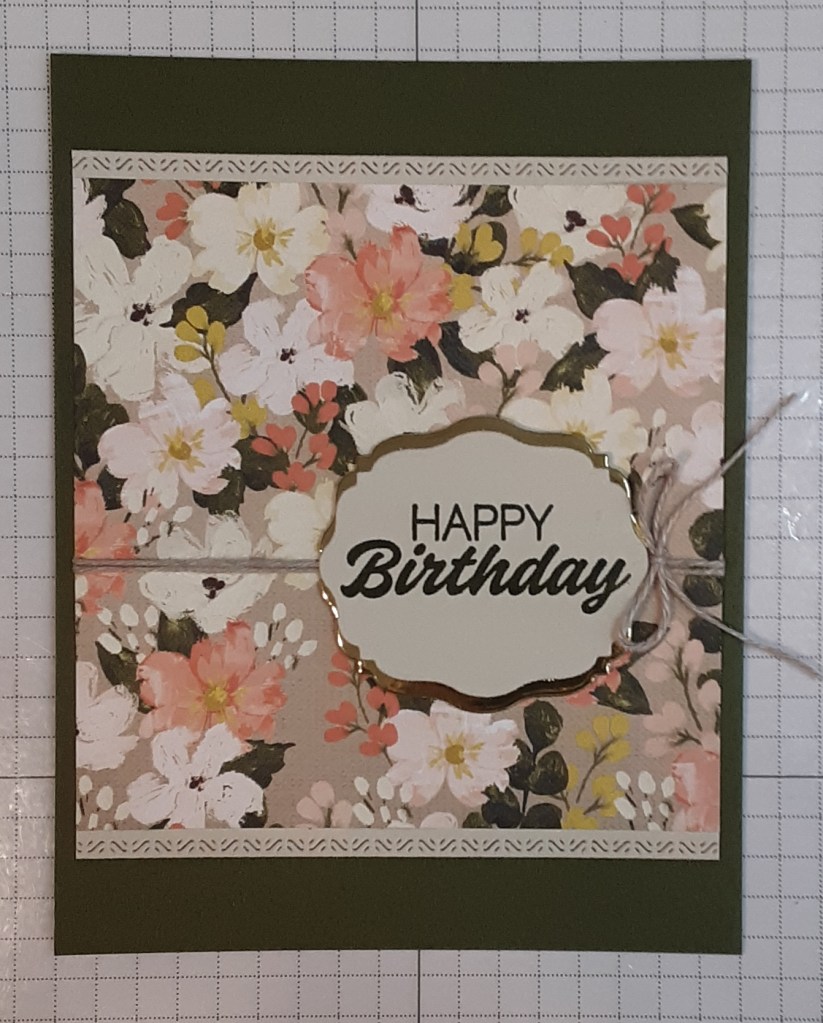
Now on to the card. For the card base, I cut a piece of Mossy Meadow cardstock to 5½” x 8½” on my Paper Trimmer, scored and folded at 4¼”, and burnished with my Bone Folder. I cut a piece of Brushed with Beauty DSP to 4″ x 4″.
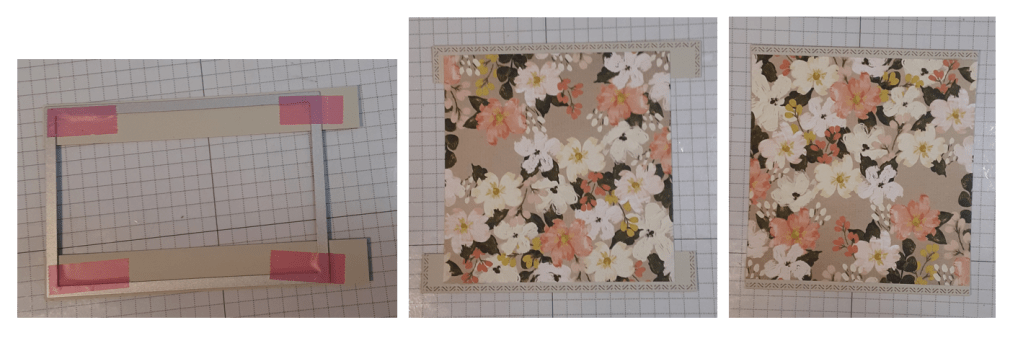
With ½” strips of Basic Beige cardstock, I used the Textured Notes dies (Last Chance!) to cut a decorative edge on the strips with my Stampin’ Cut & Emboss Machine. I used Easy See tape to tack the die to the paper. I added the DSP to my strips with my favorite adhesive (Multipurpose Liquid Glue or Stampin’ Seal). I trimmed the extra even with the edge of the DSP. This technique gives a little texture to my strips.
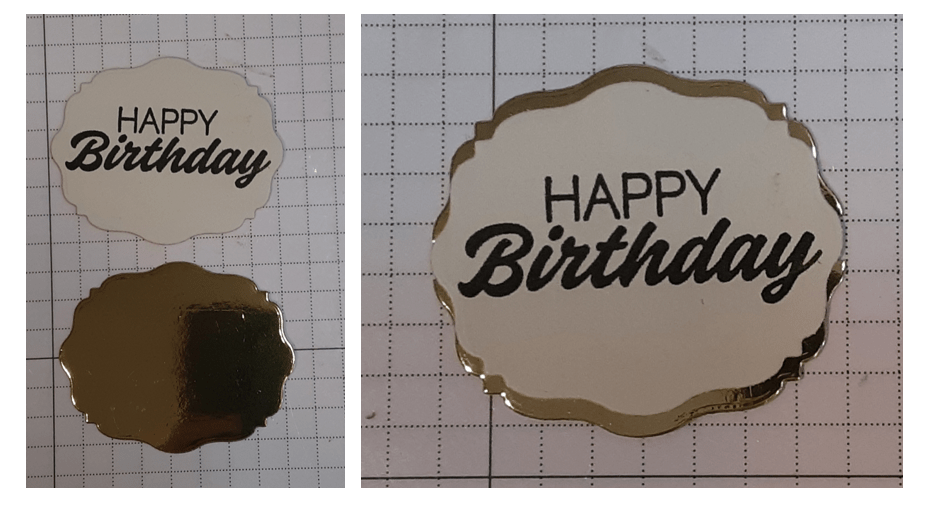
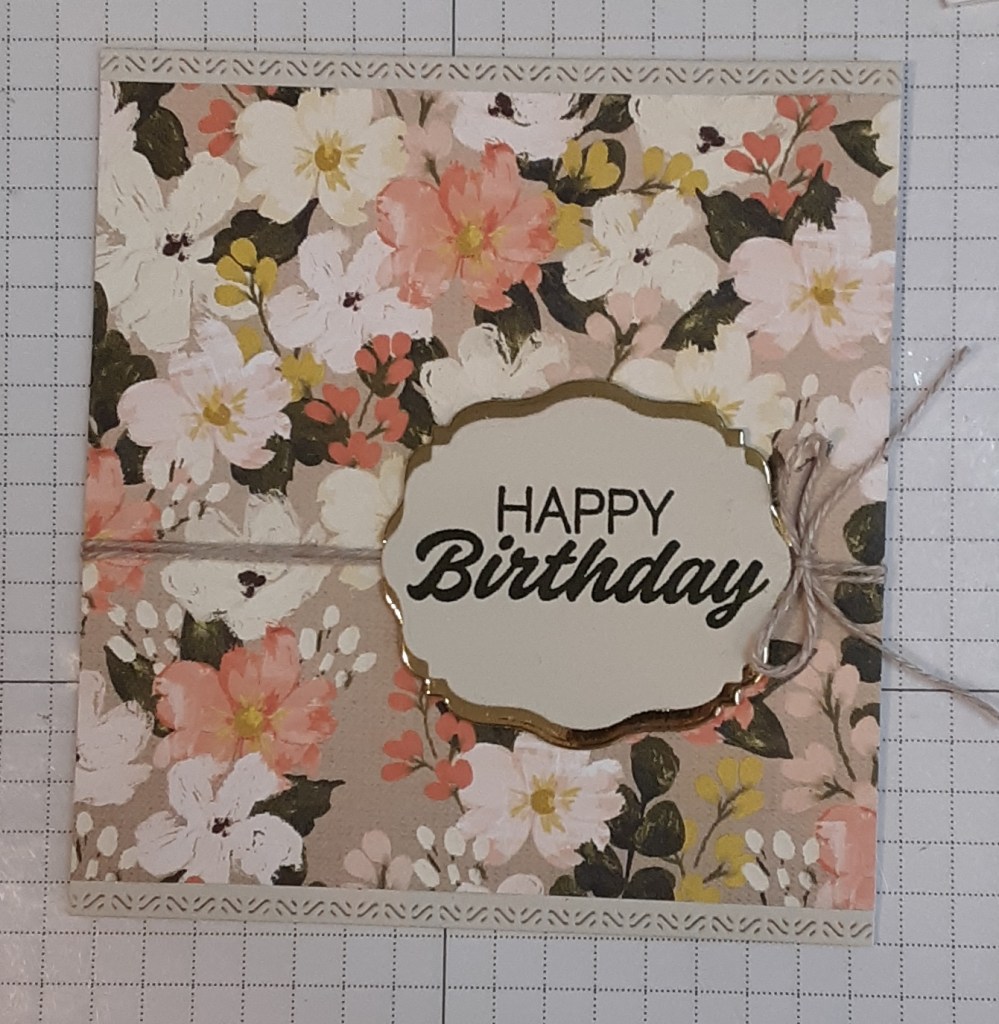
I stamped Happy Birthday from the Boardwalk Fun stamp set on a piece of Basic Beige cardstock with Mossy Meadow ink. I die cut this with my Beautifully Celebrated dies. I cut another of the same label from Gold Foil sheets. I cut the gold label in half horizontally and adhered the beige label to it with just a bit of gold peeking out top and bottom. This is an easy way to stretch your dies when there isn’t a nesting die or if the nesting die isn’t the size you want. I thought the next size up in this die set would have overwhelmed the card and chose this technique instead.
I cut a piece of Linen Thread to about 11,” folded it in half, and stuck the ends to the back of my DSP panel with Mini Glue Dots.
I added my sentiment with Stampin’ Dimensionals.
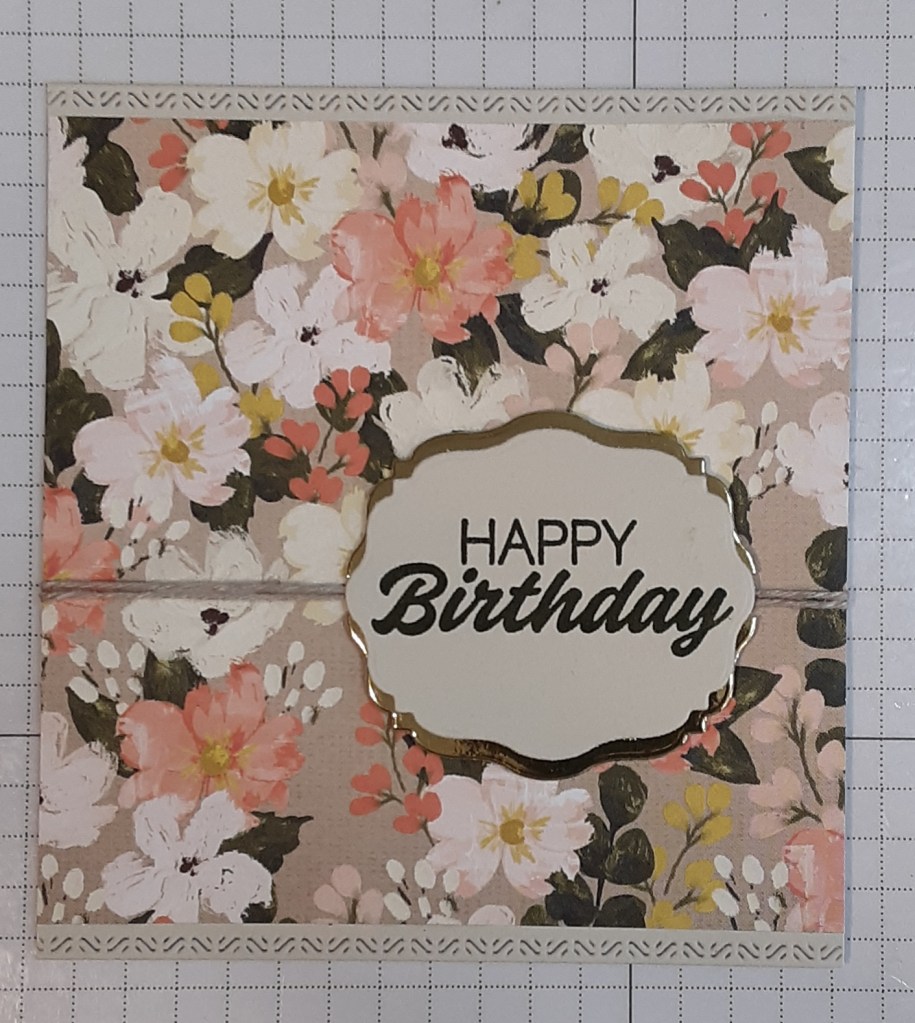
I tied a bow with the Linen Thread and added it to the right side of my sentiment with a Mini Glue Dot.
I glued this panel to my card base keeping even borders.
I tried adding some embellishments to the card, but they seemed to detract more than enhance it. If you have some gems that you would like to try, just put them in place without pushing them onto the paper. You can move them around until you get them where you want them, or remove them completely.
To finish the card, I stamped a greeting on a 4” x 5¼” piece of Basic White cardstock and glued it inside the card.
I hope you liked this simple card (with just a little jazzing up)!
For the complete supply list, click here.
