
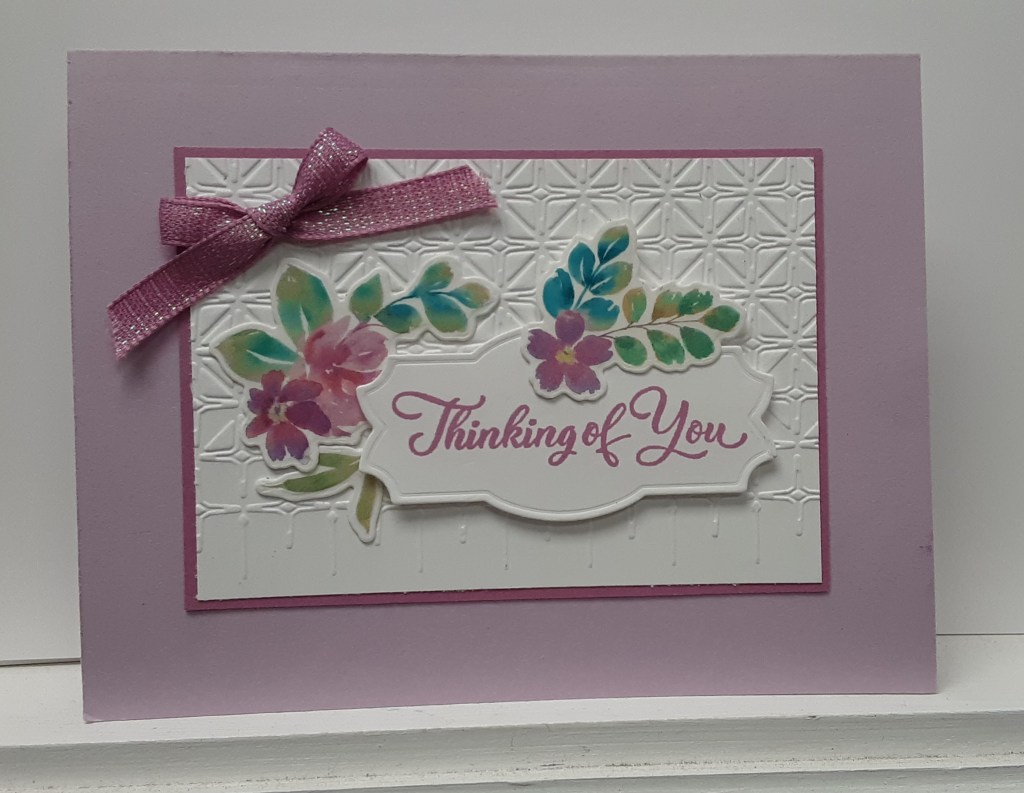
It’s Saturday so I have a simple card for you. What makes this card so easy is the washi tape. Stampin’ Up! has designed washi tape that has coordinating dies that cut out all the images in one pass. No coloring, no fussy cutting, no vacillating on what colors to use. It’s already done for you! If you enjoy coloring the images yourself, you can also use the coordinating stamp set.
Just a reminder if you haven’t already done it, redeem those bonus coupons! You only have until the end of the month, and February is our shortest month. No time to waste! Now on to our card.
To make the card base, I cut a piece of Fresh Freesia cardstock to 5½” x 8½” on my Paper Trimmer, scored and folded at 4¼”, and burnished with my Bone Folder. I cut a piece of Petunia Pop cardstock (a soon to be retiring In Color!) to 4⅛” x 2⅞”. I cut a piece of Basic White cardstock to 4″ x 2¾”. I ran this last piece through an embossing folder (that is no longer available) on my Stampin’ Cut & Emboss Machine. You could use the Damask Designs Embossing Folder or the Forever Plaid Embossing Folder. I adhered the white piece on the Petunia Pop mat with my favorite adhesive (Multipurpose Liquid Glue or Stampin’ Seal).
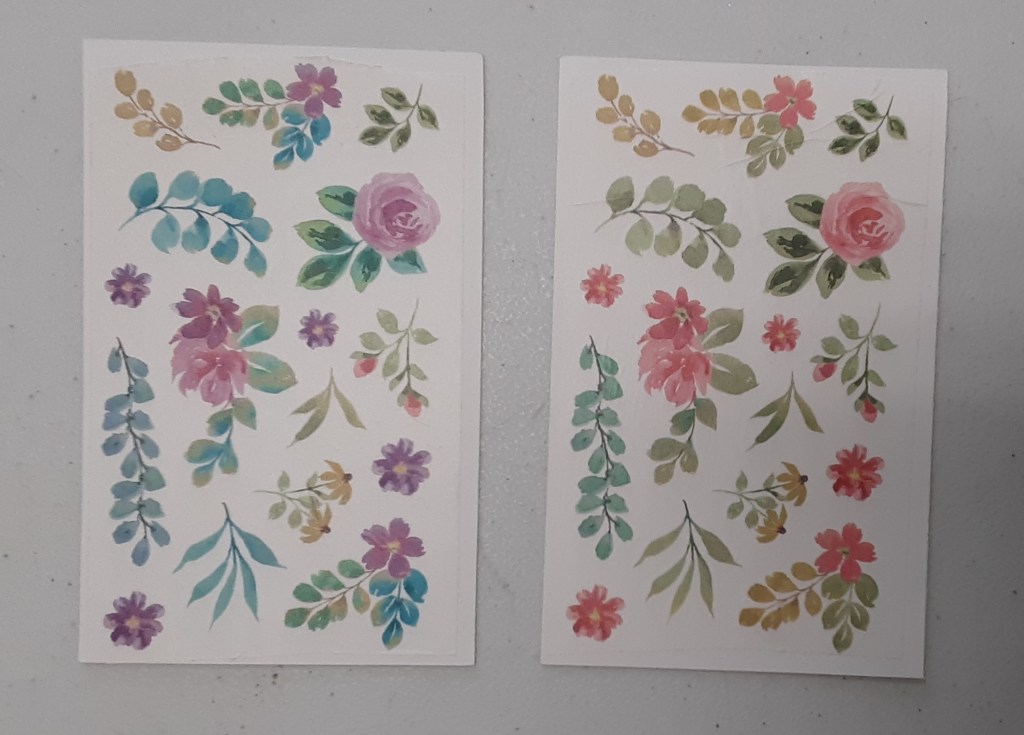
I used the Extraordinary Flora Washi Tape with the coordinating dies. To use the washi tape, you roll out a section that coordinates with the dies and adhere it to a piece of Basic White cardstock. Trim the washi tape at the end of the section. You will want to secure it by pressing it down with your bone folder. Below are two color palettes on the roll. This card uses the one on the left. To adjust the color palette for the one on the right, you could use Pretty in Pink and Sweet Sorbet. You can make several cards with one panel or a couple elaborate ones.
Place the Extraordinary Flora die on the images and secure so that the die doesn’t shift in your machine.
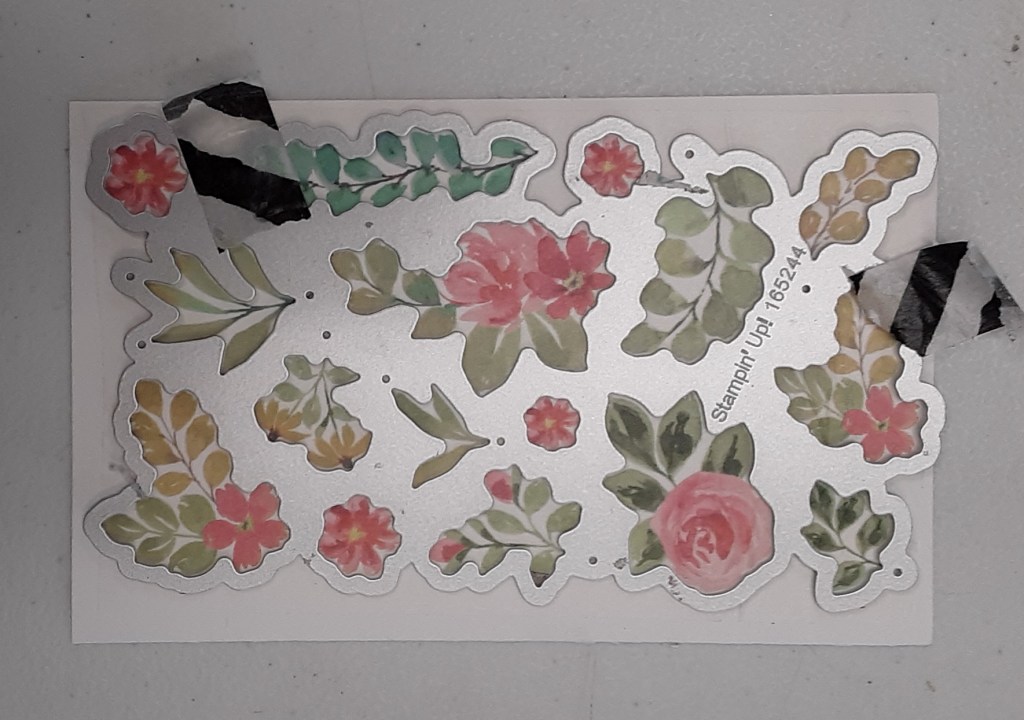
You will have plenty of pieces to create your card.
I stamped a sentiment on a scrap of Basic White cardstock with Petunia Pop ink. I cut out the sentiment using a retired label die. A good substitute would be the Beautifully Celebrated dies. It is a great die set because it has a variety of sizes. It also has a cool corner die.
Arrange the floral images on and behind the label. I adhered the label to my panel with Stampin’ Dimensionals. I adhered the panel to my card base.
I added a bow from Petunia Pop Iridescent Ribbon (Last Chance Product!) with a Mini Glue Dot.
To finish the card, I glued a 4” x 5¼” piece of Basic White cardstock inside the card.
I hope you like this quick and easy card!
For the complete supply list, click here.
