
Happy New Year! I hope everyone had a wonderful holiday season and plenty of crafting time. I don’t know how I worked a full-time job, took care of my family, and found time for the holidays, let alone crafting. But somehow everything got done. Maybe not to a Hallmark Christmas movie standard, but good enough. I hope you were able to accomplish everything on your to-do list.
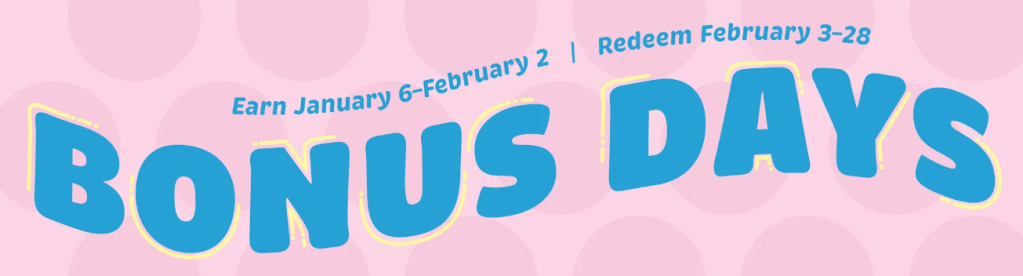
From January 6 to February 2, you can earn Bonus Days coupons! There is no limit to how many coupons you can earn, so it’s the perfect time to get items on your wish list from the current catalog, Online Exclusives, Kits Collection, and more. Here’s the deal: for every $50 USD | $60 CAD you spend, you’ll get a $5 USD | $6 CAD coupon that can be redeemed from February 3 to 28. It’s time to start shopping and earning! Stampin’ Up! will email you the coupon codes, so don’t forget to save them when you receive them!
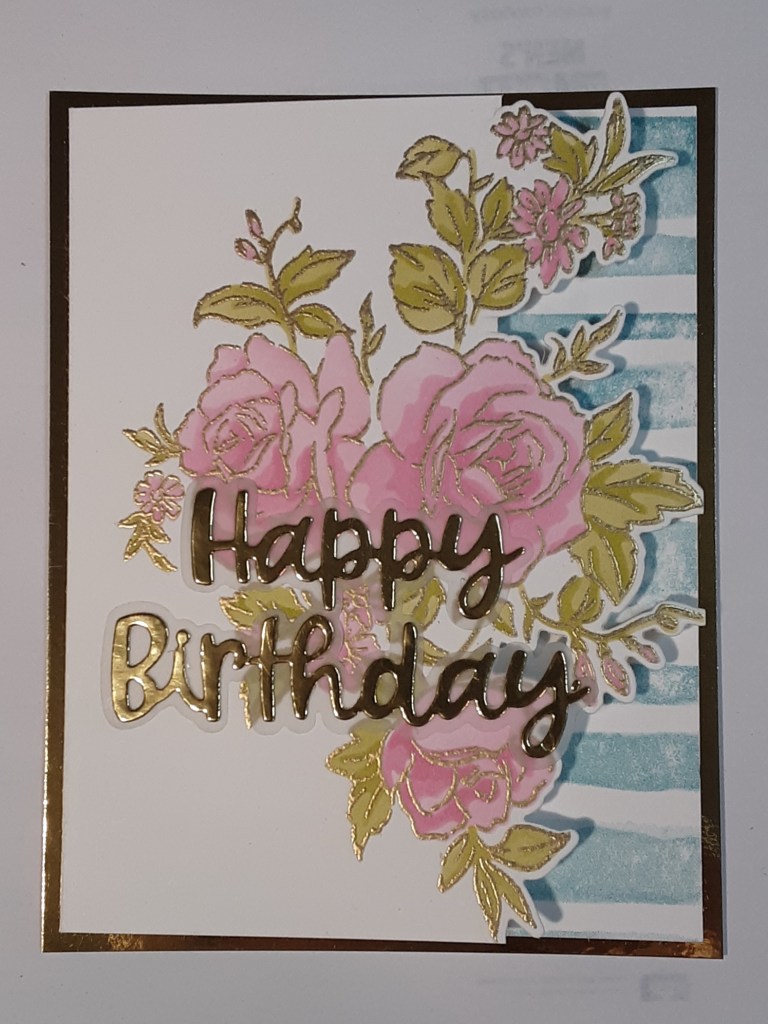
Stampin’ Up! will no longer be doing Sale-abration. Instead, they are offering a different Product of the Month and occasional specials. This month’s product is a stamp set. It has some lovely sentiments.

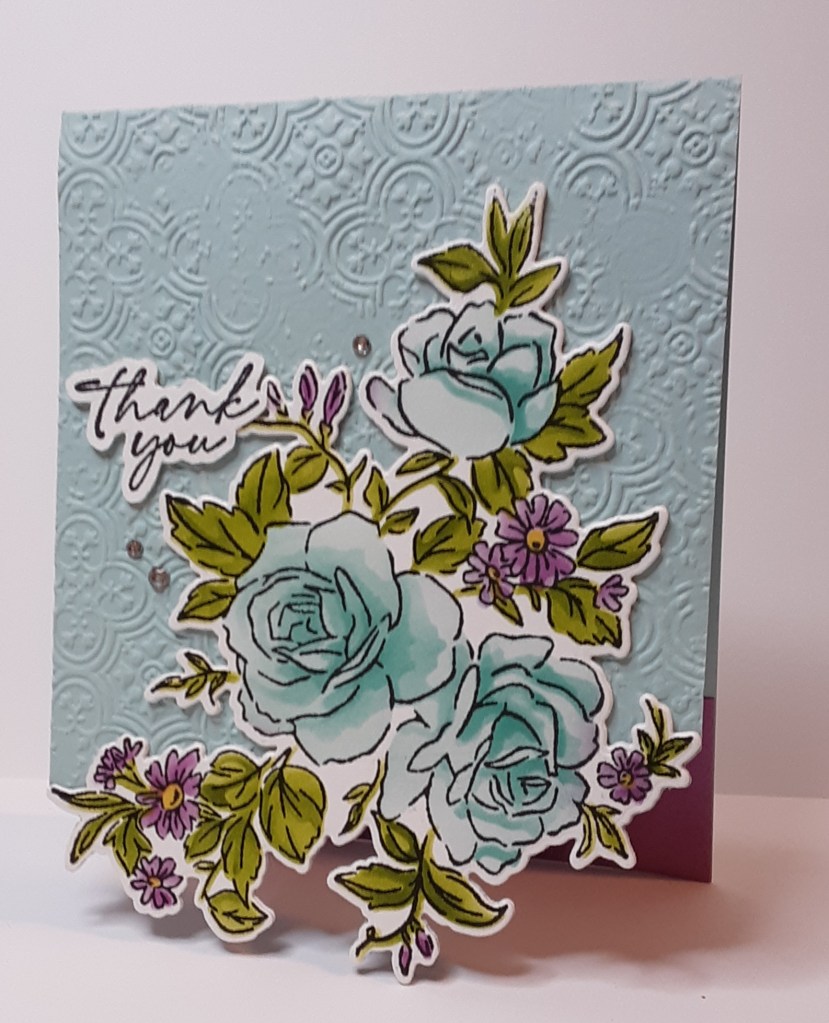
Now on to the card. To make the card base, I cut a piece of Pool Party cardstock to 4¼” x 11” on my Paper Trimmer, scored and folded at 5½”, and burnished with my Bone Folder. I cut a piece of Petunia Pop cardstock to 4¼” x 1½.” I cut a piece of Basic White cardstock to 4″ x 3⅞.”
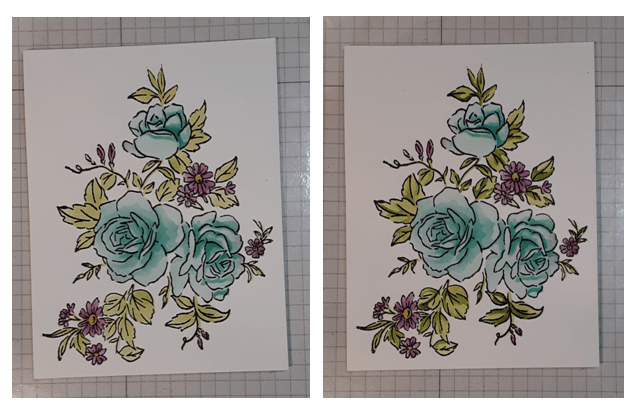
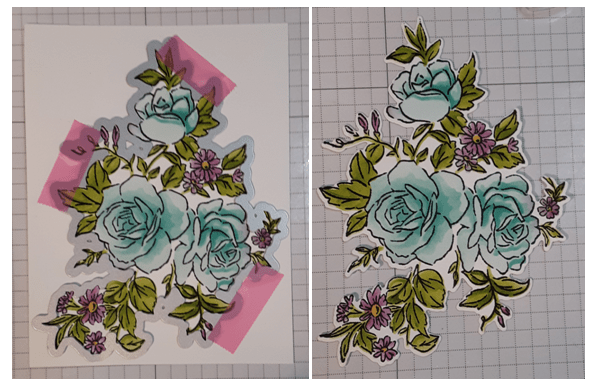
For the focal image, I stamped the large flower image from Layers of Beauty bundle with Momento Tuxedo Black ink. I used the coordinating stencils in the bundle to color the flowers in. I lined up the first stencil and applied a light coating of Pool Party ink with my Blending Brush to the roses. I applied Fresh Freesia ink to the smaller flowers. With the next stencil (#2), I applied Coastal Cabana ink to the roses and Petunia Pop ink to the smaller flowers. With the next stencil (#3), I applied Summer Sky ink to the roses and Daffodil Delight ink to the center of the small flowers. I used a sticky mat behind my cardstock to secure my stencils. You could also use low tack tape, like Easy See Tape.
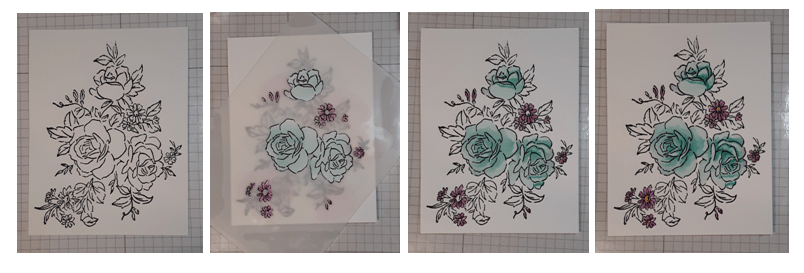
To color the leaves, I used Lemon Lime Twist ink with stencil #4. With stencil #5, I applied Granny Apple Green ink.
I used the coordinating die to cut out the image. I secured the die with some Easy See tape so it wouldn’t shift in my Stampin’ Cut & Emboss Machine.
The next step involves partial die cutting. I wanted my floral image to touch the bottom of the front of my card so I laid the image on the card front where I wanted it to go. I also wanted it to touch both sides of the card.
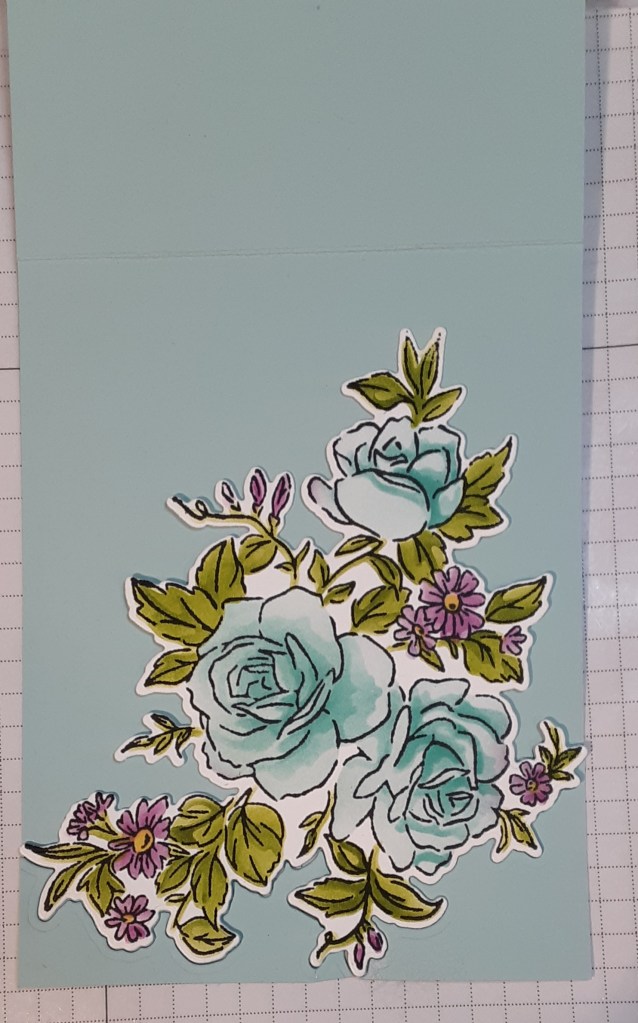
I carefully laid the die over the image so that it would cut exactly where I wanted it. The die should “click” into place. Once again, I secured it with low tack tape. Since I only wanted to cut the bottom portion of the image, I placed my top plate so the edge of the plate lined up with the sides that touched and ran it through my machine.

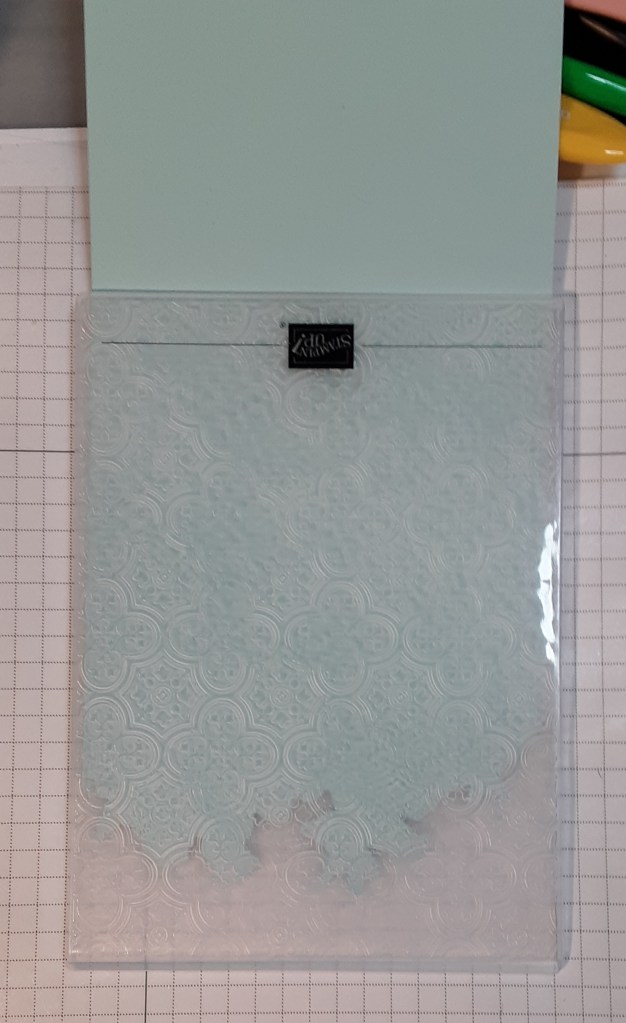
I removed the die cut image from the card front. I wanted a little texture, so I ran it through my Damask Designs Embossing Folder. I lined up the folded edge with the edge of the embossing folder and ran it through my machine.
I adhered the focal image to my card with my favorite adhesive (Multipurpose Liquid Glue or Stampin’ Seal), matching up the die cuts. I prefer wet glue in these instances because if affords a little “wiggle” room. They should line up perfectly.
I stamped Thank You from the Textured Notes stamp set (Last Chance product!) in black ink. I fussy cut it out. I added it to the card with Stampin’ Dimensionals.
I added the Petunia Pop piece to the inside of the card. I also added the Basic White piece.
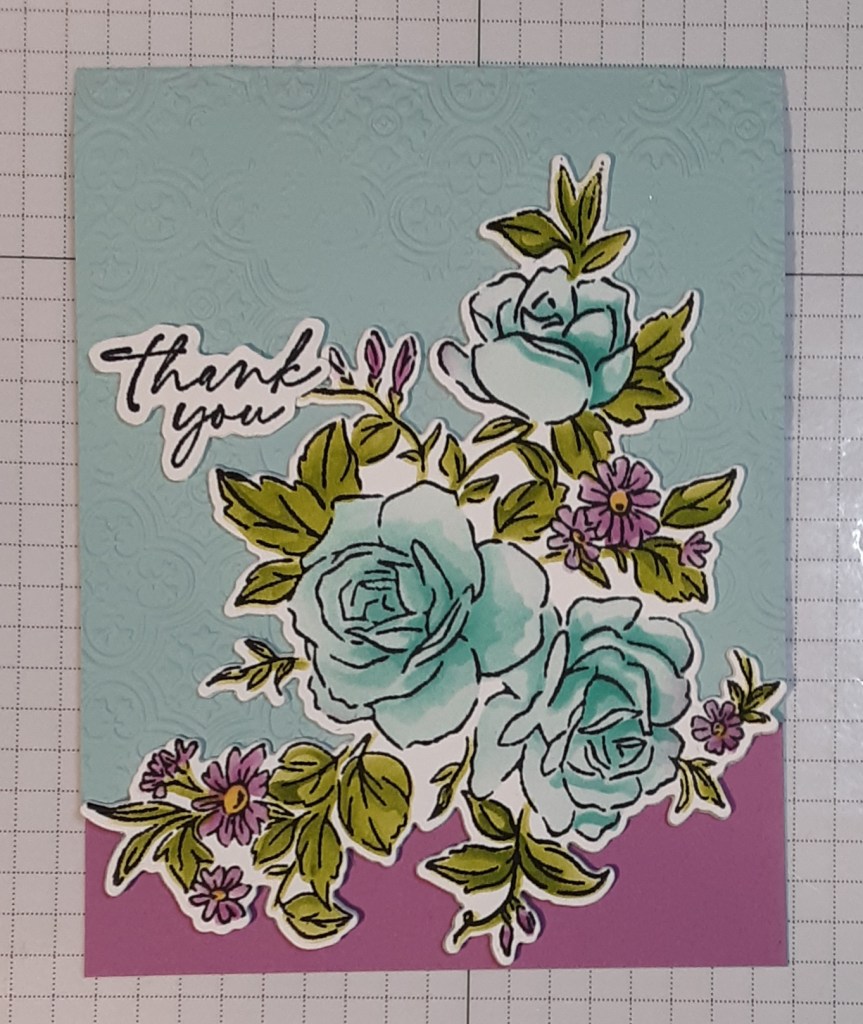
For a bit of sparkle, I added five Basic Rhinestones.
I hope you liked this card!
For the complete supply list, click here.
This card uses two In Colors that will retire at the end of the catalog life in early May. If they are colors that you love, please consider ordering them now while you can take advantage of the Bonus Days and also while they are still available.
Additional inspiration:
Images © Stampin’ Up!
