
It’s Saturday and I have another simple card. There is just a little bit of stamping. Can you believe that Christmas is less than two weeks away? I still need to get my Christmas cards together and I’m running out of time! I hope you were able to take advantage of the free shipping that ended yesterday and also the Product of the Month! It will be perfect for those spring cards. (Did I say spring?! It’s not officially winter yet, despite all the snow we’ve been having!)
Product of the Month
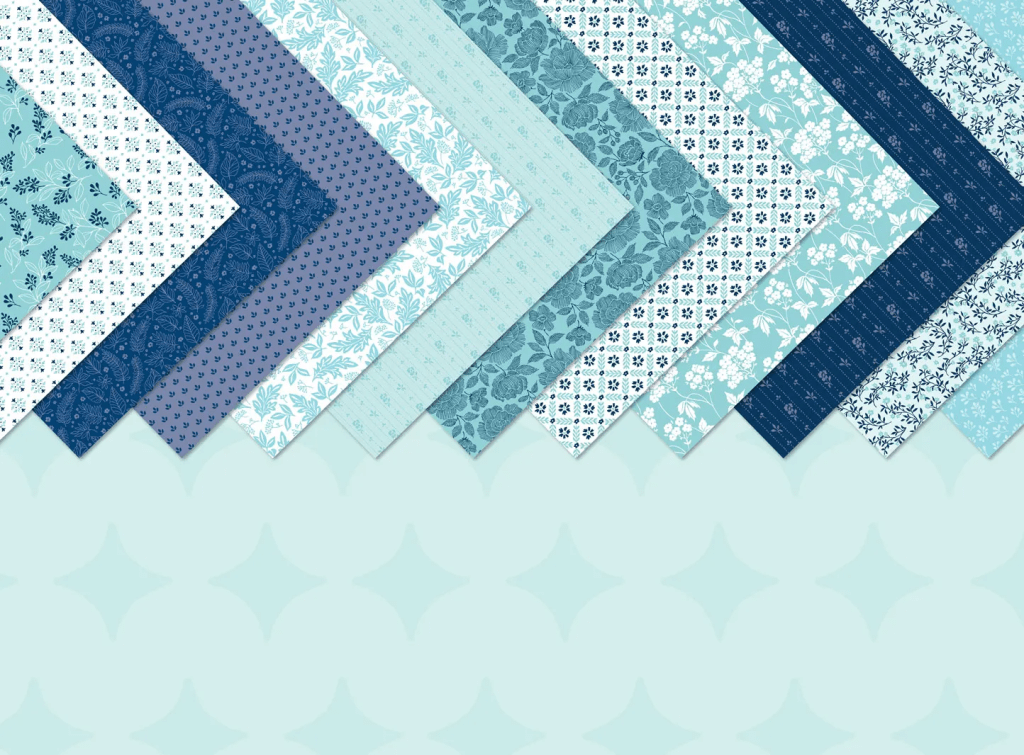
Get the exclusive True Blue Florals 12″ x 12″ (30.5 x 30.5 cm) Designer Series Paper for only $5 when you spend $75 or more in a single order. Act fast before it’s gone for good!
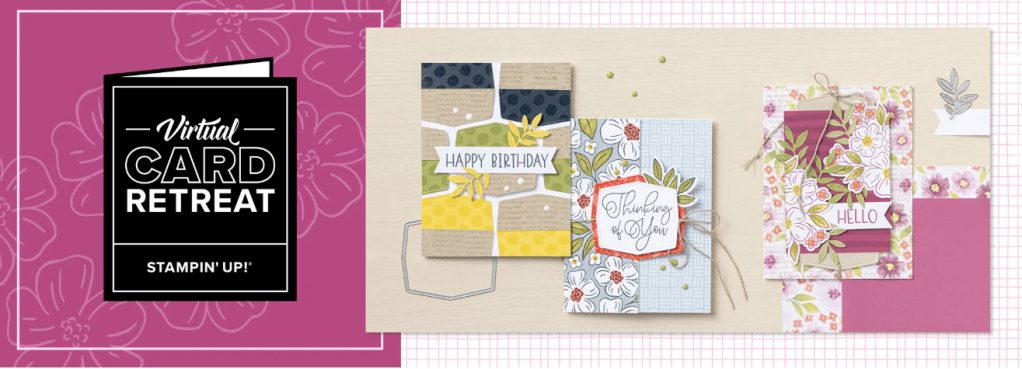
Stampin’ Up! is also having a Virtual Card Retreat.
Introducing the Virtual Card Retreat, a crafting extravaganza for people who love card making and community! During this two-day virtual event, you’ll craft along with Stampin’ Up! staff as they go through the step-by-step process of creating 15 beautiful cards using the 2026 Virtual Card Making Retreat kit. They’ll even have some fun giveaways! This event is a great opportunity to craft alongside a community of crafters who share a passion for card making. It will be held January 22–23, 2026, from 2:00 p.m.–9:00 p.m. (MT) on a Private Facebook Group. There is no registration for this event! By purchasing the 2026 Virtual Card Making Retreat kit, you’ll get access to the exclusive Facebook group where the live event will stream. The price for the retreat kit is $165 USD. This event will be presented in English only. You can access the recorded event videos on the exclusive Facebook group. Videos with English, French, German, and Dutch captioning will be available through the Facebook group within two weeks after the live stream.
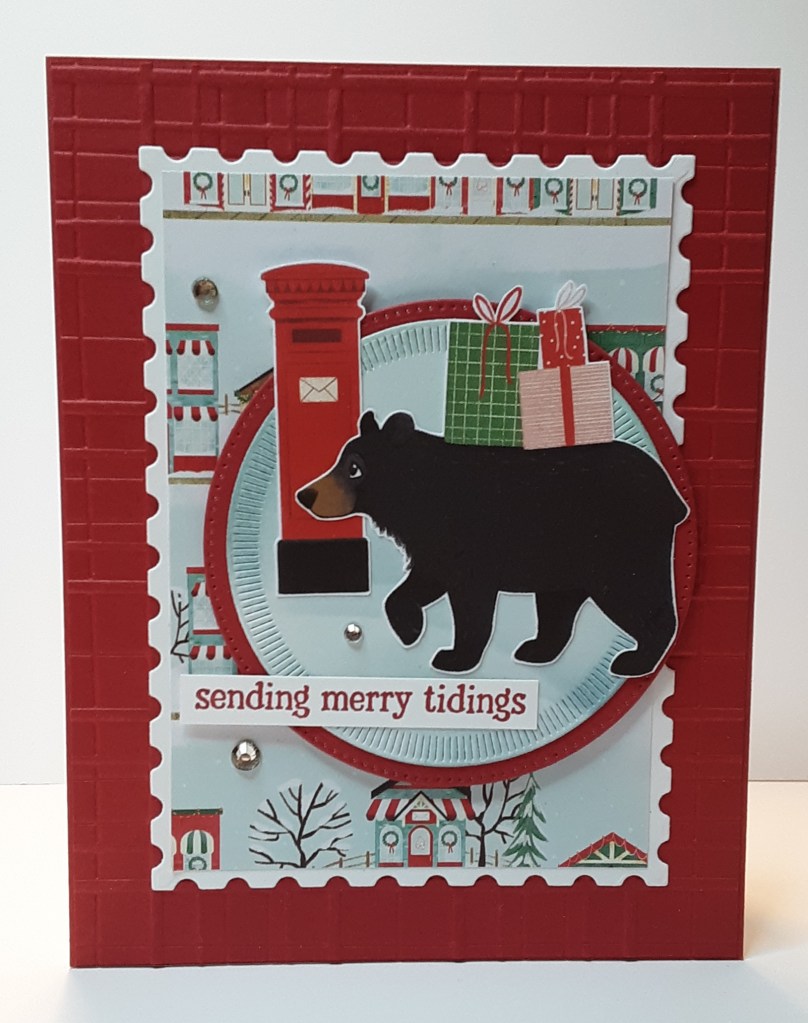
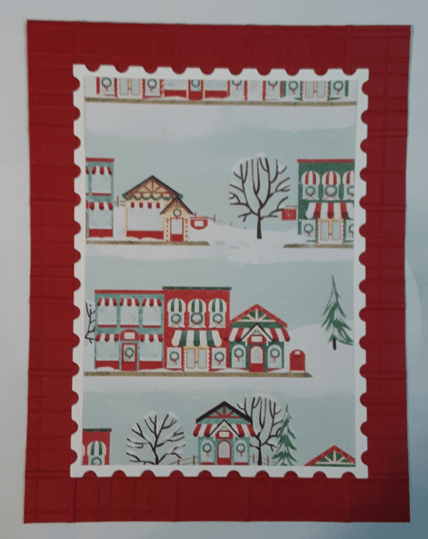
Now on to the card. To make the card base, I cut a piece of Real Red cardstock to 5½” x 8½” on my Paper Trimmer, scored and folded at 4¼”, and burnished with my Bone Folder. I cut an additional Real Red piece to 5⅜” x 4⅛”. I ran this piece through my Forever Plaid 3D Embossing Folder on my Stampin’ Cut & Emboss Machine. You could skip this part and just emboss the card front, but I like my card front to be sturdier and not have the embossing showing inside my card. I die cut from a piece of Basic White cardstock the second largest rectangle from the Perennial Postage Dies. I die cut the largest circle from Stylish Shapes dies from Real Red cardstock. I die cut the third largest die from Spotlight on Nature dies from a piece of Basic White cardstock. Finally, I cut a piece of North Pole Delivery DSP (Last Chanc) e productto 3″ x 4¼”, being careful with the direction.

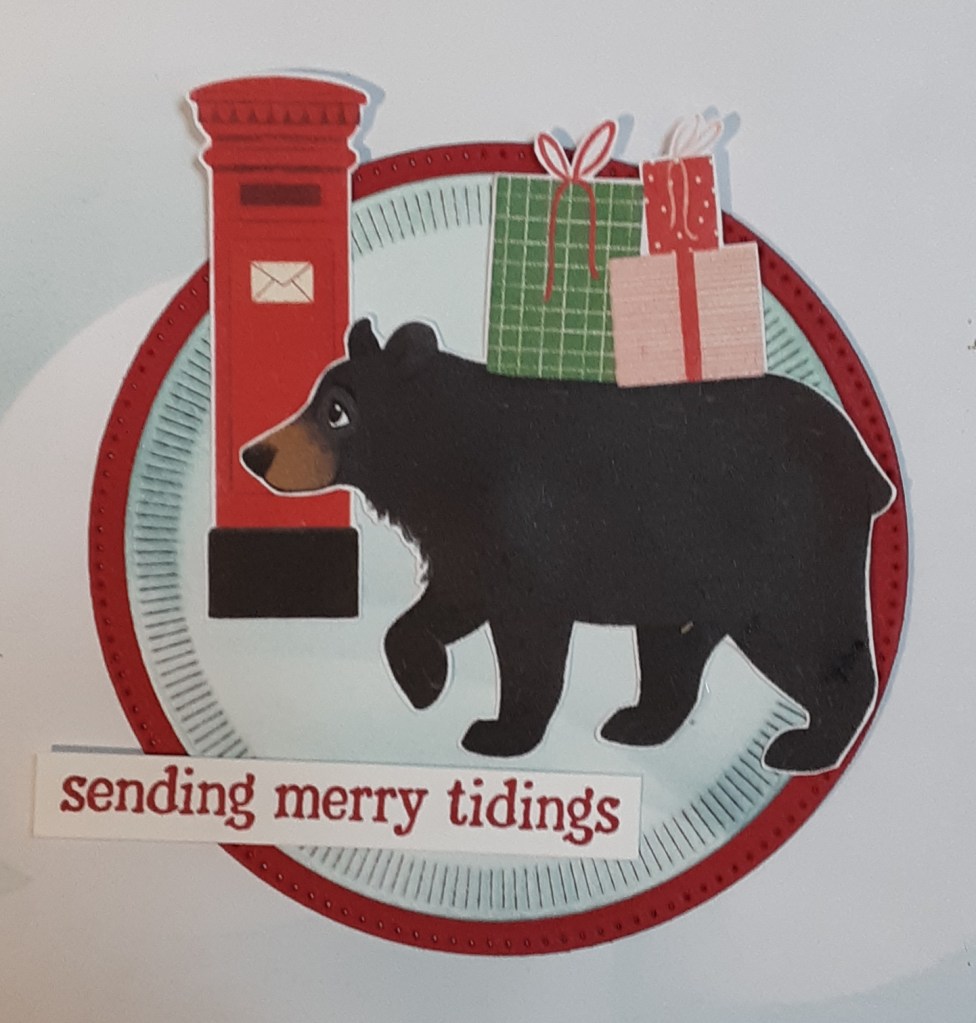
I also popped out two of the images from the DSP, a mailbox and the bear with presents. I did fussy cut around them because I thought the white was too broad around the images. Sorry for the floaters around the images. I’m sure there is a way to erase them that I am completely unaware of.

I stamped Sending Merry Tidings from Jolly Delivery Stamp Set (Last Chance product) in Real Red ink on a strip of Basic White cardstock and trimmed it down.
I adhered the embossed red piece to my card base with my favorite adhesive (Multipurpose Liquid Glue or Stampin’ Seal). I adhered the DSP piece to the white postage die cut. I added this panel to my card base.
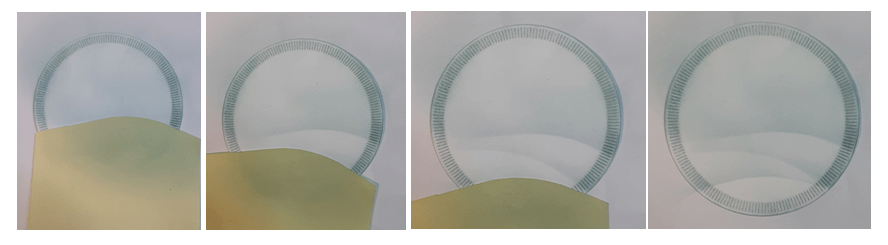
With the white circle, I added some Pool Party ink with a Small Blending Brush. Before I began, I cut a curve on the sticky end of a Post-It note. I placed this on the circle where I wanted the snow drift to be. I ink blended around the edges of the circle and up from the Post-It. I moved the Post-It down and changed the angle a little and blended up from the Post-It. I moved it one last time and blended up again. I added some color to the edges of the circle at the bottom also. I thought this helped minimize the starkness of the white paper but not overwhelm if I had used Pool Party cardstock.
I glued this piece to the red circle.
I added my mailbox, bear, and sentiment flat on my circle. I tried to make sure my mailbox was vertical and my sentiment was horizontal. There are several choices of animals to put on your card. The stamp set also has animal images that you could stamp, color, and fussy cut out. So many cute options!
With Stampin’ Dimensionals, I adhered the circle to my card.
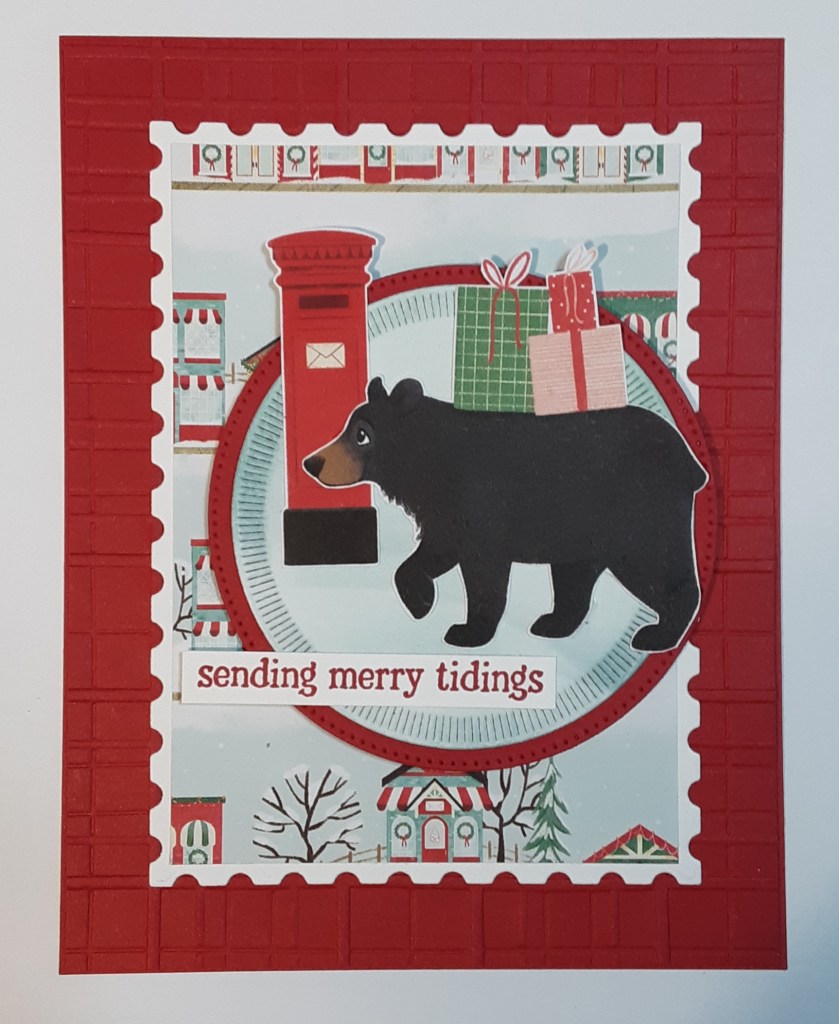
To add a little sparkle, I added three Rhinestones to the card.
To finish the card, I stamped a greeting on a 4” x 5¼” piece of Basic White cardstock and glued it inside my card.
I hope you liked this card!
For the complete supply list, click here.
