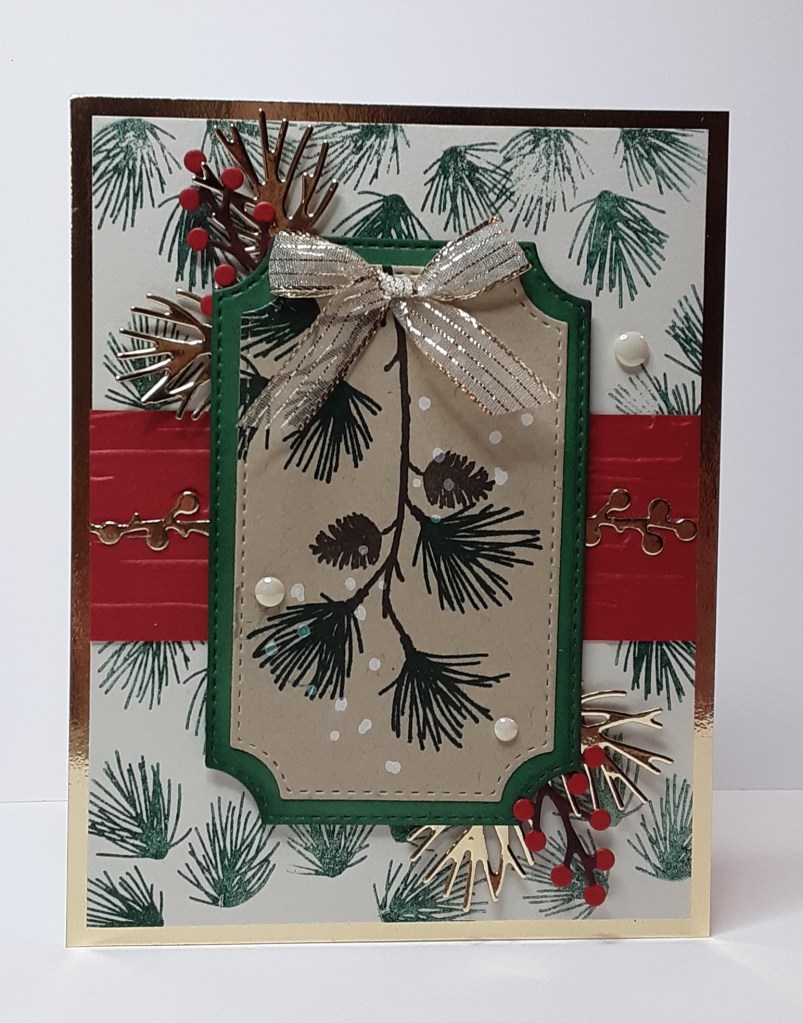
Today I have a card using the Branching Out bundle. I used this bundle about a month ago, but it is so much fun, I had to give it another go. The stamp set and bundle are on the Last Chance list. The dies will continue to be offered.

Also, Stampin’ Up! is offering FREE SHIPPING today through Friday on orders over $75 before tax and after all rewards are applied! This is a great way to save on shipping costs. Now on to the card.
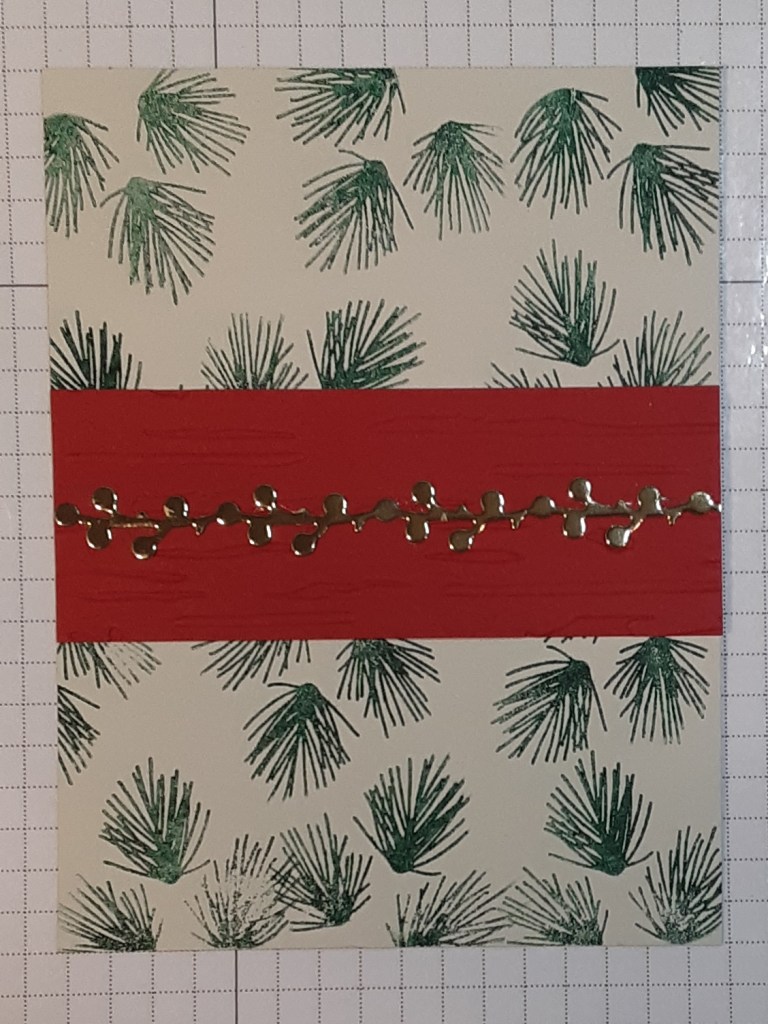
To make the card base, I cute a piece of Thick Basic White cardstock to 5½” x 8½” on my Paper Trimmer, scored and folded at 4¼”, and burnished with my Bone Folder. I cut a piece of Basic Beige cardstock to 4” x 5¼”. I cut a strip of Real Red cardstock to 1½” x 4”. I ran this through my Birch Wood Embossing Folder on my Stampin’ Cut & Emboss Machine.
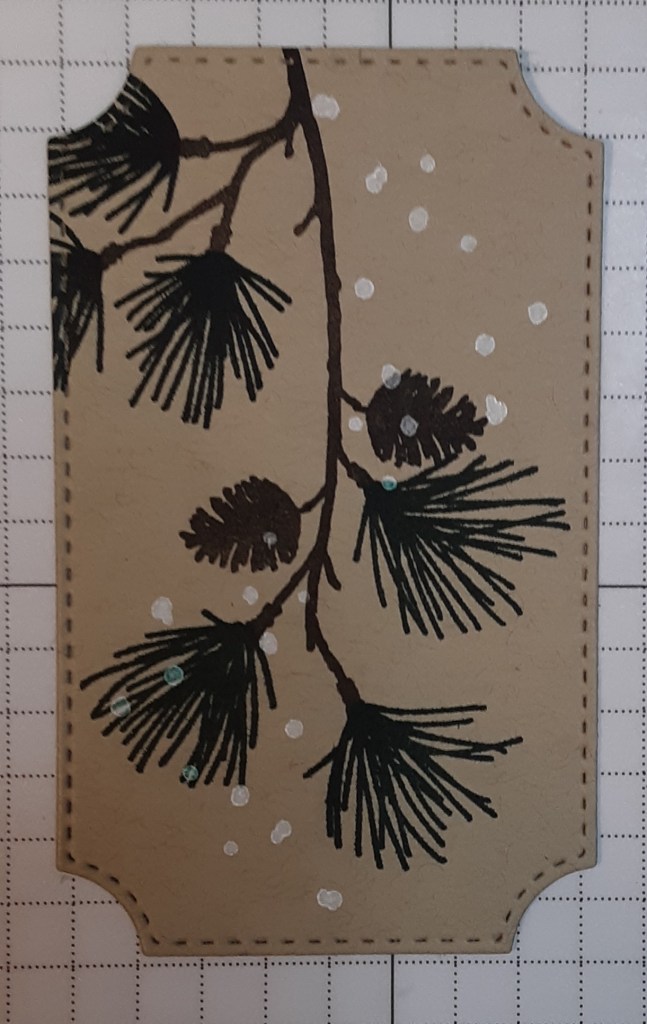
I die cut the second smallest label die from the Branching Out bundle from Crumb Cake cardstock. I cut the third smallest label from Garden Green cardstock.
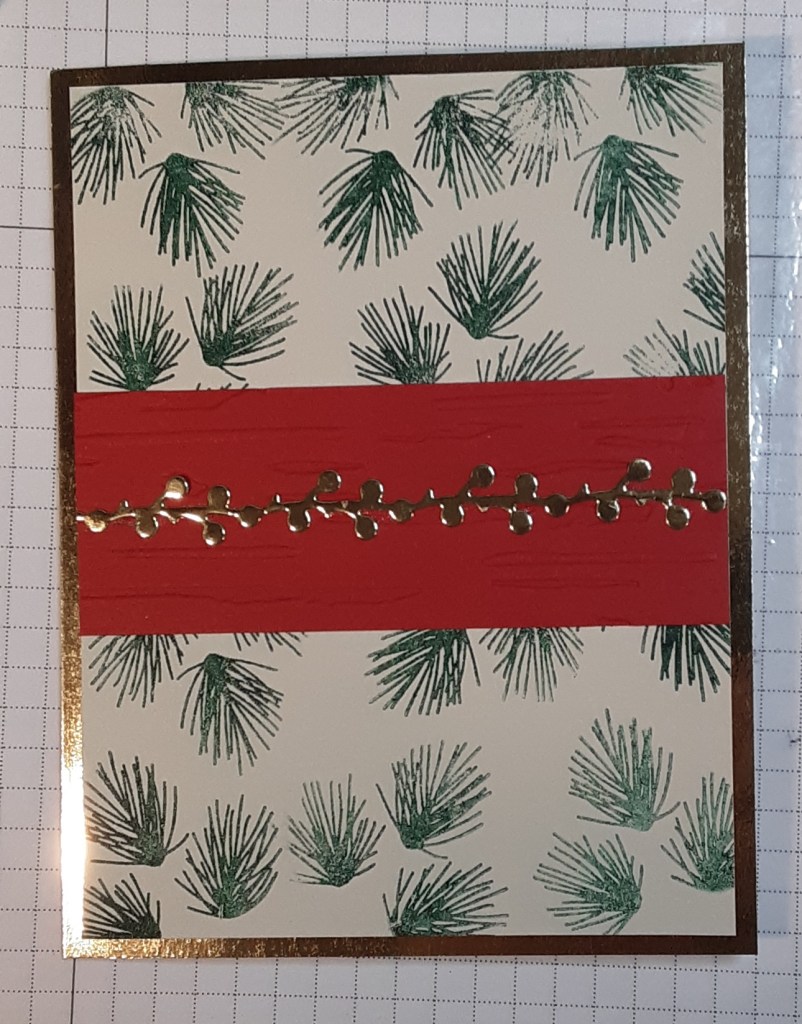
I cut a piece of Gold Foil Sheets to 4¼” x 5½”. From this piece, I also die cut the pine branches twice and the garland strip, being careful not to get too close to the edges. If you are worried about getting too close, you can cut the middle out of the piece first and use the scrap. Or use another piece altogether.
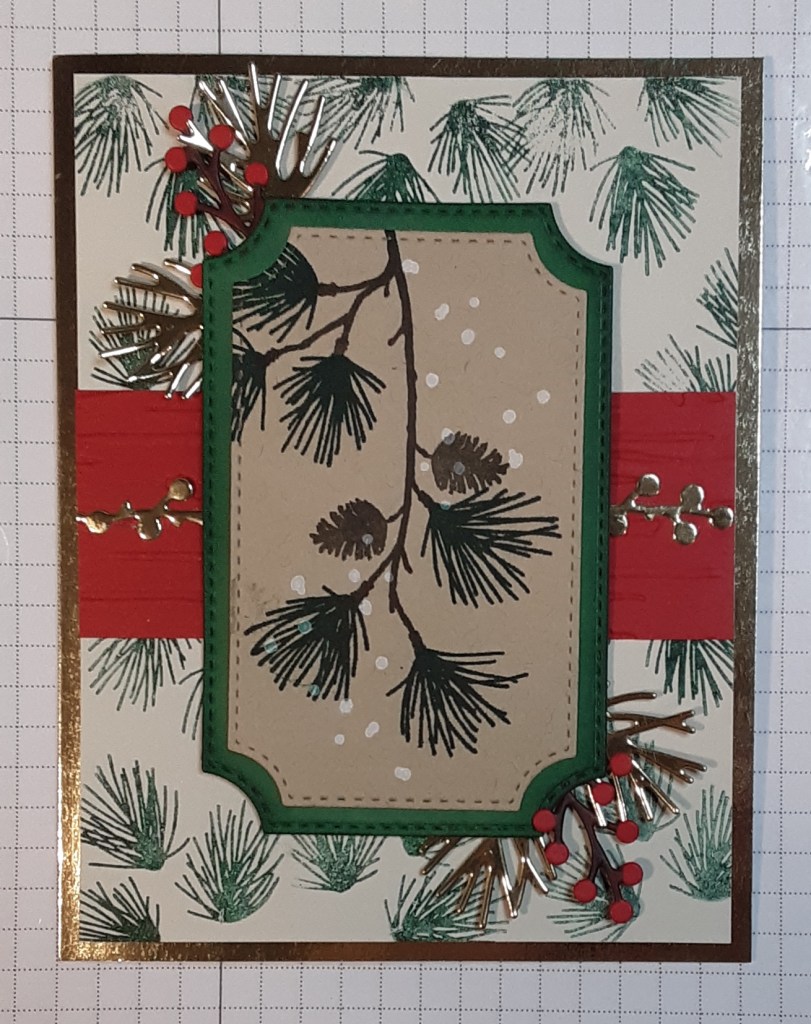
I also die cut the berry sprig from Real Red cardstock. I used a SU100 Stampin’ Blend to color in the stems on the sprigs.

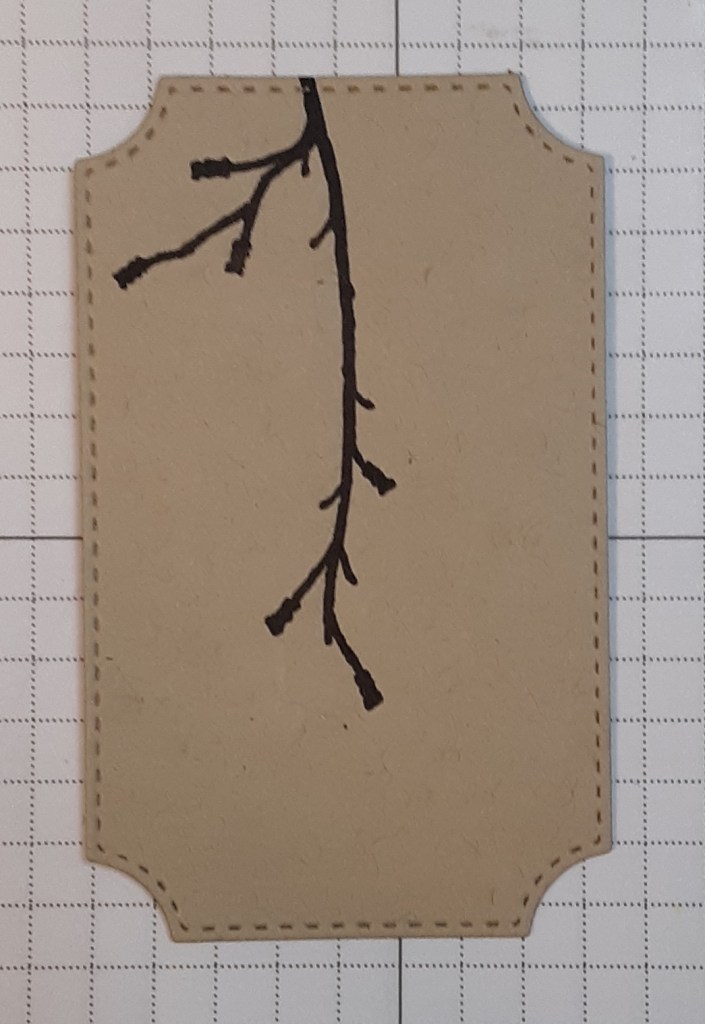
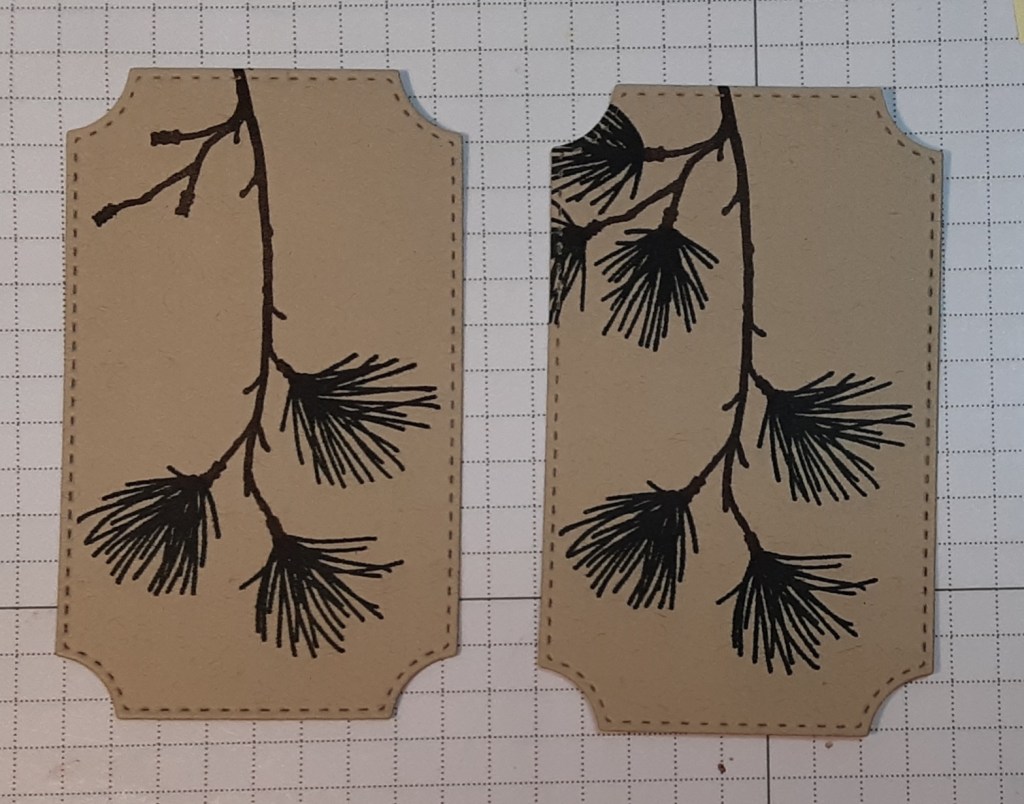
With the Crumb Cake label, I began stamping my focal image. I stamped the smaller branch from the Branching Out bundle with Early Espresso ink. You’ll want to make sure to give yourself enough room at the end of the branch for the pine needles.
I added the pine needles with Shaded Spruce ink. The trios of needles fit perfectly on the branches.
Next, I stamped the pinecones in Early Espresso ink.

For a final wintry touch, I stamped the smaller scatter stamp (I thought it looked like snow) with White Craft ink. You do need to give the white ink a few minutes to dry.
While the white ink was drying, I took the Garden Green label and added some Shaded Spruce ink to the edges with a Blending Brush. If you prefer, you could use a piece of Shaded Spruce cardstock and skip the blending, but I really like the blended look.

My last bit of stamping is for the mat piece. I stamped off once with Shaded Spruce ink and the smaller pine needle cluster and stamped it on my panel. I knew I was putting a strip through the middle, so I didn’t worry about the center.

I adhered the gold garland down the middle of the red strip. If I made the card again, I would use Adhesive Sheets before die cutting the garland. As it was, I switched between Multipurpose Liquid Glue and Stampin’ Seal. They both left a bit of a sticky mess. I trimmed the gold garland to fit my strip.

I adhered my focal layer to the green mat.

I added the foliage I die cut to the back of my focal image, starting with the berries and then the pinecones. I did cut the pinecones apart so I could position them where I wanted them to be.
I adhered my gold piece to my card base. I added my red strip to my stamped mat piece.
I adhered this to my card base.
I adhered my focal image with Stampin’ Dimensionals.
With Gold Striped Mesh Ribbon, I tied a little bow and added it to the top of the branch with Mini Glue Dots.
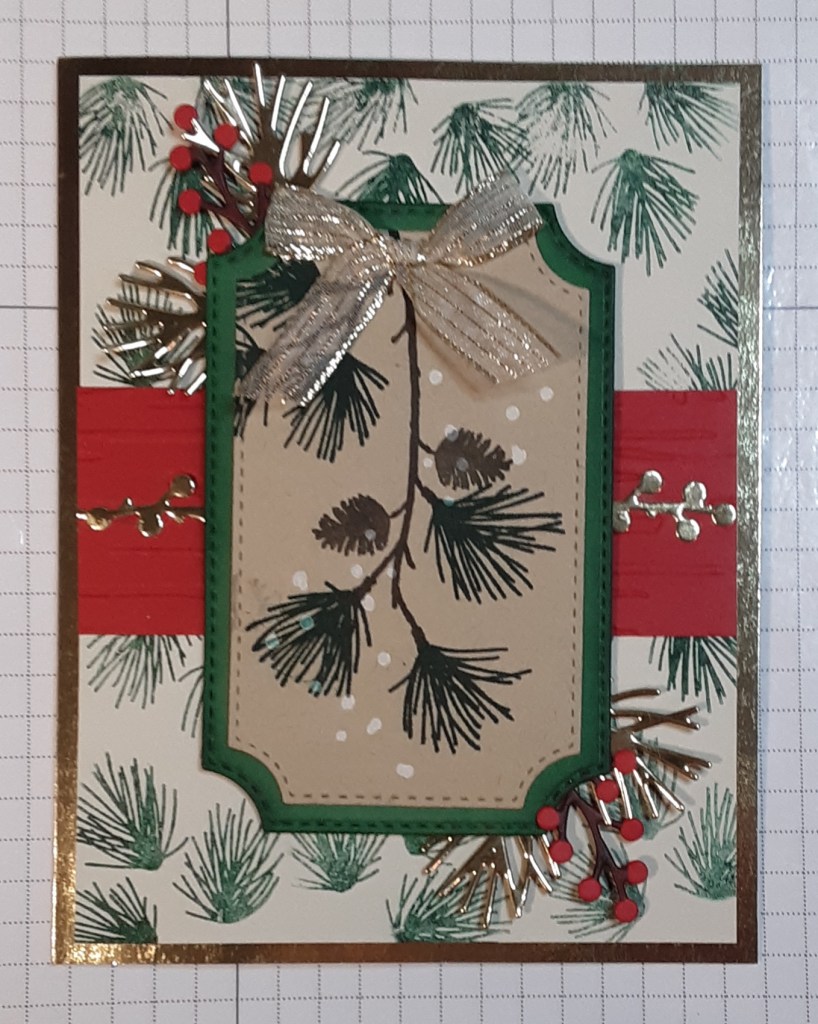
As a finishing touch, I added three Antique Pearls.
To finish the card, I stamped a sentiment inside the card.
I hope you liked this card!
For the complete supply list, click here.
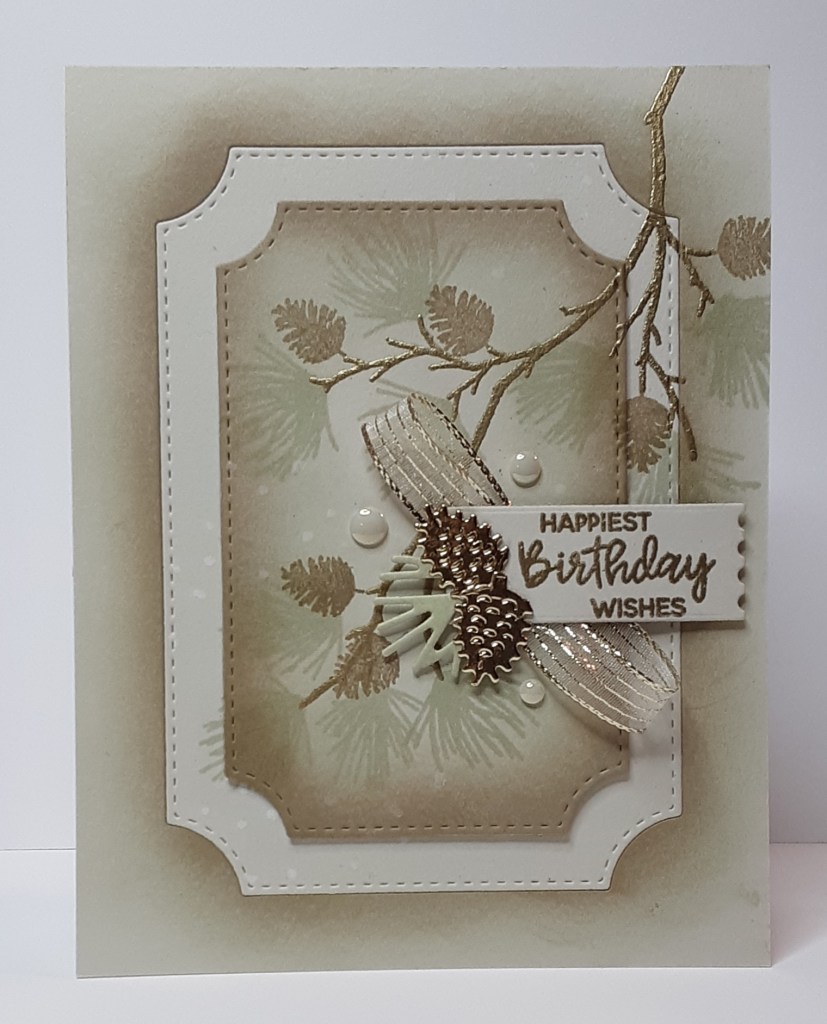
Another Branching Out card: