
It’s Saturday and I have another simple but elegant card. I hope everyone has been enjoying a long Thanksgiving weekend. I appreciate everyone who had to go into work yesterday, and also the other days of the weekend. You are what keeps the wheels turning in our great nation and I am grateful for you.
Stampin’ Up! still has two days left for their Black Friday sale. The last time I checked they still had most of the Stampin’ Blends in stock. The other supplies sold out before noon on Tuesday. But if you are in need of alcohol markers, most colors are still available. We will be using one on today’s card!
Don’t forget, if you are thinking of trying Paper Pumpkin, beginning Monday, you can get a subscription for three months, six months, or twelve months at a discounted price. Subscriptions purchased during this promotion start immediately with the December Watercolor in Bloom Kit. This kit cannot be skipped.
From December 1–9, prepaid Paper Pumpkin subscriptions will be discounted as follows:
3-month prepaid: $61.00 (regular price $81.00)
6-month prepaid: $122.00 (regular price $162.00)
12-month prepaid: $244.00 (regular price $324.00)

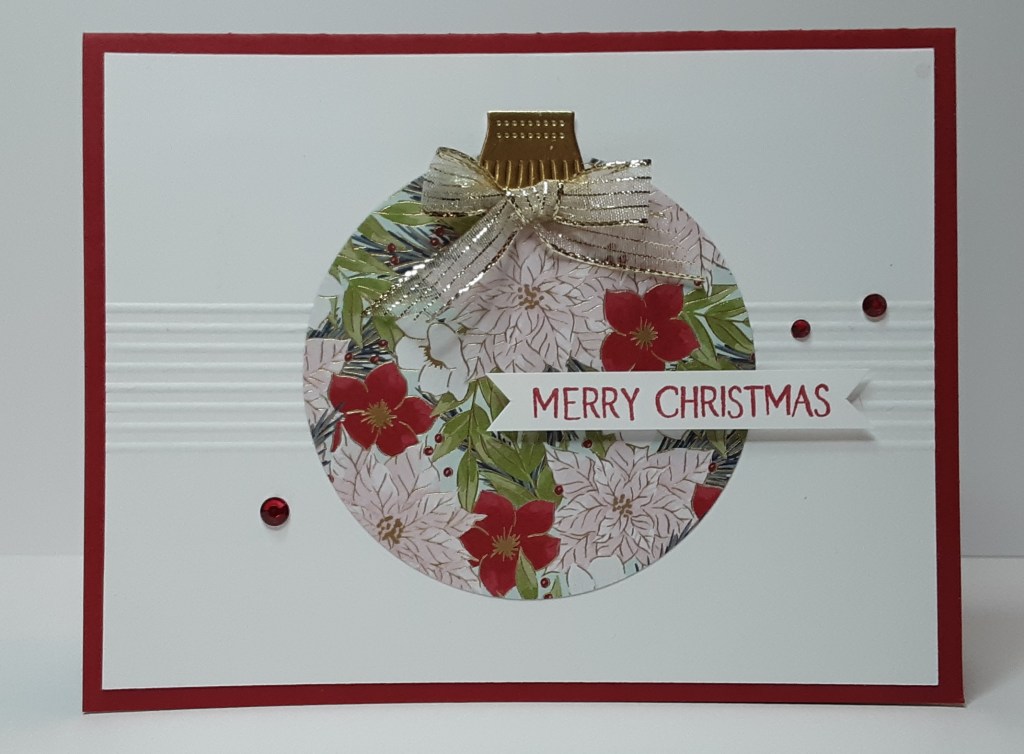
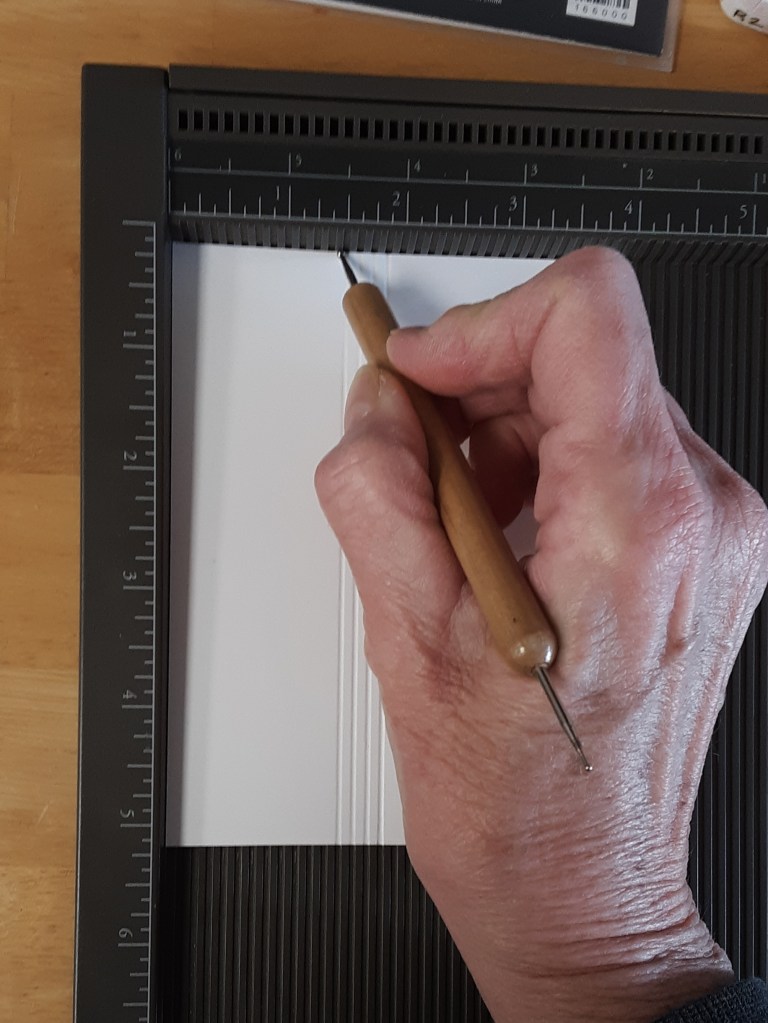
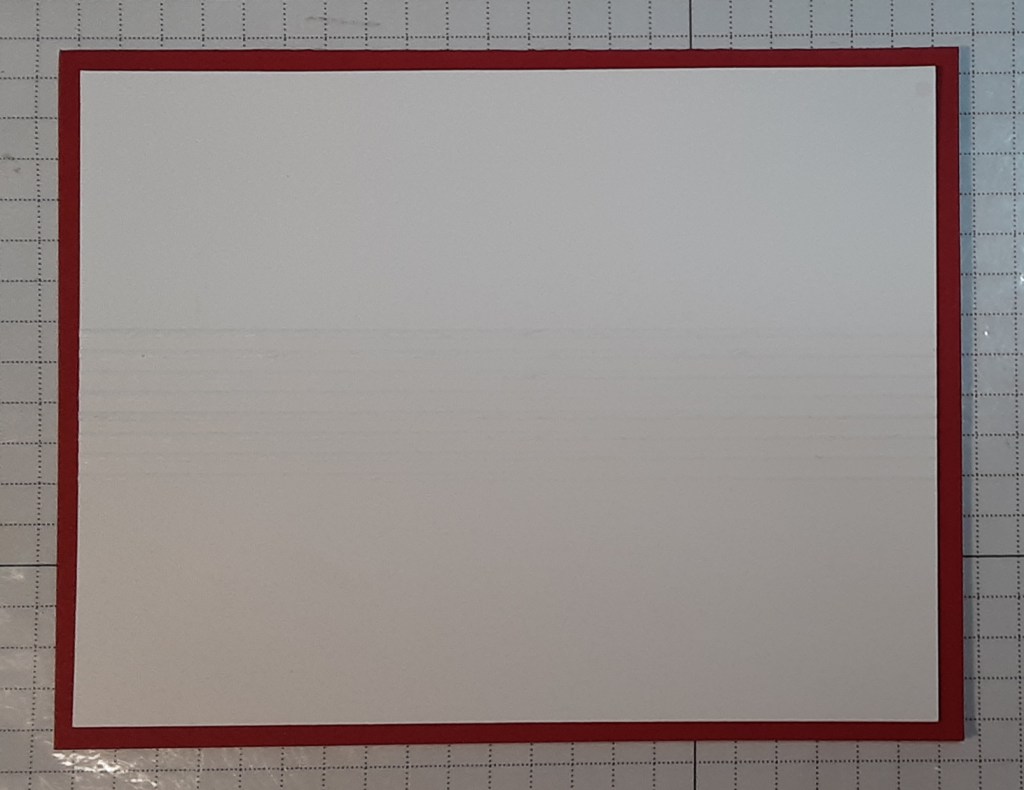
Now on to our card. To make the card base, I cut a piece of Real Red cardstock to 5½” x 8½” on my Paper Trimmer, scored and folded at 4¼”, and burnished with my Bone Folder. I cut a piece of Basic White cardstock to 4” x 5¼”. To add some texture to the white mat piece I placed it on my Simply Scored Scoring Tool with the 4″ edge along the top. Beginning at 1½”, I scored in each ⅛” groove creating 8 score lines. I will use the reverse side on the card.
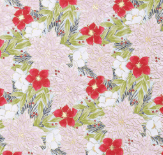
Using the Ornamental Christmas dies, I die cut the circle die from Traditions of Christmas DSP on my Stampin’ Cut & Emboss Machine. I cut the ornament topper from Gold Foil Sheets.
On a scrap strip of Basic White cardstock, I stamped Merry Christmas from the Gift of Joy stamp set with Real Red ink. In the set, the Christmas is paired with Happy. I simply cut the two words apart and substituted Merry on my Acrylic Block. If you prefer, you can keep it as Happy Christmas. I trimmed this down and flagged the ends with my scissors.
I adhered the topper to the circle using my favorite adhesive (Multipurpose Liquid Glue or Stampin’ Seal). If you use the wet glue, use it sparingly so that it doesn’t seep through the slits that the die cuts. The tape runner doesn’t have this issue.

I adhered my white mat to my card base, making sure my score lines had the bumpy side facing up. The lines are difficult to see in the photo, but they are there!
I adhered my ornament, centered on the card. With a Mini Glue Dot, I added a bow made from Gold Striped Mesh Ribbon.
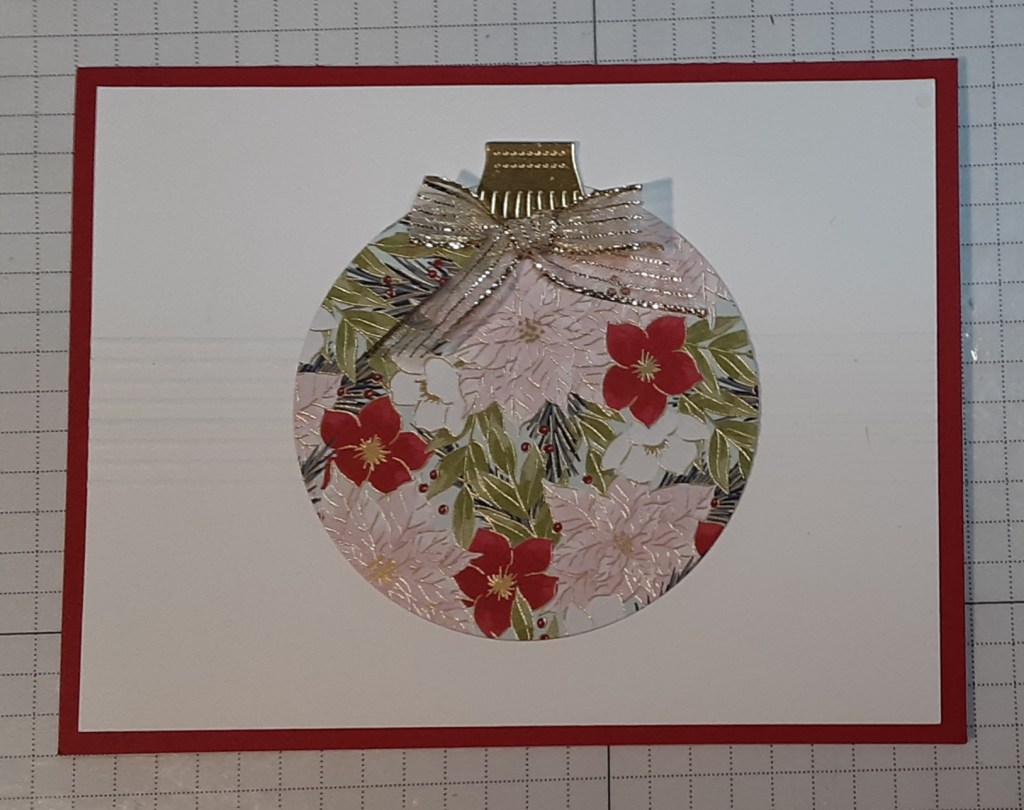
With Stampin’ Dimensionals, I adhered my sentiment. I wanted my gems to be red, so I took a Real Red Stampin’ Blend and colored three Rhinestones. You can make your rhinestones any color you want with Stampin’ Blends.

I added my gems to the card and the front was complete.
To finish the card, I stamped a greeting on a 4” x 5¼” piece of Basic White cardstock and glued it inside the card.
I hope you liked this card!
For the complete supply list, click here.
For further inspiration using Traditions of Christmas DSP:

