With Halloween in the rearview mirror, we are rapidly approaching the whirl of the holiday season. With less than a month between Thanksgiving and Christmas this year, time will seem to flash by. Before you know it, we’ll be in a new year. Today’s card features the Tractor & Co bundle that we used in October, but this time it has a holiday vibe. When I see this card, it reminds me of my childhood when we would take a Saturday and travel to a tree farm in Indiana to find the perfect tree. My parents made this an event by inviting other friends with families to join in the fun and then have a meal at our house. We always looked forward to it. Marilyn here with another card.
To make the card base, I cut a piece of Night of Navy cardstock to 5½” x 8½” on my Paper Trimmer, scored and folded at 4¼”, and burnished with my Bone Folder. I cut a piece of Garden Green cardstock to 4” x 5¼” and a piece of Basic White cardstock to 3¾” x 5”. I cut a piece of Peaceful Pines DSP to 2½” x 5”. I thought this piece looked like a cloudy sky.

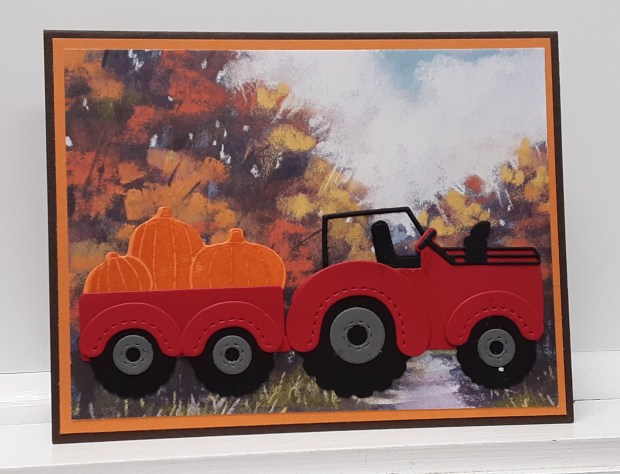
With the Tractor & Co bundle, I die cut the tractor and wagon pieces on my Stampin’ Cut & Emboss Machine. From Basic Black cardstock I cut both sets of tires, tractor seat, and frame. I was able to die cut almost all the pieces in one pass, though I did need to cut two additional smaller tires.

From Real Red cardstock, I cut the body of the tractor and the trailer, and the fenders. I cut two additional smaller fenders.

From Smoky Slate cardstock I cut the wheel hubs.

I stamped the trees from Tractor & Co bundle with Garden Green ink on a scrap of Garden Green cardstock. I cut this out with the coordinating die. You could save a little paper and cut it from the center of the mat piece. This also helps reduce bulk from your card. Now I had all the pieces and could assemble the card.
I began assembling the tractor by adhering the frame, seat, and front piece to my tractor base with my favorite adhesive (Multipurpose Liquid Glue or Stampin’ Seal). You could also use Adhesive Sheets before die cutting.
I adhered the gray hubs to the black tires. I adhered the larger tire to the left side of the tractor body. I glued the smaller tire to the right side. I added the fenders. I repeated this with the trailer. I added the trees to the trailer.
I glued my green mat piece to my card base.
I stamped Happy Holidays in Garden Green ink along the bottom of the Basic White piece. This stamp is from an older retired set. You could use Celebrate the Season from the Delicate Pines bundle or whatever you have in your stash. I adhered this to my card base.
I added the DSP piece. I adhered the tractor and trailer together to the card.
To add some sparkle, you could brush on some Wink of Stella to the white portion of the card.
To finish the card, I stamped a greeting on a 4″ x 5¼” piece of Basic White cardstock and glued this inside the card.
I hope you liked this card!
For the complete supply list, click here.
For further inspiration: