

It’s Wednesday and I feel like I can really let my hair down and show you something fun and different! Today’s card does just that. But don’t worry, I have detailed instructions and plenty of pictures to show you the steps to make this pretty and unique card. It folds flap to fit in an envelope but stands up nicely on its own. You could easily change the focal image and sentiment to make this a wedding card. I hope you give it a try!
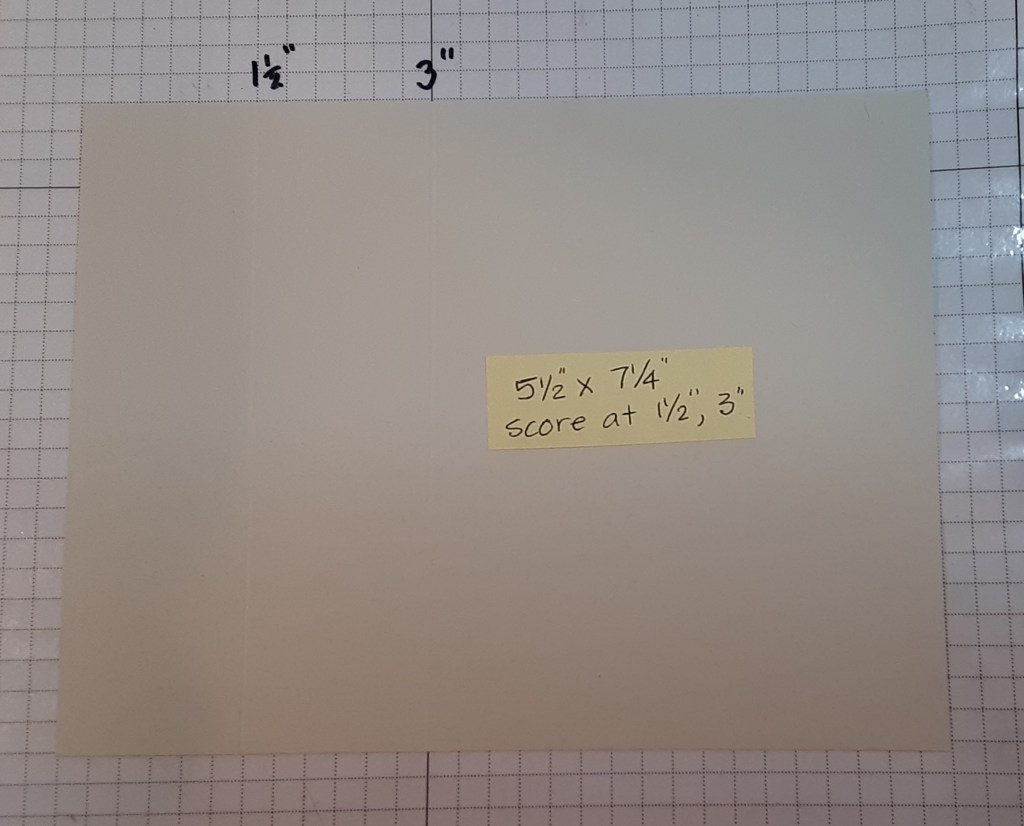
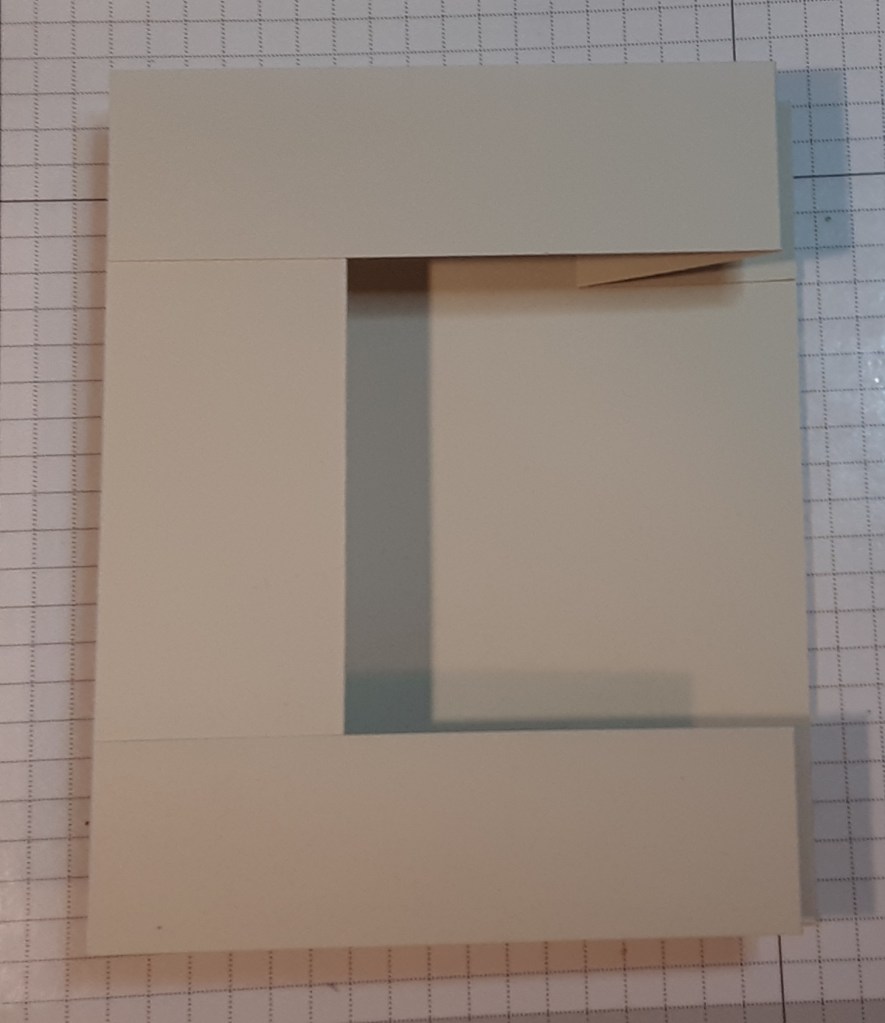
To make the card base, I cut a piece of Basic Beige cardstock to 5½” x 7¼” on my Paper Trimmer and scored at 1½” and 3″ on the 7¼” edge. This is different from our standard A2 card, but it will end up being A2 sized. I folded in at the 3″ score line and out at 1½” for a Z fold card. I burnished the folds with my Bone Folder.
I cut another piece of Basic Beige cardstock to 5″ x 7¼”, again scored 1½” and 3″.
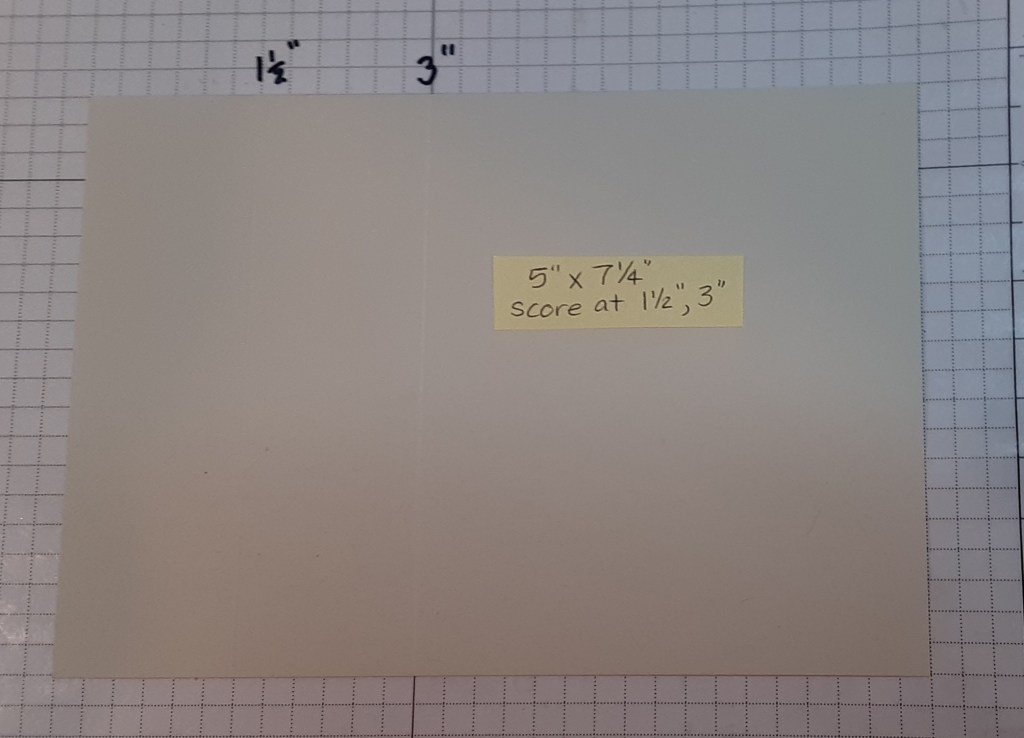
I folded the second piece along the score lines; I folded in on the 3″ line and out at the 1½” line for a Z fold and reinforced the folds with my Bone Folder. This will ensure that all my pieces will have consistent fold lines. I cut four strips 1¼” x 5½” from this piece.
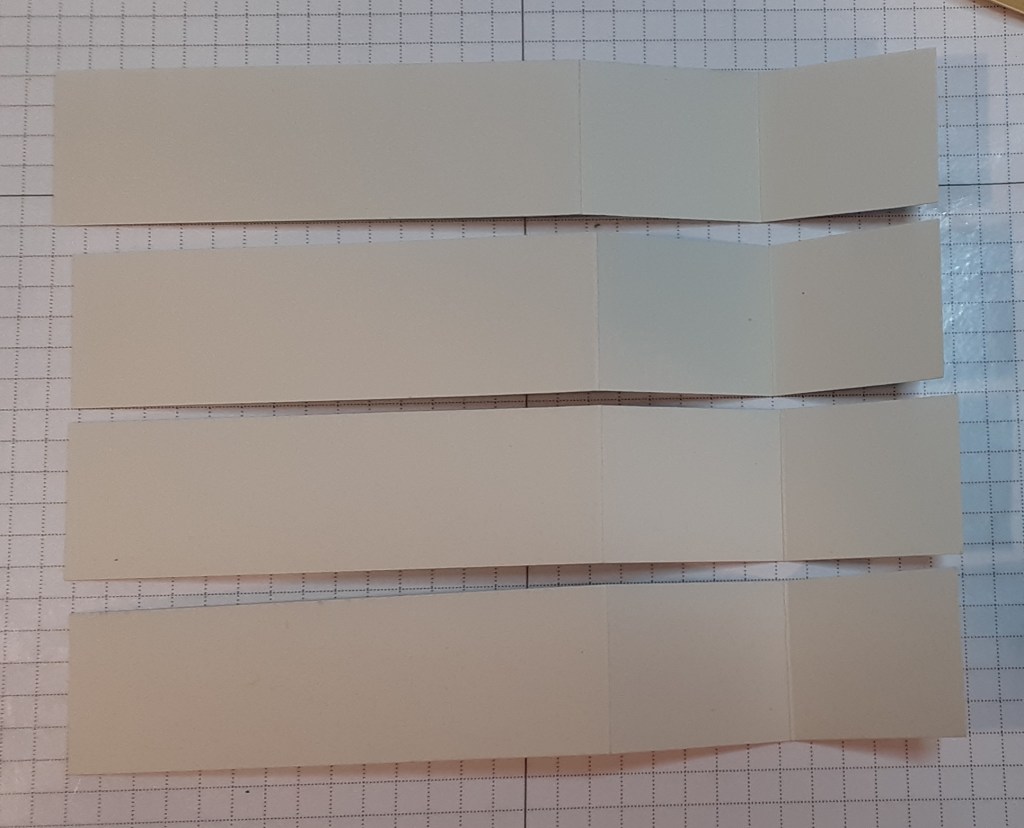
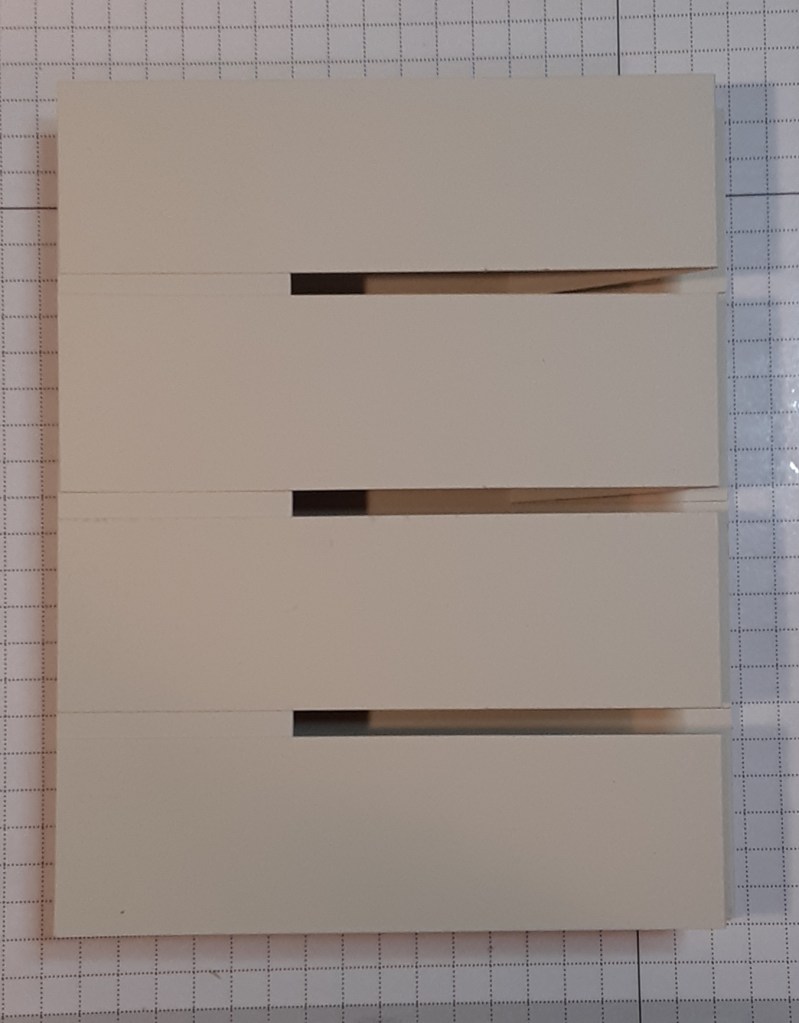
To assemble my card base, I added the strips to the card, starting with the one at the top. I flipped the strip over and applied my favorite adhesive (Multipurpose Liquid Glue or Stampin’ Seal) where the ends would come into contact with the base. I turned my strip over and adhered it to my card base.
Repeat this for the strip at the bottom of the card.
Line up the strips in the middle before adhering to keep the spacing even.
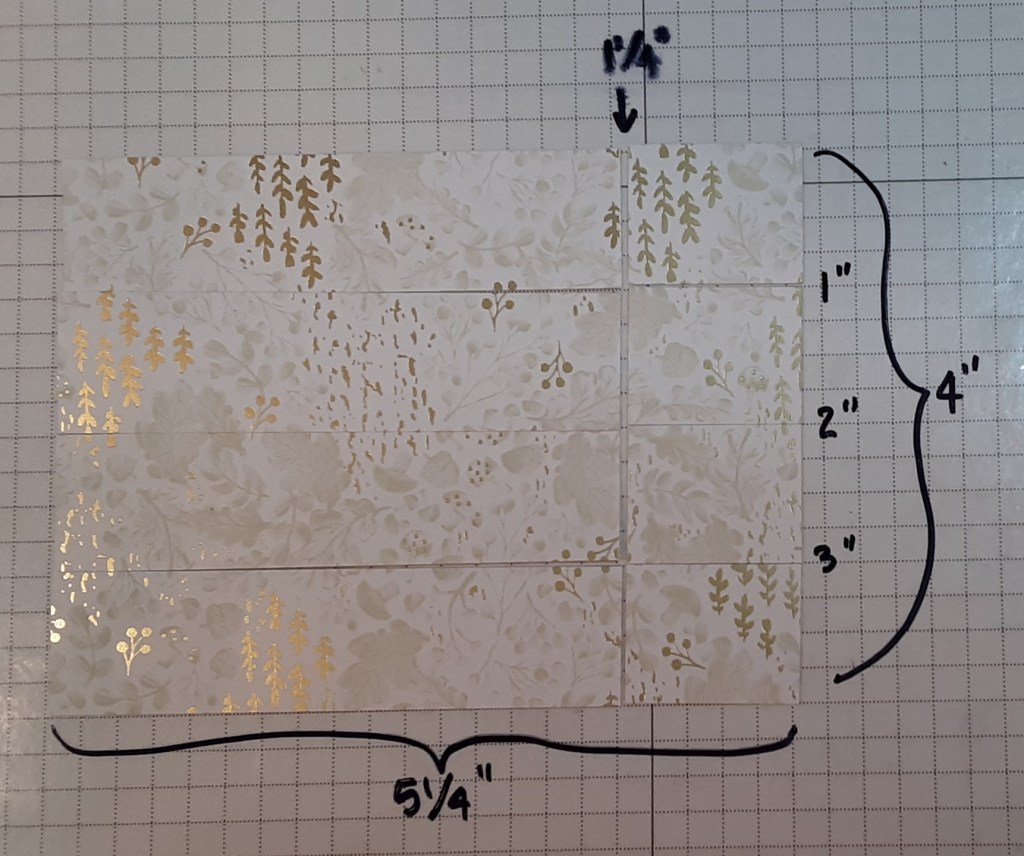
To add the DSP, I cut a piece of Gathering Together Specialty DSP to 4″ x 5¼”. I cut this into four 1″ x 5¼” strips. I cut 1¼” off the right ends of the strips. You can keep the pieces in order for a continuous pattern or randomly apply. The pattern that I used didn’t necessarily need to be kept in order.
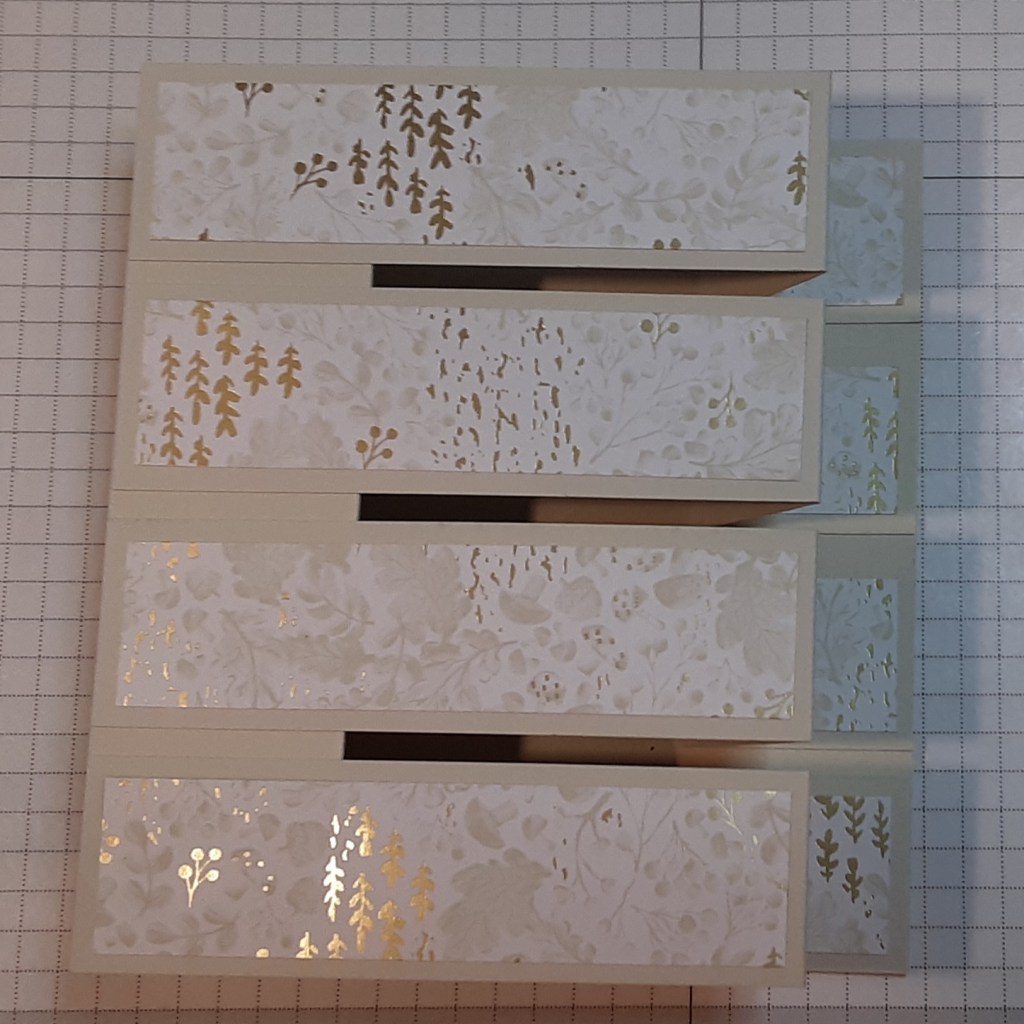
I adhered the strips to the slats on my card, keeping the pieces in order.
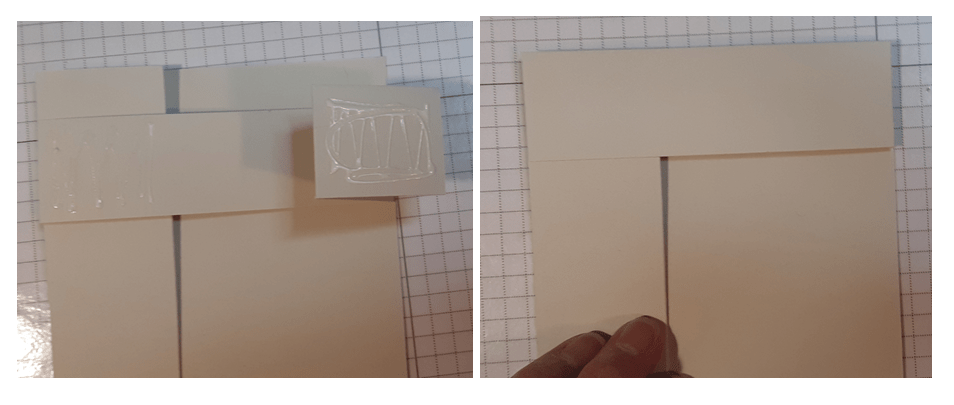
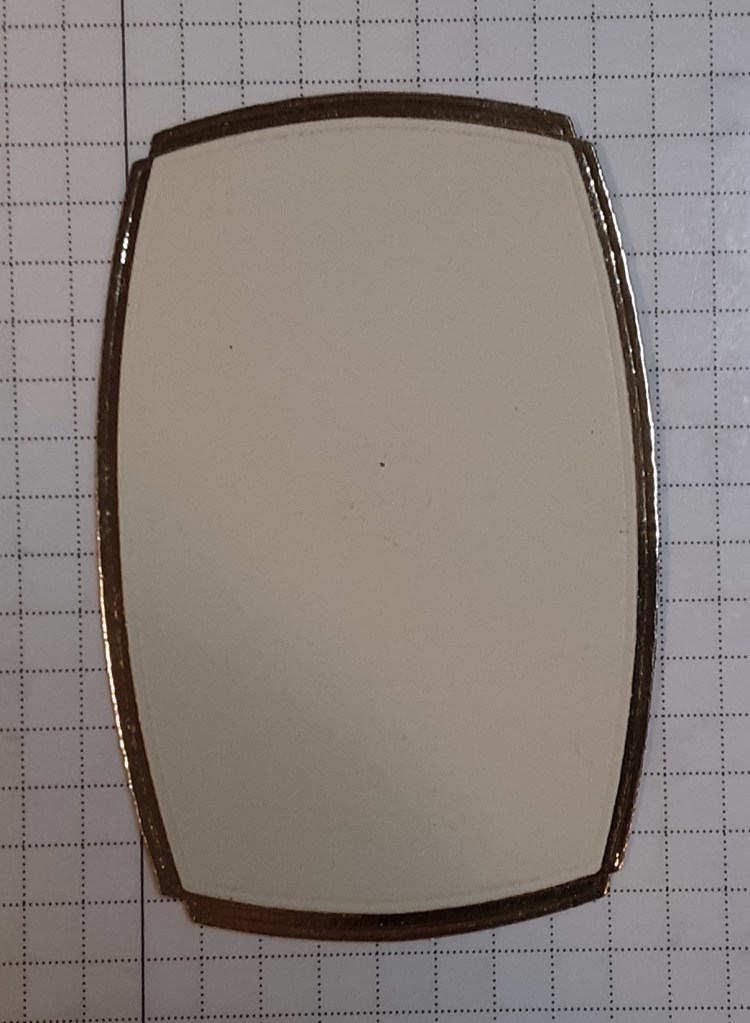
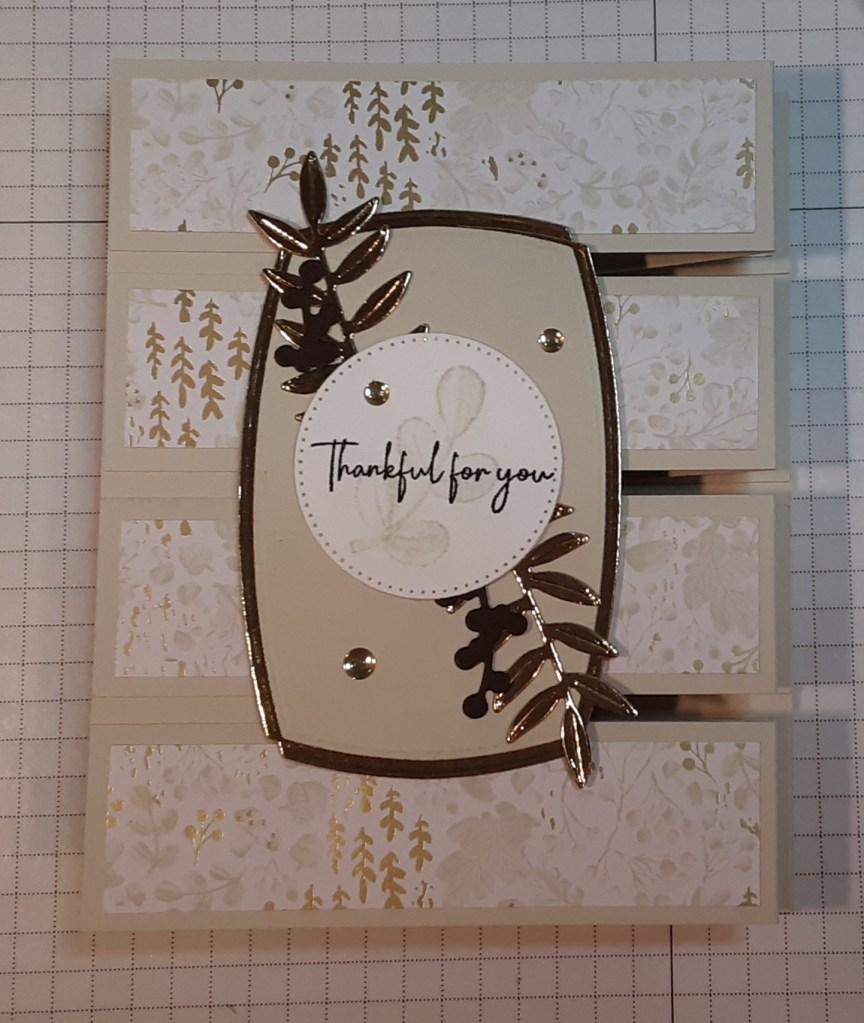
To make the focal image, I die cut the label from Label Me Grateful dies from Basic Beige cardstock on my Stampin’ Cut & Emboss Machine. I cut two additional labels from Gold Foil Sheets with the addition of the sprig from Label Me Grateful dies. The picture below shows how I cut the two dies simultaneously. I did this twice. I cut one of the labels in half horizontally and one vertically. I adhered the Basic Beige piece to the gold foil on the long sides.
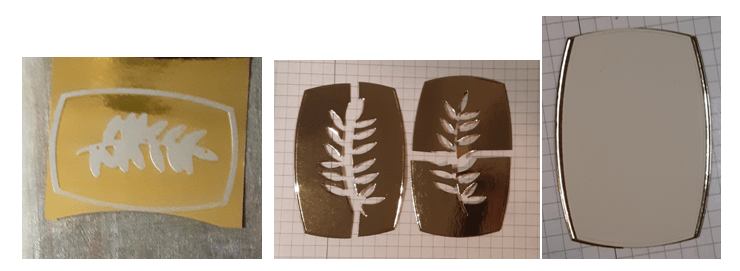
I added the two shorter sides to complete the mat. There are little notches at the corner of the gold.
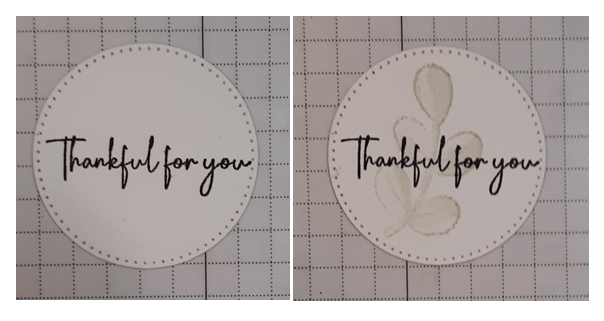
I die cut a circle in Basic White cardstock from the Stylish Shapes dies. I stamped Thankful for you from Gathering Moments stamp set in Early Espresso ink on the circle. I stamped a leaf from the stamp set with Basic Beige ink that I stamped off once over the sentiment. Stamping off gives a lighter version of the image and doesn’t overpower the sentiment.
I die cut two sprigs with Label Me Grateful dies from Early Espresso cardstock. I adhered these to the back of my circle label with tape runner. I also added the gold sprigs behind them. I adhered this arrangement to my label.
I adhered this to my card base, being careful not to put adhesive where there are gaps in the card front. I just flipped the label over and put adhesive where the slats were.
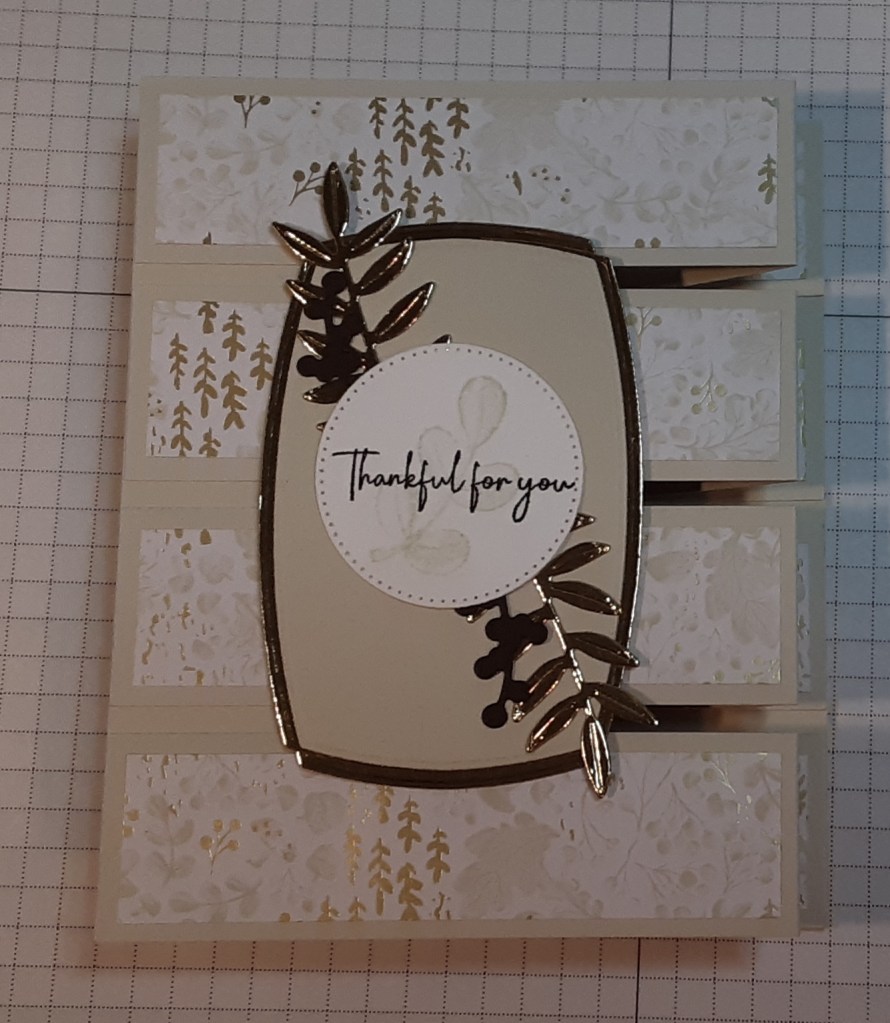
For a bit more shine, I added three Low Profile Dots.
To finish the card, I added a 4″ x 5¼” piece of Basic White cardstock to the back of the card to accommodate my greeting.
I hope you liked this card!
For the complete supply list, click here.
