Today I have another fun Halloween card using some of the same supplies I’ve used before. I call that more bang for your buck. Who wouldn’t want to receive this cute card? This card was inspired by Pam Beam, one of Terry’s downline. You can follow the design or tweak it to make it your own. It looks complicated, but in fact, it isn’t too tricky. I’m here to show you how.
Before we jump in, I wanted to let you know that Stampin’ Up! is having a Kits Collection Sale through today! Sara Douglas used the Handmade and Heartfelt Kit during her presentation Saturday on World Card Making Day. You may also want to check out the updated Last Chance list. These products are only available while supplies last.

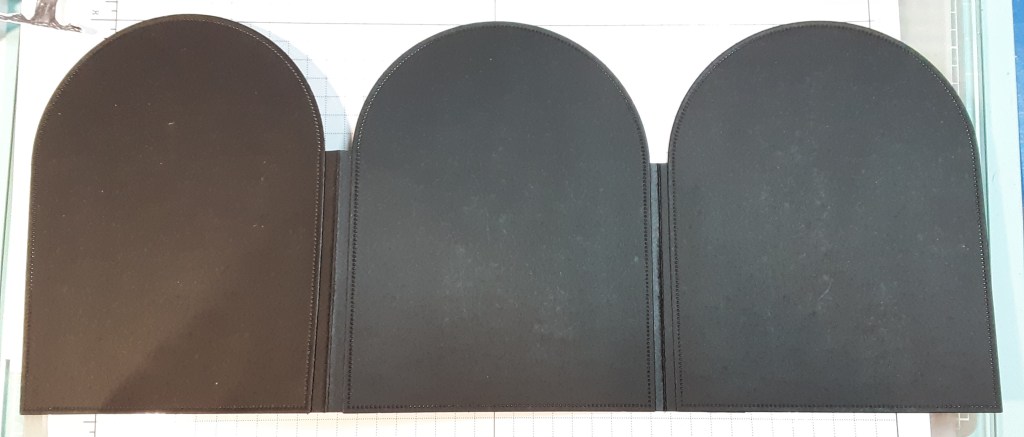
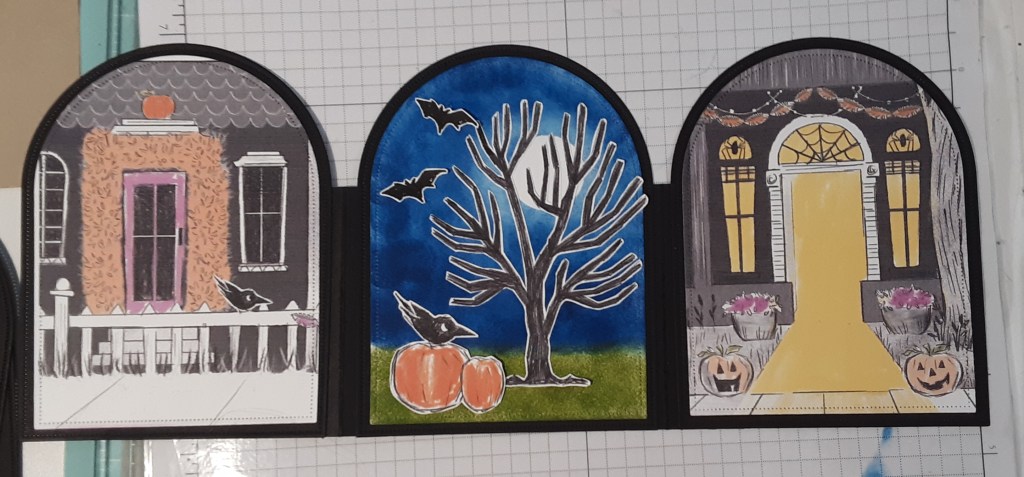
Now on to the card. To make the card base, I cut three pieces of Basic Black cardstock to 4¼” x 5½” on my Paper Trimmer. I die cut these with the largest arch in the Everyday Arches die set on my Stampin’ Cut and Emboss Machine. I cut two pieces of Basic Black cardstock to 2″ x 3¼” and scored them in the middle long ways at 1″, folded and burnished with my Bone Folder. These will be my hinges. An alternative would be to cut a piece of Basic Black cardstock to 3¼” x 8½”, scored at 2⅛” from either end of the strip. This will leave a 4¼” panel in the middle. The long strip eliminates measuring where to put your arches.
To make the trifold, I used my Grid Paper to determine the width of my center panel. I wanted it to be 4¼” wide to make an A2 card size. With the folds facing out, I temporarily taped the hinges down on my Grid Paper so the folded edges were 4¼” apart. If you opted for the strip, the center arch is centered in the 4¼” section in the middle.

I adhered my first arch (be mindful that the die cut stitching on the arch is facing up) to my hinges with my favorite adhesive (Multipurpose Liquid Glue or Stampin’ Seal), making sure to center it between the folds and flush with the bottom of the strips. If you use the longer strip, make sure the bottom of the arch is flush with the bottom of the strip or it could end up wonky. The hinges will be on the back of the panel. Bend the left hinge to the back and the right one to the front.

Now that I had my center panel established, I flipped it over and applied adhesive to the hinge on the right side.

I lined up my second arch with the stitching facing up and adhered it. This will be the front panel of the card. Next, I flipped the card over again and unfolded the second hinge. Once again, I lined up my last arch with the center arch with right sides facing each other, added some adhesive to the hinge, folded it toward the panel, and adhered it. The panels will form a backwards Z. Now I have my card base ready for decorating.
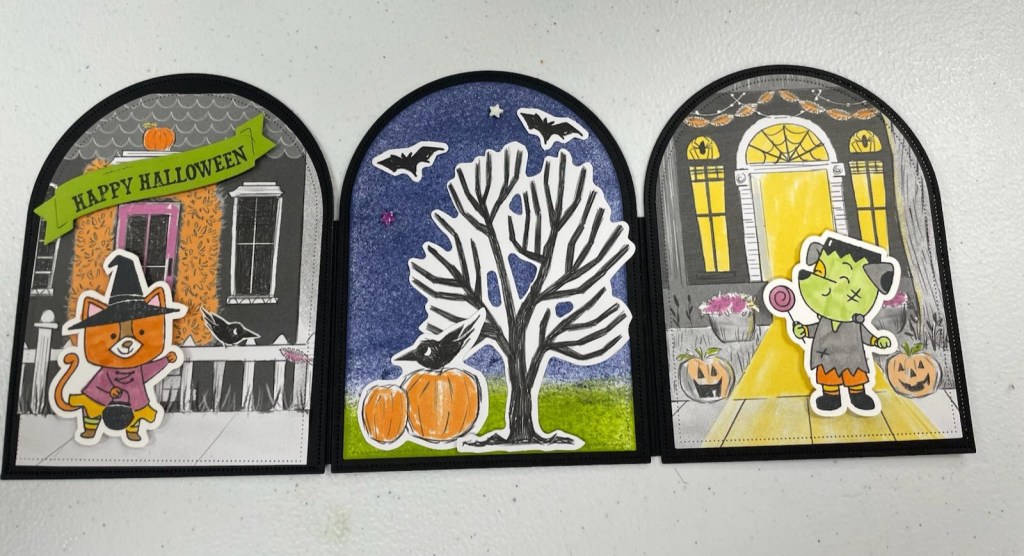
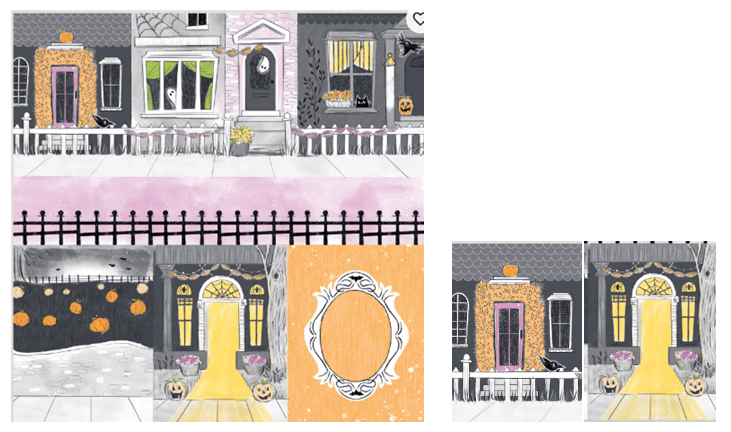
With the Spooky Sweet DSP, I chose two panels from the sheet. I ran these through my die machine with the second largest arch. Some of the image will be cut off. I added these arches to the first and last panels of my card.
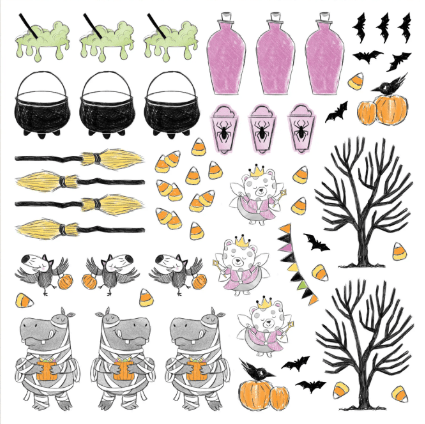
I popped the tree, two bats, and the pumpkin with the crow from the precut image sheet. There are several cute images to choose from. I didn’t want as much white space around my images, so I trimmed them down a bit. That was just my personal preference. You could leave them as is.
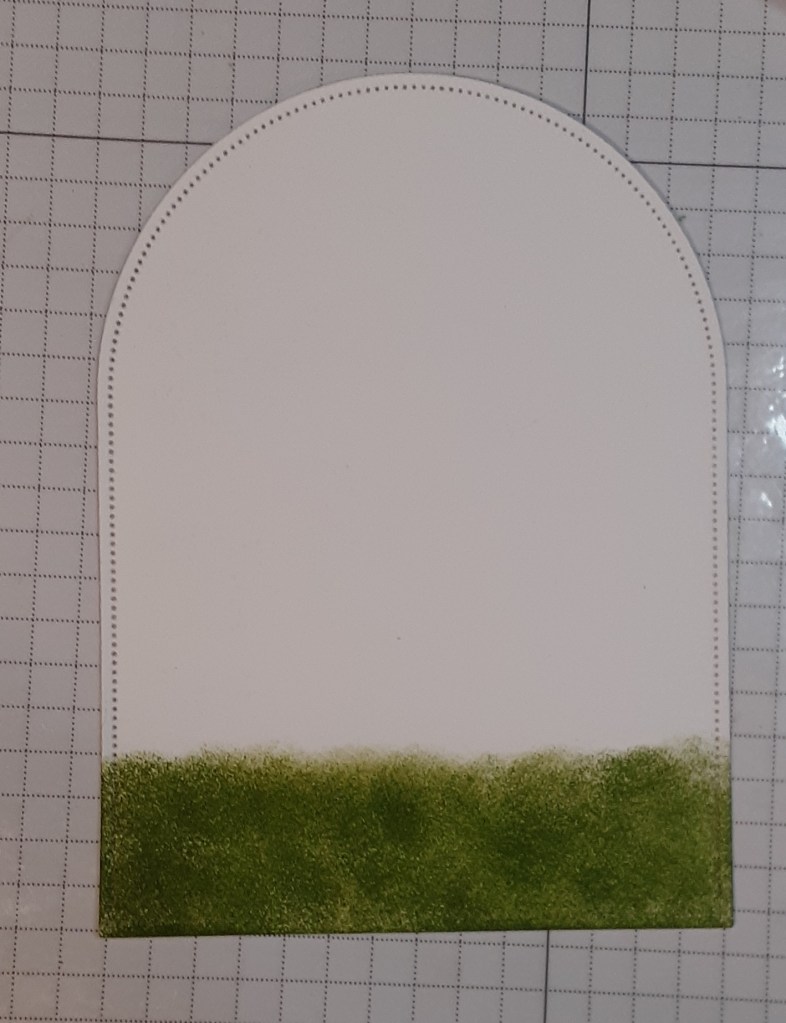
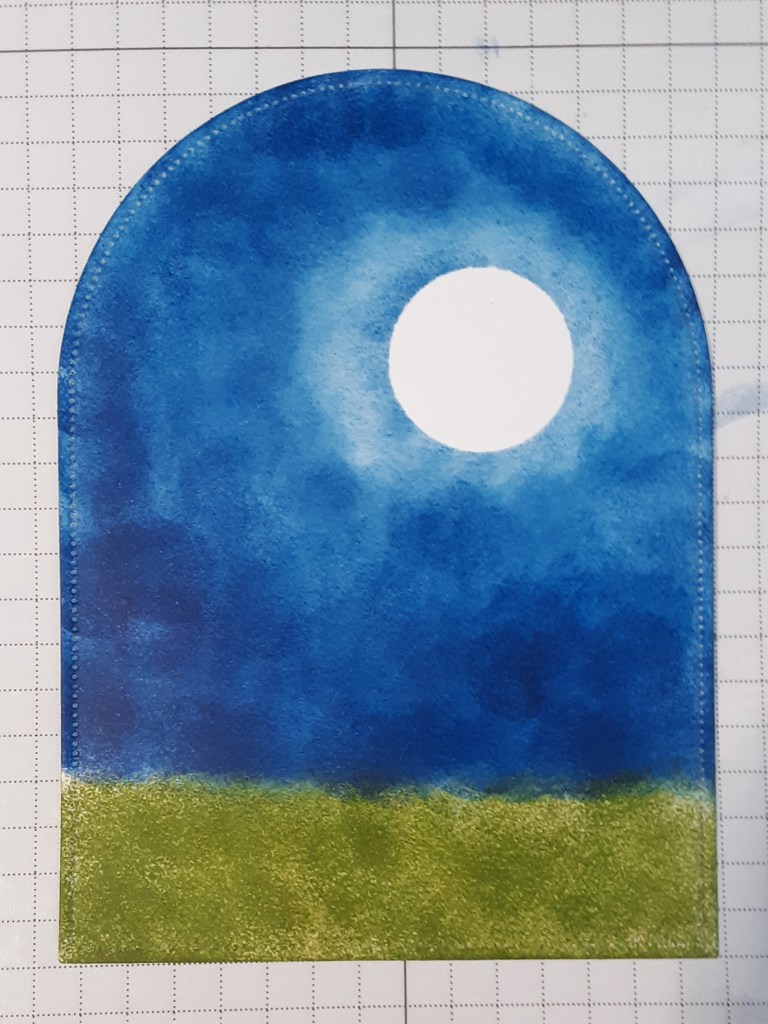
I cut the second largest arch from Basic White cardstock. To this is used a Sponge Dauber to add Granny Apple Green ink as a ground to the bottom inch. You could also use a Blending Brush if you prefer.
I punched a 1″ circle from Masking Paper and put it where I wanted a full moon to be. I added Blueberry Bushel ink with a Sponge Dauber, with heavier concentrations toward the edges. I did just lightly add some ink around my masked circle for the moon’s glow.

When I removed the masking paper, I had the perfect full moon.
I added the final arch to my card base.
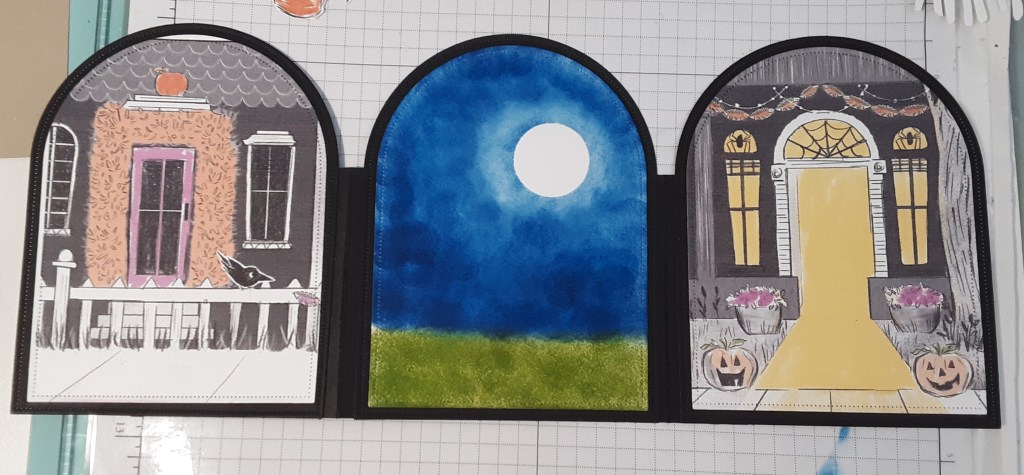
I adhered the tree, bats, and pumpkin with crow to my middle panel.
I stamped the trick or treaters from the Spooky Halloween bundle on Basic White cardstock with Momento Tuxedo Black ink. I colored the images in with Stampin’ Blends: Granny Apple Green, Petunia Pop, Bubble Bath, Crumb Cake, Pumpkin Pie, and Pecan Pie. I die the images out with the coordinating dies. I added these to my card. I popped up the image on the front of the card with Stampin’ Dimensionals. I adhered the inner panel images flat to reduce bulk and help the card fold flat. You could also use the precut images for the trick or treaters.
I stamped Happy Halloween from the Fright Night bundle in Momento Tuxedo Black ink on Granny Apple Green cardstock and die cut it with the coordinating banner die. I adhered this on the front panel with Stampin’ Dimensionals.
For a bit of sparkle, I added Shimmer Star Foam Stickers to the various panels.
I hope you liked this fun card! What has been your favorite Halloween card? Leave a comment! I’d love to hear from you!
For the complete supply list, click here.