
Can you believe it is already September? The past year has really flown by. Marilyn here, and I have been working on Terry’s blog for a year now. As I mentioned on my last post, this is my blogiversary and I would like to celebrate! I have had a lot of fun writing this blog and sharing so many cards, over 100! I’m not going to lie, it has been a challenge at times, especially since I am technologically challenged. To help me celebrate, I would love for you to leave me a comment. From the comments, a random commentor will receive a $25. gift certificate to Terry’s Cards and Gifts Shop! Any purchase exceeding the $25. will be the winner’s responsibility. To post a comment, go to Contact Me on the bar at the top of the blog post. I would love to hear about your favorite card or technique, or you can let me know what you would like to see more of. I will announce the winner next Wednesday on my post. This is only open to residents of the United States.
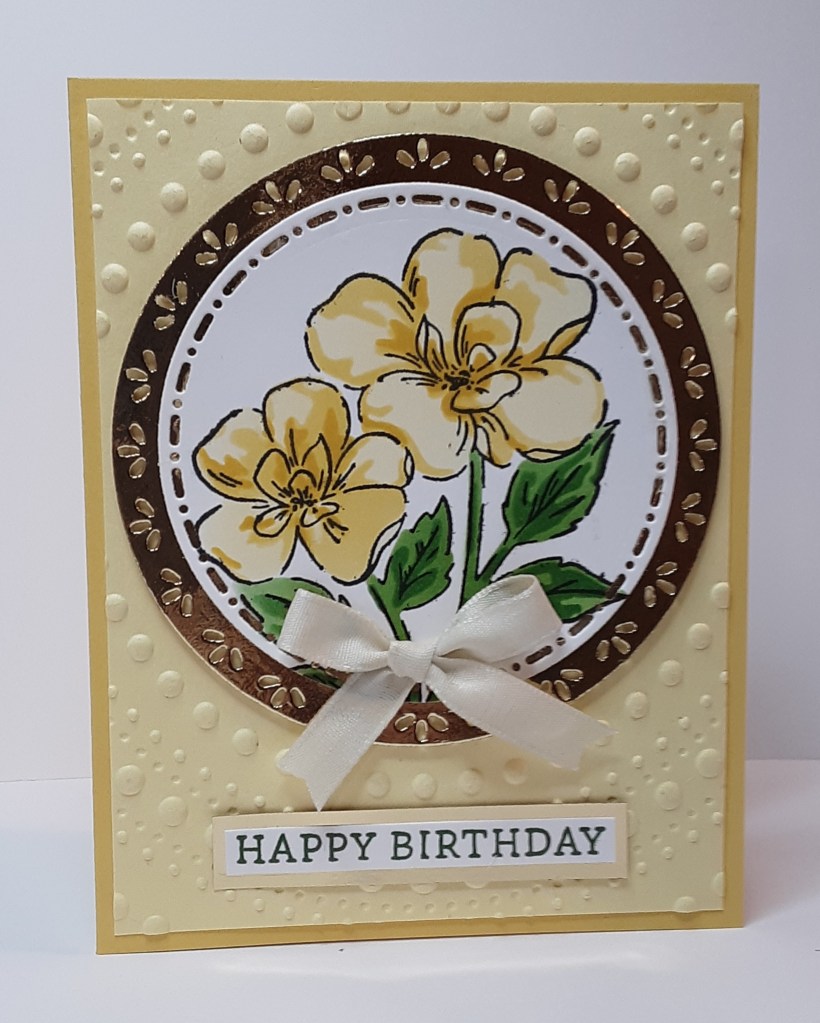
Today’s card uses the Thankful Garden bundle with the stamps and stencils. I ink blended the colors and I have a few tips for you.
To make the card base, I cut a piece of Daffodil Delight cardstock to 5½” x 8½” on my Paper Trimmer, scored and folded at 4¼”, and burnished with my Bone Folder. I cut a piece of Lemon Lolly cardstock to 4” x 5¼” and embossed this with my Dotted Circle 3D Embossing Folder on my Stampin’ Cut & Emboss Machine. I was careful to line the dots on my cardstock before running it through. I wanted my dots to be closer to the top of my matte. Hopefully you can see how I lined it up in the picture below. (I need a new phone. My kids tell me my camera is subpar.)

I adhered my embossed panel to my card base with my favorite adhesive (Multipurpose Liquid Glue or Stampin’ Seal).
I stamped the flowers from Thankful Garden stamp set in Momento Tuxedo Black Ink on a 4¼” x 5½” piece of Basic White cardstock. To color it in, I used the stencils that come in the Thankful Garden bundle, but you can order them separately if you prefer (here). The bundle has the stamps, dies, and stencils.
I put my cardstock on a sticky mat. I made my mat from a piece of the sticky mat for a Cricut machine. I cut my 12″ x 12″ mat into quarters to make it more manageable to use. You could use any sticky mat you have. I began with the #1t stencil and lined it up on my image. The stencils are numbered and make it easier to differentiate. It is easy to line up the petals on the stencil with the stamped petals. With my Blending Brush, I applied a light amount of Daffodil Delight ink. I actually have a brush dedicated to yellow ink in general and wiped most of the ink that was already on the brush on a piece of paper towel and then added it to my card. I just wanted a very light color for my base. The pictures show how the stencil lines up and after inking. Because of the way I stamped the flowers, there is a corner of my white cardstock showing. I used the plastic sheet from my mat to cover this so I wouldn’t get ink where I didn’t want it.

I used the #2 stencil and lined it up on the flower and applied more Daffodil Delight ink with my Blending Brush.

The third stencil is a little trickier to line up. It isn’t as obvious as to where it goes. I fiddled with it a bit and came up with a solution. The stencils stack on top of each other and the images line up perfectly when the corners are even. I stacked stencil #2 on top of stencil #3.
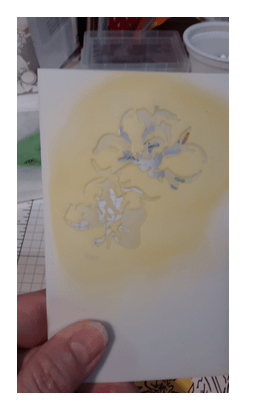
I then lined them up on the stamped image. I stuck the #3 stencil to my sticky mat and just lifted up stencil #2. As long as you keep them lined up, it will line up on your image perfectly. I applied a lot of Daffodil Delight ink to my Blending Brush to help the color stand out.

Next, I did my leaves in Garden Green ink. I used stencil #4 and applied ink with my Blending Brush after wiping excess ink on my paper towel. The stencil is fairly easy to line up, just be conscious of the stems and their positions.
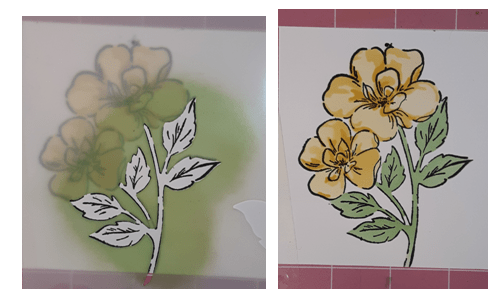
I added the final layer of Garden Green ink with stencil #5. Don’t go too heavy handed on this. I did initially and had to add a little more ink to my base layer. You can tap the extra ink off on a scrap paper or the stencil itself.
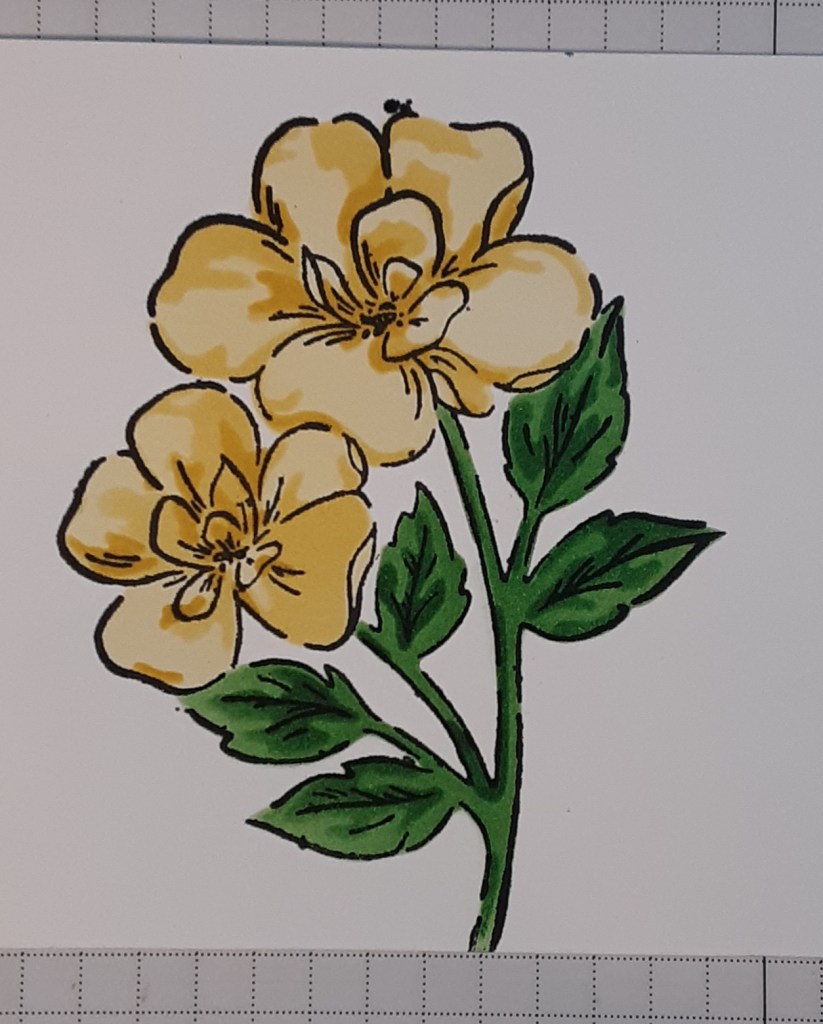
When the stenciling was completed, I die cut the image with my Spotlight on Nature dies. To remove the cardstock from the sticky mat, bend the mat away from the image piece. This reduces the amount of area the cardstock is in contact with the sticky mat and is easier to peel away without damaging it.

I die cut another circle from Gold Foil Sheets to matte my image on. Because I was using Foil Sheets, I did not use my Multipurpose Glue. It dries tacky and makes a mess on foil. I used Bearly Art glue.

I glued my focal image to the center of the embossed circles. I tied a bow with Basic Beige Classic Ribbon and adhered it to my focal image.
I stamped Happy Birthday from Simply Said stamp set with Garden Green ink. I trimmed it down and then matted it to a strip of Gold Foil Sheets. I added this to my card.
To finish the card, I stamped a sentiment on a 4” x 5¼” piece of Basic White cardstock and glued it inside my card.
I hope you liked this card! Don’t forget to leave me a comment!
For the complete supply list, click here.
