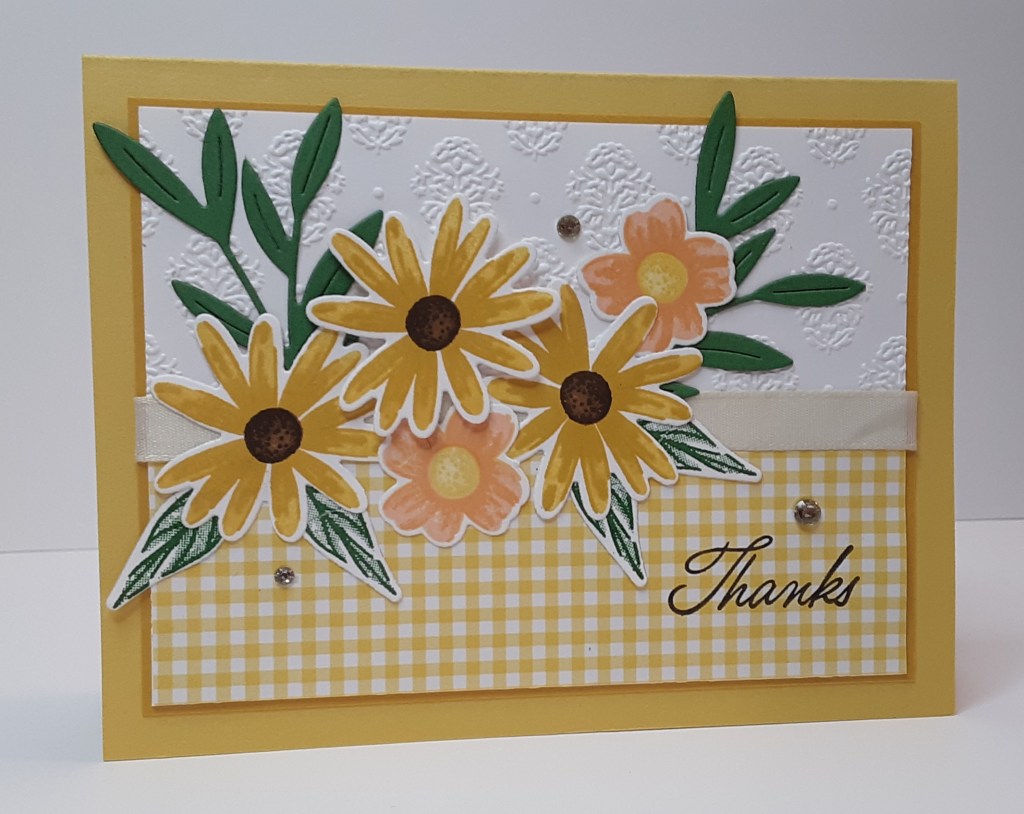
We are closing in on the end of August and most kids are back in school. Hopefully this frees up a few minutes in your day to craft! My kids are all grown and graduated so one would think I would have a lot of time for myself, but that doesn’t seem to be the case. I keep finding new things to occupy my time. I came up with this card as I thought about the end of summer and the colors of fall. It has a little of both! As an aside, all the supplies for this card have been previously used in a post. If you have been following me and ordering supplies, you will have everything you need!
Don’t forget that Stampin’ Up! is having their 15% off In Color sale on all 2025-2027 In Color products. There are more than you think: cardstock, ink, markers, DSP, embellishments, kits, etc. This sale is through August 31, 2025, so time is running out. Why pay full price later when you can get a discount today? Now on to the card.
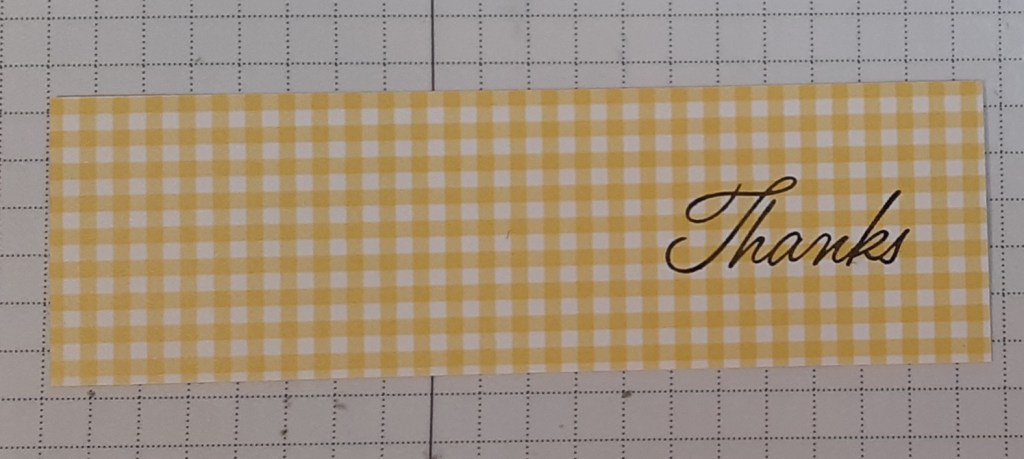
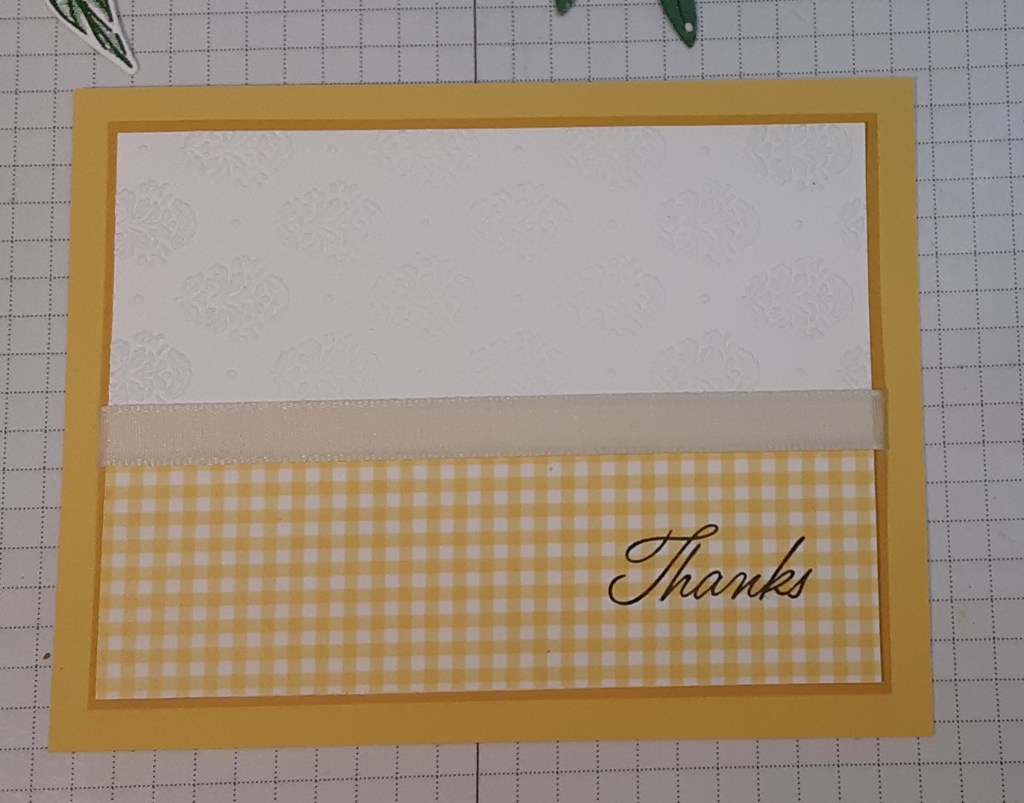
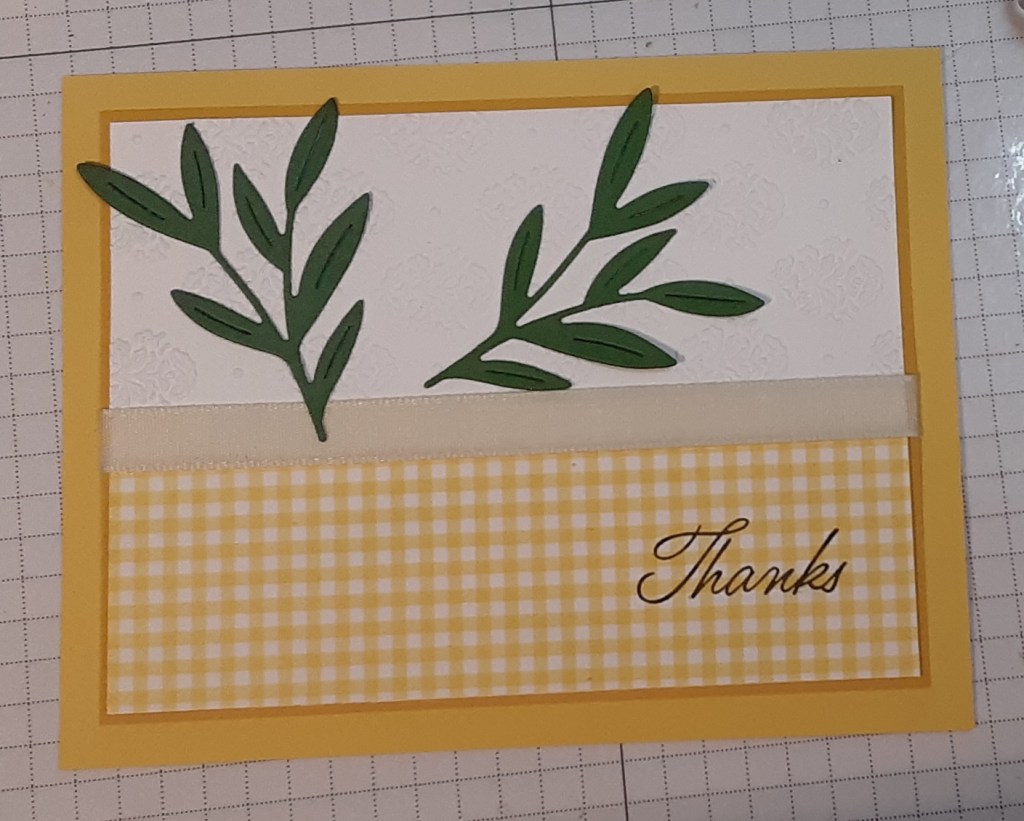
To make my card base, I cut a piece of Daffodil Delight cardstock to 5½” x 8½” on my Paper Trimmer, scored and folded at 4¼”, and burnished with my Bone Folder. I cut a piece of Crushed Curry cardstock to 3¾” x 5”. I cut a piece of Basic White cardstock to 3¾” x 5”, also. I ran this piece through my Damask Embossing Folder on my Stampin’ Cut & Emboss Machine using Base Plate 1 and two #3 Plates. I trimmed this piece down to 3⅝” x 4⅞” after embossing to ensure it was the correct size. I cut a 1½” x 4⅞” piece of Floral Delight DSP. I stamped Thanks from Impressions Abloom bundle on my DSP with Early Espresso ink.
I adhered the DSP to my embossed piece with my favorite adhesive (Multipurpose Liquid Glue or Stampin’ Seal). I adhered this panel to my Crushed Curry piece, leaving narrow borders.

I cut a piece of Basic Beige Classic Ribbon to about 6″ and used Mini Glue Dots to adhere the ribbon to my card along the edges of the DSP and the white cardstock meet. I put a glue dot on either end of the ribbon and adhered the ribbon to the back. This will not show on the completed card. I adhered this panel to my card base.
Next, I stamped the daisy-like detail image in Crushed Curry ink on Basic White cardstock. I stamped the solid daisy image with Daffodil Delight ink, lining up the various petals. I stamped the detail center image with Early Espresso ink and the solid image with Pecan Pie ink. I made three of these and cut them out with my dies.
I stamped two of the smallest flower from the set, starting with the solid image in Petal Pink ink. I stamped the detail image with Peach Pie ink. I stamped the centers with Daffodil Delight ink (detail) and Lemon Lolly ink (solid image). These were die cut.
I stamped the detailed image of the leaves in Garden Green ink. I didn’t follow this up with the solid image because I felt like the detail image looked good by itself. I made four of these. I die cut these out, also.
I cut the sprig of leaves from Pretty Florals die set with Garden Green cardstock. I glued these to my card. I let the leaves go beyond the confines of my panel, but not the card base.
Next, I added two of my daisy-like flowers. I used glue and had them lying flat on the card. I tucked the leaves under the petal and glued them in place.

I added my Petal Pink flowers to the card.
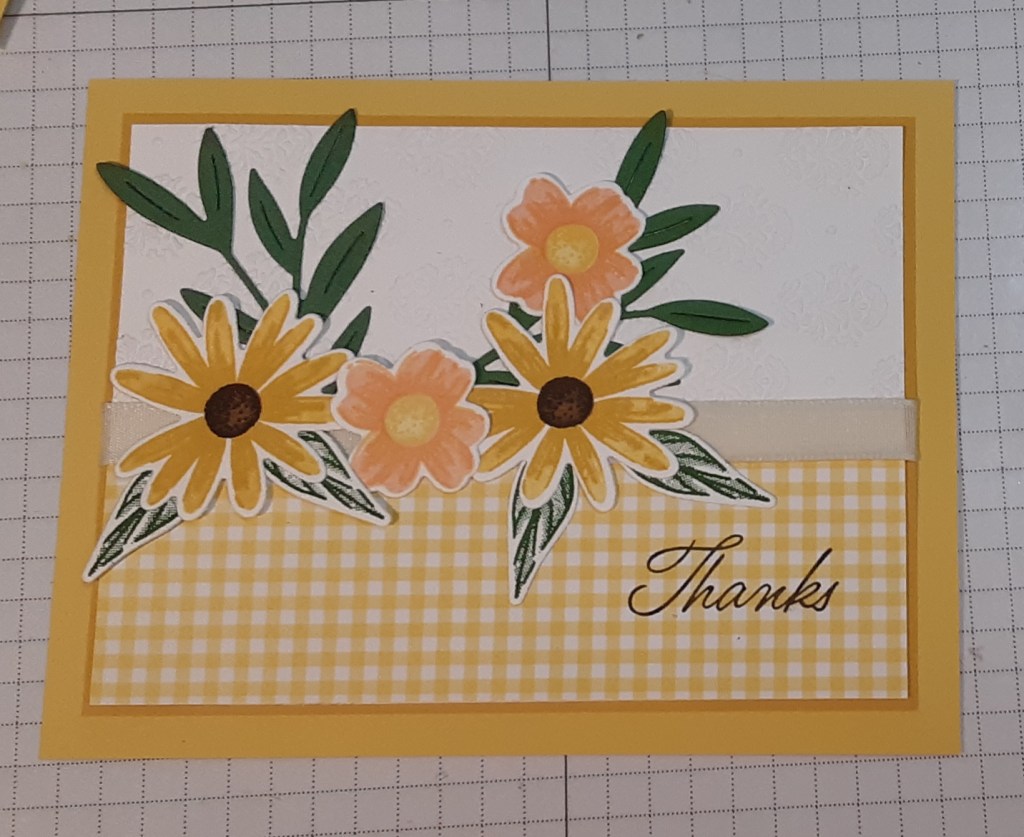
Lastly, I added the final daisy-like flower with Stampin’ Dimensionals.
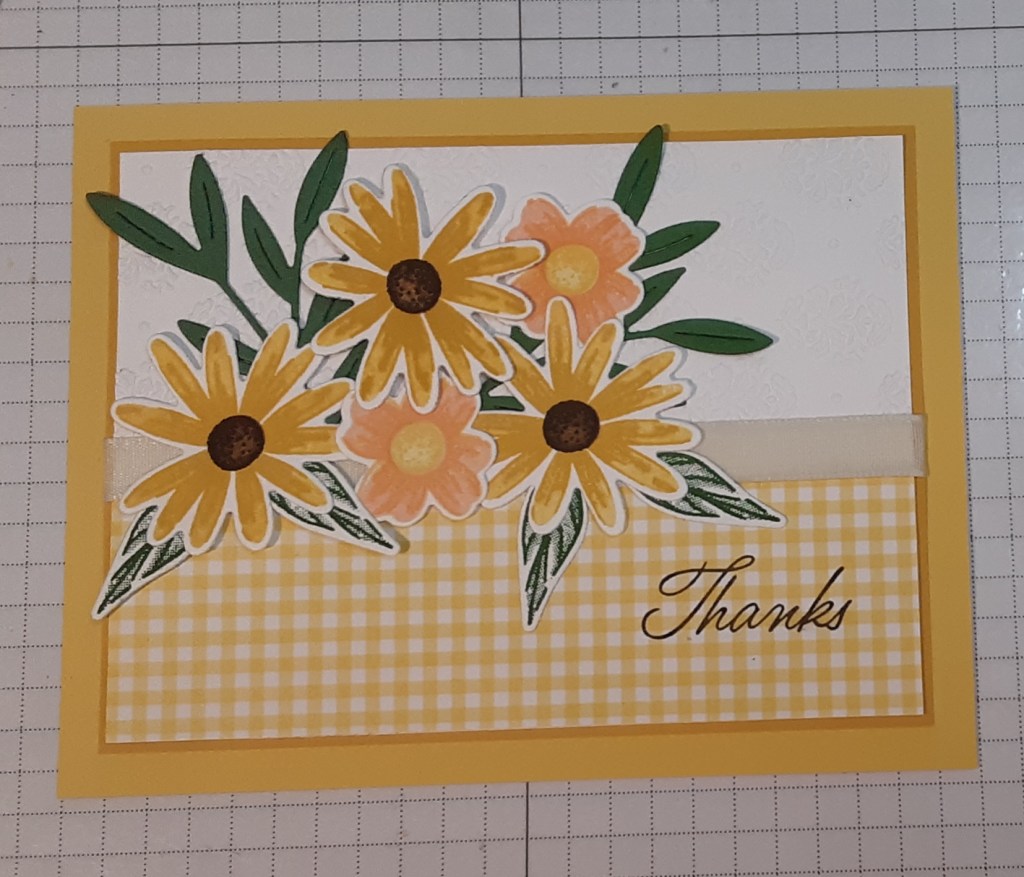
To give the card a little sparkle, I added three Rhinestone gems.
To finish the card, I added a 4” x 5¼” piece of Basic White cardstock inside my card for my personal message.
I hope you liked this card!
For the complete supply list, click here.
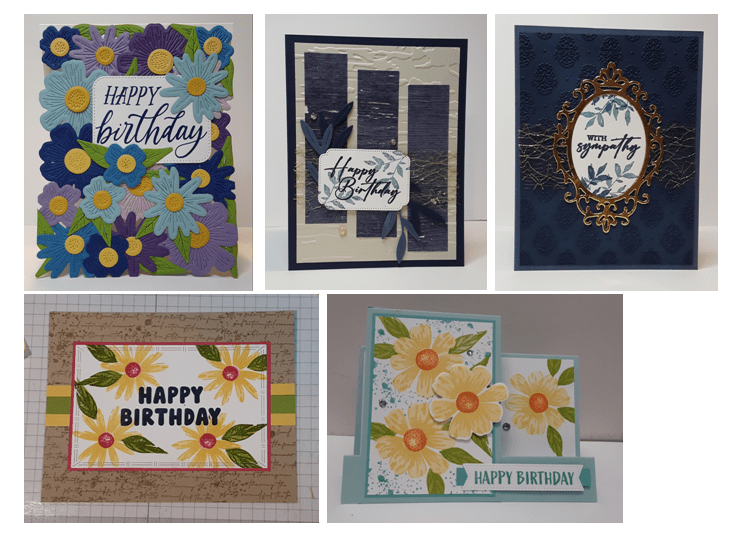
Here are a few projects I made using some of the same products.