
It seems I have needed an increasing number of sympathy cards recently. So, I came up with this simple, yet elegant, card. I have used all of the supplies needed for this card previously, with the exception of the Damask Embossing Folder.
Do you have all the new In Colors? If not, beginning Tuesday, August 5, Stampin’ Up! is offering the new 025-2027 In Color cardstock, ink pads, refills, and DSP featuring the In Colors at a 15% discount! It’s time to stock up and save. This sale extends to August 31. Now let’s jump right in to making this card!
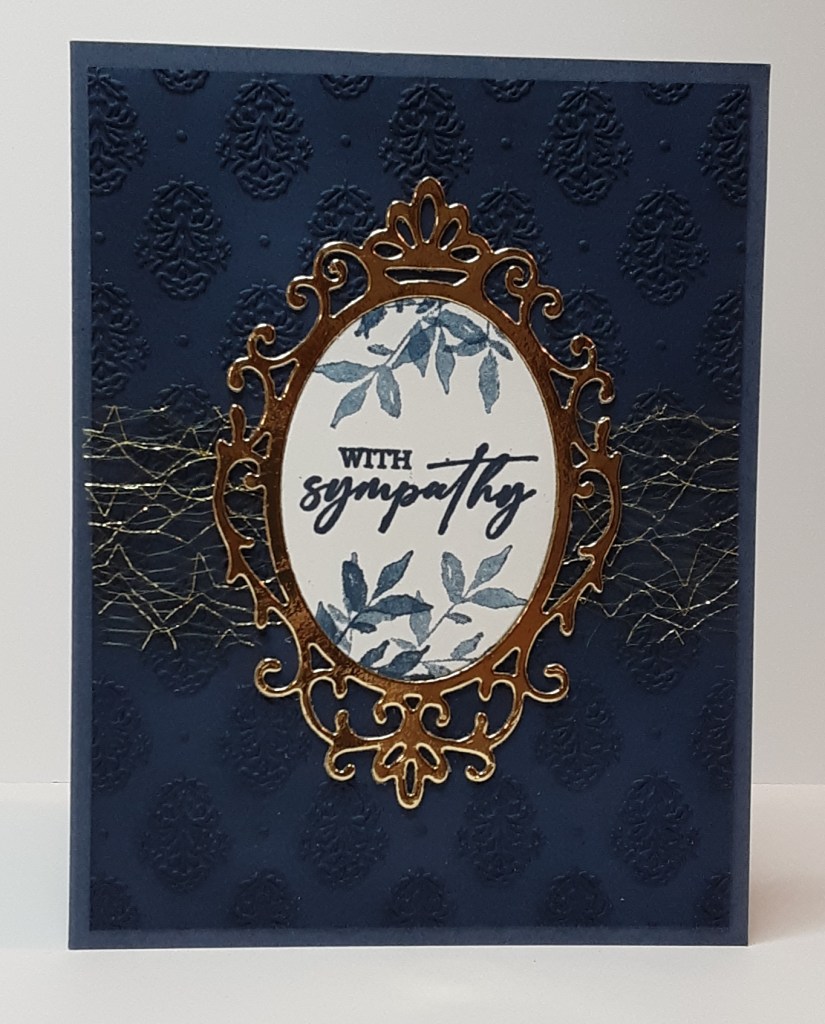
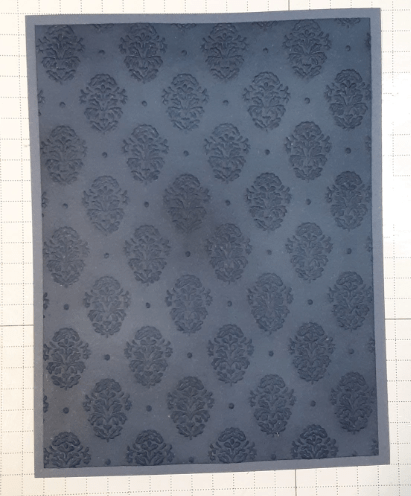
To make the card base, I cut a piece of Misty Moonlight cardstock to 5½” “x 8½” on my Paper Trimmer, scored and folded at 4¼”, and burnished with my Bone Folder. I cut an additional piece of Misty Moonlight cardstock to 4″ x 5¼”. I ran this through my Damask Embossing Folder on my Stampin’ Cut & Emboss Machine.
I die cut a frame from the Storybook Friends die set from Gold Foil Sheets. I cut an additional frame from Basic White cardstock. I used the white oval inside for my sentiment.

I stamped With Sympathy from the Unbounded Love stamp set with Misty Moonlight ink. I stamped the smaller leaf image from Textured Notes stamp set with stamped off once Misty Moonlight ink to fill most of the space above and below the sentiment. Then I stamped the leaf image again in full strength Misty Moonlight ink. Stamping off is a great way to achieve new colors without buying additional ink pads.
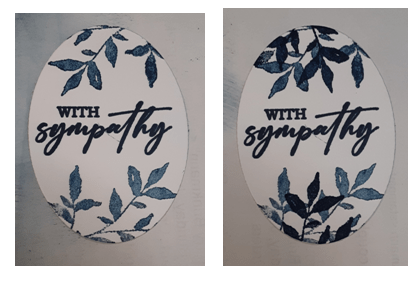
Next, I used a Blending Brush to add color (Misty Moonlight) to my damask embossed background. The ink really accentuates the embossed images. Below is a comparison with and without the ink blending. You can barely see the embossing on the first one.

I adhered my background piece to may card base using my favorite adhesive (Multipurpose Liquid Glue or Stampin’ Seal).
I cut a piece of Gold Open Weave Trim to 4″ and tacked it to the center of my card with a bit of tape runner. I only put the glue where it would be covered by my focal image.

I fit my white sentiment piece inside the frame and used a couple small pieces of Scotch tape to hold it. I also die cut another frame from the paper in a Stampin’ Dimensional pack and glued this to the back of my frame to give it a little support. I glued the frame down in the center of my card.
I’m not sure how the frame is supposed to go. From the way it was positioned on the website, the bolder, more ornate part is at the top. I had tried it both ways and I liked it better with the smaller filigree at the top. It seemed a little top heavy the other way. You can do it however you prefer.
To finish the card, I stamped a simple sentiment on a 4″ x 5¼” piece of Basic White cardstock and glued it inside the card.
I hope you liked this card! Hopefully you won’t need any sympathy cards and can change the sentiment to something more festive.
For the complete supply list, click here.
Below are some cards made with some of the same supplies that I used in this card. Directions for all of these cards can be found in my previous blog posts.

