Today I have a fun card using the Notes & Totes bundle. The card has a real beachy feel and with school starting soon, I couldn’t resist savoring the last few weeks of summer bliss. We made this card at one of Terry’s recent classes, but I decided to jazz it up a smidge. Using DSP really helps make the tote look more realistic. I think the caps on the different bottles should be different colors than the main part of the bottle, so I will show you how I did that.
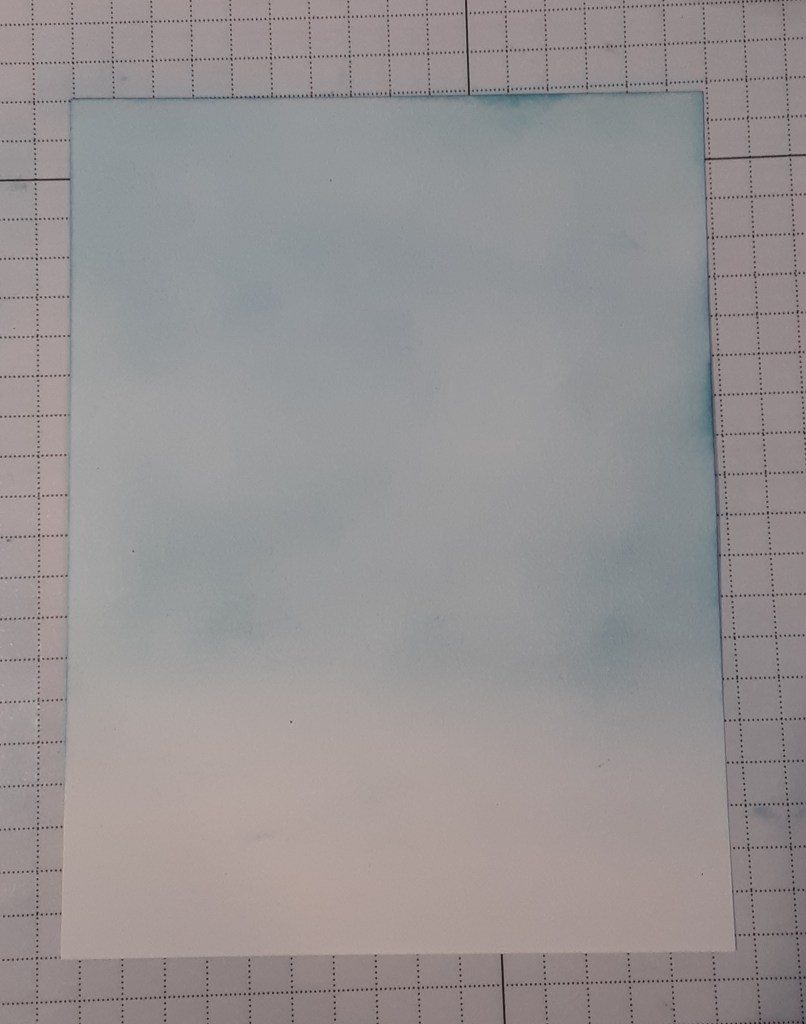
To make the card base, I cut a piece of Balmy Blue cardstock to 4 ¼” x 11″ on my Paper Trimmer, scored and folded at 5½”, and burnished with my Bone Folder. I cut a piece of Basic White cardstock to 4″ x 5¼”. I cut a piece of Basic Beige cardstock to 4″ x 2¼”.
With the white piece, I added Balmy Blue ink with a Blending Brush.
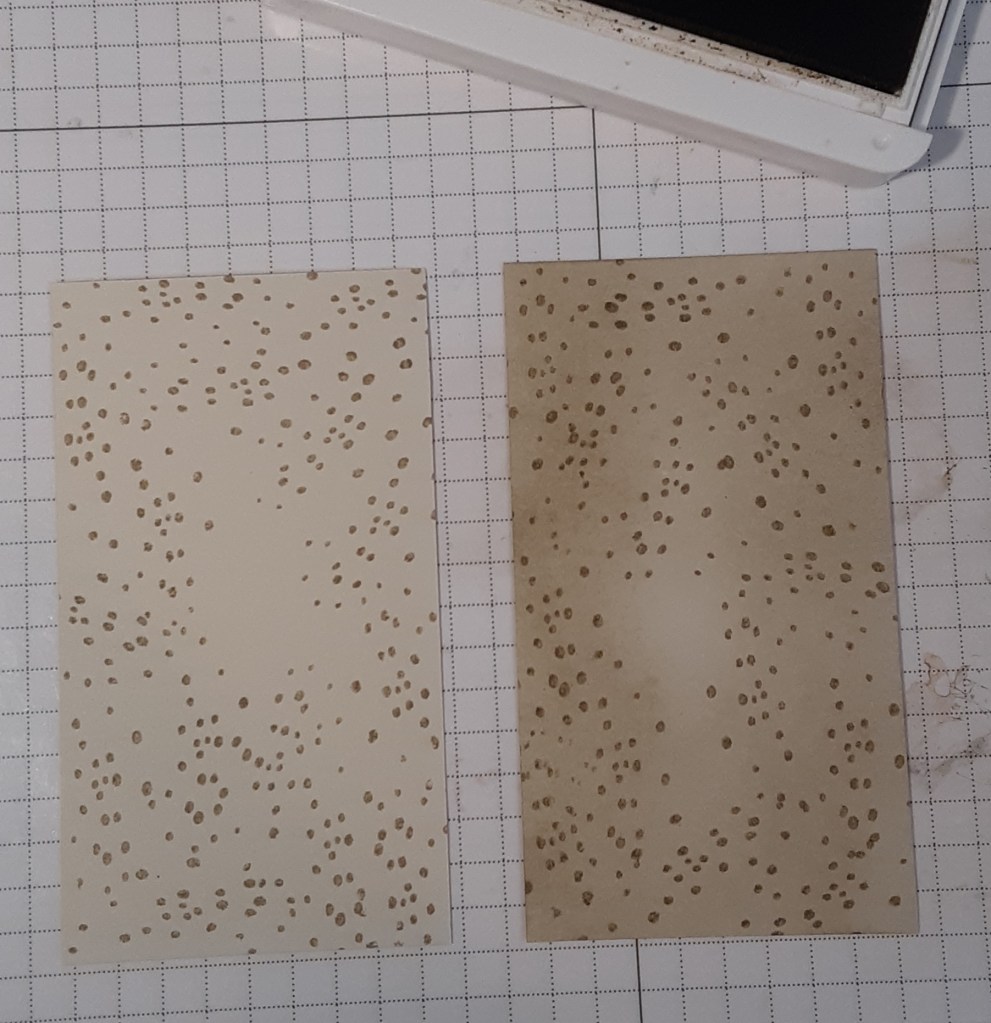
I stamped the spatter stamp with Crumb Cake ink on the Basic Beige piece.
I used a blending brush to add Crumb Cake ink to the edges of the piece.
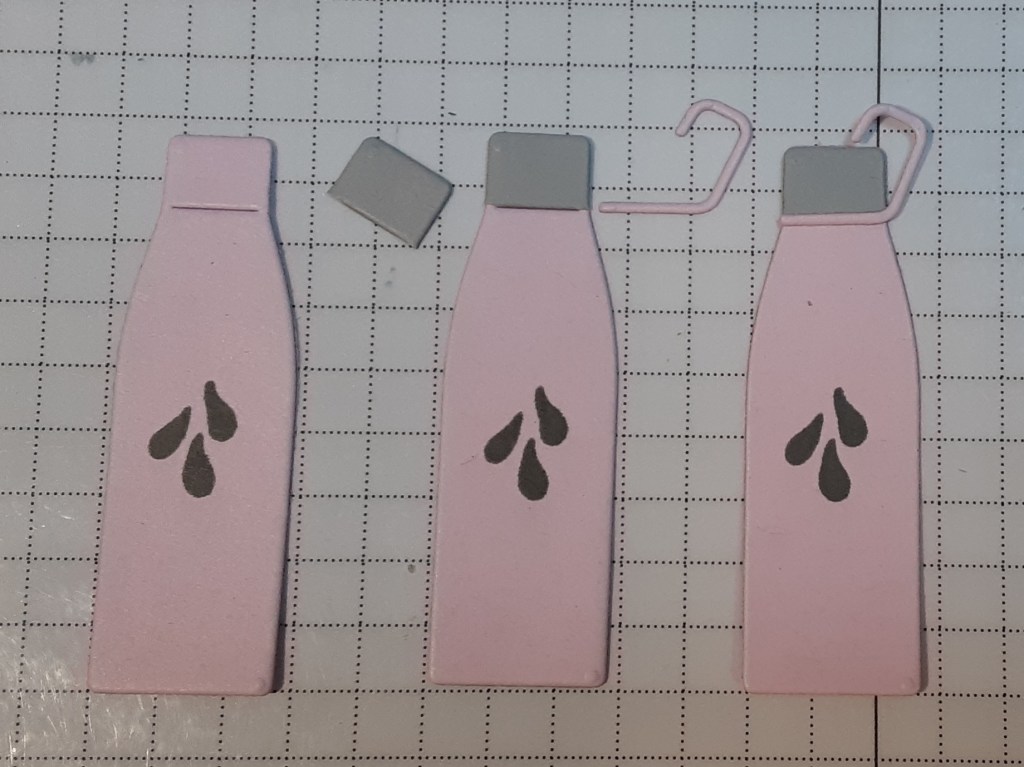
With a scrap of Bubble Bath cardstock, I die cut from the Notes & Totes bundle the tall water bottle with my Stampin’ Cut & Emboss Machine. This die cuts the bottle and the handle. From a scrap of Smoky Slate cardstock, I cut out the lid, which is part of the same die.
I trimmed the lid where the natural cut line is and glued it to the water bottle. I also glued on the handle. I stamped the water image in Smoky Slate ink on the water bottle.
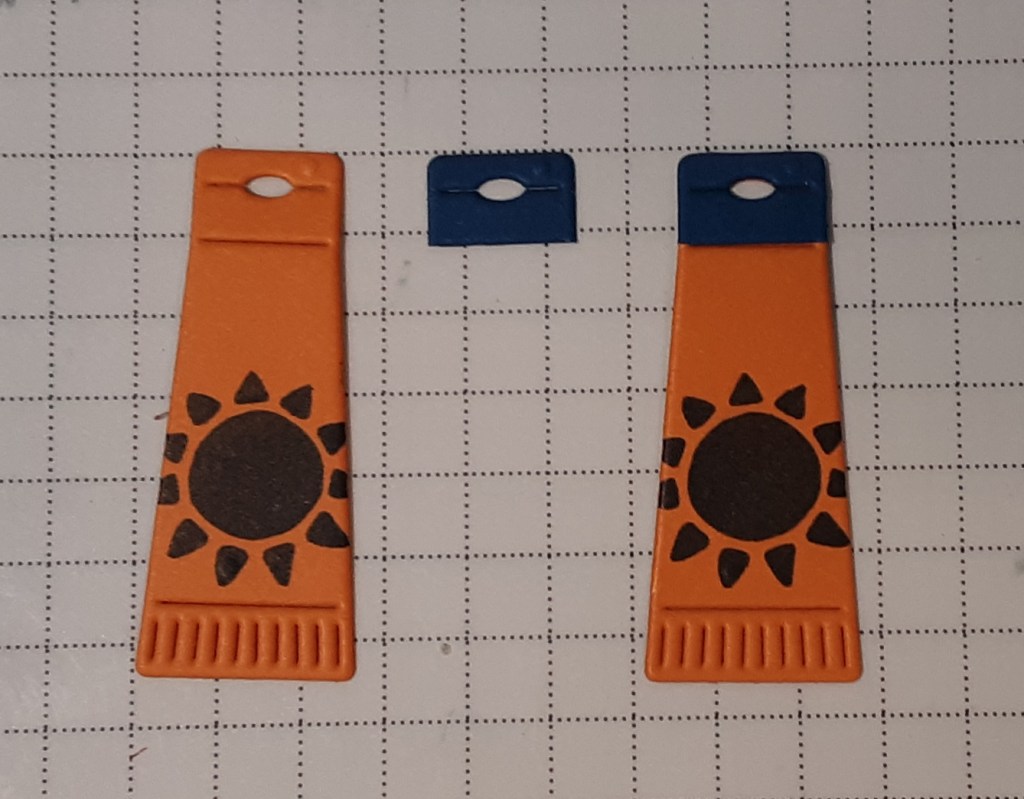
From Pumpkin Pie cardstock, I die cut the tube of sunscreen. I cut out the lid from a scrap of Blueberry Bushel cardstock.

I cut the lid to fit along the die cut lines and glued the lid to the tube. I stamped the sun image with Blueberry Bushel ink on the tube.
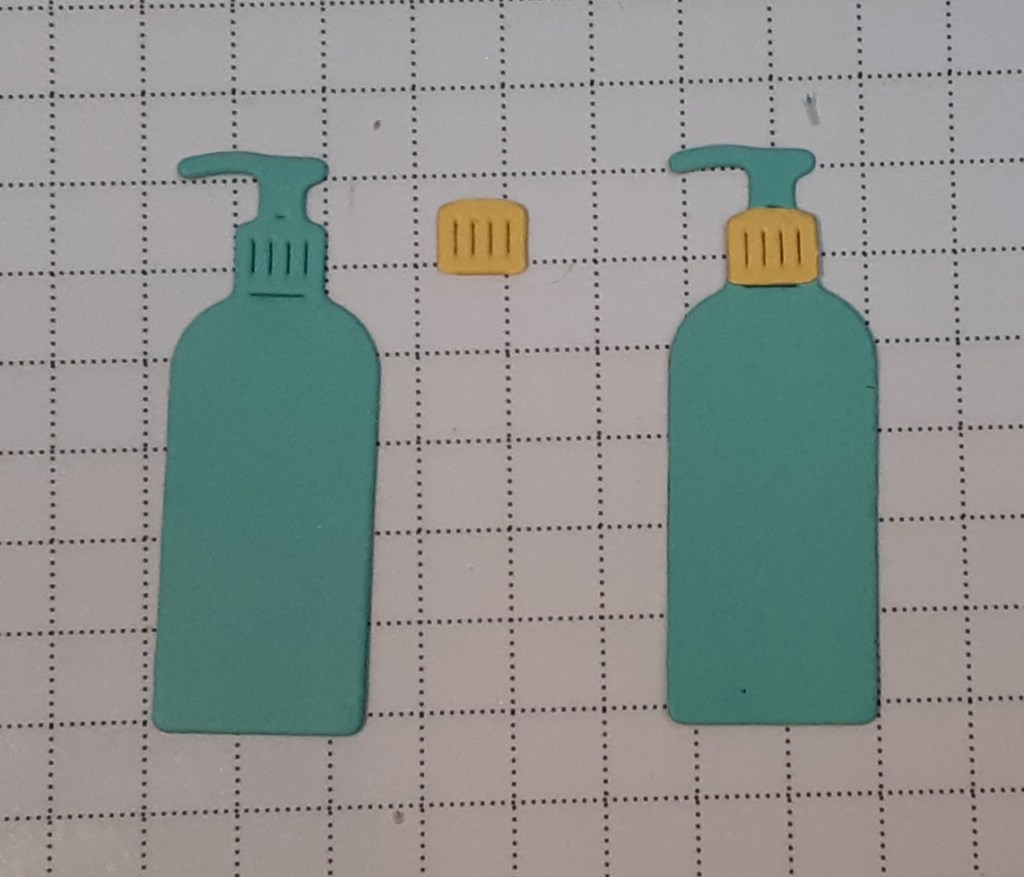
I cut the lotion pump from Coastal Cabana cardstock. I cut the nozzle from Daffodil Delight cardstock. I cut the lid from the Daffodil Delight die cut.
I die cut the straps and handle from Real Red cardstock.
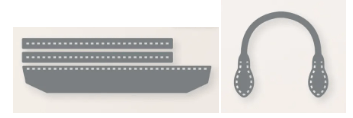
I cut the body of the tote from a piece of Turtle-y Cute DSP.
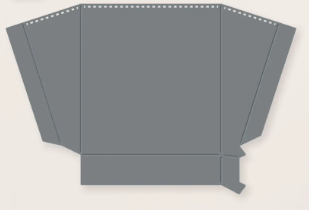
I folded the tote on the fold lines created by the die. I trimmed off the bottom right flap since I wouldn’t be needing it. I glued on the strips by the fold lines, added the bottom piece, and the handles.
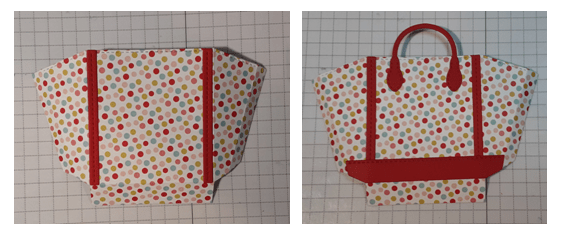
I had all my pieces and could assemble the card. I adhered the sand piece to my ink blended panel, lining up the sides using my favorite adhesive (Multipurpose Liquid Glue or Stampin’ Seal). If one of the edges doesn’t line up completely, trim to fit. I glued this panel to my card base, centering it.
I added glue to the tabs on my tote and folded them in before adding it to my card. I added glue to the bottles and slid them into the tote and pressed them down. I added a couple of Mini Dimensionals behind the handle straps to keep it from catching when putting the card in or out of an envelope.
I stamped Happy Birthday from the Unbounded Love stamp set with Momento Tuxedo Black ink in the blended sky above the tote.
To finish the card, I stamped a sentiment on a 4″ x 5¼” piece of Basic White cardstock and glued it inside the card.
I hope you liked this card!
For the complete supply list, click here.
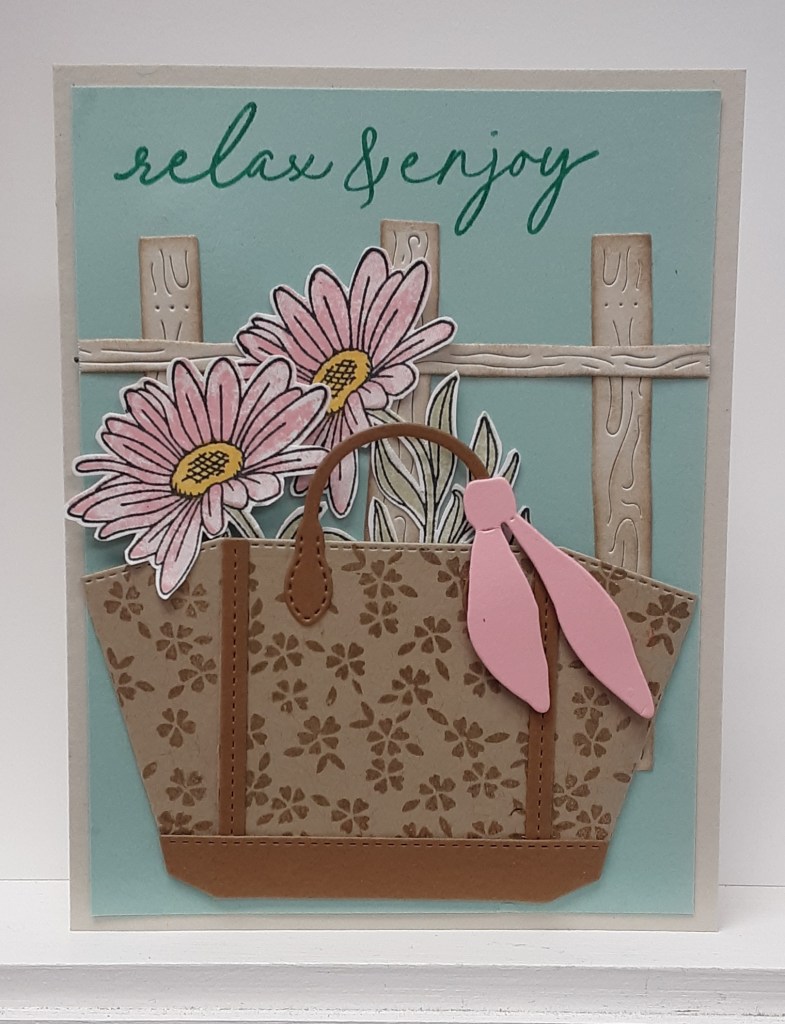
Here is a more stepped-up version of the card.

Further inspiration: