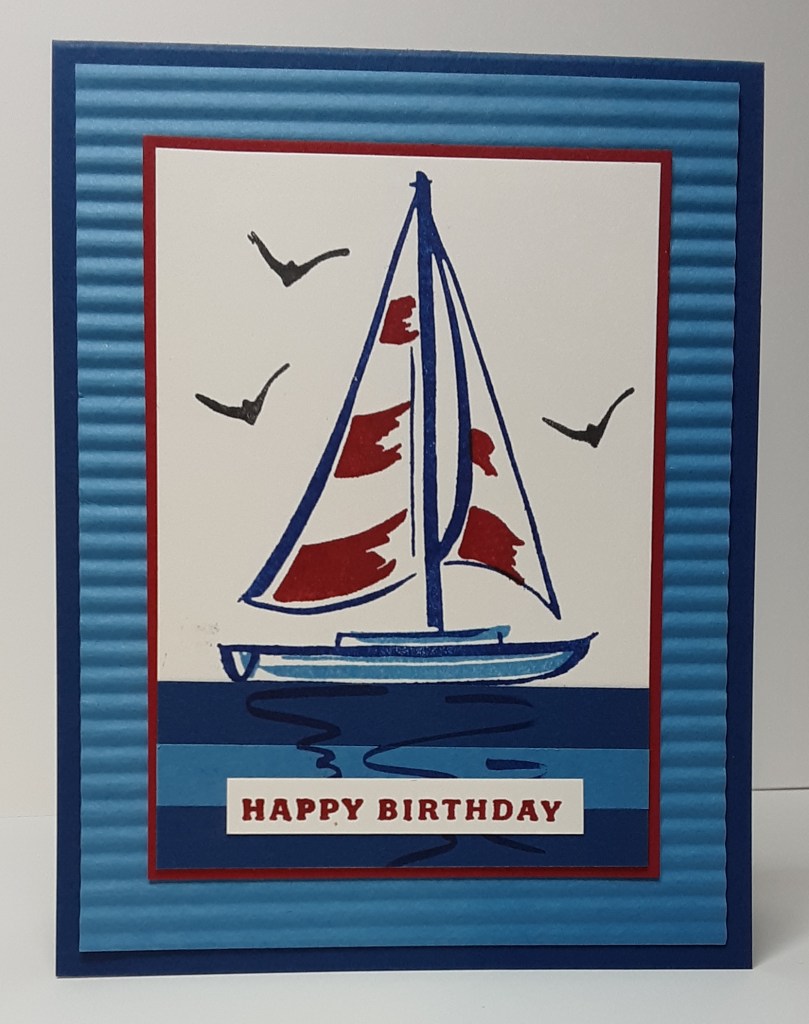
In July in the USA, we celebrate our nation’s independence. In honor of Independence Day, I used a patriotic red, white, and blue color palette. It’s also Saturday, so this is my simple card.
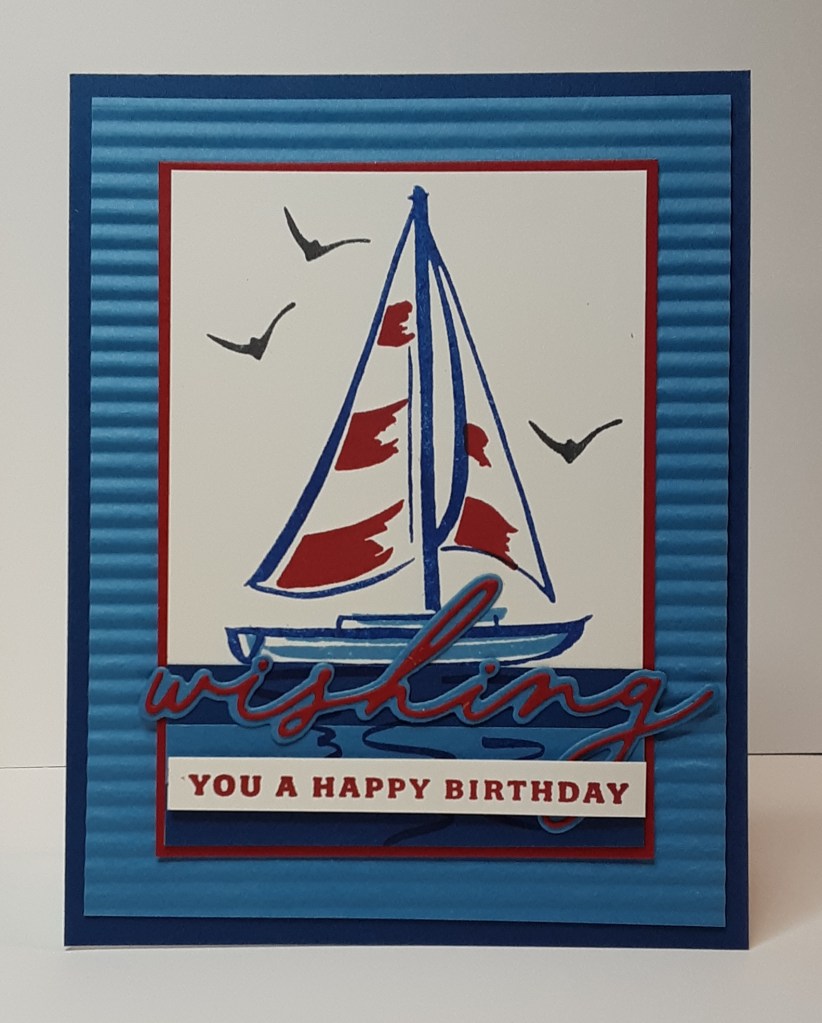
To make the card base, I cut a piece of Blueberry Bushel cardstock to 4¼” x 11″ on my Paper Trimmer, scored and folded at 5½”, and burnished with my Bone Folder. I cut a piece of Azure Afternoon cardstock to 4″ x 5¼” and ran this through my Mini Corrugated 3D Embossing Folder (which apparently is no longer available. You could substitute the Soft Waves 3D Embossing Folder or if you have a crimper, you could use that) on my Stampin’ Cut & Emboss Machine. I cut a piece of Real Red cardstock to 3⅛” x 4⅜”. I cut piece of Basic White cardstock to 3″ x 4¼”. With Azure Afternoon cardstock (1) and Blueberry Bushel cardstock (2), I cut 3 strips to ⅜” x 3″.
I adhered my embossed panel to my card base using my favorite adhesive (Multipurpose Liquid Glue or Stampin’ Seal).
On my white piece, I stamped the sailboat from Sunrise Sailing stamp set in Blueberry Bushel ink near the top. I stamped the stripes on the sails in Real Red ink. I stamped the boat in Azure Afternoon ink. I added three birds with Momento Tuxedo Black ink.
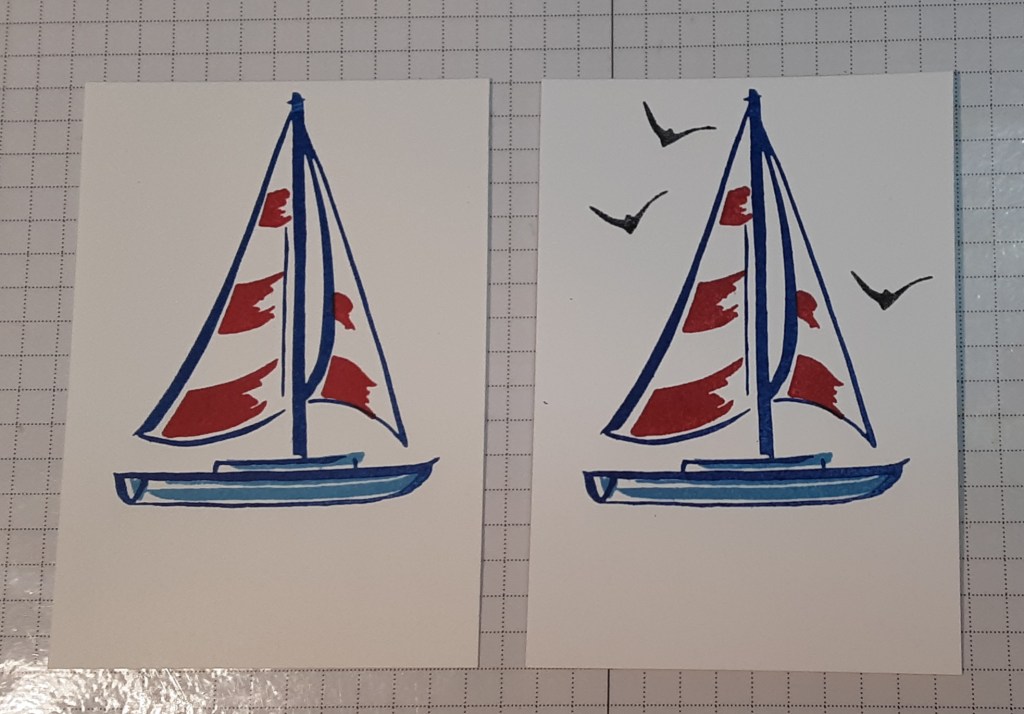
I adhered my stripes to the panel beginning with the Blueberry Bushel strip at the bottom. I added the Azure Afternoon strip and, finally, the second Blueberry Bushel strip. I used the wavy water image to stamp some reflection with Blueberry Bushel ink under the boat on the blue strips.

I adhered this panel to my red matte. It had a narrow border around it. I glued this panel to my card.
To stamp the sentiment, I used the you a happy birthday from the Delightful Wishes stamp set. Since I didn’t want the whole sentiment, I put a Post-It over the you a and inked up the happy birthday with Real Red ink. If you feel brave, you could cut it off and save it. I am not that brave and try to leave my stamps intact.
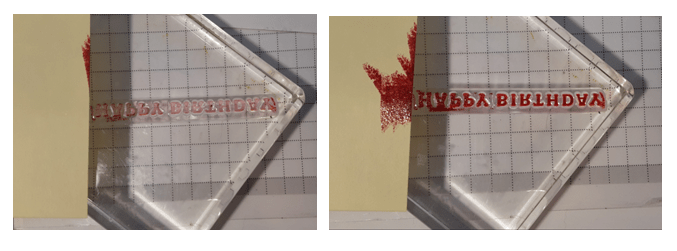
I removed the Post-It note before stamping on a narrow strip of Basic White cardstock. I glued my sentiment to my card.
To finish the card, I stamped a sentiment on a 4″ x 5¼” piece of Basic White cardstock and glued it inside my card. You could jazz up the inside by stamping another sailboat.
I hope you liked this simple card!
For the complete supply list, click here.
For further inspiration, I stepped up my card and added the wishing die cut from Delightful Wishes bundle and used the complete sentiment you a happy birthday. That’s why I didn’t cut it apart! I’m terrible a lining them back up.
And Wednesday’s card: