

Happy Wednesday! Today I have a fun birthday card for all of those kids (and adults) who have a fancy for dinosaurs. My boys were especially fascinated by these huge prehistoric creatures, as were many of the students that have passed through my classroom doors. Remember the Land Before Time movies? We had the first one and they came out with many more. (I googled it and there were 14!) Marilyn here with another card, a fun technique, and a walk down Memory Lane. Here’s a little trivia question: What kind of dinosaur is featured on the card?
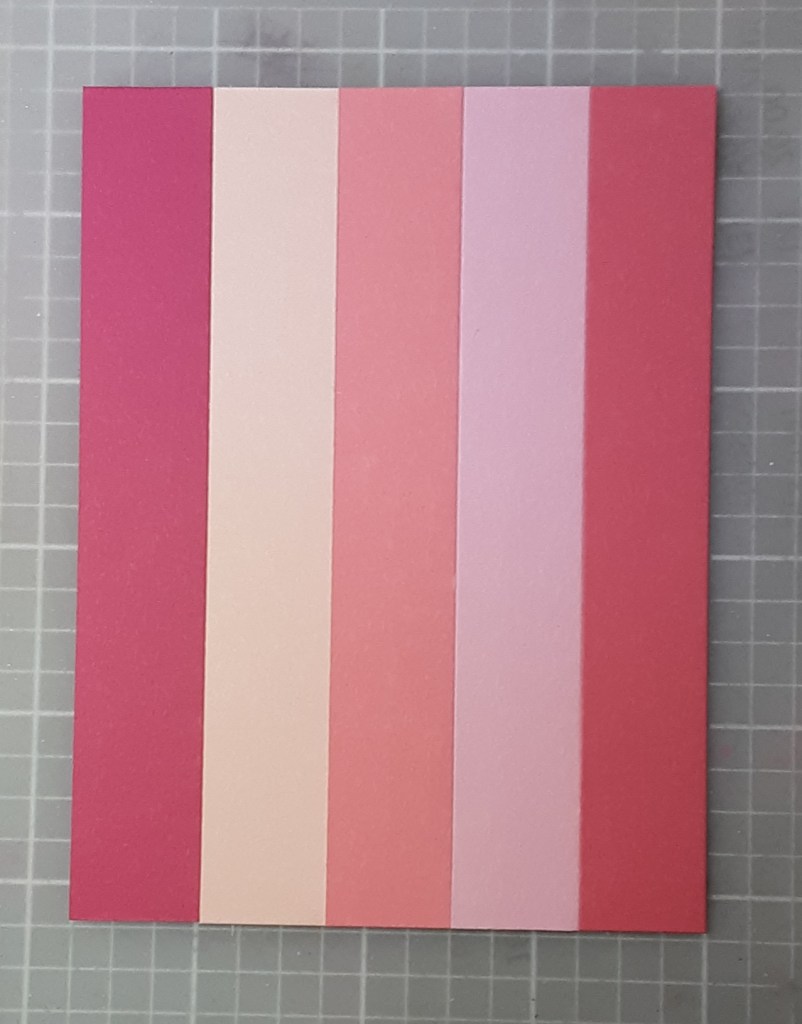
To make the card base, I cut a piece of Mambo Melon cardstock to 4-1/4″ x 11″ on my Paper Trimmer, scored and folded at 5-1/2″, and burnished with my Bone Folder. I cut a piece of Basic White cardstock to 4″ x 5-1/4″. I cut strips 3/4″ x 5″ from Melon Mambo cardstock, Petal Pink cardstock, Flirty Flamingo cardstock, Pretty in Pink cardstock, and Strawberry Slush cardstock. We’ll use these strips for a technique.
I stamped the triceratops dinosaur from Darling Dinos bundle on a scrap of Basic White cardstock with Momento Tuxedo Black ink. I also stamped the bow. I stamped the balloon on a scrap of Pretty in Pink cardstock and again on Melon Mambo cardstock.
With a scrap of Basic White cardstock, I die cut the 2-3/4″ circle from Spotlight on Nature die set on my Stampin’ Cut & Emboss Machine. I stamped the sentiment ROAR means … in dinosaur on the right side of the circle.
I colored in my dinosaur with Stampin’ Blends: Pretty in Pink, Melon Mambo, and Pumpkin Pie. I die cut my dinosaur, bow, and balloons with the coordinating dies.
I stamped Happy Birthday from the set with Melon Mambo ink on Pretty in Pink cardstock. I cut this down to 1/4″ x 2-1/4″.
Now for the fun technique! To make the background panel, I adhered the strips on a piece of scrap paper. I used copy paper because I didn’t want to add too much bulk to my card. If you’d like to use cardstock, feel free to do so. I cut my copy paper to slightly smaller (3-5/8″ x 4-3/4″) than my final panel size which will end up being 3-3/4″ x 5″. I applied my favorite adhesive (Multipurpose Liquid Glue or Stampin’ Seal) to my copy paper near the top, middle, and bottom. I laid down my Melon Mambo strip on my work surface, flipped the copy paper over, and lined it up on my strip. This will be my starting point, and I can adhere the rest of the strips from the front.
Next, I added the Petal Pink strip and snugged it up next to the Melon Mambo strip so there is no gap. I followed this with Flirty Flamingo, Pretty in Pink, and, lastly, Strawberry Slush. I trimmed any uneven bits on my Paper Trimmer.
Now I had a solid panel. I loved the colors, and it looked great. But I stepped it up just a little. I lined it up in my Dotted Circles 3D Embossing Folder. When lining it up, you want the face touching the side of the embossing folder with the Stampin’ Up logo on it to get the embossed look. Of course, you could experiment and see what the debossed side would look like by flipping it over. When positioning your panel in the embossing folder, be aware of where you place it and where you want the eventual dots to go on your panel. I wanted mine to be centered side to side, but more toward the top.

Now, I have all my pieces and can assemble the card. I glued my striped panel to my Basic White matte and glued this to my card base, keeping even borders on both. I glued the stamped circle directly to the card, being cognizant of my sentiment’s position. I added the Happy Birthday strip with Mini Stampin’ Dimensionals. I drew two balloon lines with a pen. You could also use the stamp. I added one balloon directly to the card and popped the other one up with Stampin’ Dimensionals. I added the dinosaur to the card with Dimensionals.
I stamped a sentiment on a piece of 4″ x 5-1/4″ white cardstock and glued that inside the card.
I hope you liked this card! I was inspired by a card I saw on Pinterest that featured a different dinosaur and colors. I don’t know who originally made that card, so this was my take on it. I liked the technique of embossing the striped panel and thought I would share.
The answer to my trivia question is contained in the post. Did you catch it?
For the complete supply list, click here.
