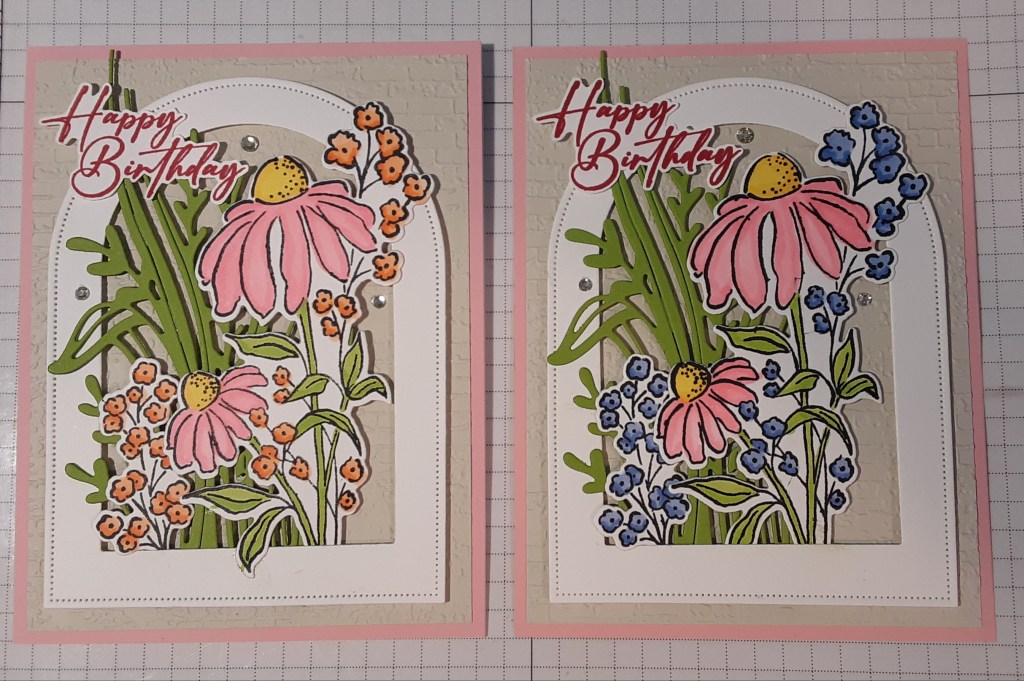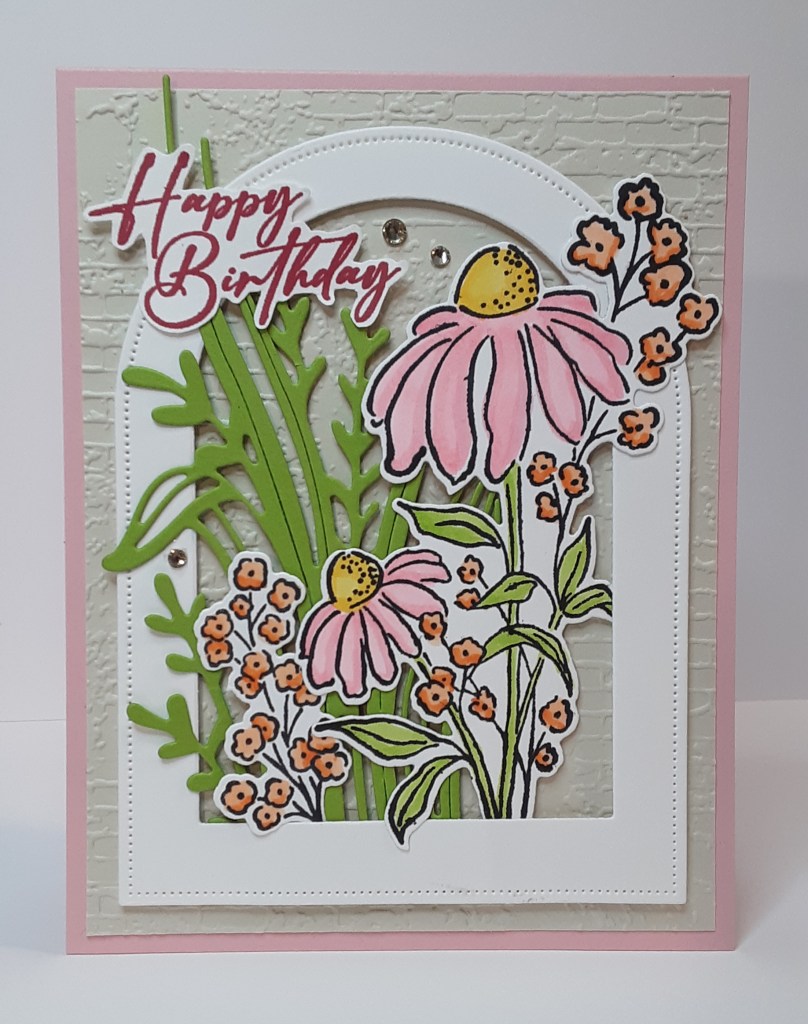
Today I have a fun and pretty card that uses an arched frame to accentuate the floral images. Though it looks complicated, it really isn’t. It is simplified by die cutting and easy coloring. Marilyn here with another card. As an aside, if you haven’t had a chance yet to check out the new July release of Online Exclusives, click here to go directly to Terry’s site. There are some fun Halloween and Christmas stamps that you will want to check out, and new kits. Go to Shop Products and click Online Exclusives. Also, Stampin’ Up is offering its two-tone cardstock for 20% off today through Friday, while supplies last. To watch a video showing some techniques using two-tone cardstock, click here. Now, let’s dive right in!
To make the card base, I cut a piece of Pretty in Pink cardstock to 4-1/4″ x 11″ on my Paper Trimmer, scored and folded at 5-1/2″, and burnished with my Bone Folder. I cut a piece of Basic Beige cardstock to 4″ x 5-1/4″ and ran it through the Exposed Brick 3D Embossing Folder on my Stampin’ Cut & Emboss Machine.
To make the arch, I used the Everyday Arches Dies. I laid the dies on my grid sheet to make sure they were equally bordered and straight, and taped them together with Easy-See tape. This allows you to make one pass through your machine and keeps your dies in the perfect position! With Basic White cardstock, I ran the dies through my machine. I saved the inside piece for another card.

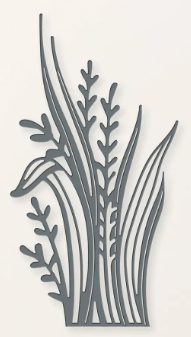
I die cut the grassy image from the Mixed Florals Bundle from Granny Apple Green cardstock. This is a great die for adding texture to your card. It doesn’t coordinate with any of the stamped images in the set, so it is a stand-alone die. You could also use it with other floral image sets.
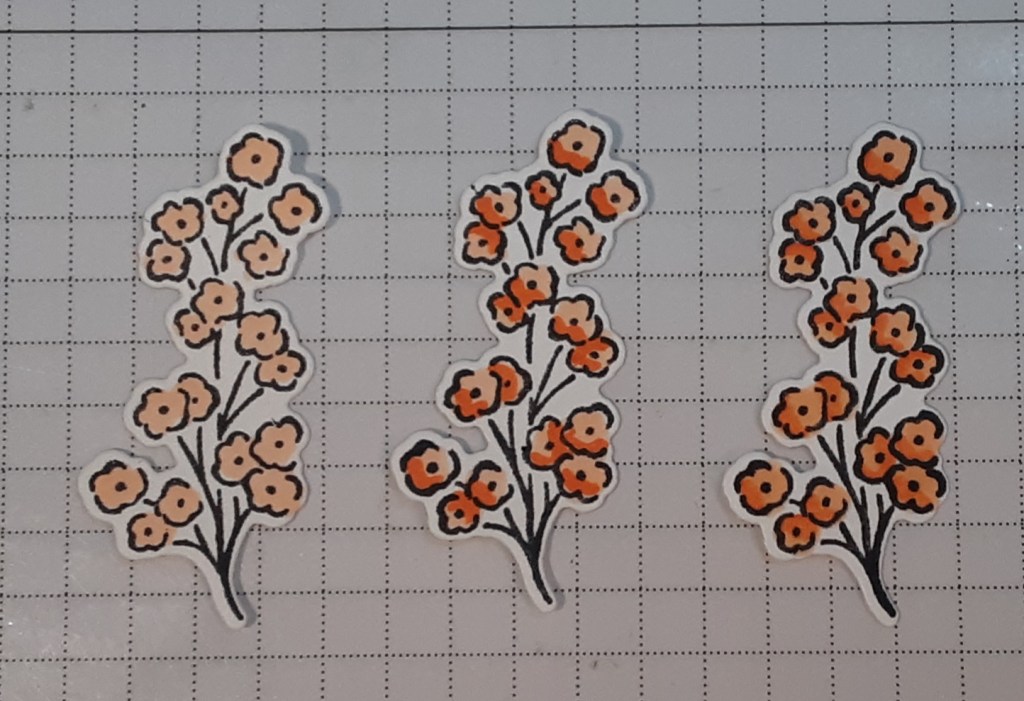
I stamped the coneflower image and the smaller flower image from Mixed Florals Bundle with Momento Tuxedo Black ink, which is safe for my Blends. I colored them with my Stampin’ Blends before die cutting them.
I started with the flower petals and Pretty in Pink Blends. I outlined the petals with the dark one and then blended it with the light. When blending, I overlapped the dark and the light to make a smoother transition. I colored the centers with Daffodil Delight Blends. I used the dots on the image to guide where I put the darker marker.
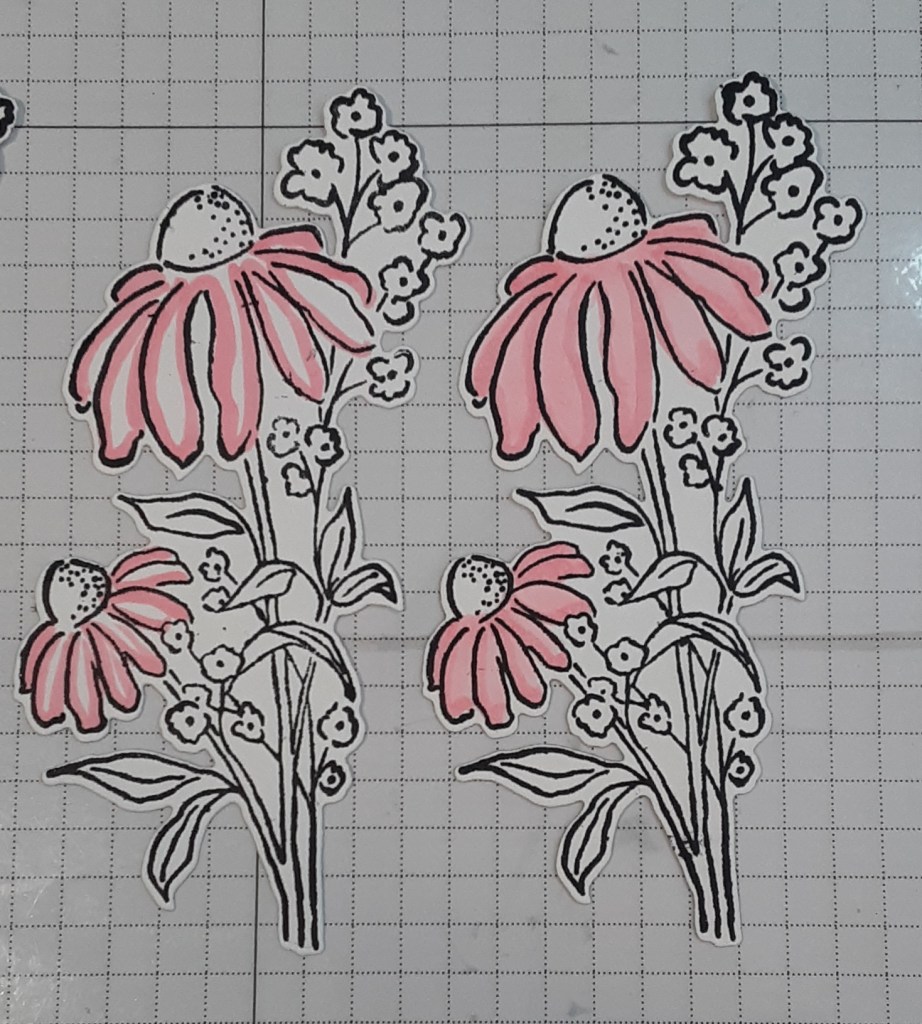
For the smaller flowers, I used Pumpkin Pie Blends. I started with the light color and added shadowing where I thought it should go. I blended them together with the light. Disclaimer: I do love to color with alcohol markers, but I am certainly NOT an expert.
I used Granny Apple Green Blends to color in the leaves and stems. I die cut both of my pieces.
The final element before assembling the card was to stamp the Happy Birthday from Unbounded Love stamp set in Melon Mambo ink on a scrap of Basic White cardstock. This stamp set has several great sentiments in it. I love the font and size of the greeting. I fussy cut this because I didn’t want it to cover too much of my floral image using a larger die to cut it out. An alternative would be to use vellum.
I adhered my embossed piece to my card base with my favorite adhesive (Multipurpose Liquid Glue or Stampin’ Seal) leaving equal borders.
Next, I laid my arch (NOT adhered) on my card and decided where I wanted my Granny Apple sprig to go. I dotted a little bit of glue on the bottom front and adhered it to the back of my frame. I didn’t want the tallest grass to extend beyond the top of my card. If it wants to extend too far up, just slide the bottom of the sprig farther down the frame and trim any that shows below the frame. I didn’t have to do this. I had the bottom of the sprig almost flush with the bottom of the frame.
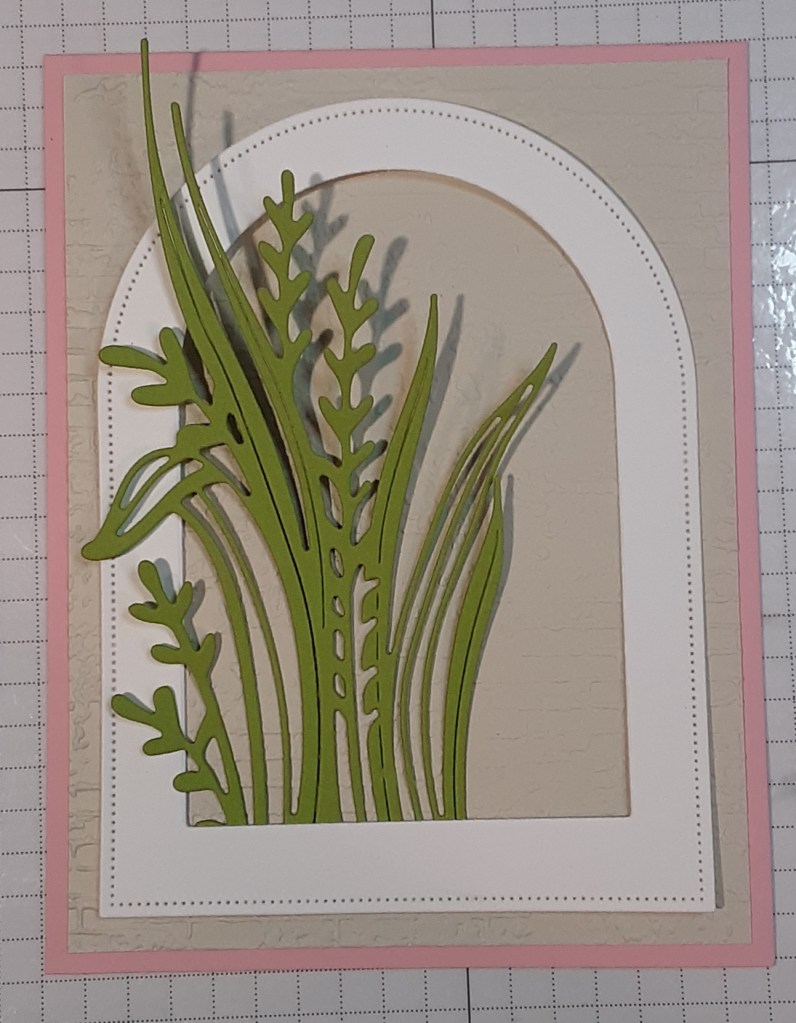
Before gluing, I laid the flowers where I wanted them to go. When I was satisfied with the placement, I glued them to the bottom of the frame, starting with the smaller image. I wanted to slide my large focal image in place last. Once I had my flowers placed and glued, I added bits of glue to secure the upper part of the flowers to the front of the frame, rather than the back.

I added the greeting by laying my focal panel on my card base and lightly securing the greeting, being careful not to glue the panel down. I tried to put as much of the greeting as I could over the long piece of grass because I didn’t want the grass to flop and bend too much. I also secured any loose bits.

I flipped the panel over and generously applied Stampin’ Dimensionals to give the frame some dimension. I adhered the panel to my card.
For a bit of sparkle, I added three Rhinestones.
To finish the card, I stamped a sentiment on a 4″ x 5-1/4″ piece of Basic White cardstock and glued it inside the card.
I hope you liked this card!
For the complete supply list, click here.
I decided to play with some other colors for the smaller flowers. I used some other alcohol markers I had on hand. I think the blue really compliments the pink. If you’re interested in the blues I used, they are Copic B63, B66.