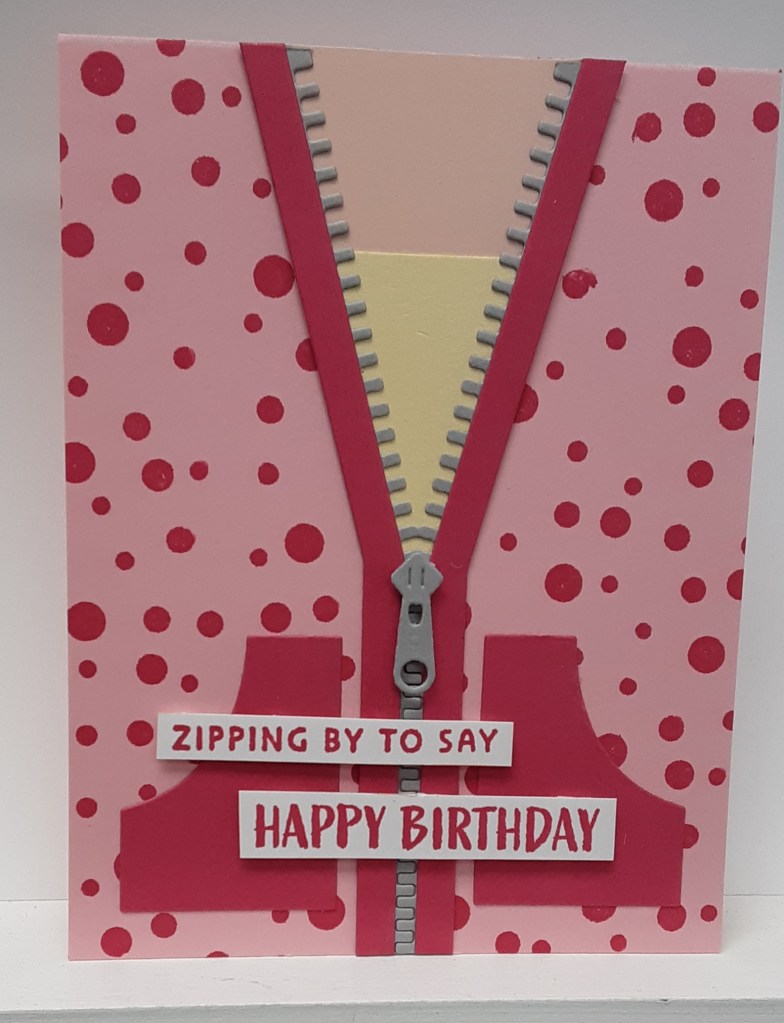
Today I’m used the All Zipped Up bundle to create this simple card. Looks are deceiving in that this card was not simple! I played with this set and, through trial and error and using the card on Stampin’ Up!’s website as a guide, came up with how to use it. There may be videos out there that show a simpler way of constructing the zipper feature, but this is what I came up with. And I tend to be a perfectionist so keep that in mind. So here goes….
To begin, I cut a card base of Pretty in Pink cardstock to 4-1/4″ x 11″ on my Paper Trimmer, scored and folded at 5-1/2″, and burnished with my Bone Folder. I cut a piece of Smoky Slate cardstock to 2-3/8″ x 5-1/2″ for the zipper. I also had an 11″ piece of Melon Mambo cardstock, at least 2″ wide.
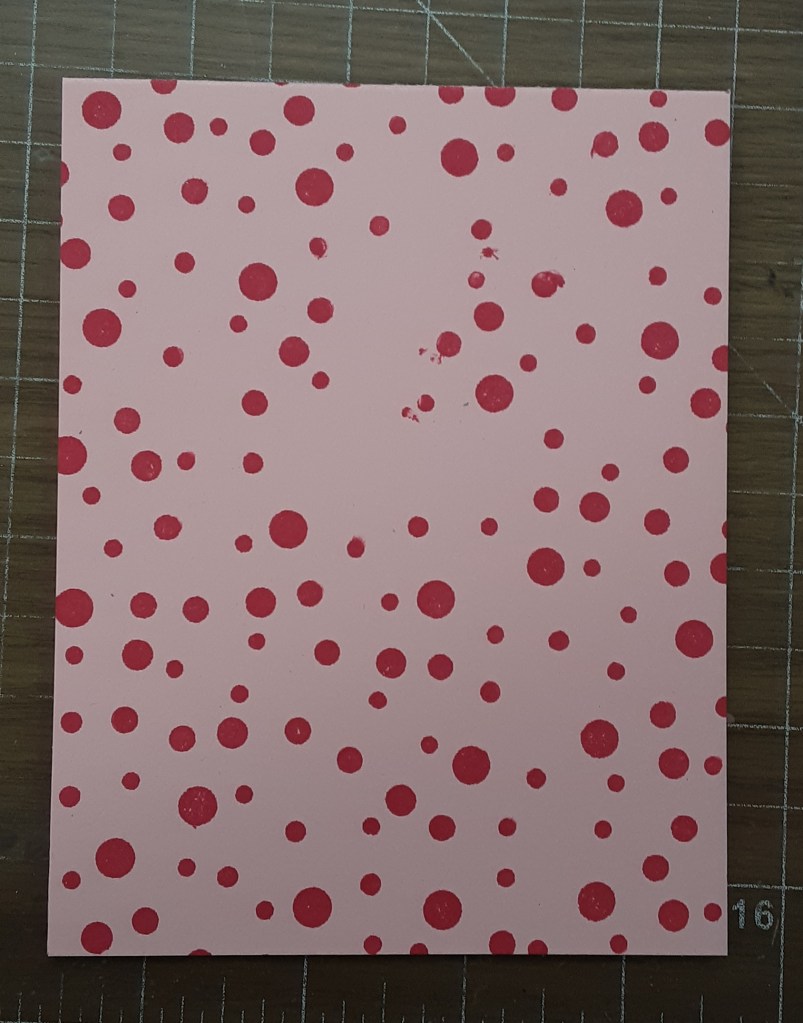
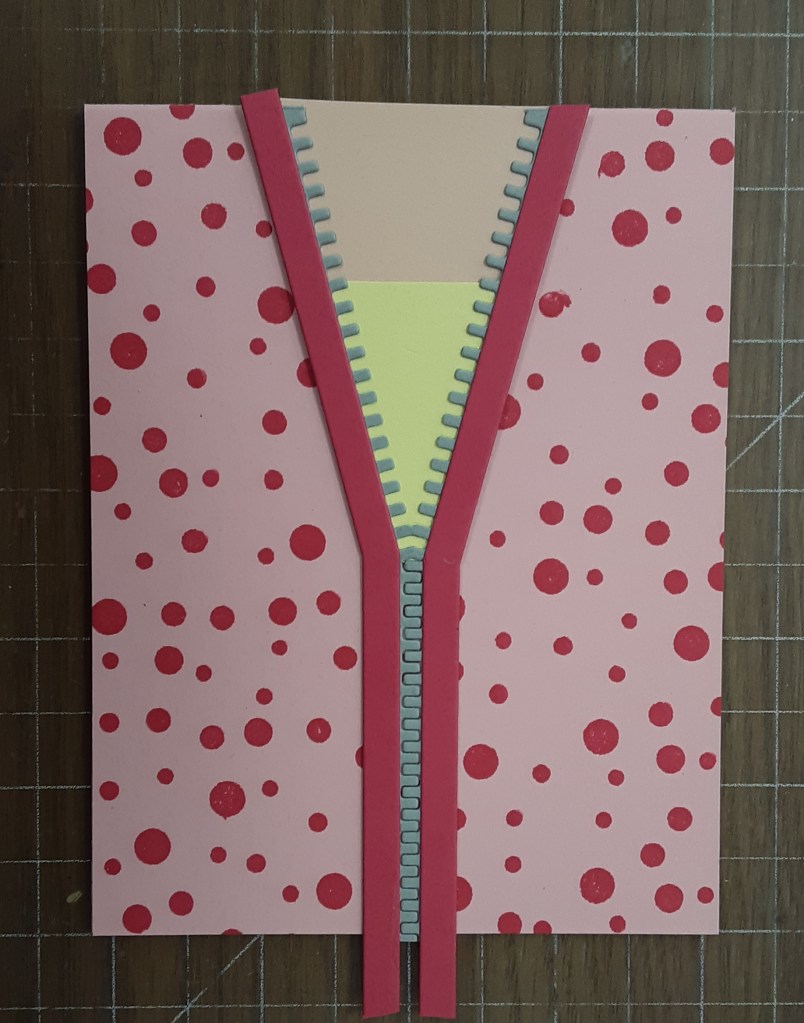
I used Melon Mambo ink to add dots from the All Zipped Up bundle to my card base. I turned my stamp as I went to make the dots random.
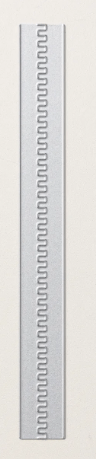
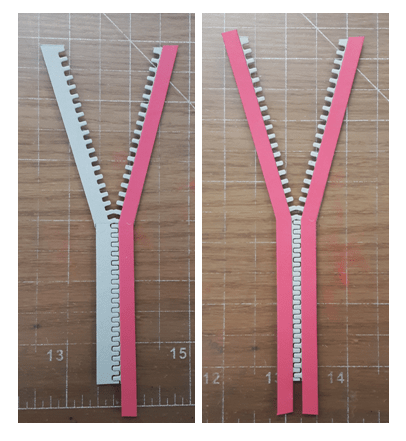
For the zipper, I placed the die flush with the top of the cardstock. I ran it through my Stampin’ Cut & Emboss Machine. As you can see in the photos, the die does not cut all the way through.
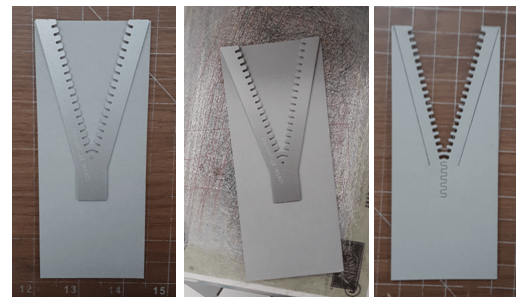
To extend the zipper, I used the long zipper die.
The trick is to line this up with the teeth on the previous zipper die cut. You will notice the top of the straight die lines up with the first closed teeth of the zipper under where they separate. I used these teeth as a guide for placement. The first photo is a flipped-over view of the teeth lining up. You can feel (but not really see) the die locking in. Make sure to tape the die in place so that it doesn’t shift while you’re cutting.
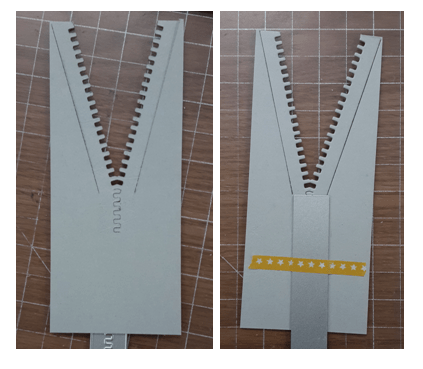
Here is my first attempt. I didn’t like how the die cuts weren’t completely matched up but if this happens to you, you could easily cover it up with the zipper pull. I die cut the zipper pull from the scrap of Smoky Slate cardstock.
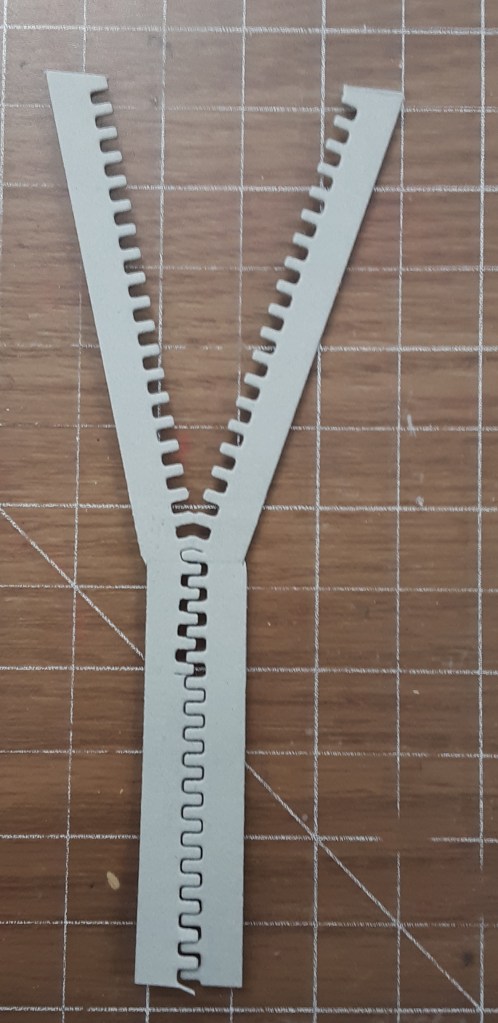
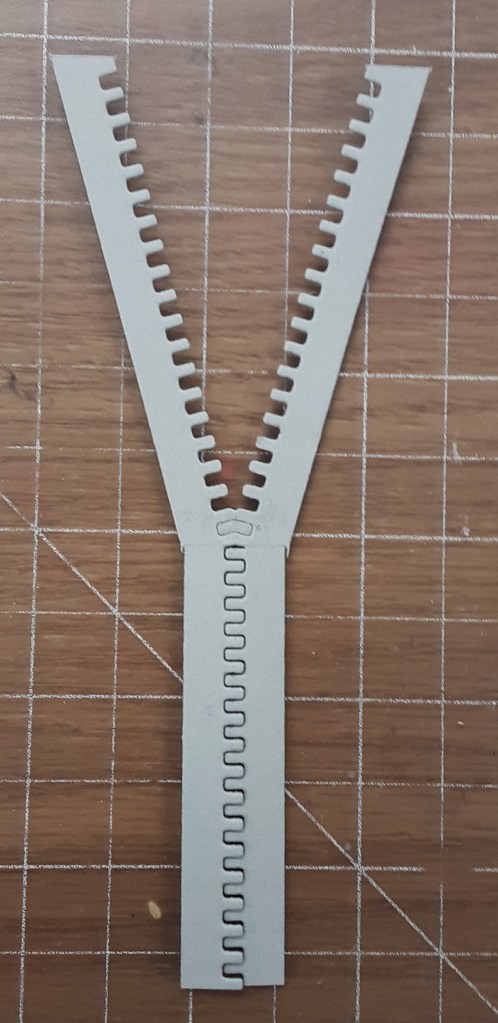
My second attempt was much more satisfactory. I think the difference was that I hadn’t slotted the die as far up as I could.
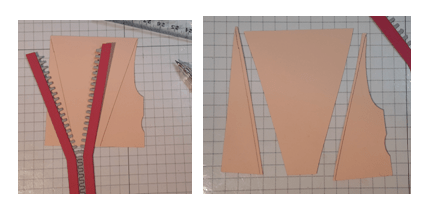
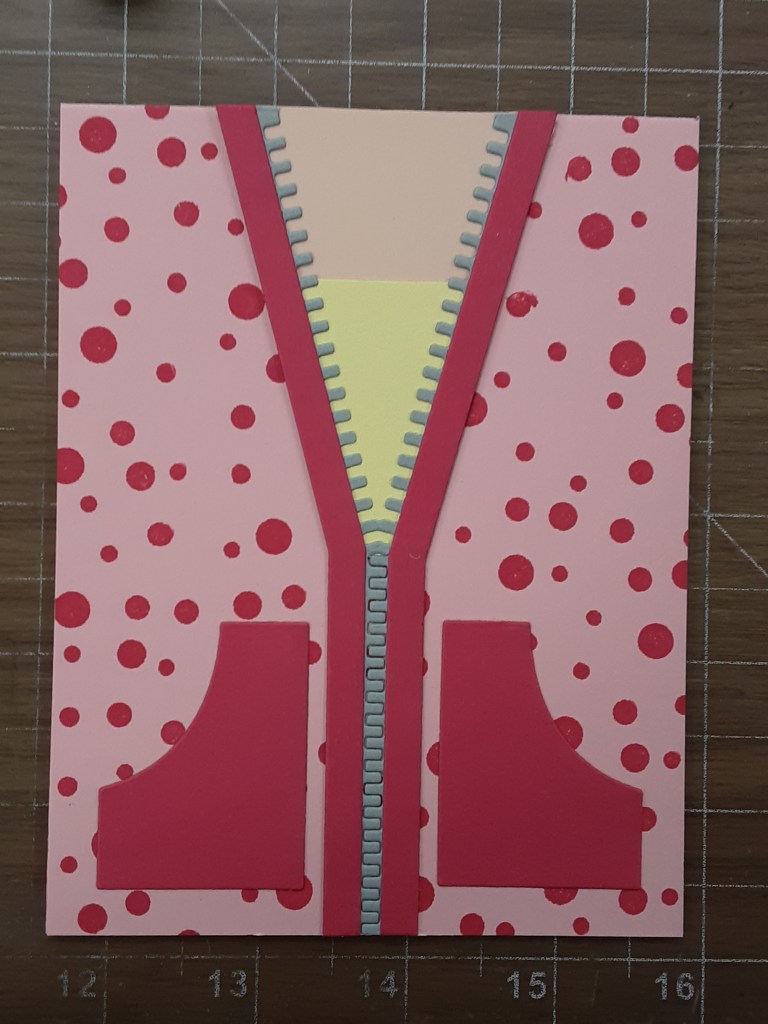
I cut the pair of angled dies and pockets from Melon Mambo cardstock. You’ll notice the angled dies don’t cut the top and bottom out. I’m not sure why they were designed this way. I just used my Paper Snips and cut them myself.
I adhered the strips to either side of the zipper teeth using my favorite adhesive (Multipurpose Liquid Glue or Stampin’ Seal). I prefer to use liquid glue when I need to wiggle the piece a little to make it fit properly. Tape runner tends not to let me do that. The edge of the V piece actually lines up with the edge of the zipper piece, so you may want to use that feature to help guide your placement.
For the next part, you could use the die to cut out an inlay for the shirt under the zippered shirt. I just laid the zipper piece on a piece of Petal Pink cardstock and traced the edges of the zippered part and cut it out with my Paper Snips. I did cut slightly inside the pencil lines. I didn’t want my Petal Pink extending beyond the zipper.
I repeated the process with a piece of Lemon Lolly cardstock, just shifted the zipper a tad.
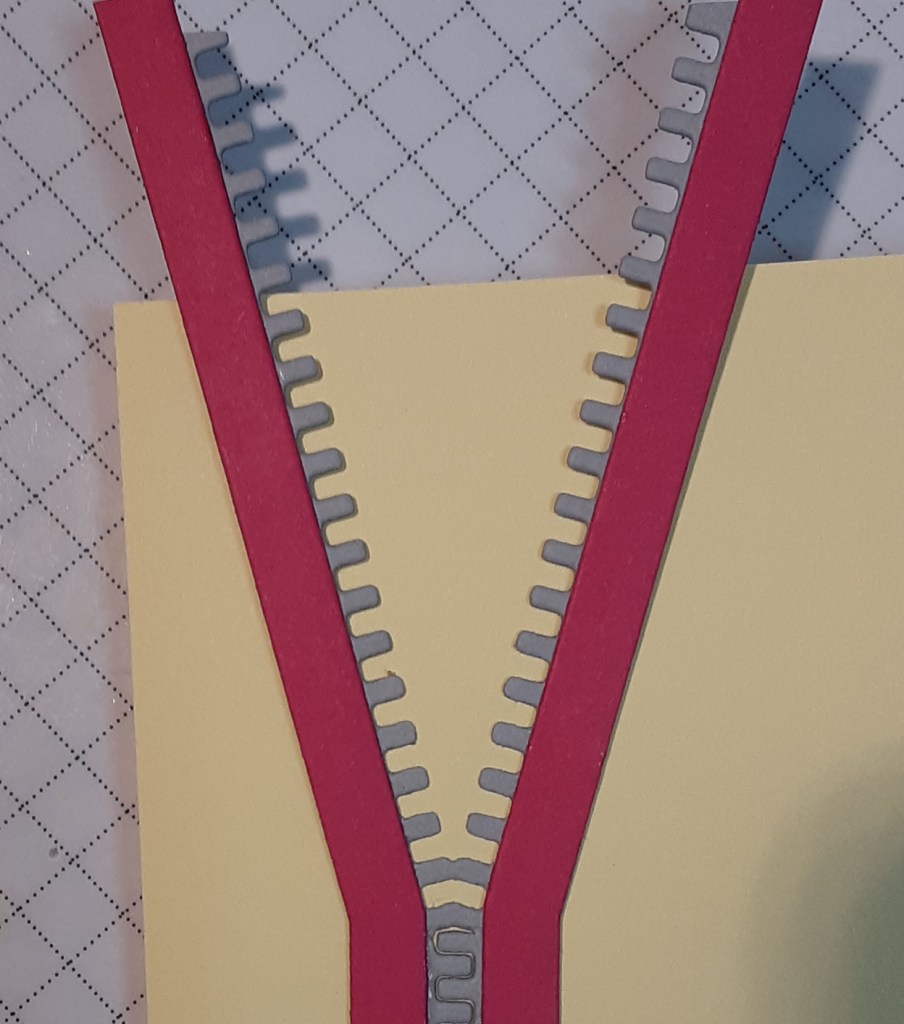
I adhered the two pieces to the back of the zipper, making sure they didn’t extend beyond the zipper. I glued this to my card base, centering the zipper piece. I trimmed the excess from the top and bottom of the card.
I added my two pockets.
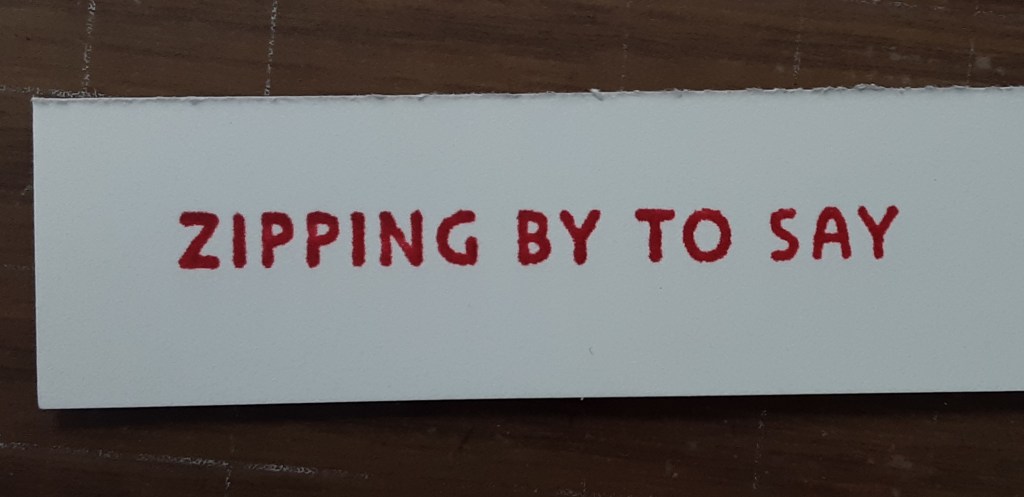
For the sentiment, I wanted to say Zipping by to say Happy Birthday, but the stamp had hello at the end. I could just cut the hello off my stamp and gone for it. But I have a hard time cutting up my stamps, so I just masked the word hello before inking it with Melon Mambo ink on a scrap of Basic White cardstock. I removed the tape before stamping.

It created a perfect sentiment! I trimmed my sentiment down.
I stamped the Happy Birthday stamp with Melon Mambo ink, also and trimmed it down. I have used this Happy Birthday on several cards lately.
I adhered the sentiment to my card using Stampin’ Dimensionals. I also adhered the zipper pull with Stampin’ Dimensionals.
To finish the card, I stamped a sentiment on a 4″ x 5-1/4″ piece of Basic White cardstock and glued it inside my card.
I hope you liked this card! I will definitely use this stamp set again, so stay tuned!
For the complete supply list, click here.
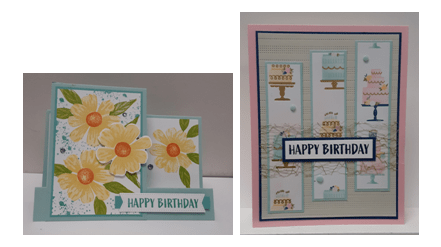
Here are some other cards I used the Happy Birthday sentiment from All Zipped Up stamp set.