
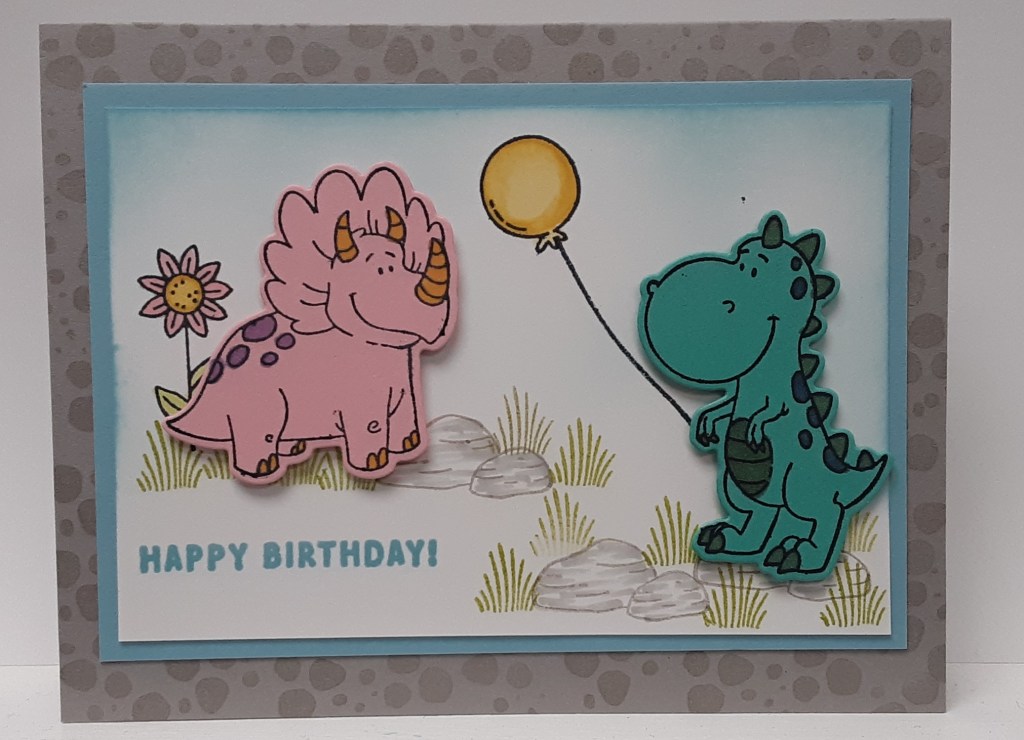
It’s Simple Saturday and I have a fun kid’s birthday card featuring dinosaurs. When my older son was in preschool, he loved dinosaurs, and I thought of him as I created this card. Marilyn here with a simple card that can easily be stepped up.
To make the card base, I cut a piece of Gray Granite cardstock to 5-1/2″ x 8-1/2″ on my Paper Trimmer, scored and folded at 4-1/4″, and burnished with my Bone Folder. I cut a piece of Balmy Blue cardstock to 4-5/8″ x 3-3/8″. This will be my matte. I cut a piece of Basic White cardstock to 4-3/8″ x 3-1/8″ for my focal layer.
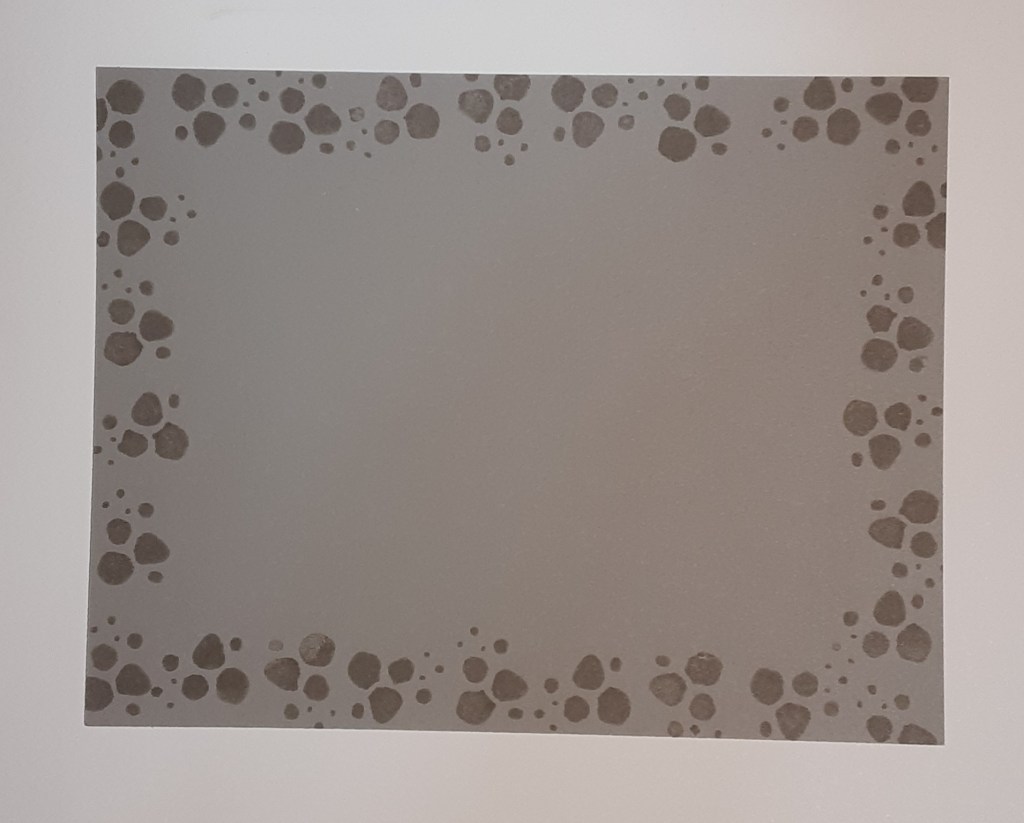
To prep my card base, I stamped the spot image from Darling Dinos bundle in Gray Granite ink around the edge of my card base. I turned the stamp as I went to make the spots look random.
I took a scrap of Pretty in Pink cardstock and stamped the triceratops (three horned dino) in Momento Tuxedo Black ink and die cut it from the Darling Dinos bundle on my Stampin’ Cut & Emboss Machine. I stamped the tyrannosaurus (actually I’m not sure what that dinosaur is. He’s too friendly looking to be a T-Rex) on Summer Splash cardstock and die cut it out. If you like to color, you could stamp these two images on Basic White cardstock and color them.
I colored the horns on the triceratops with Daffodil Delight Blends. I colored the spots with Highland Heather Blends. For the tyrannosaurus, I colored the spots with Misty Moonlight Stampin’ Blends and the claws, belly, and spikes with Crumb Cake Stampin’ Blends.
Next, I took my white panel and stamped the rock image three times in Gray Granite ink. I stamped the grass image in Lemon Lime Twist ink several times around the rocks. I stamped the flower image with Momento Tuxedo Black ink on the left side. I stamped a balloon in the open space with black ink. I laid my T-Rex on the card and made a light pencil mark where his hand would be. I stamped the balloon string connecting the balloon to where his hand would be. With Balmy Blue ink and a Blending Brush, I added ink around the top and upper sides of my stamped panel. In the picture below, I have the approximate position for the different images. Ignore the second string and the die cut etchings along the edges. That is for my stepped-up version. The panel doesn’t show it, but I stamped the Happy Birthday! with Balmy Blue ink in the open space in the corner.
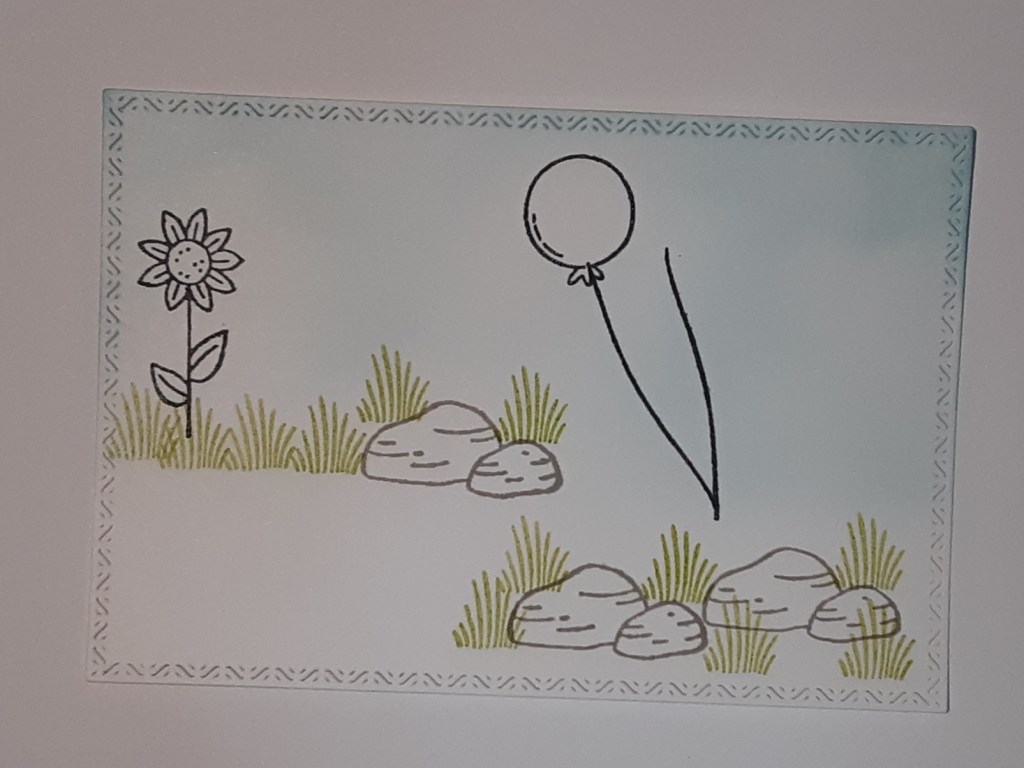
With a Smoky Slate Stampin’ Blend, I lightly brushed side to side the rocks to give them a smidge of color. I colored the flower with Pretty in Pink, Daffodil Delight, and Lemon Lime Twist Stampin’ Blends. I colored the balloon with Daffodil Delight Stampin’ Blends.
I adhered my stamped panel to my Balmy Blue matte piece with my favorite adhesive (Multipurpose Liquid Glue or Stampin’ Seal) and adhered this to my card base. I added my dinosaurs with Stampin’ Dimensionals.
To finish the card, I stamped a sentiment on a 4″ x 5-1/4″ piece of Basic White cardstock and glued it inside my card.
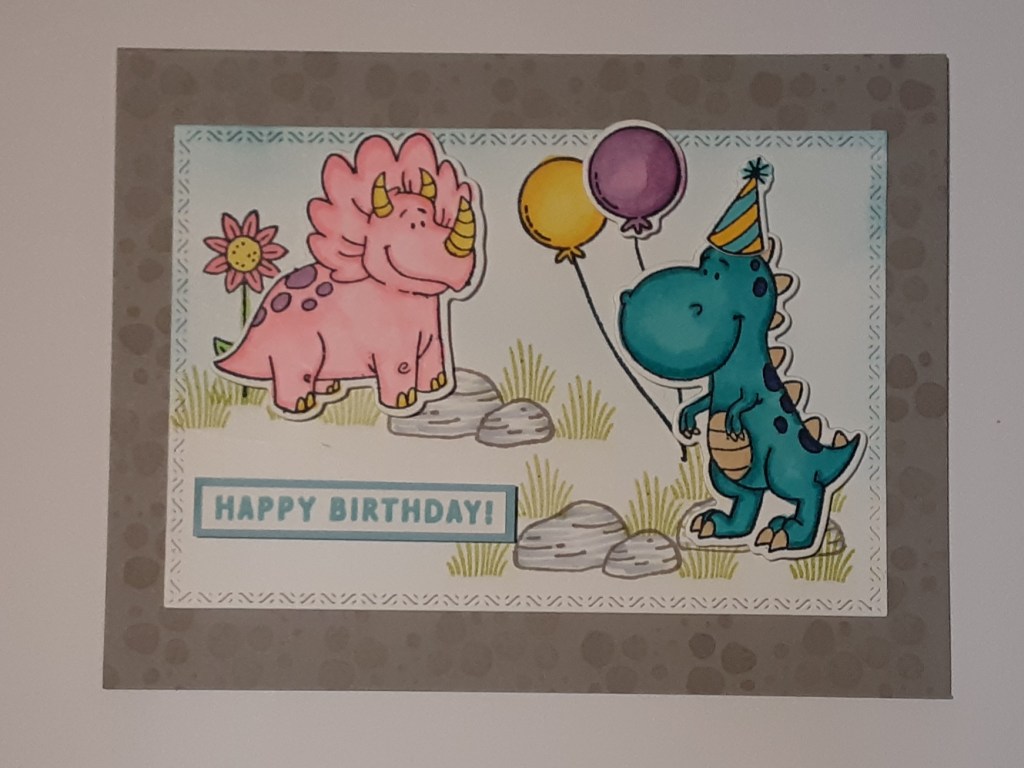
Below is a picture of my stepped-up version of the card. I stamped the dinos on white cardstock and colored them in with Stampin’ Blends before die cutting and adding to my card. I also stamped, colored, and cut out an extra balloon and a party hat and added them to my card. Another difference is I die cut the rectangle with my Textured Notes dies. I stamped Happy Birthday! with Balmy Blue ink on a strip of Basic White cardstock, that I cut down close to the words. I mounted this on a strip of Balmy Blue cardstock and trimmed it for a narrow border. I added my sentiment in the open space with Dimensionals.
You could easily change the color of the dinosaurs by using a different color cardstock or Stampin’ Blends.
I hoped you liked one or both versions of my card!
For the complete supply list, click here.
