
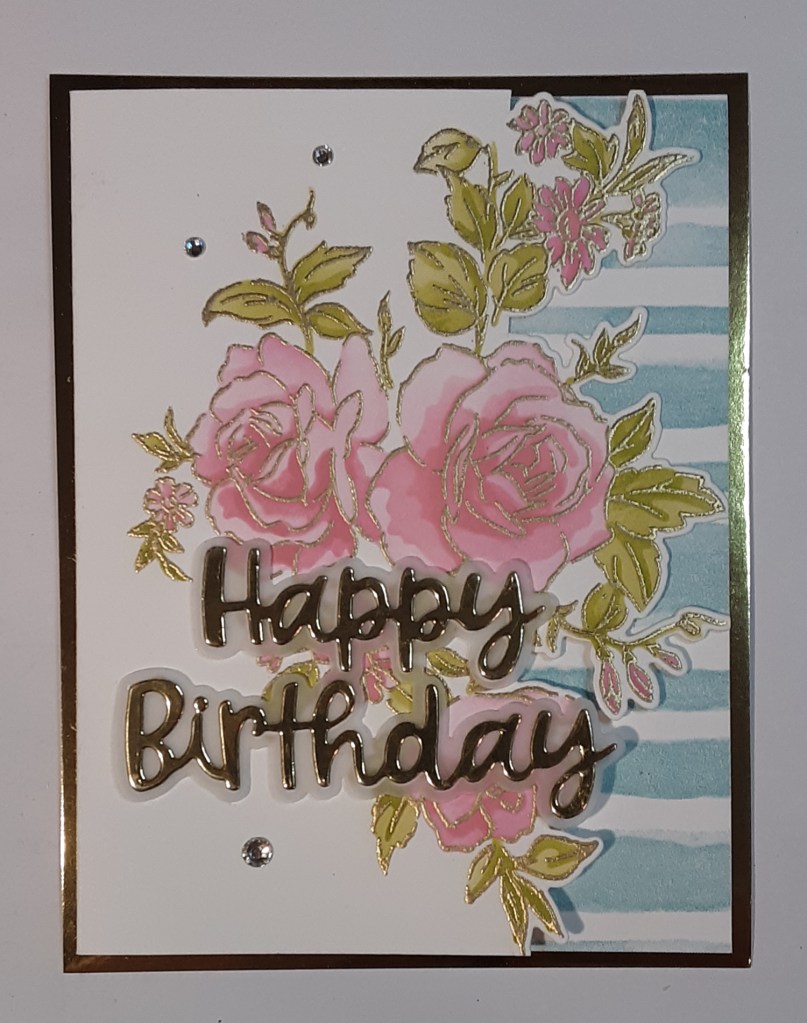
Happy Wednesday! Today I have a card that uses a few fun techniques. This is actually the birthday card I made for Terry’s birthday. Marilyn here with a card that involves stenciling, heat embossing, and partial die cutting. I used the Layers of Beauty bundle, which includes the stamps, dies, and stencils.
To make my card base, I cut a piece of Gold Foil Sheets to 4-1/4″ x 5-1/2″ on my Paper Trimmer. I cut a piece of Basic White Cardstock to 5-1/4″ x 8″, scored and folded at 4″, and burnished with my Bone Folder. This is my card. I cut another piece of Basic White cardstock to5-1/4″ x 2-5/8″.
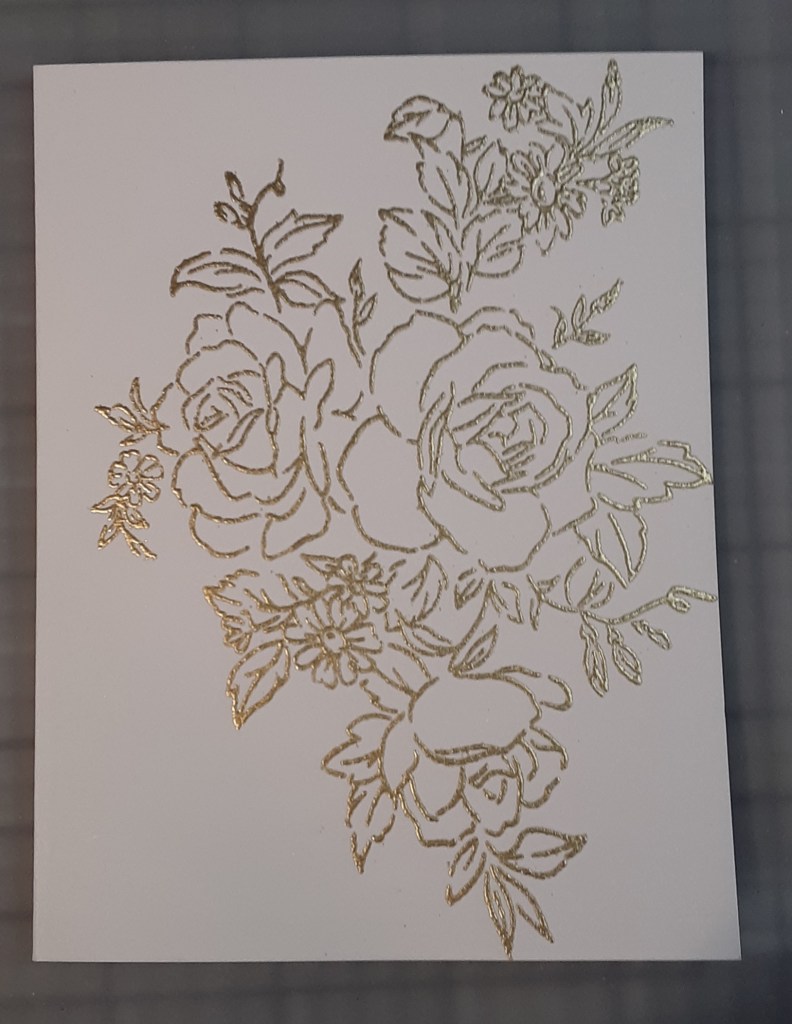
To begin, I stamped the large floral image from Layers of Beauty bundle with Versamark ink along the right edge of my card front after putting down some anti-static powder. This stamp has a lot of detail, and the anti-static powder will preserve these details. I sprinkled on Gold Embossing Powder and heat set it with my Heat Tool.
Using the first stencil in the set, I lightly applied Pretty in Pink ink with a Blending Brush to the card. The stencil is easy to line up. The stencils in the set are numbered in the recommended order and there is a notch cut to help align the stencils. I kept it from shifting by using a sticky mat under the cardstock and stencil. You could also use low tack tape to hold the stencil in place while ink blending. I repeated this process using stencil two, again with Pretty in Pink ink, and then, again, with stencil three. Using the same ink color guarantees a match in color. It gets darker with each applied layer. You definitely want to use a light hand as you apply the color, so that you get the variety of colors. If you would like a more striking contrast in color, you could apply Melon Mambo ink as your third layer color but go light! Remember to daub off the initial burst of color before applying the ink. Melon Mambo is a much more intense color than Pretty in Pink.
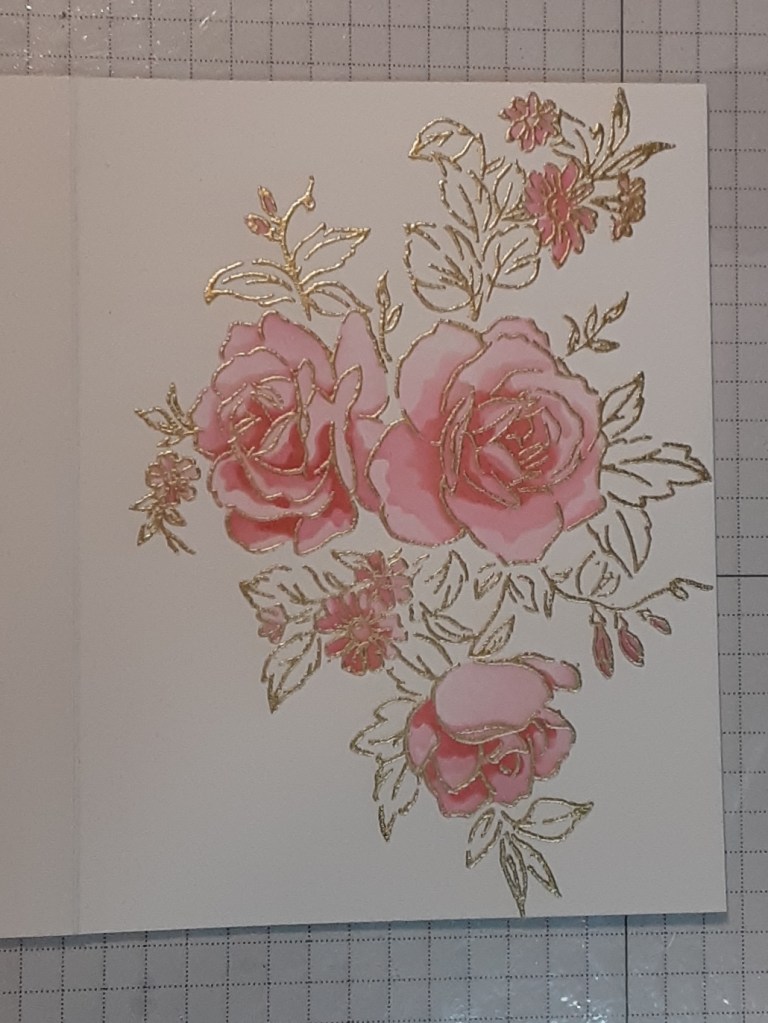
I ink blended the leaves using stencils 4 and 5 and Lemon Lime Twist ink.

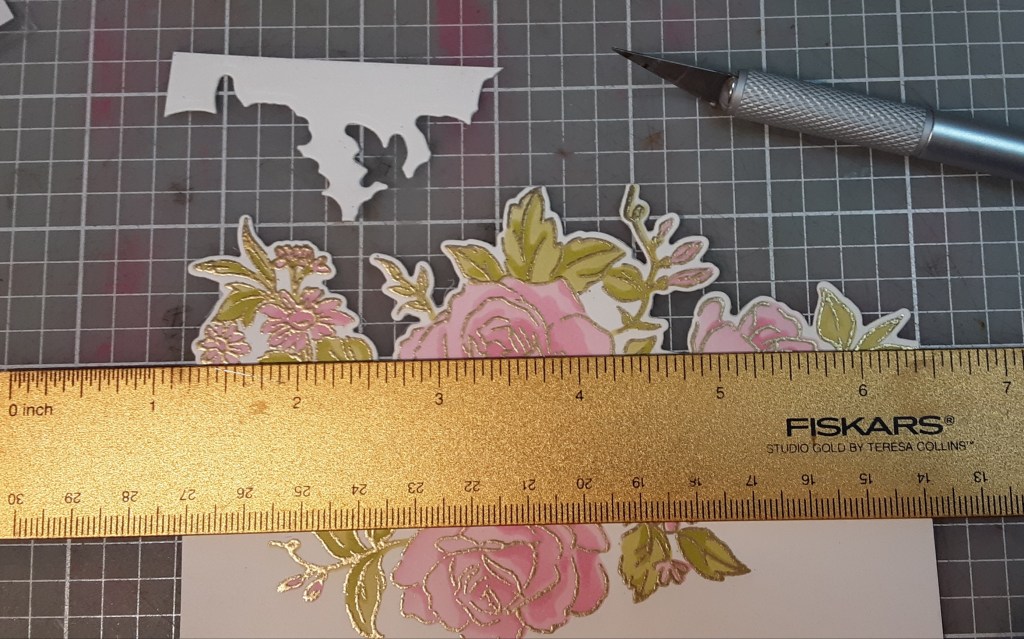
With my ink blending complete, it was on to the next step, partial die cutting. It may not be obvious in the top picture, but the right edge is not a straight cut. To achieve this look, I only wanted to cut out the right side of the floral image. I lined up my die on my image and used some Easy-See tape to hold it in place. I lined up the top plate of my Stampin’ Cut & Emboss Machine, so the edge was 1-1/4″ in from the edge. I used a pencil to mark where I wanted the cut line to be. The die will only cut where there is a top and bottom plate to add pressure. I ran this through my machine.

Since I didn’t cut out the entire image, there were spots that weren’t released by the die cutting. To remedy this, I used a straight edge ruler and an Exacto knife to free these spots. I used a self-healing mat to cut on. The grid lines helped me position the ruler at 1-1/4″. You could use your Paper Trimmer for this if you’re careful not to cut into the image. Some spots are very narrow and would be difficult to see under the blade.

Gently remove the die cut pieces.
To add a little contrasting color to the inside of the card that shows through, I stamped the new Online Exclusive Painted Stripes stamp with Balmy Blue ink to the right side of the inside of the card. I tried masking the inside to make a clean line, but I didn’t meet with success. So, I added the 2-5/8″ x 5-1/4″ piece inside the card, after stamping my sentiment, to make a clean edge inside.

I adhered my card to my card base using my favorite adhesive (Multipurpose Liquid Glue or Stampin’ Seal).
With the Wanted to Say dies, I cut the Happy Birthday out of Gold Foil Sheets and the shadow out of vellum. These dies are on the Last Chance list, so get them while you can! I cut additional Happy Birthdays out of some white packaging cardstock. I adhered the gold Happy Birthday to the shadow with small dots of glue. I used a glue that dries clear but isn’t tacky. I struggle with glue on Gold Foil, so I used the non-tacky stuff. On the reverse side of the vellum, I glued my two extra Happy Birthday die cuts for a bit of dimension.
I positioned my sentiment on the front of my card before gluing to get a sense of where I would apply glue. The “y” in birthday extented beyond my die cut edge, so I wanted to make sure I didn’t apply glue there. Again, I recommend using a glue that doesn’t dry tacky, just in case. I like Bearly Art glue for this.
As a finishing touch, I added three Rhinestones. I think they fill the white space nicely.
I hope you liked this card! I had a lot of fun making it.
For the complete supply list, click here.
