
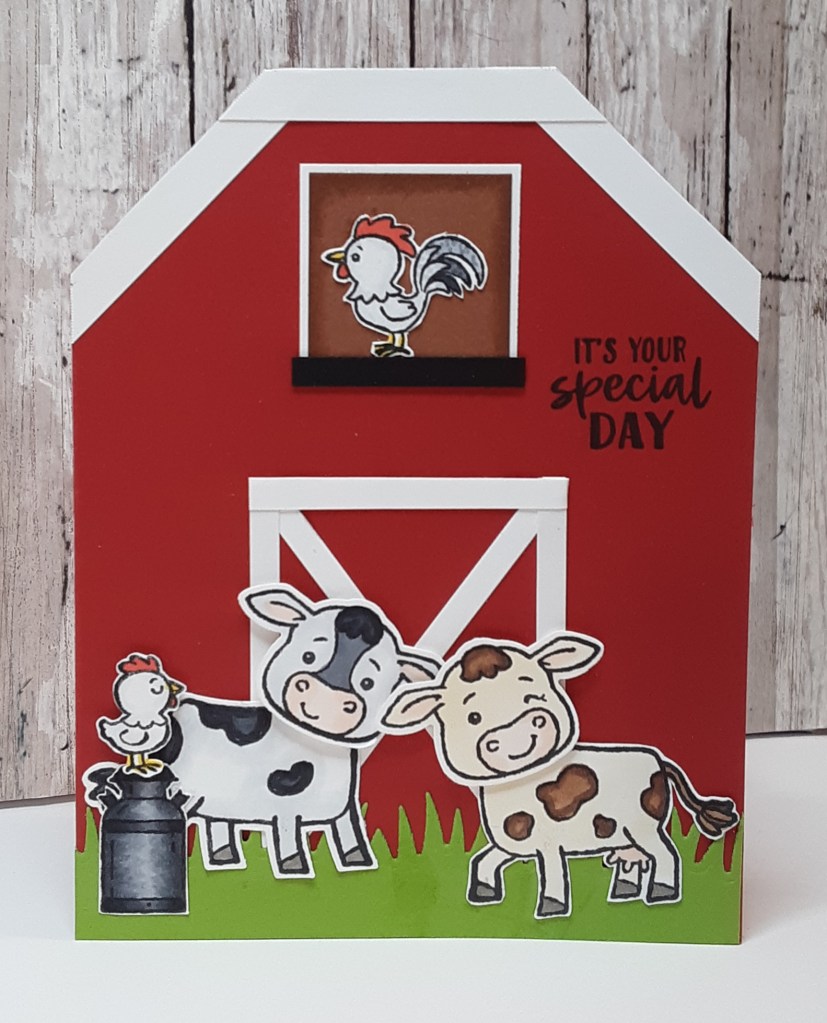
I’ve had this card in my queue for a while now and thought I’d pull it out while the Cutest Cows stamp set and punch are still current. This cute set is on the Last Chance List at a discount, so if you’d like to add it to your collection, now is the time to act.
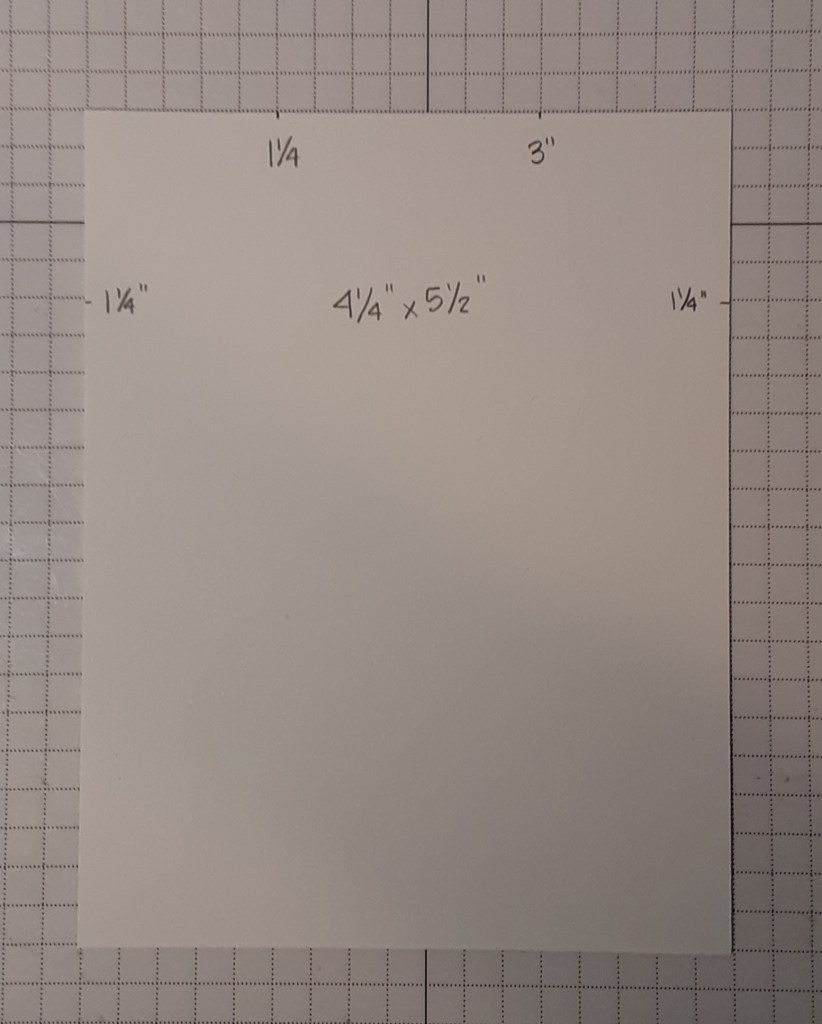
To make the card base, I cut a piece of Real Red Cardstock to 5-1/2″ x 8-1/2″ on my Paper Trimmer, scored and folded at 4-1/4″, and burnished with my Bone Folder. I cut an additional piece of Real Red cardstock to 2″ x 2-1/2″.
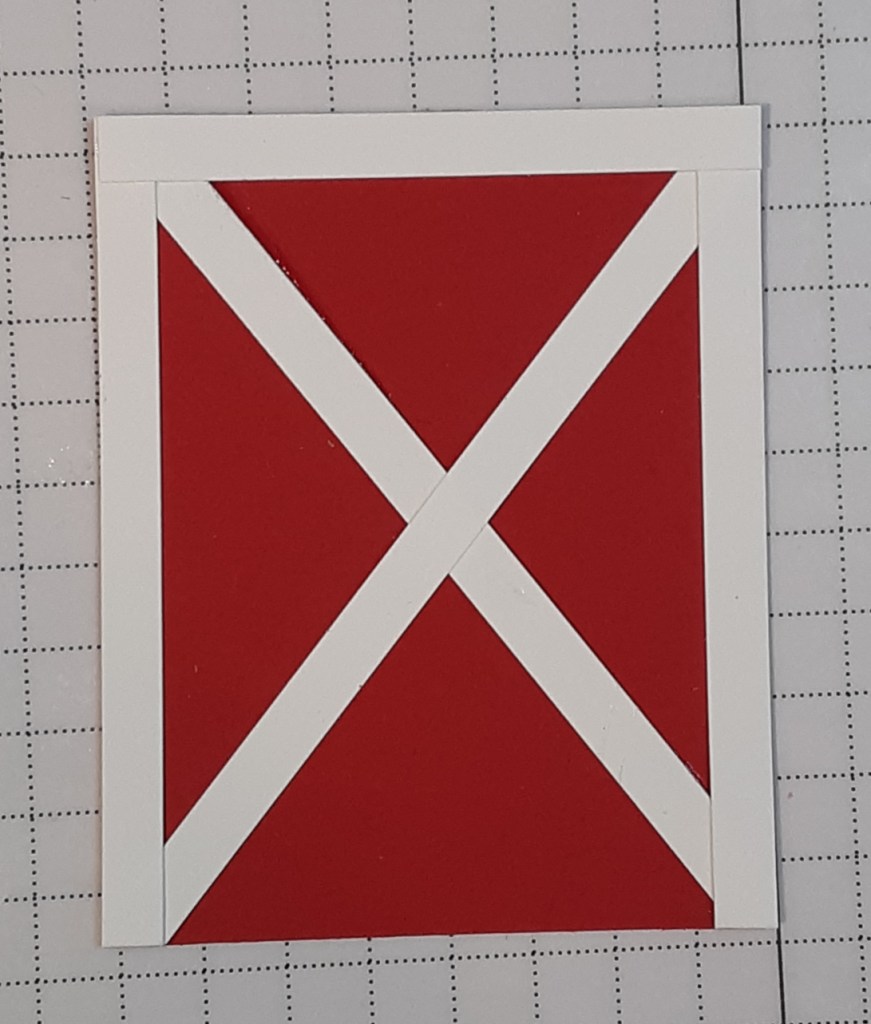
To cut the barn shape on the card base, I marked 1-1/4″ from each upper corner. I have a diagram below. Keep in mind that the Real Red cardstock is folded, and the fold should be on the left.
Following the tick marks that I made, I lined them up in my Paper Trimmer and cut diagonally to cut off the upper corners.
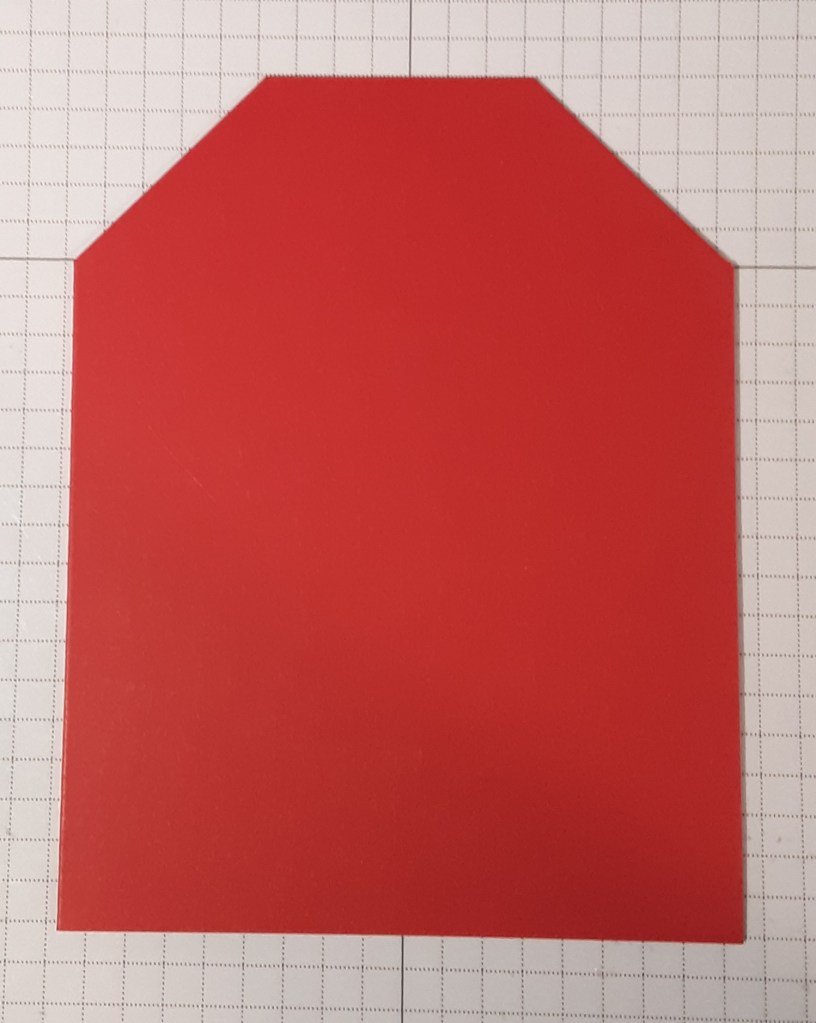
I cut some Basic White cardstock paper strips 5/16″ wide. I adhered them to the cut corners with my favorite adhesive (Multipurpose Liquid Glue or Stampin’ Seal) and then across the top. I trimmed them with my Paper Snips flush with the edges of the card.
To make the barn door, I added 3/16″ strips of white cardstock corner to corner on my 2″ x 2-1/2″ piece of Real Red. You’ll notice I didn’t add them to the upper corners of the piece. They will be covered, and I wanted to minimize bulk. I trimmed the lower corners with my Paper Snips.
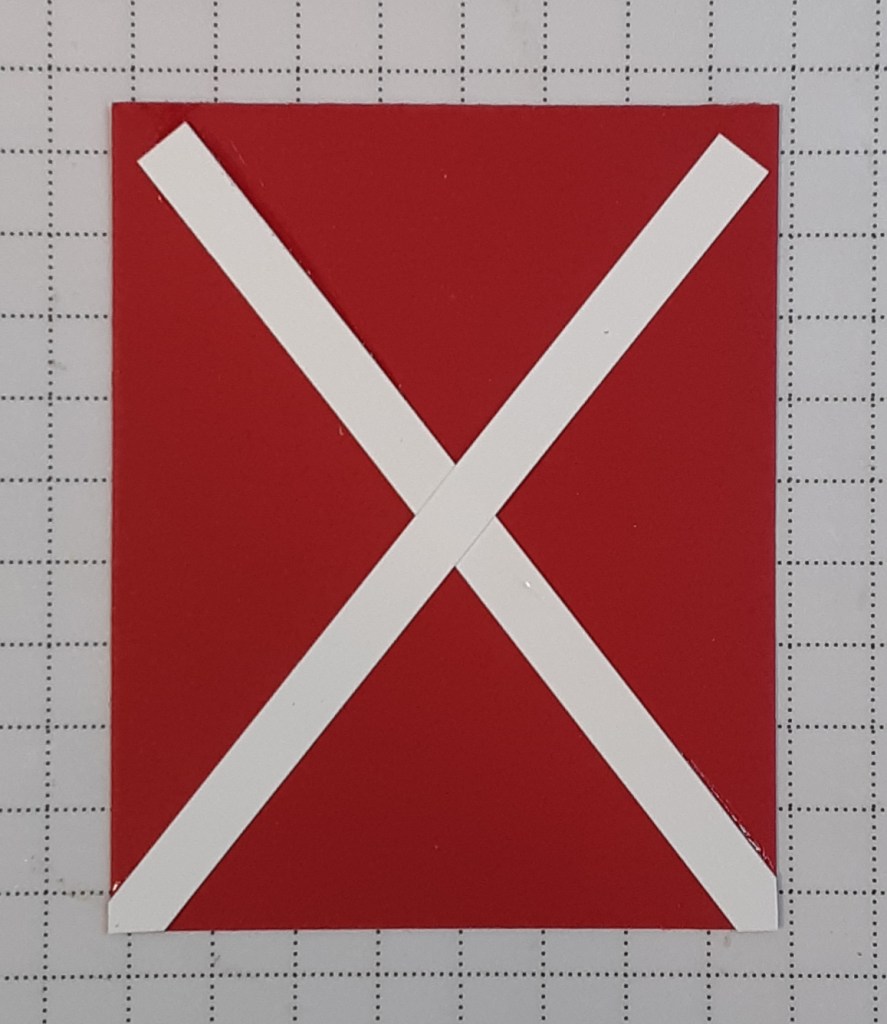
Next, I added strips to the top and sides. I trimmed them with my Paper Snips.
I die cut some Granny Apple Green cardstock for grass. I used a die that I had in my stash. You could also cut some grass with Paper Snips. I trimmed the bottom of the grass strip to 3/4″, excluding the grass blades, and 4-1/4″ wide. I laid this across the bottom of the card and positioned the door so the base of it tucked slightly under my grass. I adhered it to the card, then glued on the grass.
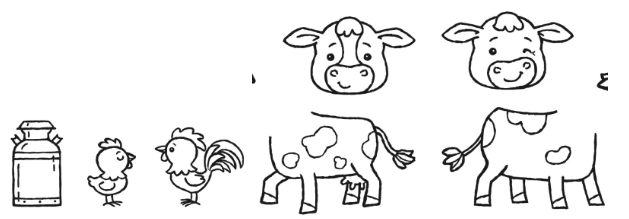
I stamped the two cows and their heads from the Cutest Cows stamp set on Basic White cardstock with Momento Tuxedo Black ink. There are three cows to choose from and I used the two cows standing. I also stamped the two heads that can be punched out with the Cutest Cow Builder Punch. I stamped the milk can and two chickens. The right facing cow can be punched out but the other needs to be fussy cut. If you want to punch out the cow, keep in mind where you stamp it on your cardstock so you can more easily punch it out. The chickens and milk can need to be fussy cut.
Before cutting or punching out the images, I colored them with Stampin’ Blends: Petal Pink (ears, udder), Basic Black (milk can, spots), Smoky Slate (hooves, chickens, cow’s body, milk can), Ivory (cow’s body), Pecan Pie (spots, tail), Real Red (chickens’ combs), Daffodil Delight (chicken feet). After coloring, I punched or fussy cut all my pieces. When using the punch, flip it over so you can line up your images with the cutting edges of the punch.
I cut a 1-3/8″ square from Basic White cardstock and 3-1/4″ square from Pecan Pie cardstock. I used a Sponge Dauber to add Pecan Pie ink around the edges of the Pecan Pie square for a bit of depth. I adhered the Pecan Pie square on the white square, leaving a narrow border. I glued a 3/16″ x 1-1/2″ strip of Basic Black cardstock along one edge of the squares. I adhered this piece to my card with the black strip on the bottom to create a window to the hay loft. I stamped It’s Your Special Day in the space to the right of the window in Momento Tuxedo Black ink.
I positioned and then glued the cow bodies to the card. I adhered the cows’ heads with Stampin’ Dimensionals. I glued on the milk can and the chicken in the window. I added the smaller chicken to the top of the milk can with Dimensionals.
To finish the card, I glued 4″ x 4″ piece of Basic White cardstock inside the card after stamping my sentiment.
I hope you enjoyed this fun card despite all the pieces and oddball measurements!
For the complete supply list, click here.
