
Today I have a simple but stunning card for you. Marilyn here, with a monochromatic color schemed card. I had been wanting to use the Spring Corners stamp set for a while, and this is what I came up with. I am quite pleased with the result. The elegance of the daisies really makes the card stand out.
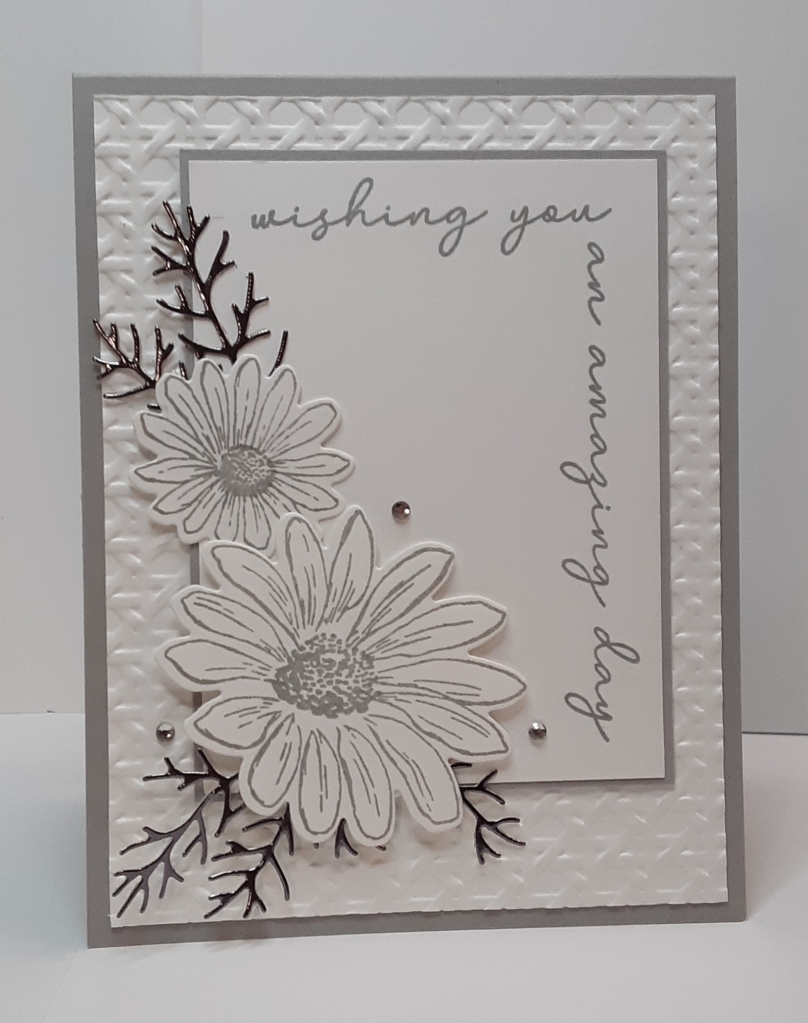
To make the card base, I cut a piece of Smoky Slate cardstock to 5-1/2″ x 8-1/2″ on my Paper Trimmer, scored and folded at 4-1/4″, and burnished with my Bone Folder. I cut another piece of Smoky Slate cardstock to 3-1/8″ x 4-1/8″. I cut a piece of Basic White cardstock to 4″ x 5-1/4″ and another to 3″ x 4″.
I ran the 4″ x 5-1/4″ piece of Basic White through my Cane Weave 3D Embossing Folder on my Stampin’ Cut & Emboss Machine. I adhered this piece to my card base with my favorite adhesive (Multipurpose Liquid Glue or Stampin’ Seal).
With a scrap of Basic White cardstock, I stamped the two full blooming daisies from Cheerful Daisies stamp set with Smoky Slate ink. I also stamped the centers of the flowers. I cut these out with the Cheerful Daisies dies.
With Smoky Slate ink, I stamped “Wishing you an amazing day” from Spring Corners Stamp Set (the bundle saves you 10%) in the upper right-hand corner of the 3″ x 4″ in piece of Basic White cardstock. You could change the sentiment to make it a Thank You card.
I cut two sprigs from the Cheerful Daisies dies from Silver Foil Sheets.
I glued my stamped white piece to the Smoky Slate matte. This has a narrow border. I glued this panel to the upper right corner of my card base. I left a 3/8″ border at the top and right side.
With my Paper Snips, I cut apart one of the sprigs.

I laid my daisy pieces on my card and decided where I wanted my sprigs to go. I adhered the larger sprig behind the larger daisy where it extended toward the lower left corner. I added the small cut off sprig on the daisy to the right. I glued the remaining sprig to the smaller daisy so that it would extend to the upper left.
With Stampin’ Dimensionals, I added the larger daisy. I glued the smaller daisy above it with the lower edge slightly tucked under the petals of the larger flower.
I added some Rhinestones for a little additional sparkle.
To finish the card, I stamped a sentiment on a 4″ x 5-1/4″ piece of Basic White cardstock and glued it inside the card.
I hope you liked this card!
For the complete supply list, click here.
For additional inspiration:

