

Spring is right around the corner and this card definitely puts me in the mood for warmer days and sunshine. Spring officially begins March 20, but who’s counting?
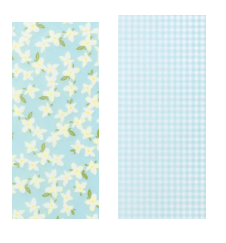
For my card base, I cut a piece of Pool Party cardstock to 5-1/2″ x 8-1/2″ on my Paper Trimmer, scored and folded at 4-1/4″, and burnished with my Bone Folder. I cut two pieces of Basic White cardstock to 4″ x 5-1/4″. From the Floral and Gingham Vellum pack, I cut a 1-1/2″ x 4″ strip of the floral design and another of the gingham print. I cut an additional piece of Basic White cardstock to 1-1/2″ x 4,” which will later go under the gingham vellum.
On a scrap piece of Basic White cardstock, I stamped the flower image from Delightful Wishes bundle with Daffodil Delight ink. I used the image below. It is the shadow image from the set. The yellow will be the shading on a white flower.
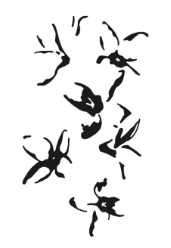
I also stamped the leaf image three times with Old Olive ink. I die cut the leaf and flower images with the dies in the bundle. The flowers are a little tricky to line up, but doable. When you die cut the flowers, they cut into four pieces that you arrange on your card. You can use them all or fewer if you prefer. I die cut the branch from Pecan Pie cardstock. You may want to use Adhesive Sheets on the branch because it is so detailed.
With Pecan Pie ink, I stamped Happy Birthday on a 1/2″ strip of Basic White cardstock. This stamp is from the retired Go-to-Greetings set. You can use whatever you have in your stash. I cut the ends off at an angle for a bit of interest.
Now to assemble the card. I glued the white 4″ x 5-1/4″ matte to my card base using my favorite adhesive (Multipurpose Liquid Glue or Stampin’ Seal).
Now for the trickier part. When you put adhesive on vellum, it shows through unless you cover the whole piece. You can use adhesive sheets and eliminate the problem. Or you can add the adhesive strategically, which is what I did. I laid the floral piece of vellum on my work surface. Next, I put the white piece on that, overlapping about 1/2″ and offset. When I knew where I wanted it to go, I added adhesive on the back of the white piece just on the part that overlapped the vellum, and adhered it. Then, I laid the gingham piece on the white piece.
I adhered the flowers and leaves to the branch. I dotted glue on the back of the part of that overlapped the gingham vellum and adhered it to the gingham. I lifted the vellum with the branch stuck to it (it may need a minute to set) and added glue to the back of the branch and on the vellum where the branch is adhered. I used the glue sparingly because I didn’t want it to squish out from under the branch and then show behind the vellum. I glued this to the floral vellum and the white piece, lining the gingham up with the white piece so that the white piece isn’t obvious. The white piece allows the gingham to show up against the floral vellum since the vellum is translucent. (I really hope this makes sense.) I adhered the sentiment, tucking the left side under the flower on the gingham. Once again, I added glue wherever the vellum had something on it (the branch and flowers, and the white piece) and added it to the card. Vellum is a little slick, so it may want to slide a little. Give the glue a minute or two to set.
To add a little sparkle to the card, I brushed some Wink of Stella on the flowers. I added a Tiny Bee Trinket with a Mini Glue dot.
To finish the card, I stamped a sentiment on a piece of Basic White cardstock, which I previously cut, to 4″ x 5-1/4″ and glued it into the card.
I hope you liked this card! It was fun playing with vellum!
For the complete supply list, click here.
