
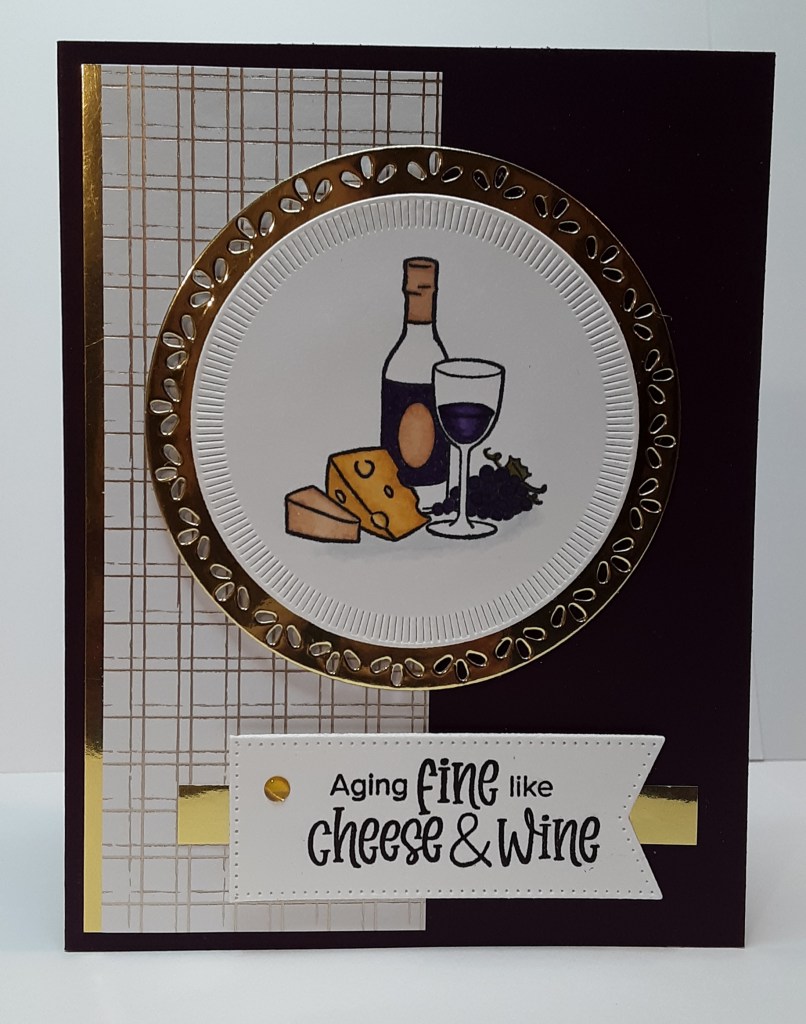
Here I am again, as promised, with the very versatile One More Year stamp set, this time featuring the wine and cheese image. This set is great because you can make three distinct cards from one set. I love when Stampin’ Up! offers this kind of set; something for everyone!
To make the card base, I cut a piece of Blackberry Bliss cardstock to 5-1/2″ x 8-1/2″ on my Paper Trimmer, scored and folded at 4-1/4″, and burnished with my Bone Folder. I cut a piece of Regal Distressed Patterns DSP to 2″ x 5-1/4″. I cut a strip of Gold Foil sheets to 3/8″ x 3-1/4″.
With a scrap of Basic White cardstock, I cut the 2-3/4″ circle from Spotlight on Nature die set on my Stampin’ Cut & Emboss Machine. I cut an additional 3-1/4″ circle from Gold Foil. Finally, I cut the banner label from Stylish Shapes dies from Basic White cardstock.
I stamped the wine and cheese image from One More Year stamp set on the white circle with Momento Tuxedo Black ink. I stamped the coordinating sentiment on the banner, with the sentiment on the right side of the banner with Blackberry Bliss ink. Using the largest square die from Stylish Shapes, I trimmed the banner. See below for my set up. I lined up the points of the banner with the edge of my die so that my cut would be square.
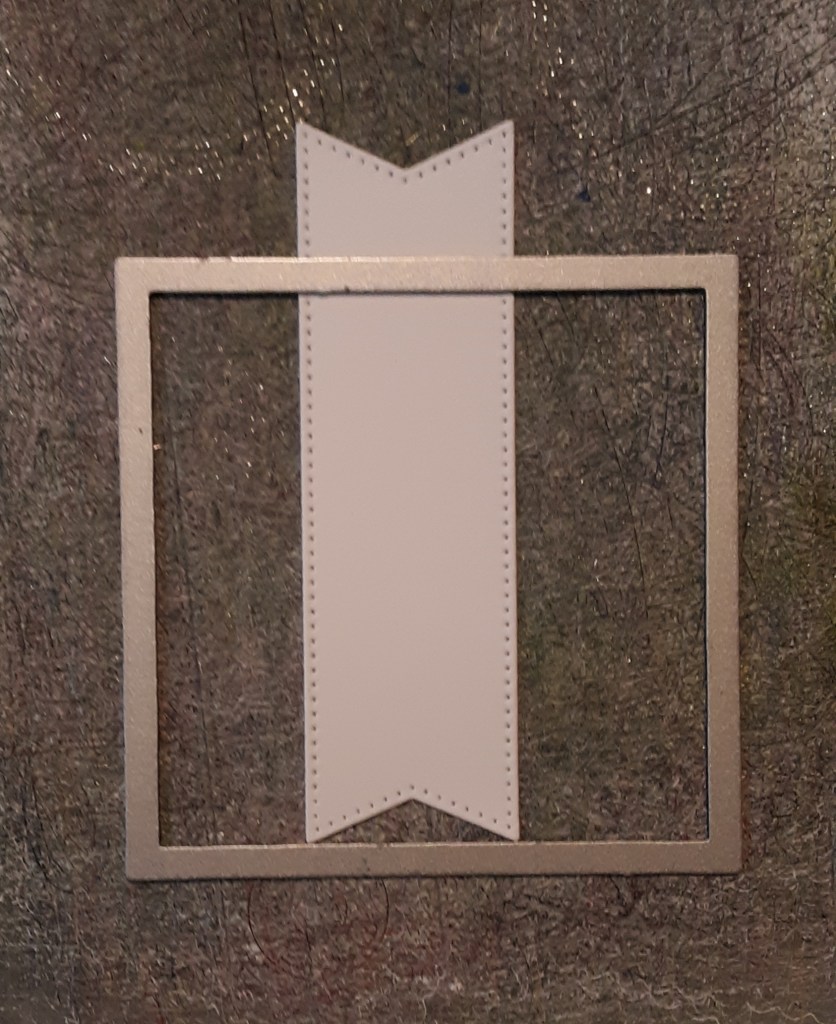
If you prefer to cut a banner on your Paper Trimmer, it should measure 1″ x 2-3/4″ before flagging the right side.
I colored my stamped wine and cheese image using Stampin’ Blends: Daffodil Delight, Blackberry Bliss, Old Olive, SU600, and SU700.
Now to assemble the card. I adhered my DSP piece to the Gold Foil strip using favorite adhesive (Multipurpose Liquid Glue or Stampin’ Seal). I adhered this to my card base, leaving a 1/8″ border top, bottom, and left side.
I glued my white circle to the gold foil circle, and adhered this to my card using Stampin’ Dimensionals. Under the focal image, I glued my narrow gold strip about 1/2″ from the bottom. On this, I adhered my sentiment with Stampin’ Dimensionals. For a bit of shine I added a gem from Gold Textured Adhesive Backed Gems to the upper left of my label.
To finish the card, I stamped Happy Birthday on a 4″ x 5-1/4″ piece of Basic White cardstock. If you would just like the Happy Birthday from the stamps in the set, cover the extra words with a Post-It note or a piece of tape before inking. I find it easier to lay the stamp face up to apply the ink and then removing the Post-It/tape before stamping. Or you could use a Stampin’ Write Marker and just ink up the Happy Birthday. Or you could keep the sentiment as is. I glued this piece inside my card.

I hope you liked this card!
For the complete supply list, click here.
