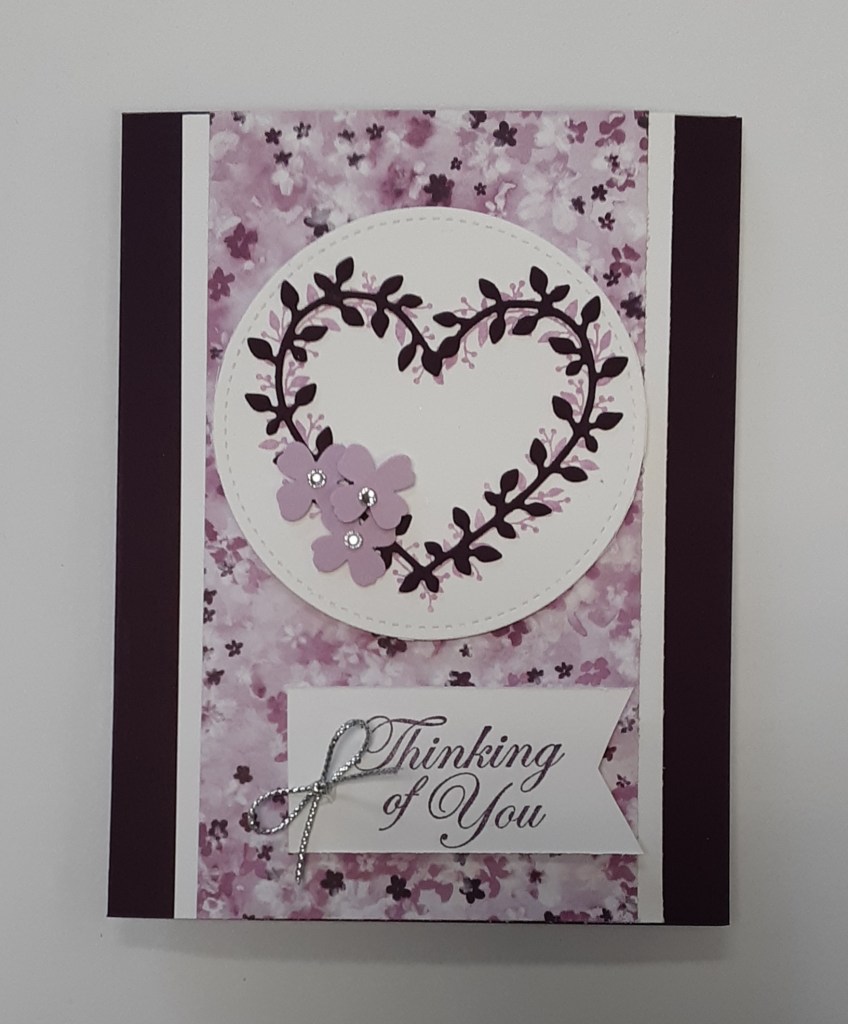
Today I have a card that uses FREE product from Stampin’ Up! We still have a couple weeks left of the Sale-abration promotion to take advantage of this fun promotion.
To make the card base, I cut a piece of Blackberry Bliss cardstock to 4-1/4″ x 11″ on my Paper Trimmer, scored and folded at 5-1/2″, and burnished with my Bone Folder. I cut a 3″ x 5-1/2″ piece of DSP from the Bloom Impressions DSP (FREE! with a $60. purchase).
I cut two strips of Basic White cardstock to 1/2″ x 5-1/2″ OR you could cut one piece of Basic White cardstock to 3-1/4″ x 5-1/2″ to act as the matte layer. I adhered my DSP to my matte piece with my favorite adhesive (Multipurpose Liquid Glue or Stampin’ Seal). If you cut the strips to save cardstock, glue them to the back of either long side of the DSP with about 1/8″ showing. This panel can be adhered to the card base.
With a scrap of Basic White cardstock, I cut the 3″ circle from the Stylish Shapes dies on my Stampin’ Cut & Emboss Machine. I stamped the heart image from Heart Shaped bundle (FREE with $120 purchase) with Fresh Freesia ink in the center of the circle. I die cut from Blackberry Bliss cardstock, the heart shape die from the bundle. From Fresh Freesia cardstock, I cut three of the flowers from the dies in the bundle. I glued the heart die cut onto the stamped image. They line up perfectly! To prep the flowers, I used my stylus (or Take Your Pick tool) to press the centers of each blossom and moved in a circle. This works best with a Stampin’ Pierce Mat under your workspace. The petals lift up and give it dimension.
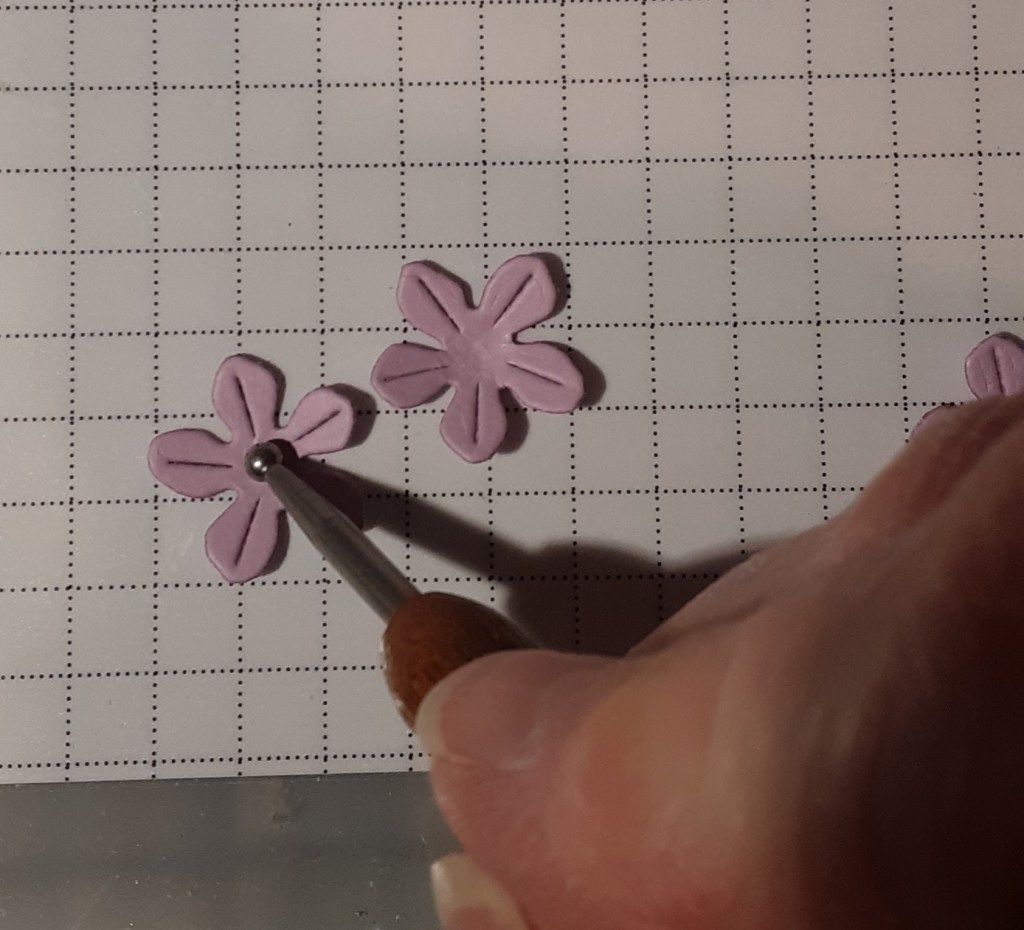
I used my Bone Folder to curl the petals back for a more realistic look.
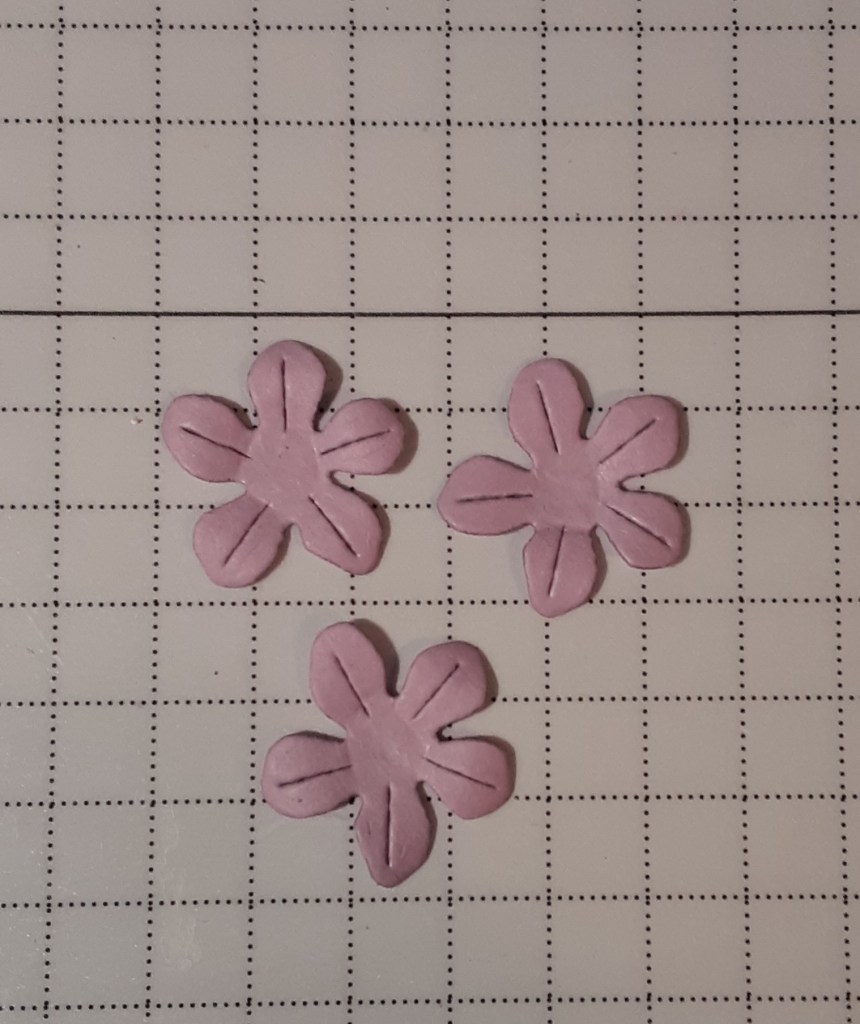
You could leave the petals flat if you prefer.
I glued two of the flowers on the wreath with a drop of wet glue. I popped up the third flower with a Mini-Dimensional. I added a Rhinestone to the center of each flower. I glued this focal image to my card about 3/4″ from the top.
Using the Stylish Shapes dies, I cut a partial banner from Basic White cardstock.
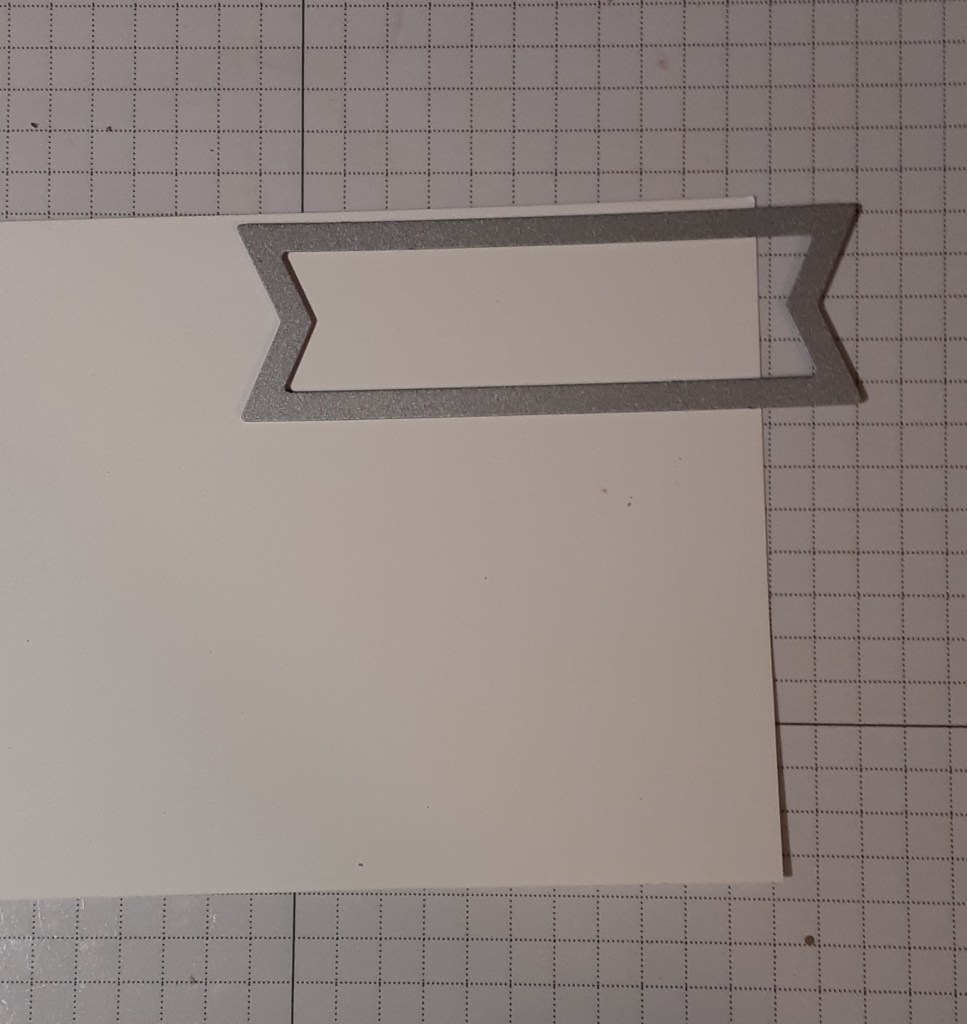
I trimmed it down to 2-1/2″ on my Paper Trimmer. You could also use a 1″ wide strip of white cardstock and flag the end with your Paper Snips. I stamped Thinking of You from the Layering Leaves stamp set with Blackberry Bliss ink.
I adhered my sentiment to my card with Stampin’ Dimensionals. I used a piece of silver cording that I had in my stash to make a simple bow and stuck it to my sentiment with a Mini Glue Dot. (Even after rolling it in my fingers, the Glue Dot was too big, so I cut it in half and saved the other half on the roll for another card.)
To finish the card, I glued a 4″ x 5-1/4″ piece of white cardstock inside.
I hope you like this card!
For the complete supply list, click here.
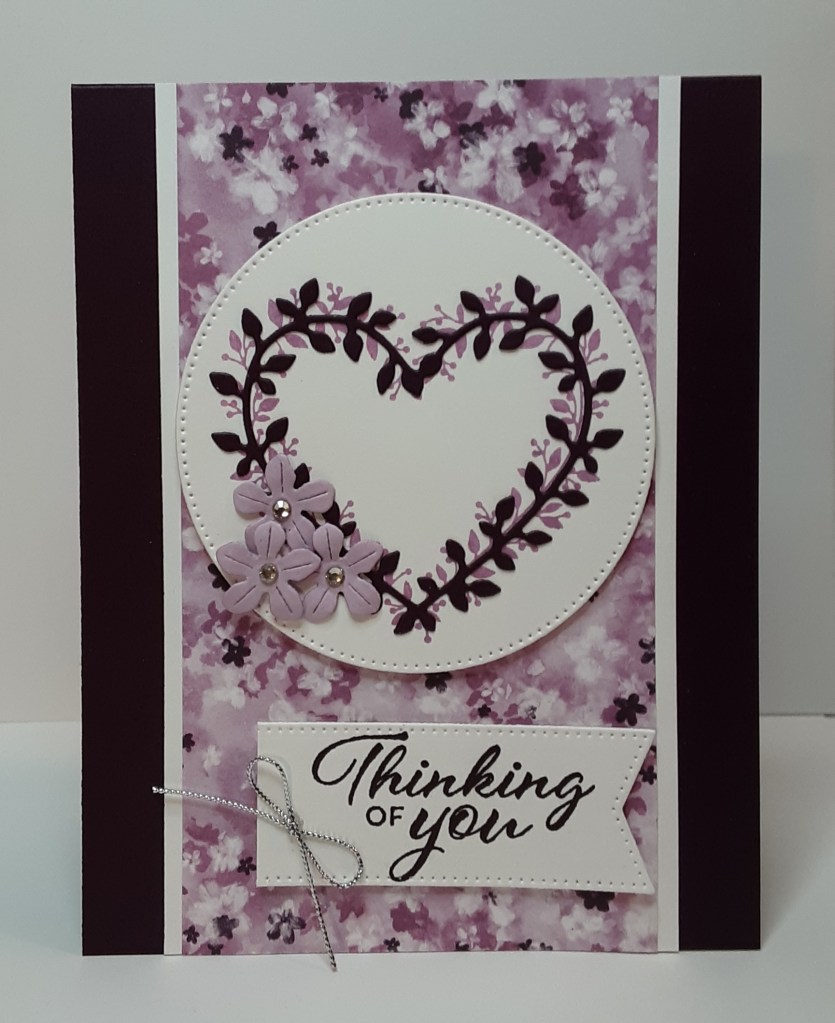
Here is a picture of the card we made in class. Some of the supplies we used weren’t current, but if you have them on hand, use them!