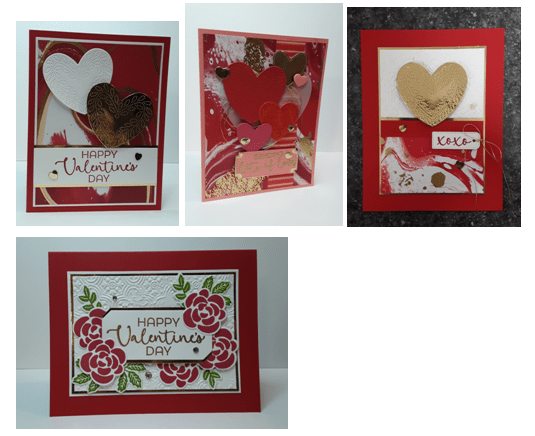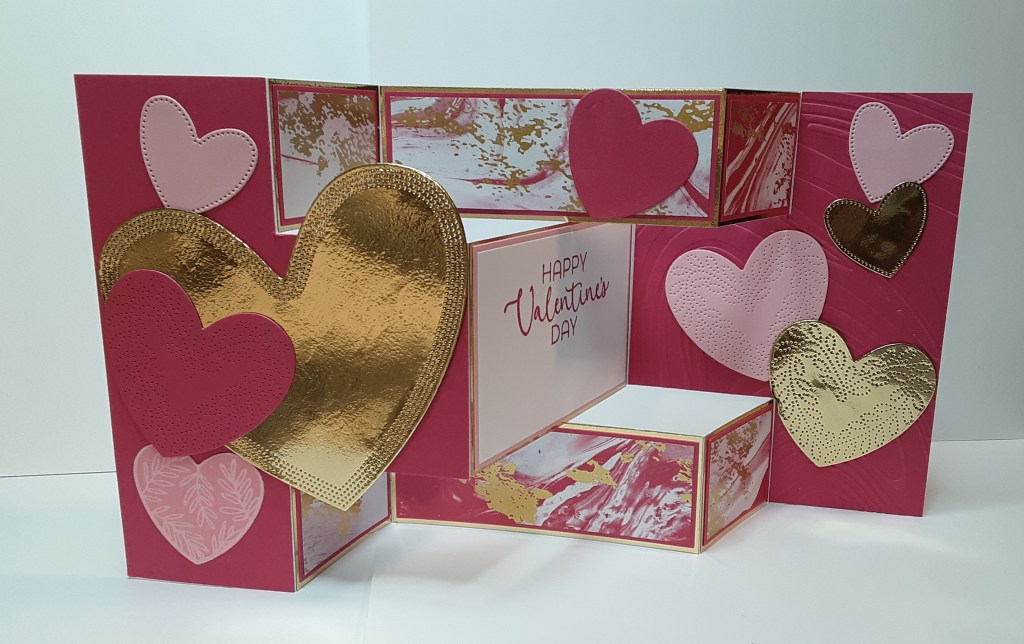
Here I am again with another card using the Hearts of Elegance stamp set and dies. I can’t seem to get enough of this set! Marilyn here with a tri-fold step card that is a real stunner.
The card base begins with a piece of Basic White 12″ x 12″ cardstock, cut to 5-1/2″ x 12″ on my Paper Trimmer. For this card a paper trimmer with a drop-down blade is essential because we will be cutting and scoring in the middle of the piece. See below for a diagram of the cuts and scores. Solid lines are cut lines and the dotted lines are score lines.
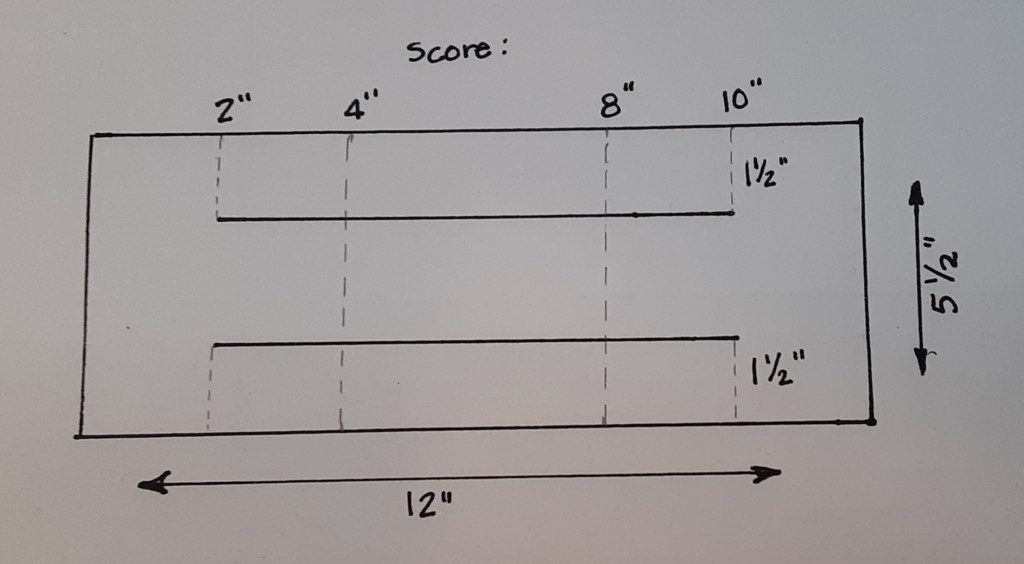
I cut the two parallel horizontal lines first. The Paper Trimmer works perfectly because it can accommodate the 12″ length of the paper, and you can drop the blade exactly where you need it to go. I lined up my paper along the 1-1/2″ line to the left, dropped my blade in at 2″ and cut down to 10.” I turned my paper around and repeated this on the other edge.
Next, I scored from top to bottom at 4″ and 8″ on the long edge. The next score line is a little trickier, but easy with the Paper Trimmer. At 2″ I scored down to the cut line, lifted the blade to the lower cut line and completed scoring to the bottom. I repeated this at the 10″ position.
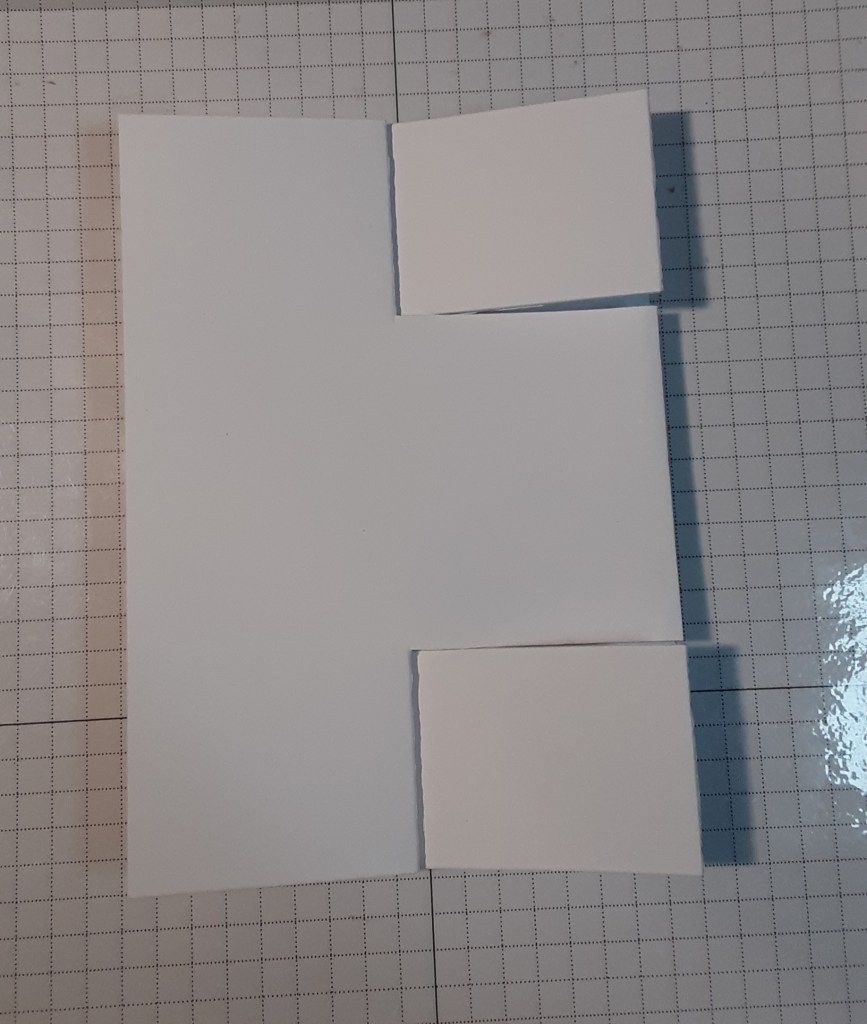
Folding is just a smidge trickier. I folded the card at 4″ and 8″ because they went from top to bottom. I reinforced those folds with my Bone Folder. I carefully folded the other score lines; on the left-side of the card they go back (mountain fold) and the right-side folds forward (valley fold). I’ve included an illustration. Notice the folds at 4″ and 8″ are not consistent from top to bottom to give it the step look. As you go across, you alternate the folds. Top row, mountain, valley, mountain, valley. Middle row, mountain, valley. Bottom row repeats the top.

Once you have reinforced all your folds, you should be able to fold it up to a 4″ x 5-1/2″ card. You may need to work the folds a little.
Next step is to cut the pieces to add to the card and make it stand out. With Melon Mambo cardstock, I cut two pieces to 4″ x 5-1/2.” These will cover the front panel of the card and the back inside panel. They need to be trimmed to fit the odd shaped bits. Again, the Paper Trimmer makes this easy. With the 4″ edge against the top of the trimmer, I lined it up with the 2″ mark. I cut down to 1-1/2″ as marked on the arm of the trimmer, lifted my blade, and cut from 4″ down to the bottom. I turned my paper and lined the top at 1-1/2″ and cut down to 2″ which it where it meets the previous cut. I slid my paper over to 4″ and cut down to 2″ and the other cut. I repeated these steps on the other piece. I ran the back piece through my So Swirly Embossing Folder on my Stampin’ Cut and Emboss Machine to give it a little texture. You should have four 2″ x 1-1/2″ pieces of Melon Mambo left. These four pieces need to be trimmed down to 1-3/8 x 1-13/16.” Sorry for the oddball number but the card doesn’t close properly with a bigger piece.
Here is a list of other pieces you will need to cut:
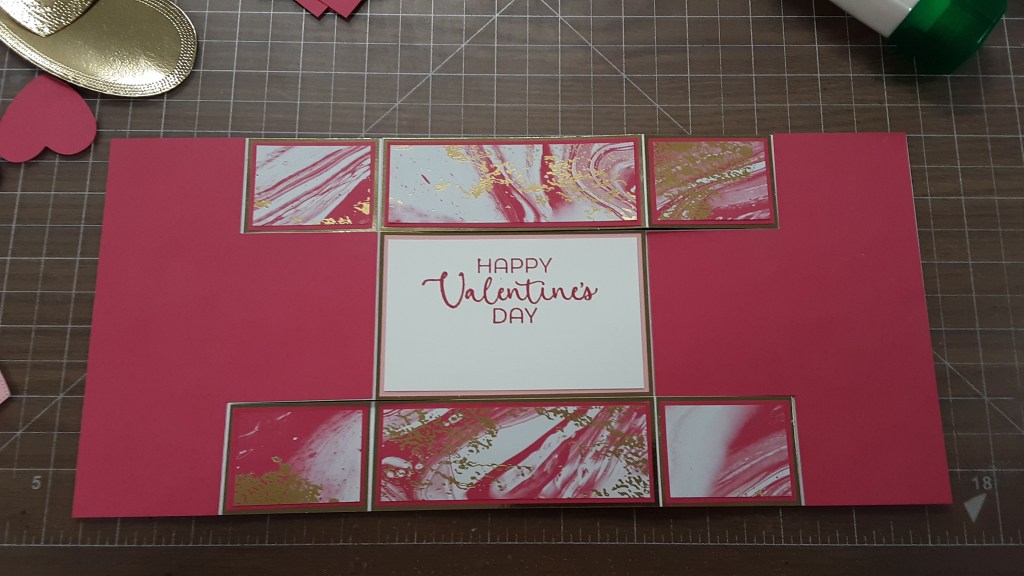
The various pieces will be glued in layers with the Gold Foil Sheet pieces as the bottom layer, the Melon Mambo cardstock as the middle layer, and the Marbled Elegance DSP on top. I used my favorite adhesive (Multipurpose Liquid Glue or Stampin’ Seal) to adhere my layers together. The layers will have narrow 1/16″ borders. The exception to the layering sequence is the center piece. For that I cut a piece of Basic White cardstock to 2-1/4″ x 3-11/16″. I stamped Happy Valentine’s Day from the Hearts of Elegance stamp set in Melon Mambo ink. (Get the bundle for 10% off.) This is glued to the Pretty in Pink cardstock piece. I laid out all my pieces before gluing them down.
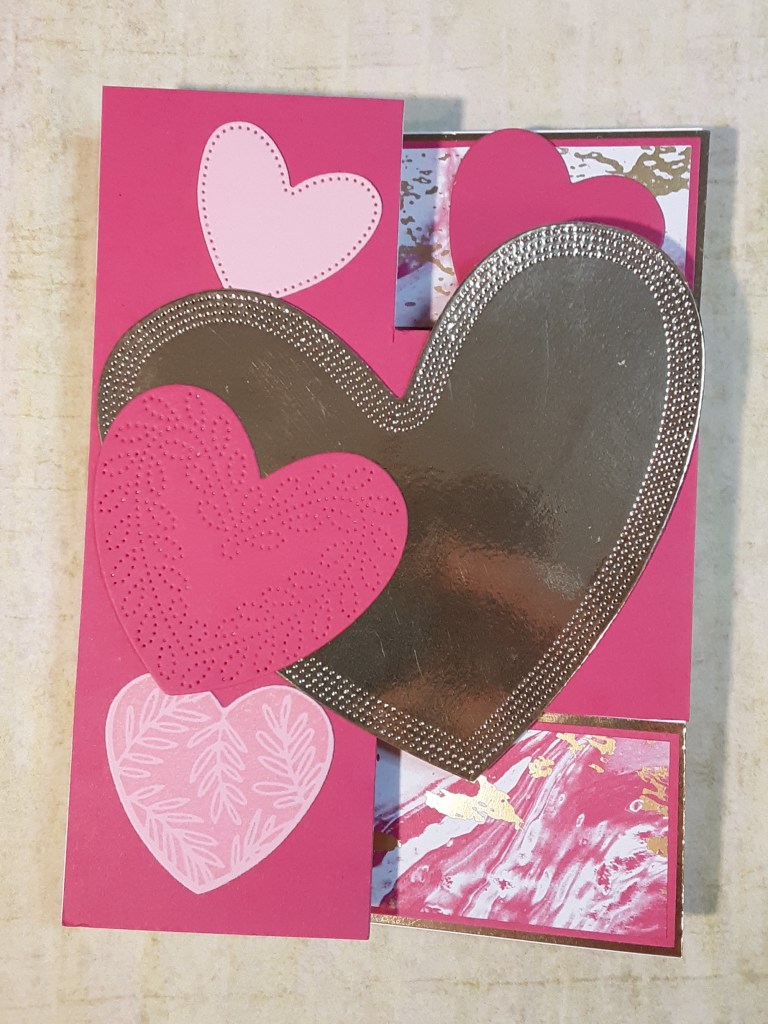
With my card base complete, I could focus my attention on the hearts. With Pretty in Pink ink, I stamped the heart image with the leaf design on Pretty in Pink cardstock. From Pretty in Pink cardstock using the Hearts of Elegance die set, I cut two of the small stitched hearts, the heart with the perforated leaf design, and the stamped heart with the coordinating outline heart die. I cut three hearts from Gold Foil sheets: the large, stitched edge heart, the heart with the perforated leaf design, and the small, stitched heart. With Melon Mambo cardstock, I cut the heart with the perforated leaf design and the smallest outline heart die. I glued the hearts to my card base, beginning with the large gold foil heart. This one extends beyond the confines of the front panel of the card, so be careful when applying glue. You don’t want to glue your card shut. You can follow my placement of hearts or get creative! You can add more or fewer hearts according to your own preferences. The final card when folded is 4″ x 5-1/2″ so you can extend your hearts beyond the edge about 1/4″ if you’d like. I suggest putting the card on an envelope to make sure you don’t extend too far.
I hope you liked this card and give it a shot. The cutting and scoring is truly the only tricky part, but hopefully I’ve explained it clearly enough that it isn’t too tricky.
For the complete supply list, click here.
For additional inspiration: