
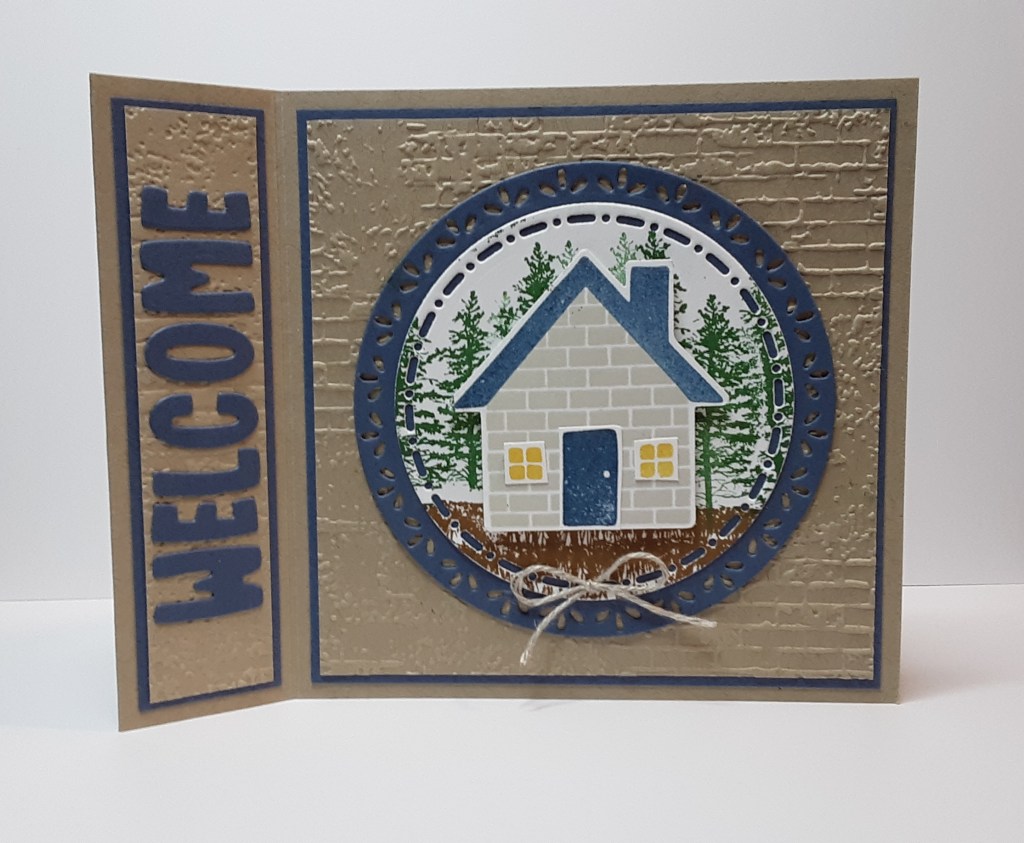
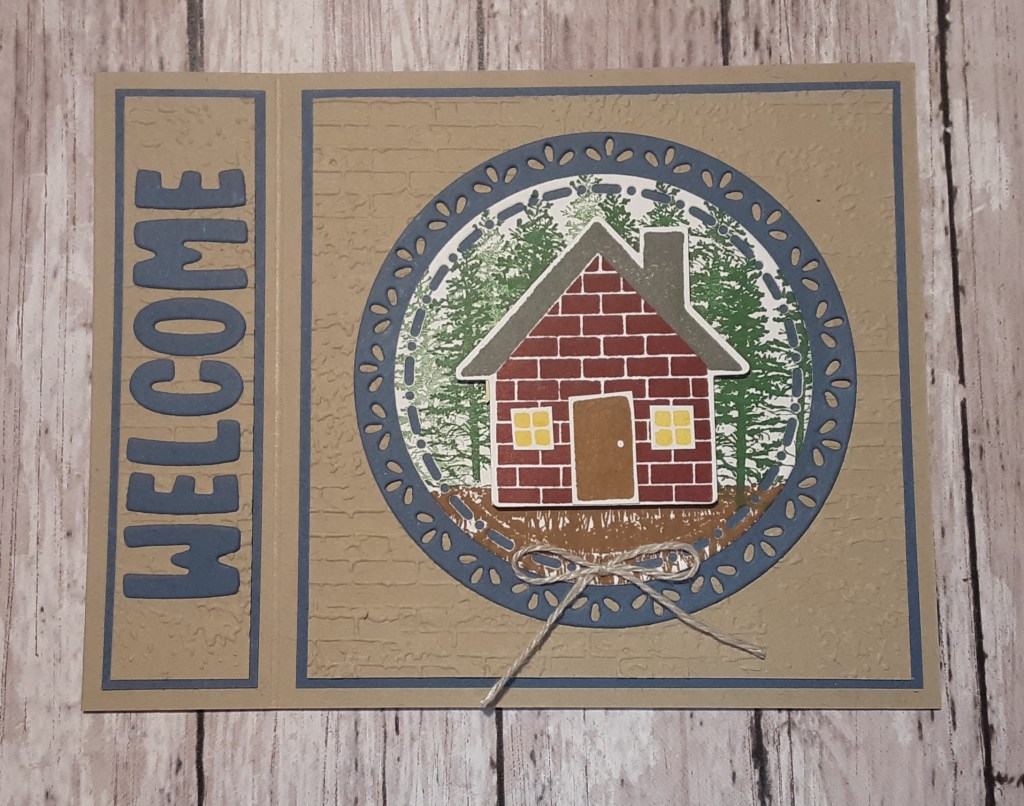
With all the snow and cold this past week, a cozy home seemed like an appropriate place to be. If you or a loved one has a new home in your future, this card is a sweet way to welcome the new homeowners. Marilyn, here, with this fun book fold card.
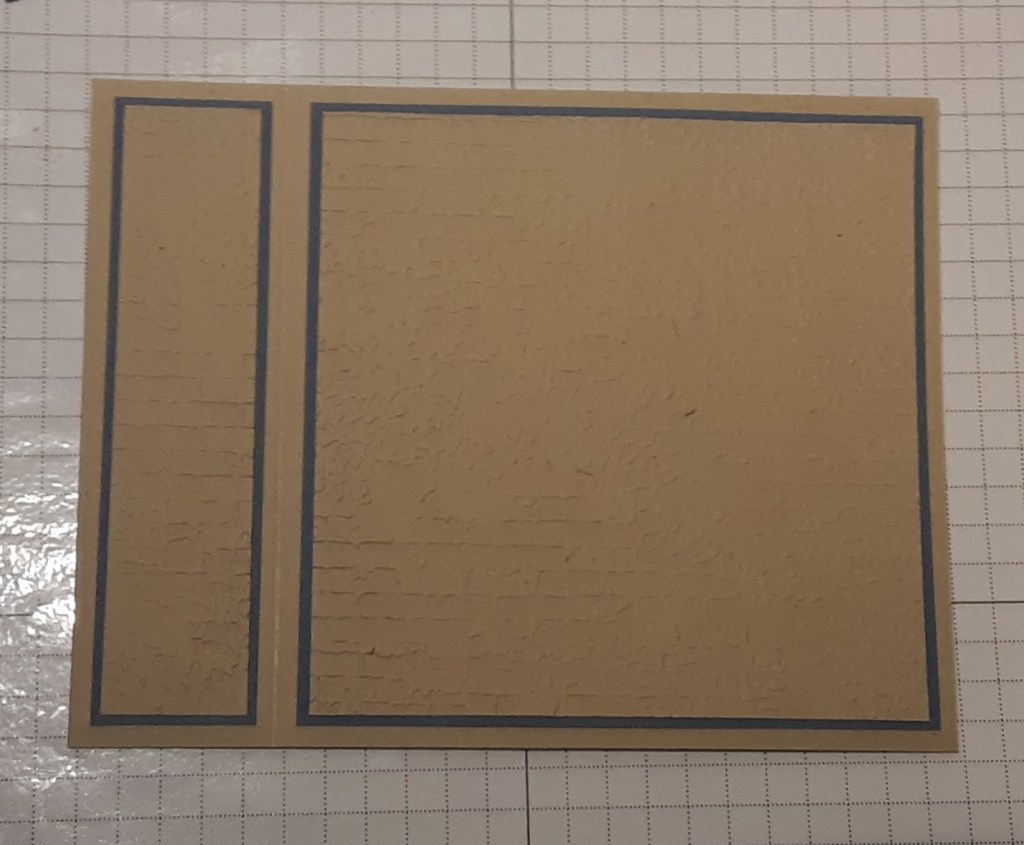
To make the card base, I cut a piece of Crumb Cake cardstock to 4-1/4″ x 11″ on my Paper Trimmer, scored and folded at 5-1/2″ (mountain fold) and 4-1/4″ (valley fold), and burnished with my Bone Folder. I cut a piece of Misty Moonlight cardstock to 4″ x 4″ and a scrap to 1″ x 4″. I cut a piece of Crumb Cake cardstock to 3-7/8″ x 3-7/8″ and a scrap to 7/8″ x 3-7/8″.
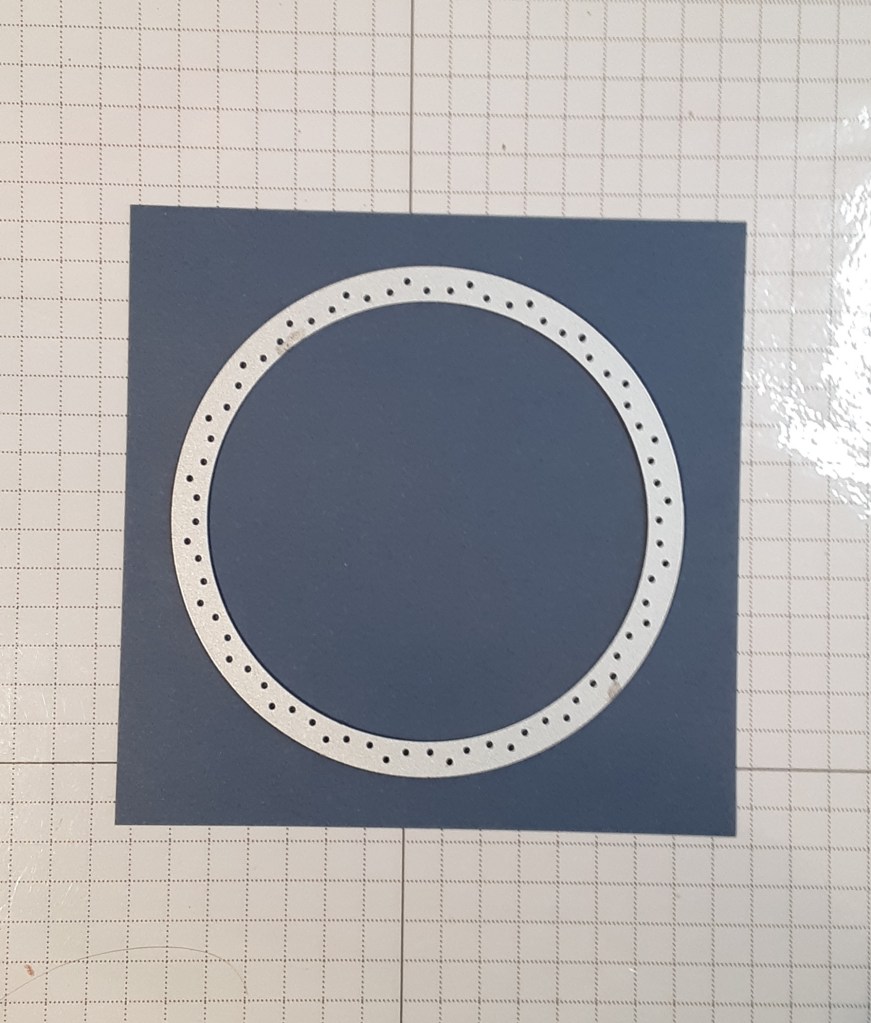
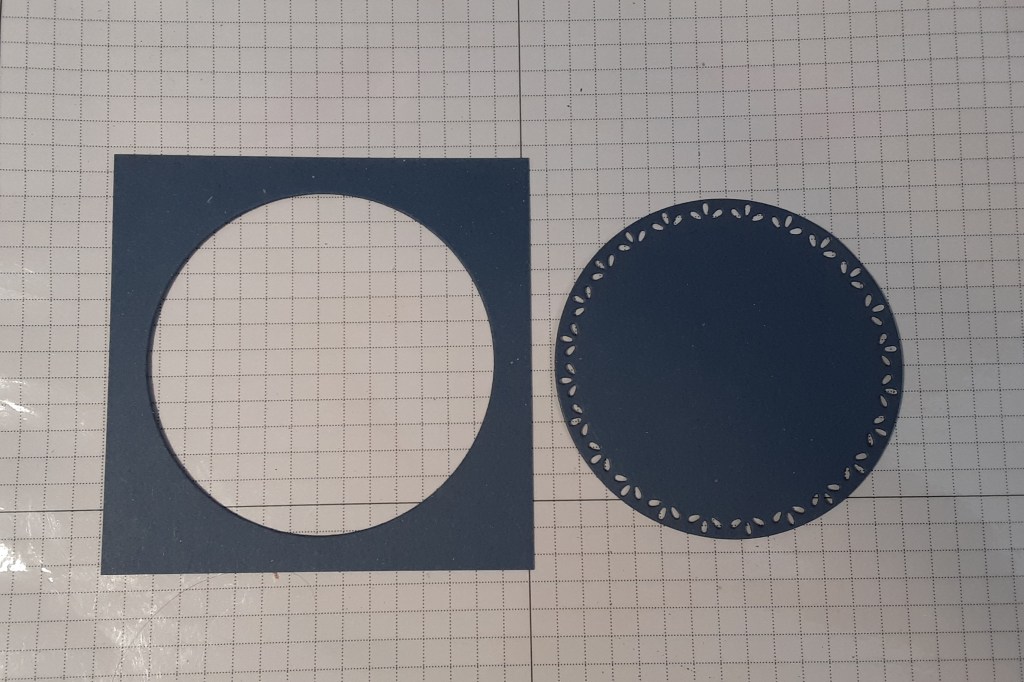
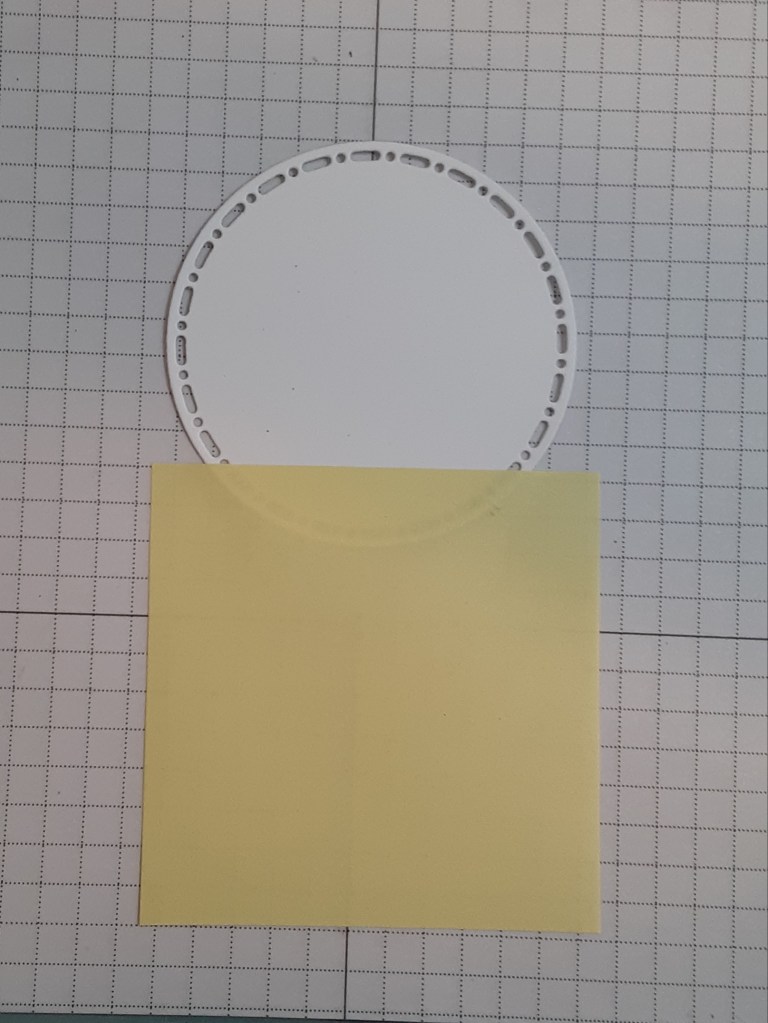
With the 4″ x 4″ piece of Misty Moonlight, I die cut the 3-1/4″ circle from Spotlight on Nature dies in the center with my Stampin’ Cut & Emboss Machine. This saves on cardstock and adds less bulk to the final card, which will have many layers.
With the 3-7/8″ square and 7/8″ strip of Crumb Cake, I ran them through my Exposed Brick 3D Embossing Folder. When positioning the pieces on the embossing folder, keep directionality in mind. This embossing folder is 3D so you will want to use the gray plate on your base plate to run it through the machine. I adhered the embossed Crumb Cake piece to the Misty Moonlight piece with my favorite adhesive (Multipurpose Liquid Glue or Stampin’ Seal), both the squares and strips. They both have narrow 1/16″ borders. I adhered these to my card base.
I also cut the 2-1/2″ circle from Basic White cardstock.
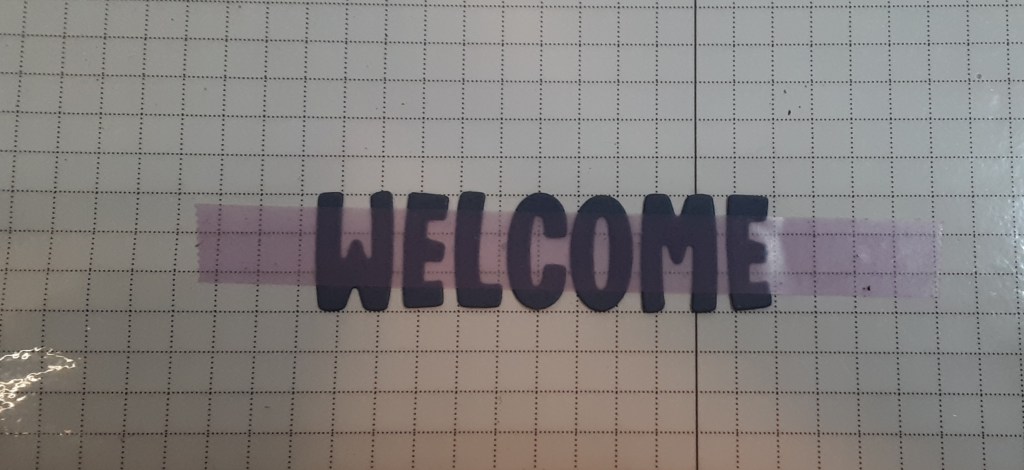
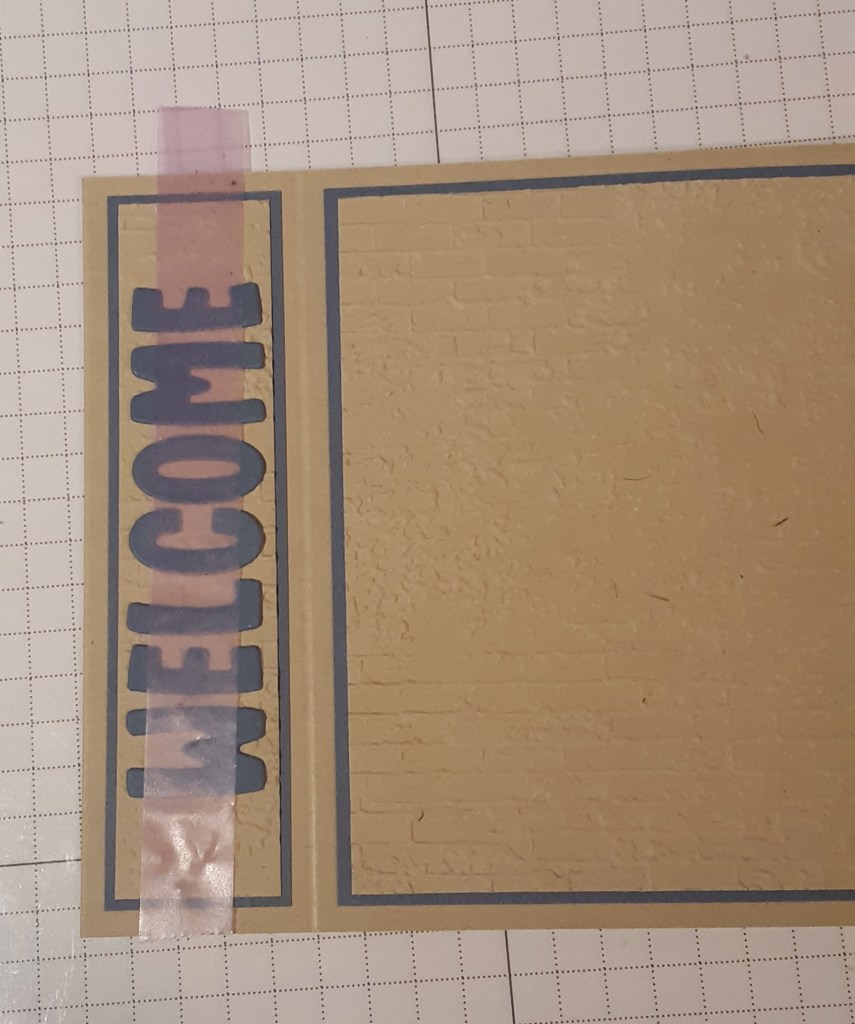
Lastly, I die cut the letters from Mini Alphabet die set from Misty Moonlight cardstock. It die cuts the entire alphabet, so I saved the letters I didn’t use to spell the word WELCOME for another project. You could also spell CONGRATS.
With a scrap of Basic White cardstock, I stamped the brick house image from Humble Home bundle (stamps and punch) with Smoky Slate ink. Then I punched out the house, lining up the bottom corners. After punching the house, I stamped the roof in Misty Moonlight ink. It is easier to line up the roof after punching. On another scrap, I stamped the window/door image with Misty Moonlight ink, cleaned the stamp, and stamped again with Daffodil Delight ink. I fussy cut the blue door and yellow windows with my Paper Snips. The punch will punch out the windows, but I found the border to be too wide.
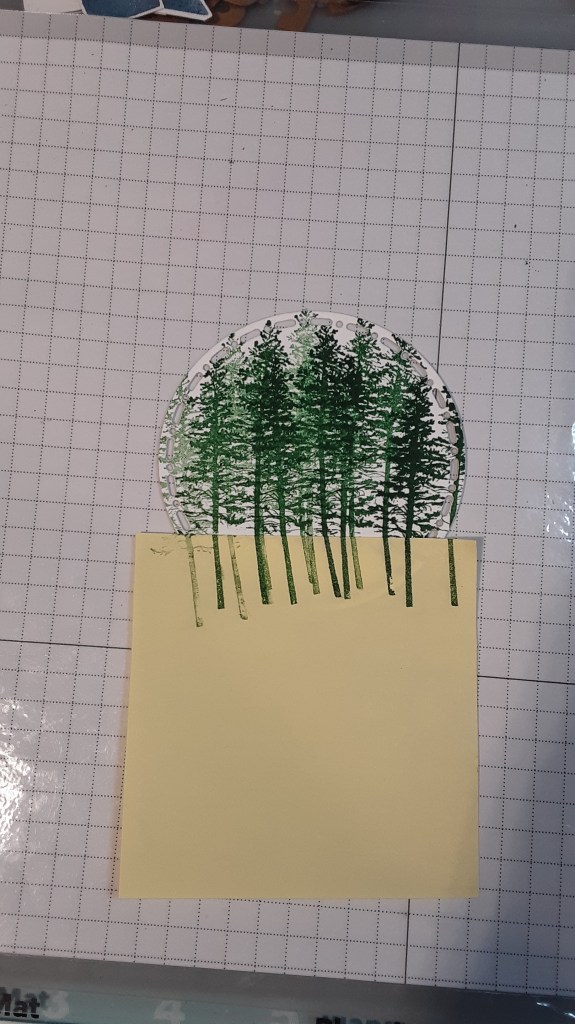
To create the background on the Basic White circle, I put a post-it note across the bottom as a mask. You could also use Masking Paper if you want to make several so the ink doesn’t bleed through.
With Garden Green ink, I stamped the evergreen trees from Grassy Grove stamp set. After stamping the trees, I removed the mask.
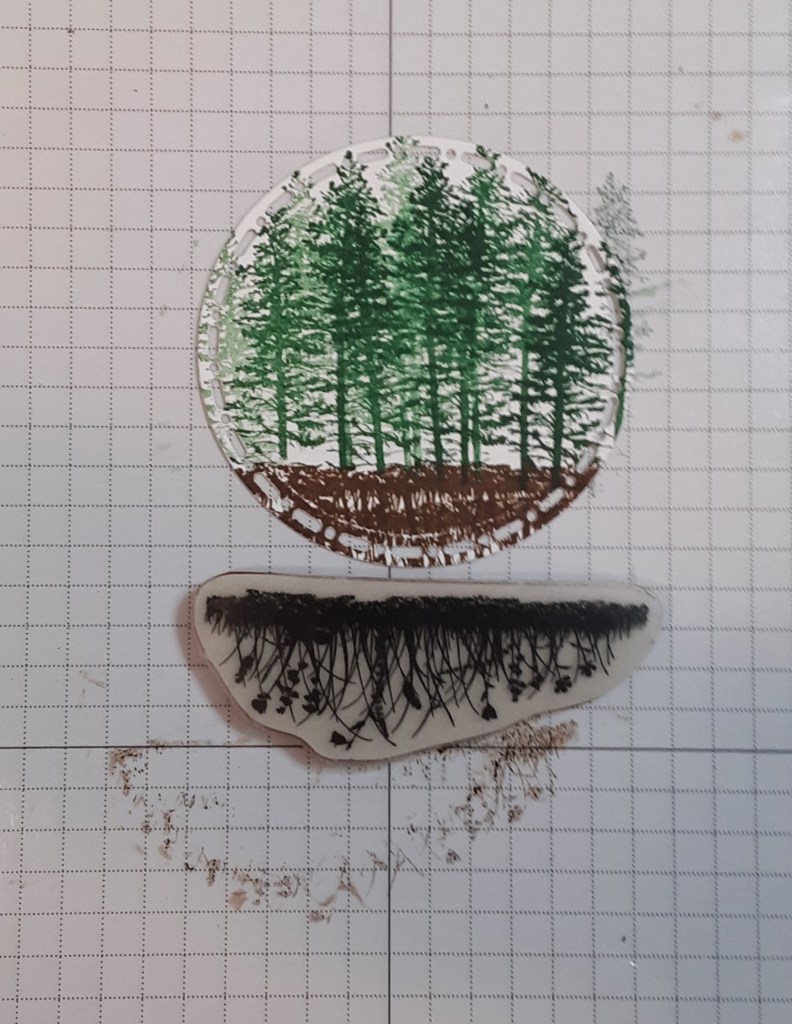
With Pecan Pie ink, I stamped the line of flowers from Grassy Grove upside down twice under the trees. I wanted a ground without the flowers.
I laid out the letters to spell WELCOME on a piece of grid paper. I used a piece of Easy-See tape to lift the letters up and add glue before sticking to my card. This helps keep them straight and evenly spaced.

Now I had all of my components and just needed to put them together. I glued the white circle to my blue circle and adhered them to the center of the square part of my card. I glued the door and windows to the house and adhered the house to my card with Stampin’ Dimensionals.
I tied a bow with some Linen Thread and glued it under the house.
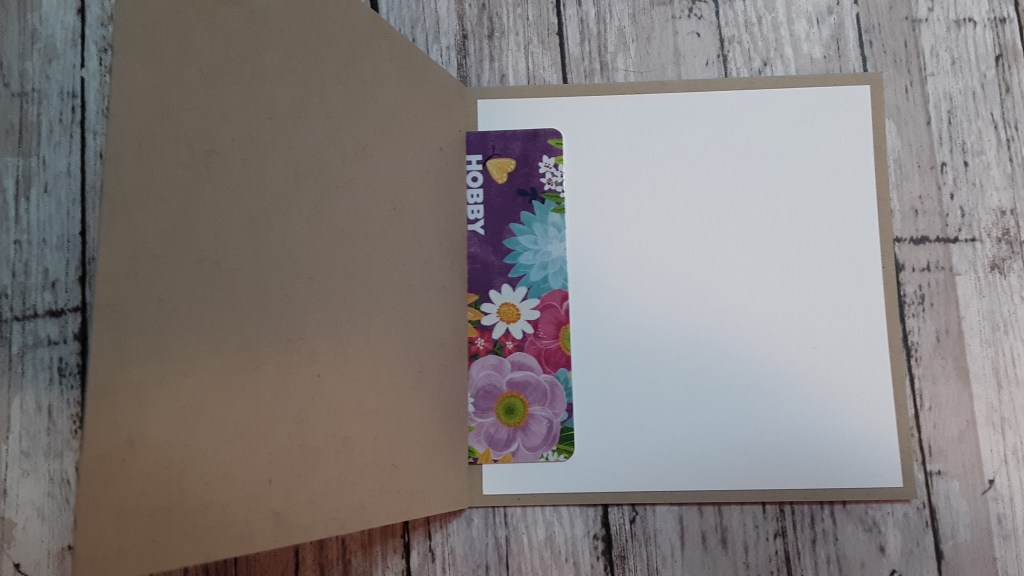
To finish the card, I glued the book fold part, just along the edges, top and bottom so that I could add a gift card. If you don’t want that option, you can just glue it together. I stamped a sentiment on a 4″ x 4″ piece of Basic White cardstock and added it inside my card.
I hope you liked this card!
For the complete supply list, click here.
Here are other cards with different colors and greeting:
Crumb Cake brick, Real Red door
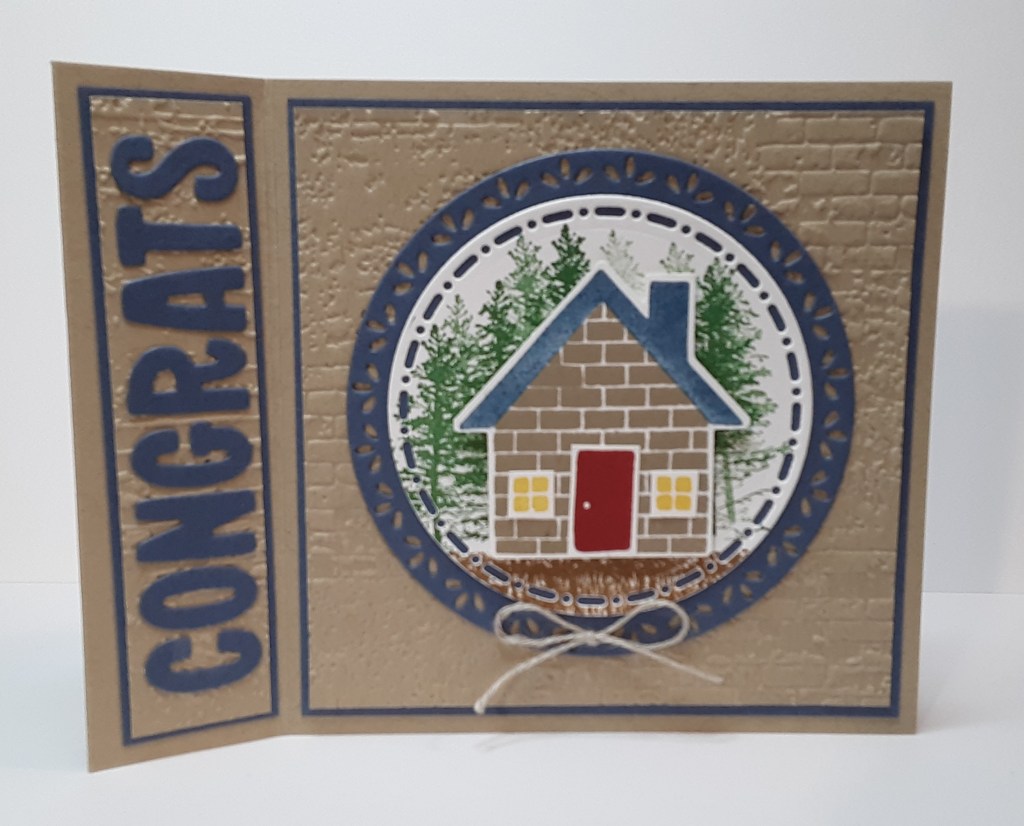
Cherry Cobbler brick, Pecan Pie door
