

Now that we’ve settled into January with a week under our belts, let’s look ahead to Valentine’s Day! Marilyn, here, with another card. I know, we just took down our Christmas decorations (maybe!), but my favorite hobby store has been carrying Valentine’s Day supplies since Thanksgiving! Those of us who tend to procrastinate have a difficult time wrapping our heads around the seemingly distant holiday. But here goes!
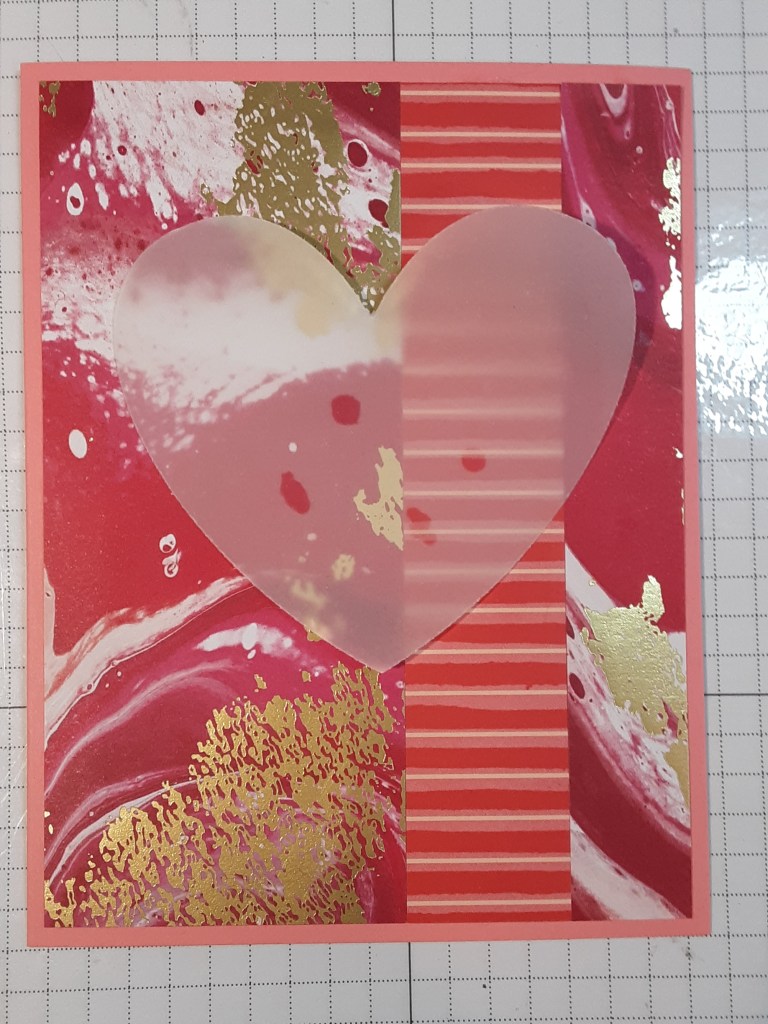
To make the card base, I cut a piece of Flirty Flamingo cardstock to 5-1/2″ x 8-1/2″ on my Paper Trimmer, scored and folded at 4-1/4″, and burnished with my Bone Folder. To make the background of my card, I used the gorgeous Marbled Elegance Specialty DSP. I cut a 5-1/4″ x 2-1/4″ piece and a 5-1/4″ x 3/4″ piece from the gold foiled marbled piece. All the marbled pieces in this pack would work perfectly!

I cut a 5-1/4″ x 1″ strip from the striped design. Make sure your lines are going the way you want them to go.

I adhered them from largest to smallest, left to right on my card base, leaving 1/8″ border using my favorite adhesive (Multipurpose Liquid Glue or Stampin’ Seal).
Using the Hearts of Elegance dies from the Hearts of Elegance stamp and die bundle, I cut 3″ wide heart from vellum with my Stampin’ Cut & Emboss Machine. I lightly tacked it to my card base with glue where I knew the glue wouldn’t show. You can see in the photo how it shows through the vellum.
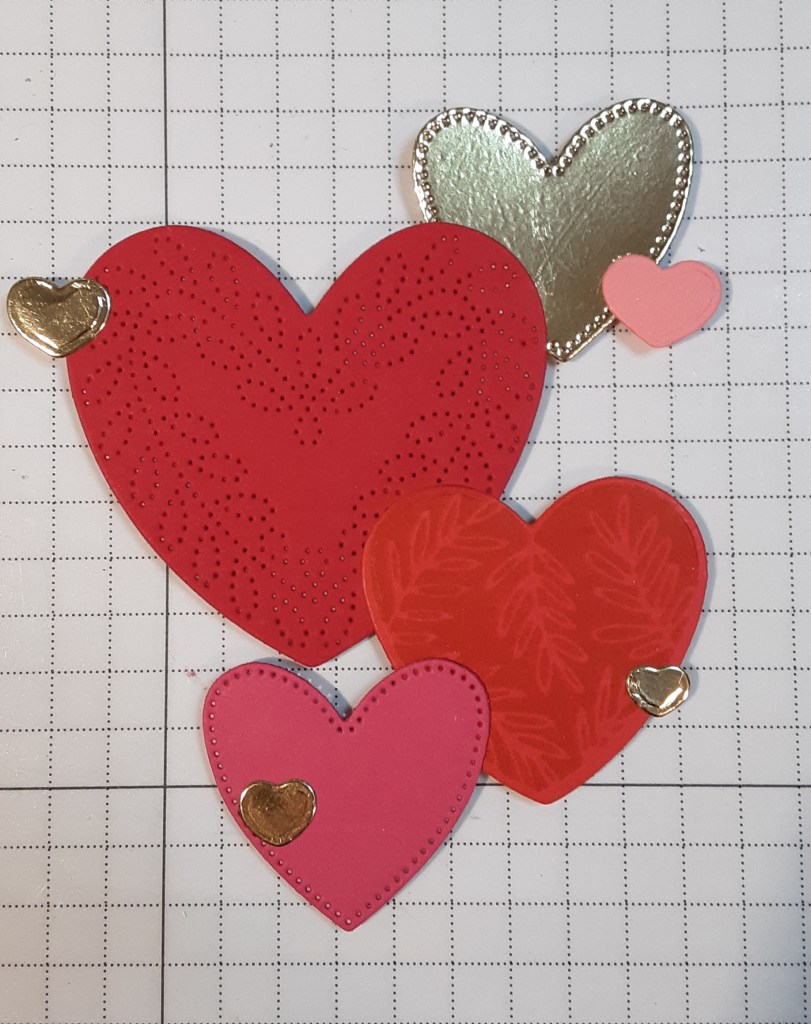
From Gold Foil sheets, I die cut the stitched heart from Hearts of Elegance and the cluster of four hearts from Sending Love dies. I also cut the stitched heart from Melon Mambo cardstock. From Real Red cardstock, I cut the elaborately stitched heart. I stamped the leafy heart image from Hearts of Elegance stamp set with Poppy Parade ink on Poppy Parade cardstock and cut it with the coordinating die. Lastly, I cut one of the two small hearts from Flirty Flamingo cardstock.
I stamped “Sending lots of love” with Versamark ink on Flirty Flamingo cardstock after applying anti-static powder. I sprinkled on some gold embossing powder from the Metallics Embossing Powder pack and heat set it with my Heat Tool. I die cut this with the label from Cheerful Daisies dies. I cut the label from Autumn Leaves dies from Gold Foil. I love how these two labels go together. I glued my sentiment label to the gold foil label and added Stampin’ Dimensionals to the back, but didn’t adhere it yet.
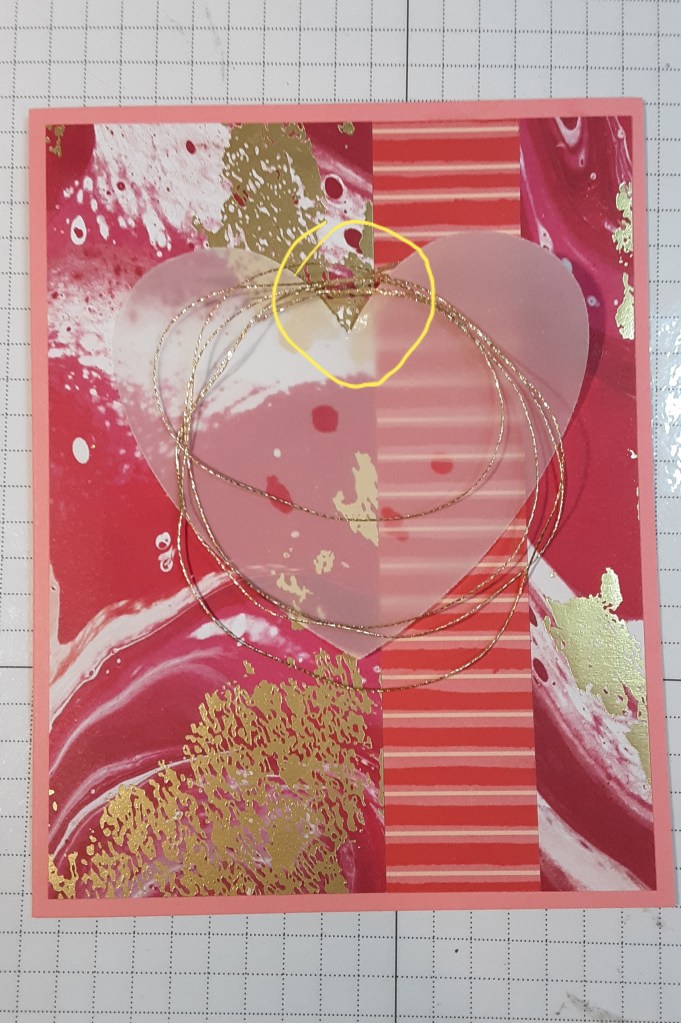
I placed a piece of clear packaging over the vellum heart and placed my hearts on it and worked with them until I was satisfied with the arrangement and carefully glued them together. I DID NOT glue them to the card! Here’s a tip: if you plan on making more than one card, I recommend placing a piece of clear plastic over the arrangement so you can use it as a template for your other cards without making a gluey mess of the original. I plan on sending one to each of my kids, so this is an easy way to make multiples.
I used my gold DMC thread from my favorite hobby store and wrapped it loosely around my fingers, pinching the ends between my thumb and index finger. Because it is on a spool, it can be very curly. Just run it between your finger and thumb a few times to straighten it out a bit. I laid this on top of my vellum and tacked the ends with some glue where I knew they would be covered.
I adhered my heart cluster with Stampin’ Dimensionals. Below that, I added my sentiment.
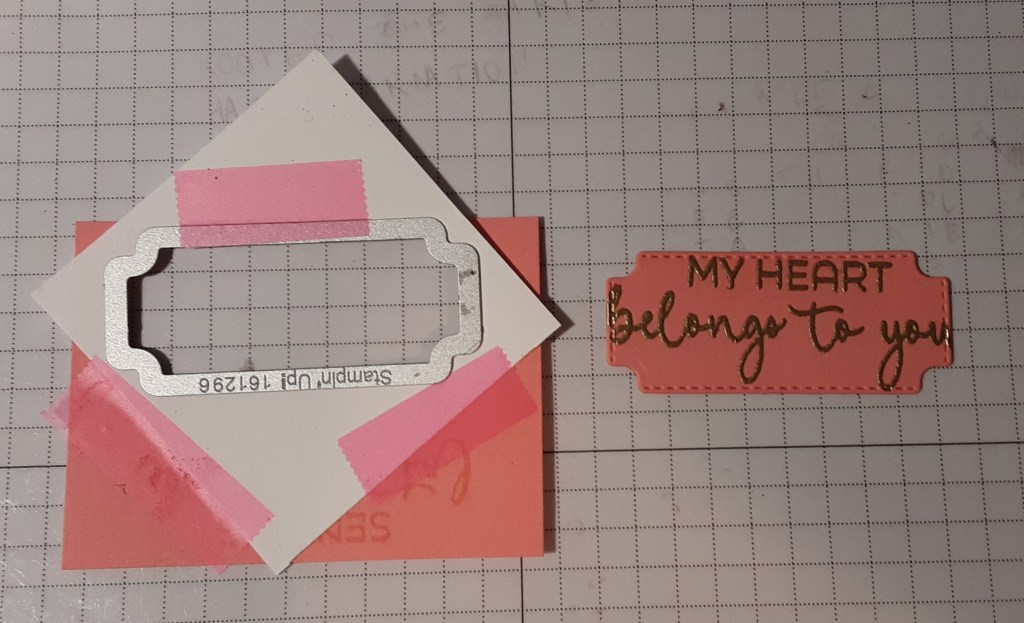
If you want to use the “My Heart Belongs to You” sentiment, it is a smidge longer than the “Sending Love” sentiment and is a little trickier to die cut. A solution to this problem is to make a template out of copy paper (you want it thin) and die cut the label from it. Leave a little space around it. You will use the window created from the die and lay it over the sentiment. Tape it down with scotch tape (not in the window). You can snug the die in the opening, tape it down so it doesn’t shift, and it will cut the sentiment out perfectly.
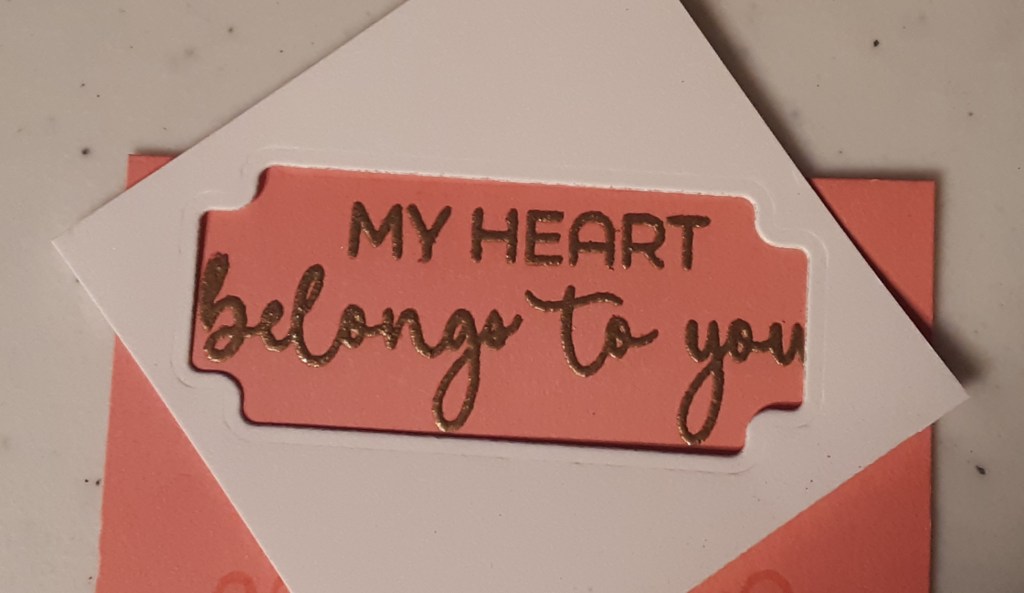
To finish the card, I stamped my sentiment on a 4″ x 5-1/4″ piece of Basic White cardstock and glued it inside my card. The Hearts of Elegance stamp set has some beautiful sentiments.

I hope you liked this card!
For the complete supply list, click here.
