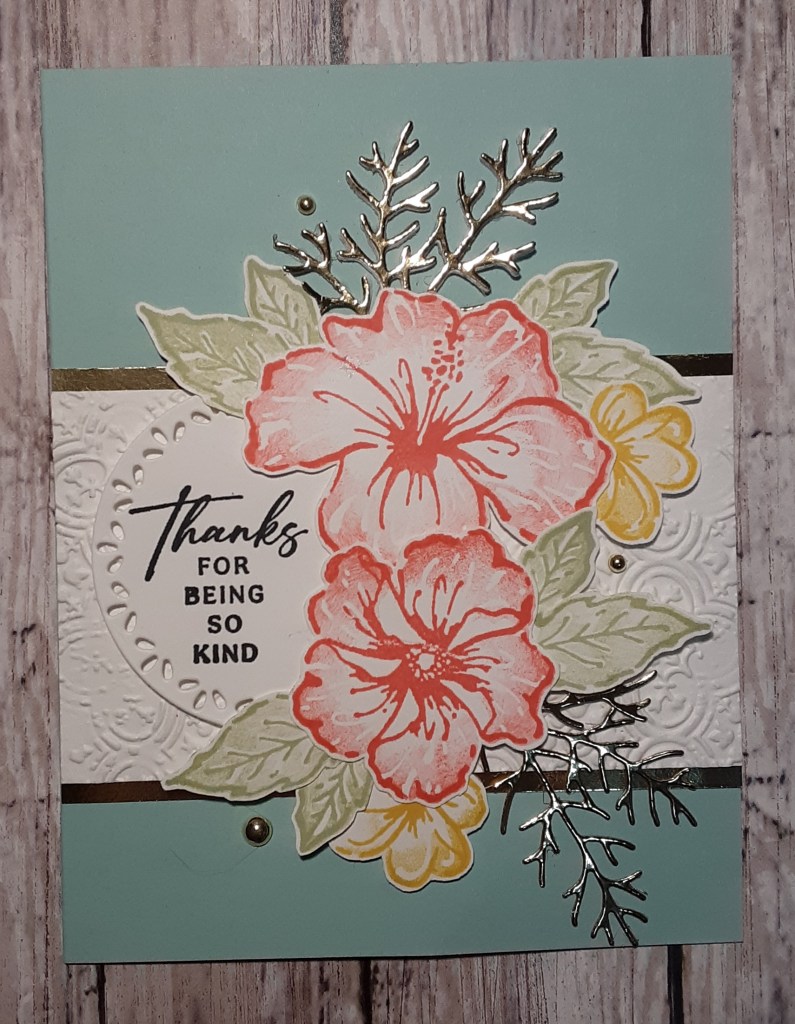
Winter officially begins today! Today’s card uses the Happy Hibiscus Stamp Set which is an Online Exclusive and is the same set I used on Wednesday’s card. Marilyn here, and I thought I’d give another example using the same stamp set. With the holidays coming, I’m sure we can all use another Thank You card.
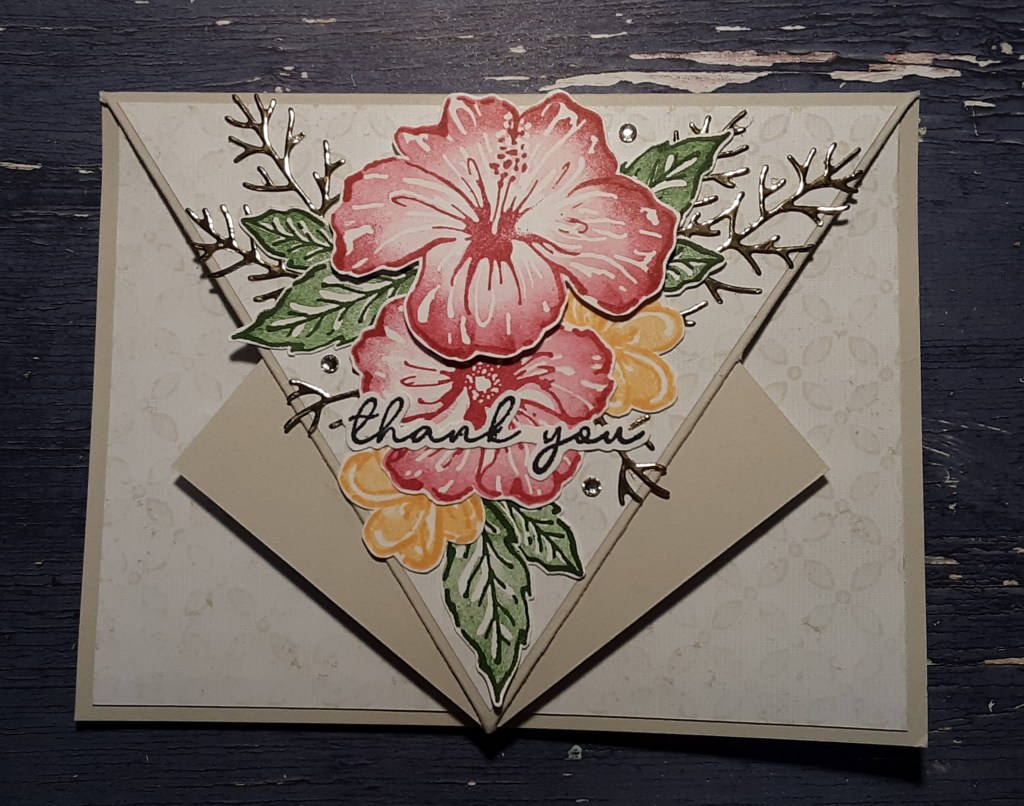
For the card base, I cut a piece of Basic Beige cardstock to 5-1/2″ x 8-1/2″ with my Paper Trimmer, scored and folded at 4-1/4″, and burnished with my Bone Folder. I used a pencil to mark pertinent measurements on the front of the card base. I put a pencil tick at 2-1/8″ on each of the 4-1/4″ sides, and 2-3/4″ on the 5-1/2″ side. With my card open, I used a ruler and my stylus to make score marks from the fold-line to the center point (2-3/4″) of the bottom of the card and another from the 2-1/8″ tick mark to the same center point. You could also use your Paper Trimmer to add the score lines. See below for an example.

Before folding, I erased my pencil marks. I folded up the score line at 2-1/8″ and back at the upper score line. I burnished my fold lines with my Bone Folder.
Next, I cut a piece of the lacey Basic Beige pattern from Country Lace DSP to 4″ x 5-1/4″. It has the gray ticking stripe on the reverse side (another beautiful pattern).

On the 5-1/4″ side I used a pencil to mark the center at 2-5/8″.
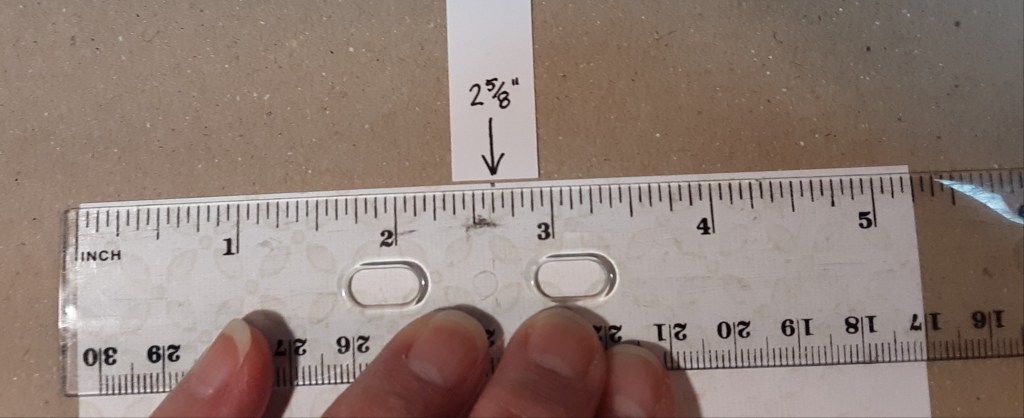
I cut from the corners to the tick mark to give me three triangles. See the photo below for the three pieces.

I adhered, using my favorite adhesive (Multipurpose Liquid Glue or Stampin’ Seal), the center triangle to the matching triangle on my card base.

I glued the flaps down, being careful not to put glue where there was nothing to stick to it.
Next, I cut a piece of Basic White cardstock to 4″ x 5-1/4″. To the corners, I adhered the remaining two triangles. I did not leave a border on the edges.

I glued this to the inside of my card after stamping a sentiment, if desired.

Now my card base is ready for decorating.
With the Happy Hibiscus stamp set, I stamped the two larger floral outline images with Melon Mambo ink. Remember that the floral images are on the same stamp. I just put a Post-It over the smallest flower before applying ink. I removed it before stamping. To add the solid color, I used a Sponge Dauber to lightly apply Melon Mambo ink to the solid image stamps. I applied a heavier amount near the edges of the stamp to give it an ombre effect. I stamped the smallest flower with Peach Pie ink and stamped the solid image after daubing on Peach Pie ink. I stamped the leaves (three pairs) with Garden Green ink. I fussy cut all the images with my Paper Snips since I didn’t have access to the dies.
I die cut the sprig image two times from Cheerful Daisies dies from a Gold Foil sheet with my Stampin’ Cut & Emboss Machine. I did cut the smallest branch from the sprig to give me a little more to play with.
I arranged the flowers on the center triangle portion of the card until I was satisfied with the arrangement before gluing. I used Stampin’ Dimensionals to pop up the largest flower.
I stamped Thank You from the Spring Corners stamp set with Momento Tuxedo Black ink. Spring Corners will be coming available soon, or you could use what you have on hand. I fussy cut it out and glued it on the card.
As a finishing touch, I added three gems from the Rhinestones Basic Jewels pack.
I hope you enjoyed this fun fold card!
For the complete supply list, click here.
For additional inspiration: