

Today’s card is easy to make because the DSP does all the work! No coloring! And easy cutting because there are coordinating dies. This card was designed by my friend Pam Beam.
To begin, I cut Real Red cardstock to 4-1/4″ x 11″ with my Paper Trimmer, scored and folded at 5-1/2″, and burnished with my Bone Folder for a crisp fold. This will be my card base. Next, I cut the red and white striped piece of Take a Bow DSP to 4″ x 5-1/4″. This will be my matte. With a piece of Shaded Spruce cardstock, I die cut the circular pine image on my Stampin’ Cut & Emboss Machine.
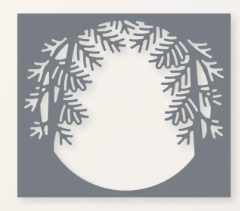
With the largest circle from the Stylish Shapes dies, I die cut a circle around the image that I just cut out. I cut another circle from Basic White cardstock of the same size. I die cut the reindeer from Reindeer Days DSP using my coordinating die from the Reindeer Fun bundle. There are five reindeer on the sheet that you can die cut. But don’t let the rest of the reindeer go to waste! They can easily be fussy cut using Paper Snips. I stamped the Merry Christmas from the Reindeer Fun bundle on a scrap of Basic White cardstock with Real Red ink. Using my Happy Little Things dies or Stylish Shapes dies, I cut out the sentiment.
To assemble the card, I glued the red and white striped matte to my card base using my favorite adhesive (Multipurpose Liquid Glue or Stampin’ Seal). Next, I glued the Shaded Spruce piece to the Basic White circle. I adhered this to my card about 1/2″ from the top of the card. I adhered the reindeer with Stampin’ Dimensionals to the circle area. I adhered the sentiment to the bottom of the card with Stampin’ Dimensionals. The final touch was a red bow adhered to the top of the circle with a Mini Glue Dot.
I hope you like this card!
For the complete supply list, click here.
