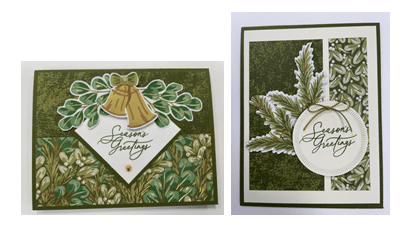
Thanksgiving is looming just around the corner and then it is a mad scramble to Christmas. Today’s card has a simple layout with gold foiling and a few embellishments that give it that little extra.
To begin, I cut a piece of Garden Green cardstock to 5-1/2″ x 8-1/2″ with my Paper Trimmer, scored and folded at 4-1/4″, and burnished with my Bone Folder for my card base. I cut a piece of Gold Foil Sheets to 4-1/8″ x 5-3/8″ for a matte. I cut a piece of Very Vanilla cardstock to 3-7/8″ x 5-1/8″ and then ran it through my Distressed Tile 3D Embossing Folder with my Stampin’ Cut and Emboss Machine. I cut three 1″ x 4″ strips from Season of Green and Gold Specialty DSP.
I stamped the solid CELEBRATE from the Happy Little Things stamp set with Garden Green ink on a strip of Very Vanilla cardstock. I dried the ink with my Heat Tool. You can just let the ink dry completely if you’d prefer. I applied anti-static powder over the word. Then, I stamped the outline of CELEBRATE with Versamark ink. I sprinkled on some Gold Embossing Powder from the Metallics Embossing Powder pack and heat set it with my Heat Tool. I trimmed the sentiment down leaving a 1/8″ border around the word. To save my Gold Foil paper, I cut a 3-7/8″ x 7/8″ strip from the center of the Gold Foil matte. The drop-down blade on my Paper Trimmer makes this easy. No one will see that I cut out a piece. I adhered the sentiment to the Gold Foil strip.
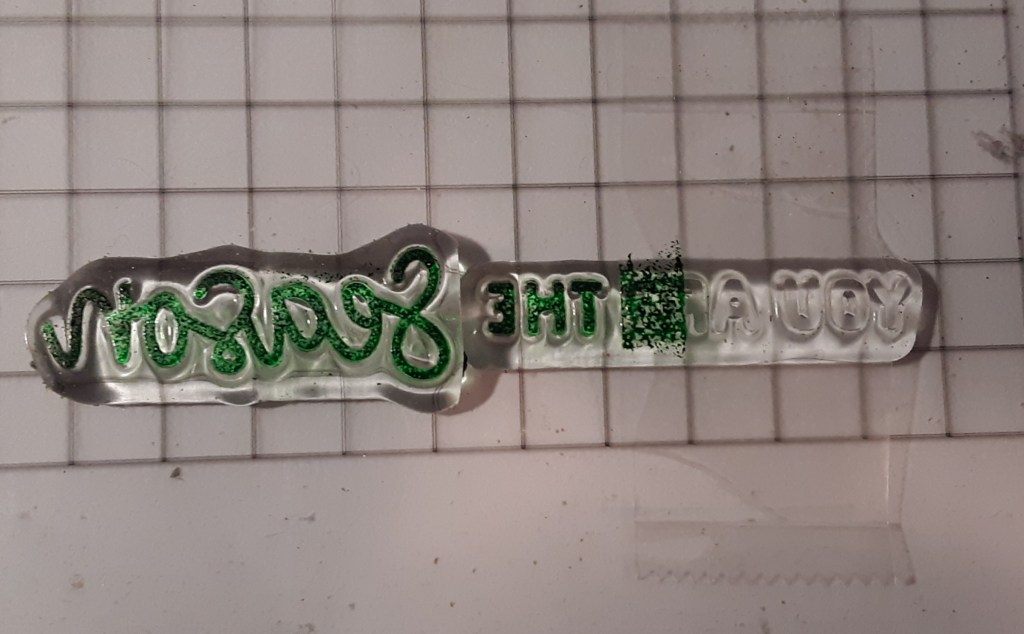
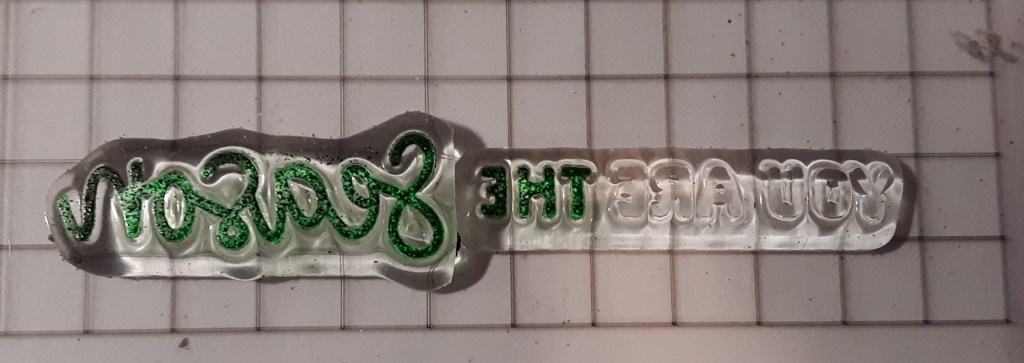
From the More Than Autumn stamp set, I took the Season stamp and the YOU ARE THE stamp and combined them to make “the Season” sentiment. I put them both on my block and used a piece of tape to mask YOU ARE, so just the THE would show. I inked it with Garden Green ink, removed the tape, and stamped “the Season” on a strip of Very Vanilla cardstock. In the photos below, you can see the smudge left on the tape from applying the ink to the words and how the words are clean after removing the tape. Just don’t forget to remove the tape before stamping! I cut a narrow border around the words. If you don’t mind cutting apart your stamps, feel free to cut off the THE from your stamp. Then you don’t need to mask.
I adhered the Very Vanilla embossed piece to my Gold Foil piece using my favorite adhesive (Multipurpose Liquid Glue or Stampin’ Seal) and this panel to my card base. I left a narrow 1/16″ border. I laid out the strips, starting at the upper left, lower right, and then the center piece before glueing so that I could adjust the pieces to make them even. When I was satisfied with my placement, I glued them down.
I cut out two springs from the Season of Green and Gold Specialty DSP with my Paper Snips. I was able to use images from the edge so as not to waste any of this beautiful paper. I adhered these to the backside of the upper left side of my CELEBRATE sentiment. Using Stampin’ Dimensionals, I adhered this to my card, leaving room under it for “the Season” sentiment. I glued “the Season” under CELEBRATE.
Finally, I finished the front by adding three gems from the Drusy Adhesive-Backed Embellishment pack.
To finish the card, I stamped a sentiment on a 4″ x 51/4″ piece of Very Vanilla cardstock and glued it inside the card.
I hope you liked this card!
For the complete supply list, click here.
For additional inspiration using the Season of Green and Gold Specialty DSP: