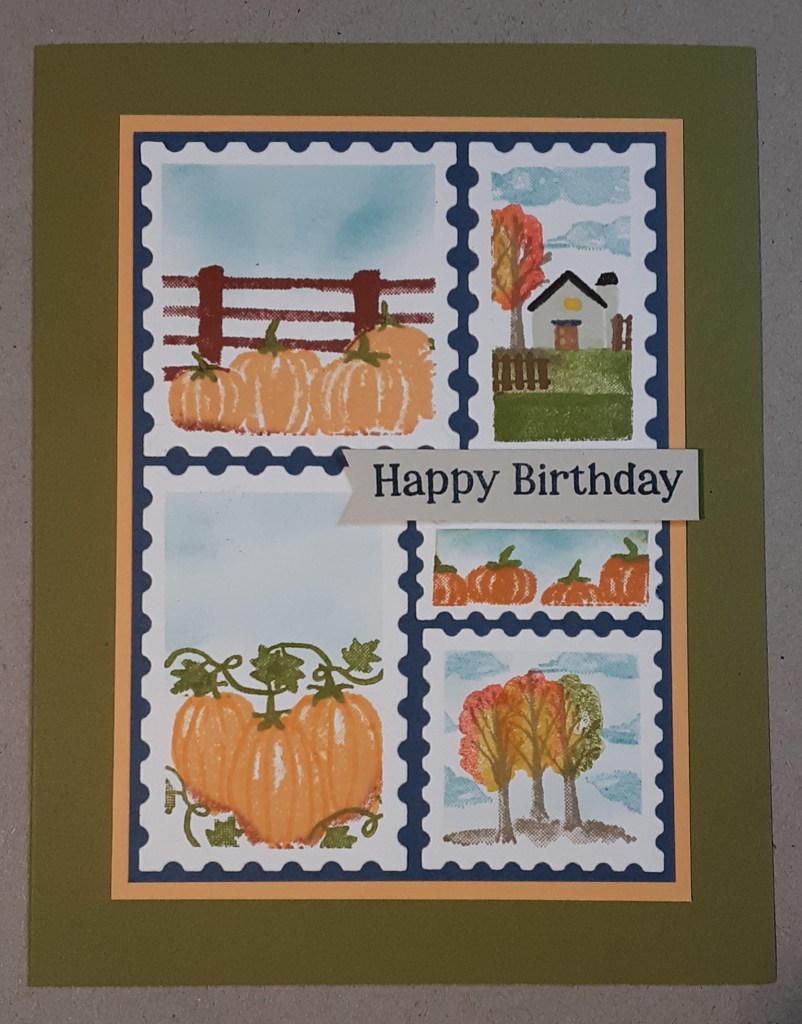
Its’ pumpkin season! Have you been enjoying your pumpkin spice lattes, ice cream, muffins, and whatever other pumpkin flavored treat you crave this time of year? Today’s card follows the pumpkin theme using the fun Scenic Pumpkin Patch stamp set. It is great as a scene builder.
I began by cutting a piece of Pumpkin Pie cardstock to 5-1/2″ x 8-1/2″ with my Paper Trimmer, scoring and folding at 4-1/4″, burnishing the fold with my Bone Folder. I cut a piece of Crumb Cake cardstock to 4″ x 5-1/4″. I ran it through my Stampin Cut and Emboss Machine with my Forever Plaid 3D Embossing Folder. I adhered the embossed matte using my favorite adhesive (Multipurpose Liquid Glue or Stampin’ Seal).
Next, I die cut a rectangle using my Stitched So Sweetly dies (sadly, retired) from Pumpkin Pie cardstock. If you don’t have the Stitched So Sweetly dies, you could use the Deckled Rectangles dies or the Everyday Details dies and adjust your white piece to fit. I cut a piece of Basic White cardstock to 2-9/16″ x 3-3/4″. This is where we are going to build our scene.
To start, stamp the larger fence from Scenic Pumpkin Patch stamp set in the lower left corner using Pecan Pie ink. With Pumpkin Pie ink, stamp the trio of pumpkins next to the fence. Stamp that image again above and slightly to the right of the original trio. With Pumpkin Pie ink, stamp the medium set of five pumpkins above the fence. Just writing this up is making me hungry for some pie! With Crushed Curry ink, stamp the small set of five pumpkins above the orange pumpkins. Stamp a partial image of the small pumpkins with Crushed Curry under the other set of yellow pumpkins. These pumpkins will run off the page to the left. Next, stamp the stand of trees twice in the upper right corner using Granny Apple Green ink. Above the yellow pumpkins, stamp the barn/house in Real Red ink. To either side of the barn, stamp the small fence image with Pecan Pie ink. Finally, stamp the stems on the pumpkins using Pecan Pie ink. Line up the images before stamping. So easy with photopolymer stamps! The stems for the smallest pumpkins look like a line of birds, but they are stems!
Adhere the stamped image to the die cut rectangle. Adhere this to the card base using Dimensionals for a bit of dimension. Finish the card by glueing a 4″ x 5-1/4″ piece Basic White cardstock inside the card after stamping a sentiment.
I hope you enjoyed this card and didn’t get frustrated with the stamping. Not for the faint of heart.
For the complete supply list, click here.
For additional inspiration: