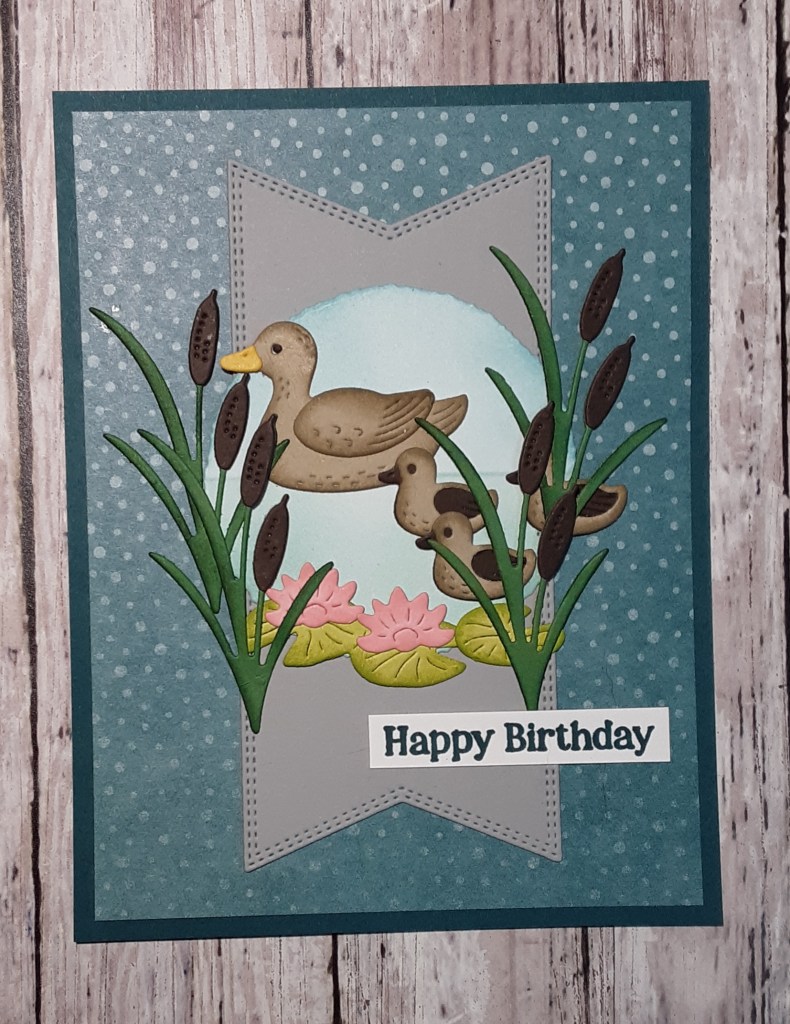
Hello! Marilyn here. Remember the Robert McCloskey book “Make Way for Ducklings?” Mother Duck stopped Boston traffic getting her brood across the street to get to the pond. The cute Charming Duck Pond stamp set and Lily Pond Lane 6″ x 6″ DSP reminded me of this classic tale.
To begin the card, I cut a piece of Pretty Peacock cardstock to 5-1/2″ x 8-1/2″ with my paper trimmer; scored and folded at 4-1/4″. I cut a piece of Lily Pond Lane 6″ x 6″ DSP to 4″ x 5-1/4″. The other side of this paper has some ducks and ducklings you can cut out so be strategic when cutting the DSP so you have some cute ducks to cut out. Out of the remaining bit of DSP, I fussy cut the mama duck and three of her ducklings with my Paper Snips. If you look carefully at the picture of the card, you can see that I used a partial duckling with its backside hiding behind the cattail. With another piece of DSP in the pack, I cut out the lily pads.
With a scrap of Garden Green cardstock, I die cut the cattails. You get two for one in this cut! I used a Stampin’ Blends Deep Combo Pack marker to color in the tops of the cattails. While I had my Stampin’ Cut and Emboss Machine out, I cut the circle with the Deckled Circle dies, the fifth smallest, from Basic White cardstock; and two banners from Smoky Slate cardstock using the Nested Essentials dies.
I glued the dotted DSP piece to my card base using my favorite adhesives, Multipurpose Liquid Glue or Stampin’ Seal. Then I took one of the Smoky Slate banners and glued it about 3/8″ from the top with the banner end pointing up, centering it side to side. I glued the other banner at the bottom of my card. You will have some overlap and if this bothers you, trim the bottom one before adhering. Line up the sides so they look continuous.
Now for the circle. I used a Post-It note for a mask (or you could use Stampin’ Up! masking paper) and stuck it midway across the circle. Using my blending brush, I blended on some Balmy Blue ink. When blending, you will want to start on the edge of the paper so you don’t get a big blob of ink in the middle of your piece. Been there, done that, so learn from my mistake. 🙂 When you are satisfied with your sky, remove the Post-It (or masking paper) and cover what you just blended and switch to Pool Party ink to do the water. I use the same brush for both colors, but before using the second color, I rub off as much of the previous color on a piece of scrap paper. You could also use a dry cloth (not wet!). Glue the circle about 3/8″ from the top of the banner, being careful to cover the overlapping banner pieces and making sure your water line is horizontal. Glue on your duck and ducklings. Add the cattails, one on either side. Lastly, glue on the lily pads you fussy cut from the DSP. If you hate fussy cutting but love die cutting, you could use the stamps and dies to make the lily pads.
I stamped the “Happy Birthday” sentiment with Pretty Peacock ink on a piece of scrap Basic White cardstock. I cut it down with my Paper Snips and glued it below my focal image. Just to jazz it up a bit, I added some Rhinestone basic jewels. You can finish up the inside by stamping your sentiment on a piece of 4″ x 5-1/2″ Basic White cardstock. If you’re feeling especially ambitious, you can cut out another duck or two from the DSP and glue them inside.
I hope you like this card!
For the complete supply list, click here.
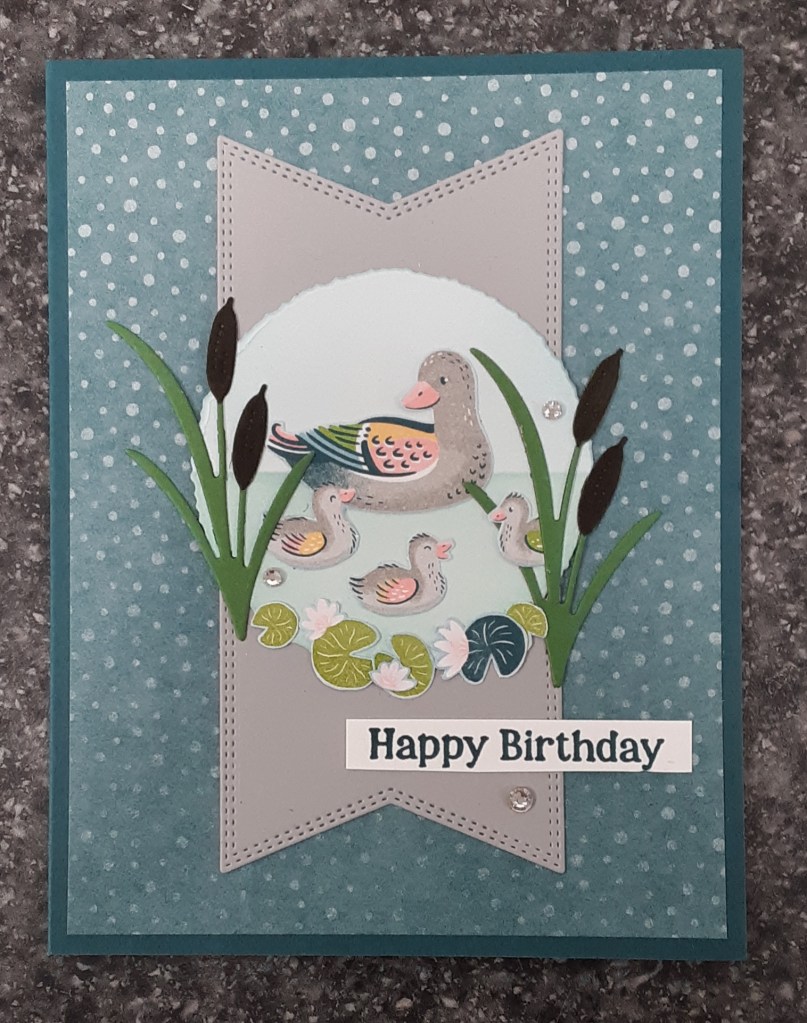
For those who love die cutting, I have included a picture of my card that uses only 22 die cuts. Not for the faint of heart.