
Free Shipping today only on orders $75 or more on product!
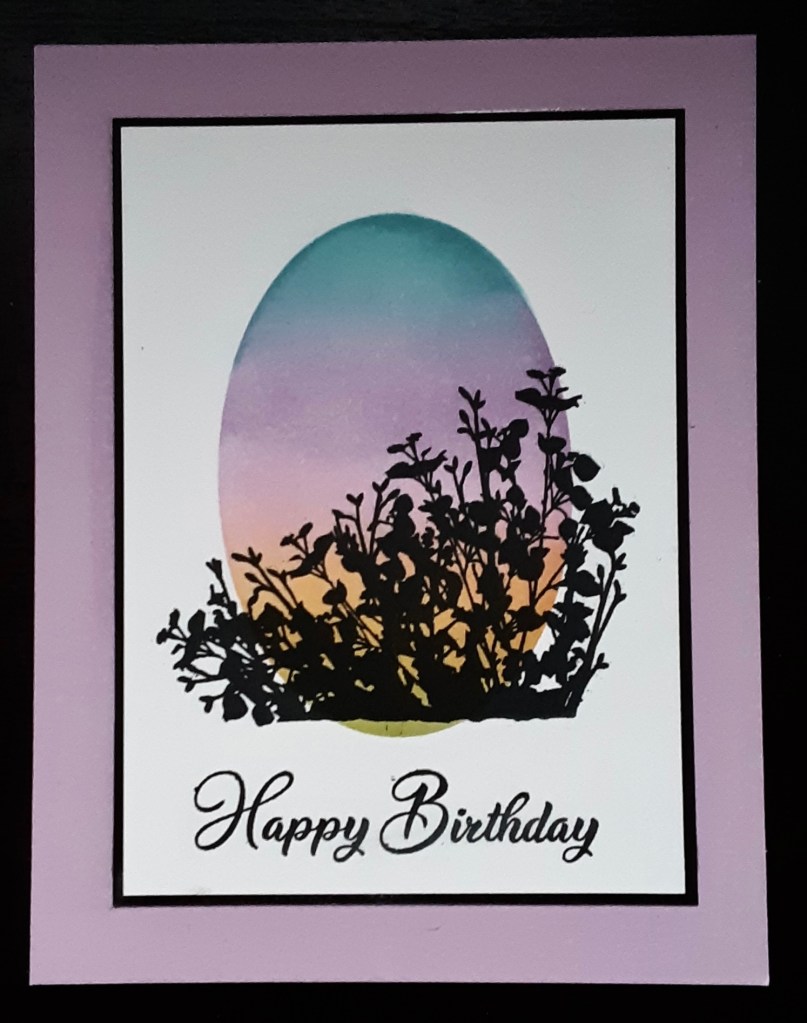
With the days getting shorter, the sunset is earlier. I love the sunset with the trees silhouetted in the vibrant blues, oranges, and pinks. I tried to recreate those colors in this card.
I began with a Fresh Freesia cardstock card base, cut at 4¼” x 11”, using my Paper Trimmer, scored and folded at 5½”.
I cut a piece of Basic White cardstock at 3¼” x 4½”. I placed the white focal piece in center of sticky mat that I picked up at a craft store and cut in quarters since it was so big. I made an oval stencil by die cutting an oval with my Layering Oval dies (retired) from a Window Sheet using my Stampin’ Cut Embossing Machine. You could use any kind of flat packaging to make a stencil. I laid the stencil on the white cardstock, placing the oval about ½” from the top and 1” from the bottom and pressed the sides onto the sticky sheet. You can also use Washi tape to hold down the stencil. With a window sheet you can see through it and place it exactly where you want your blended image to go, as opposed to masking paper. If you cut the masking paper the same size as your cardstock and carefully die cut the oval from it, making sure you have it exactly where you want it to be, you could use that by lining up your edges when placing the masking paper down. Now I didn’t have to worry about my cardstock or stencil shifting while I inked the image. When finished, I clean and store my stencil with my dies so it is handy for another use.
Using small blending brushes, I applied ink at the top with Balmy Blue ink. I started inking on the stencil to avoid a heavy concentration of ink on the cardstock. You can always add more ink, but you can’t remove it. Next, I applied Fresh Freesia ink, overlapping a little. Then, I applied, Bubble Bath ink, making sure to overlap; followed by Petal Pink ink, and finally, Soft Sea Foam ink.
When I removed the stencil, I had a beautiful ink blended sunset. To easily remove the cardstock from the sticky sheet without tearing, squeeze the sticky sheet sides together away from the cardstock. Now for the silhouette.
I stamped the floral silhouette image from the Delicate Forest photopolymer stamp set at the base of the oval with Momento Black. This image should extend beyond the oval. For best results, I used a stamp positioning tool to enable multiple stampings.
I stamped the sentiment from Go to Greetings (retired) in the white space below.
I adhered the focal image to a piece of Basic Black cardstock cut to a 3⅜” x 4⅝” matte piece using Multipurpose Liquid Glue or Stampin’ Seal. I adhered this to the card base, centering the image.
Finally, I adhered a 5-1/4″ x 4″ piece of Basic White cardstock inside for my message.
Thanks for stopping by!
For the complete supply list, click here.
